Introduction to USB Booting on Raspberry Pi
Booting your Raspberry Pi from an SD card is convenient but comes with limitations in speed and durability, especially during continuous operation. To enhance your Pi’s performance, reliability, and storage capacity, this guide explores how to boot your Raspberry Pi from an external drive or USB stick.
Connecting to Your Raspberry Pi
Start by connecting to your Raspberry Pi using SSH or directly via a screen and keyboard.
Checking the Bootloader Version
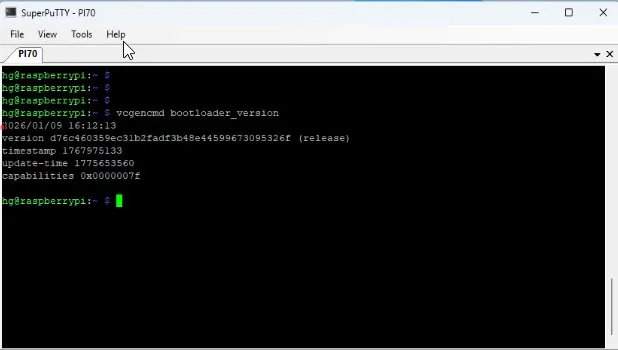
Verify your Pi’s current bootloader version to ensure it supports USB or external drive booting.
vcgencmd bootloader_versionIf the screen displays a release date and version code, your bootloader is functioning correctly. Raspberry Pi 4 models from 2020 onwards generally have stable USB boot support.
Inspecting the Bootloader Configuration
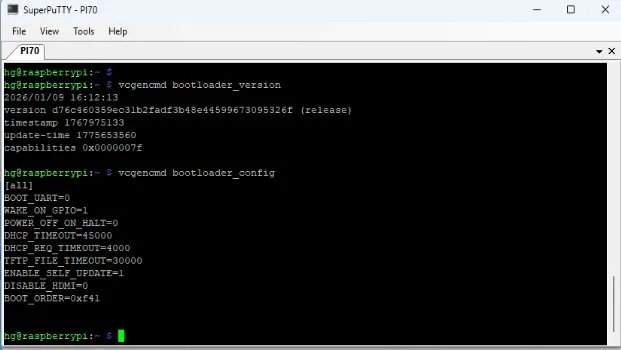
Check the current bootloader configuration to understand your Pi’s boot priority.
vcgencmd bootloader_configA configuration line such as BOOT_ORDER=0xf41 indicates the Pi will first attempt to boot from the SD card, then from a USB drive or external SSD. This means your Pi is ready to boot from USB or an external drive.
Changing Boot Order if Necessary
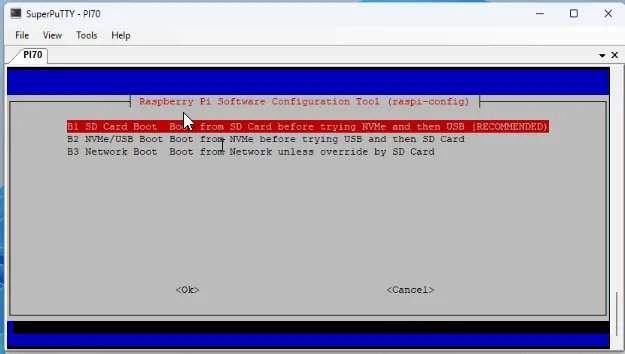
If your boot order does not prioritize USB or external drives, reconfigure it as follows.
sudo raspi-configWithin the menu, select Advanced Options, then choose Boot Order to adjust the priority.
Options include:
B1: Boot from SD card first, then NVMe, then USBB2: Boot from NVMe first, then USB, then SD card
Choose the boot order that suits your needs. If your Pi already supports USB boot, you may keep the default settings.
Updating System and Firmware
Update your Raspberry Pi’s software repositories and upgrade the system packages.
sudo apt updatesudo apt full-upgrade -yNext, update the Raspberry Pi firmware for improved stability.
sudo rpi-updateReboot your Raspberry Pi to apply all updates.
sudo rebootPreparing the USB or External Drive
Download and install the Raspberry Pi Imager software from the official Raspberry Pi homepage: https://www.raspberrypi.com/software/
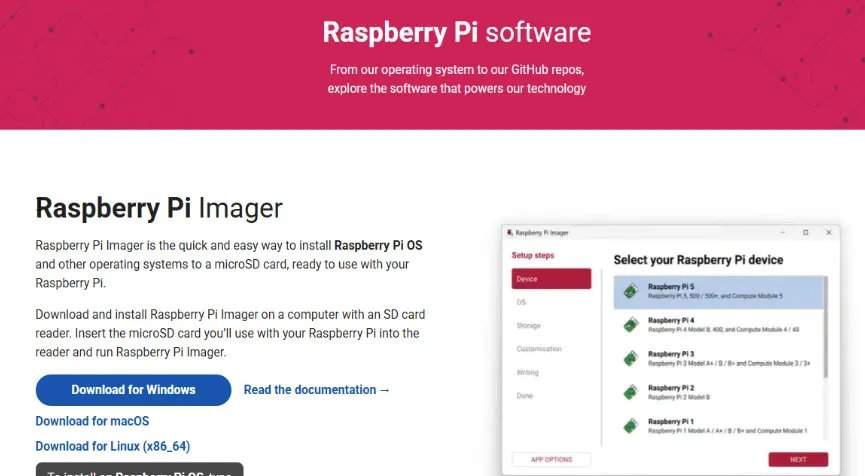
After installation, launch the Raspberry Pi Imager application.
Prepare a USB stick, HDD, SSD, or NVMe drive. Back up any important data before proceeding, as the process will erase the drive.
Recommended Storage Options
Disclosure: This post contains affiliate links. As an Amazon Associate, I earn from qualifying purchases at no additional cost to you.
Depending on your needs and budget, here are three practical storage setups you can choose from:
Option 1: USB Flash Drive (64GB)
A simple and convenient solution for basic storage and portability. Perfect for quick file transfers, bootable media, or lightweight usage.
Option 2: HDD Enclosure + SSD (120GB)
A more flexible and efficient setup. By combining an HDD enclosure with an SSD, you get better performance and the ability to upgrade or replace the drive easily. Ideal for running operating systems or improving read/write speeds.
Option 3: NVMe Enclosure + NVMe SSD
The best performance option. NVMe drives offer significantly faster speeds compared to traditional SSDs, making this setup ideal for demanding workloads, high-speed data transfer, or running systems smoothly.
Using Raspberry Pi Imager to Write OS to External Drive
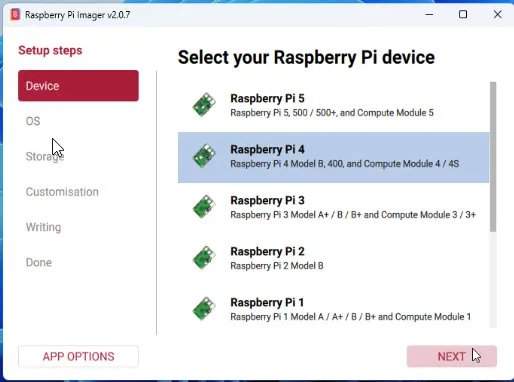
Select the Raspberry Pi model you are using, for example, Raspberry Pi 4.
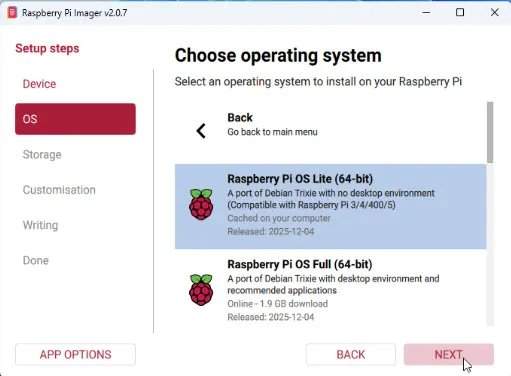
Choose the desired operating system version. For optimized performance, consider selecting the Lite version.
Select the prepared USB or external drive as the target device.
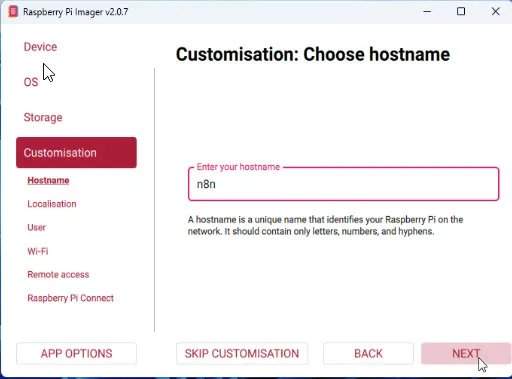
Set a hostname for your Raspberry Pi to simplify network identification.
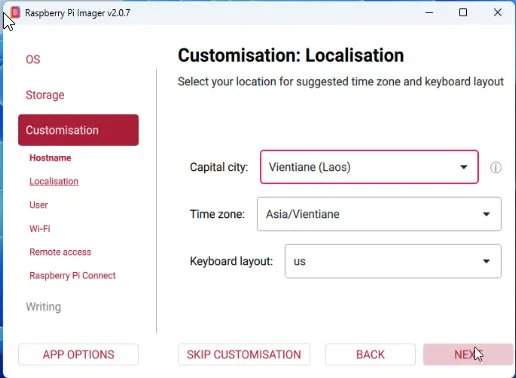
Configure your country, timezone, and keyboard layout for accurate localization.
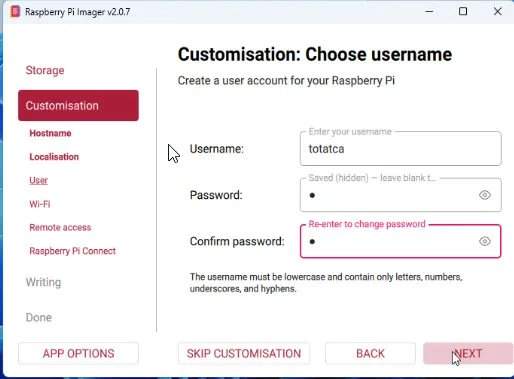
Create a strong username and password to secure your device, and remember these credentials.
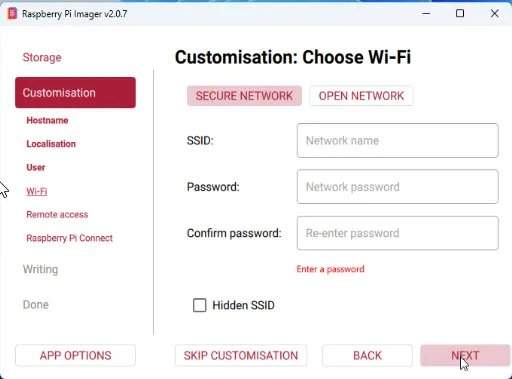
Optionally, configure network settings or leave them for later setup.
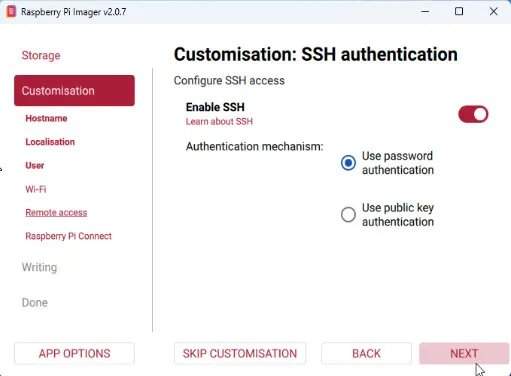
Enable SSH and password authentication to allow remote access.
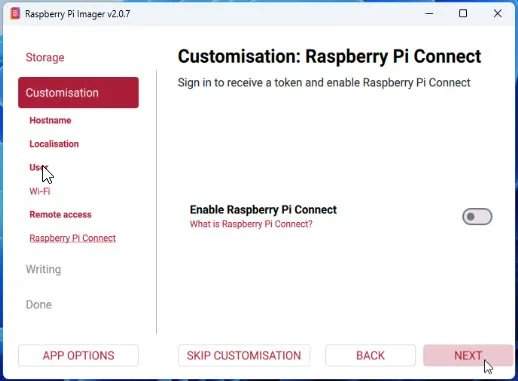
Skip Pi Connect if you do not require it.
Review your settings, then click Write to start writing the operating system to your external drive.

The writing process is typically faster on external drives than SD cards. Please wait patiently until completion.
Final Steps and Booting from External Drive
Once the image is written, remove the SD card from your Raspberry Pi.
Connect the external USB drive or SSD to the Raspberry Pi.
Restart your Raspberry Pi and enjoy improved performance and durability by booting from the external drive.
Conclusion
Booting your Raspberry Pi from a USB or external drive is an effective way to enhance speed, reliability, and storage. Follow these steps to configure your device and experience the benefits firsthand. For more helpful tutorials, stay tuned and subscribe to relevant channels.