Transform Your Raspberry Pi into a Powerful Home Server with Docker and Portainer
In the era of smart homes and personalized computing, turning your Raspberry Pi into a robust home server can unlock endless possibilities, from hosting your own websites to managing media streams. But traditional installations can clutter your system. Enter Docker: a revolutionary tool that packages applications into isolated containers, keeping your Raspberry Pi clean and efficient. In this guide, we’ll walk you through installing Docker and the user-friendly Portainer interface using Docker Compose for optimal management. Whether you’re a beginner or an experienced tinkerer, this step-by-step tutorial will help you achieve a professional setup.
Why Use Docker on Raspberry Pi?
Before diving in, let’s expand on the benefits. Docker simplifies application deployment by using containers, which are lightweight and portable. This is especially useful on resource-constrained devices like the Raspberry Pi, which runs on ARM architecture. By avoiding direct OS installations, you reduce risks of conflicts and make backups a breeze. Plus, tools like Portainer provide a web-based dashboard to manage your containers visually, making complex tasks intuitive.
Step 1: Update Your Raspberry Pi System
Every solid project starts with a stable foundation. Updating your system ensures you have the latest security patches and software versions, preventing compatibility issues down the line.
Run the Update Command
Open your terminal and execute the following command to update and upgrade your packages:
sudo apt update && sudo apt upgrade -yThis process might take a few minutes, depending on your internet speed and the number of updates available. Once complete, your Raspberry Pi is ready for the next steps.
Step 2: Install Docker Quickly and Securely
Docker is the backbone of modern containerization. For Raspberry Pi’s ARM-based chip, using the official installation script guarantees compatibility and ease of use.
Download and Run the Installation Script
Start by downloading the script:
sudo curl -sSL https://get.docker.com | shOnce installed, start and enable Docker to run on boot:
sudo systemctl start docker

sudo systemctl enable docker
Verify the status:
sudo systemctl status dockerIf it shows active (running), proceed.

Add Your User to the Docker Group
To run Docker commands without constantly using sudo, add your current user to the Docker group:
sudo usermod -aG docker $USERAfter this, reboot your Raspberry Pi or log out and log back in for the changes to take effect. This step enhances security and convenience by minimizing permission errors.
Step 3: Organize Your Directory Structure
A well-structured file system is a hallmark of professional setups. It makes backups, scaling, and maintenance straightforward, setting you apart from casual users.
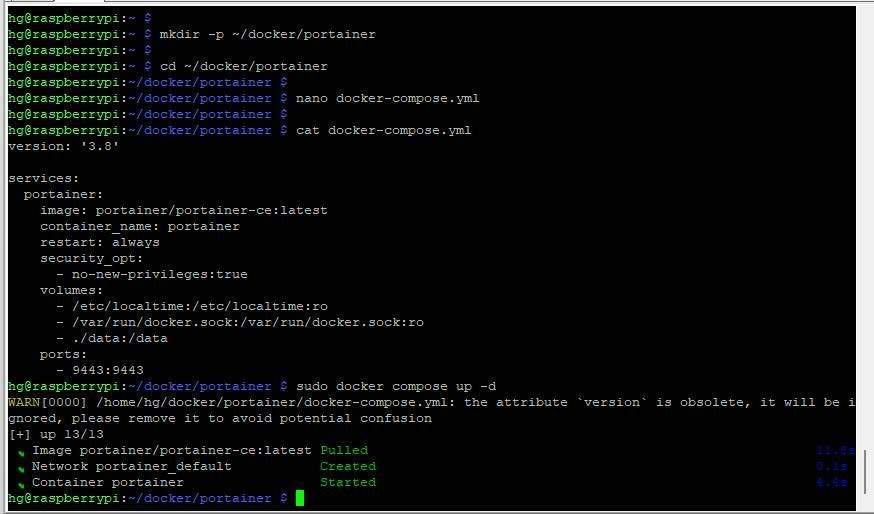
Create a root directory for all your Docker projects and a subfolder for Portainer:
mkdir -p ~/docker/portainer
cd ~/docker/portainer
This centralized approach allows you to manage multiple applications (e.g., adding Nginx or Nextcloud later) without cluttering your home directory.
Step 4: Deploy Portainer Using Docker Compose
Docker Compose streamlines container management by defining your entire setup in a simple YAML file, eliminating long, error-prone command lines.
Create the Docker Compose File
Open a new file with a text editor:
nano docker-compose.ymlCopy and paste the following configuration:
version: '3.8'

services:
  portainer:
    image: portainer/portainer-ce:latest
    container_name: portainer
    restart: always
    security_opt:
      - no-new-privileges:true
    volumes:
      - /etc/localtime:/etc/localtime:ro
      - /var/run/docker.sock:/var/run/docker.sock:ro
      - ./data:/data
    ports:
      - 9443:9443
Save the file (Ctrl + O, then Enter, and Ctrl + X to exit). This configuration ensures Portainer starts automatically and persists data safely.
Start Portainer
Launch your container with one command:
sudo docker compose up -dDocker will pull the necessary image and run Portainer in the background, making the process seamless.
Step 5: Access and Configure the Portainer Interface
Now that everything is set up, it’s time to enjoy the fruits of your labor. Portainer provides a intuitive web interface for managing your Docker containers.
Navigate to the Dashboard
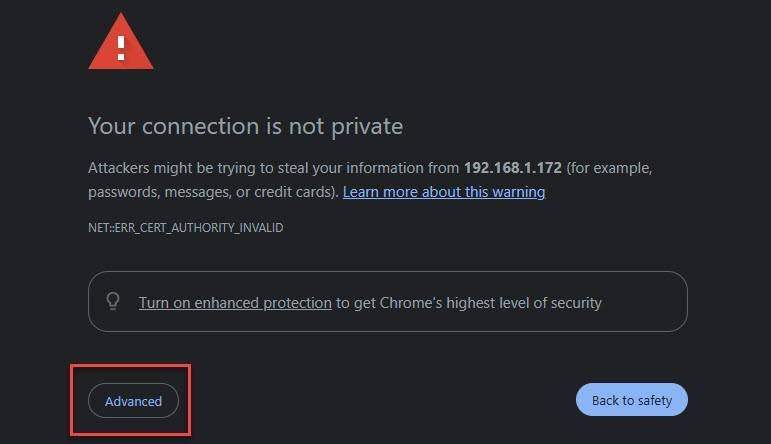
Open your web browser and go to: https://<Your-Raspberry-Pi-IP>:9443
You might encounter an SSL warning due to a self-signed certificate—just click Advanced and proceed to access the page.
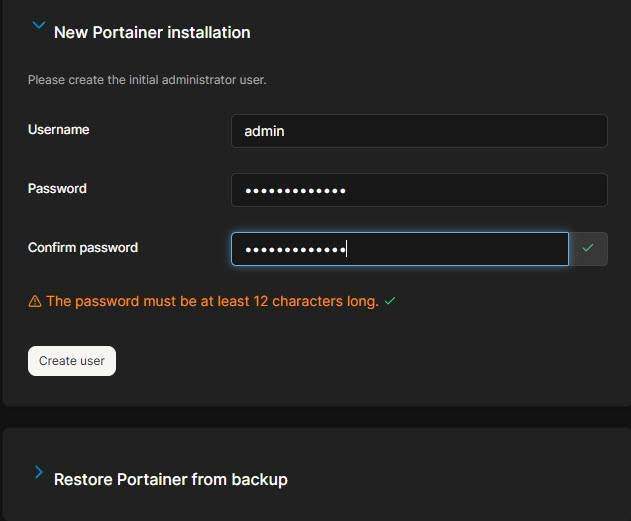
Set up an admin password and connect to your local Docker environment for a visual overview of your setup.
On the Quick Setup screen, select Get Started
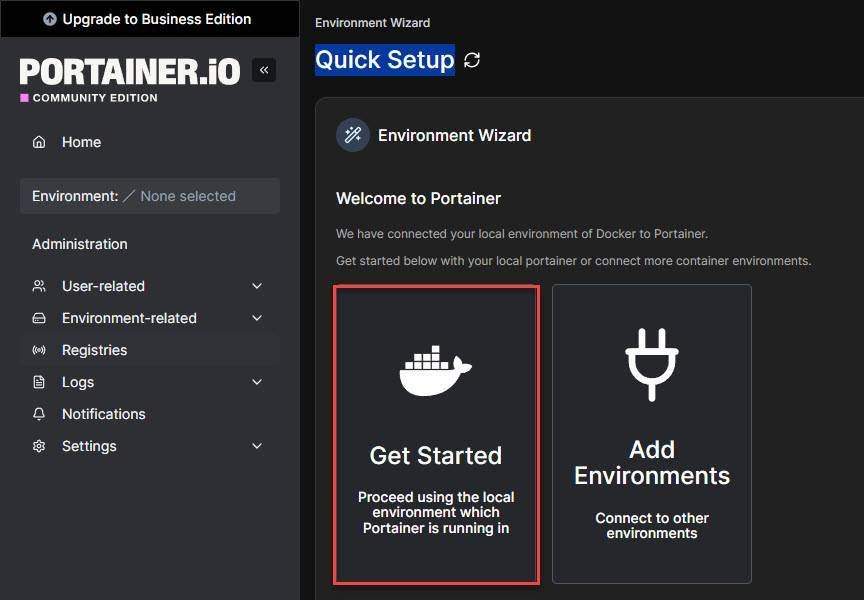
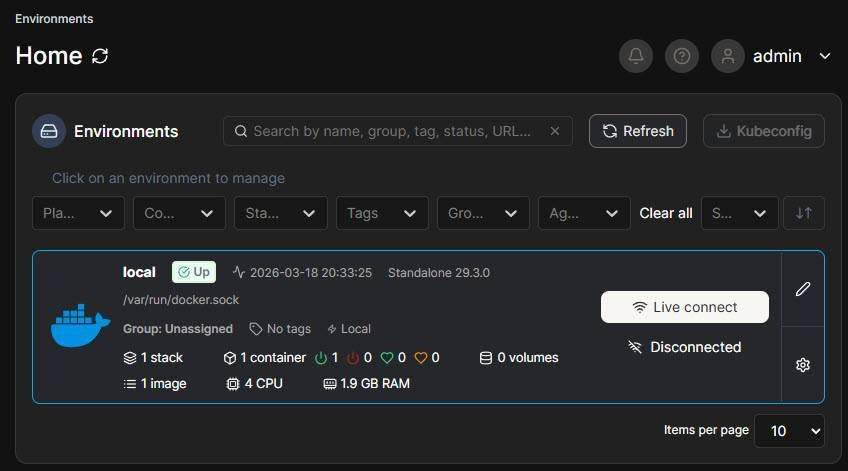
Next, under Environments, select Live Connect
Next, on the left-hand menu, click on Container. On the right-hand screen, you will see the list of containers currently available in the system.

Here, you can monitor the status of each container (running or stopped). To create a new container, click the Add Container or Create Container button. You can also perform actions such as Start, Stop, Restart, or Remove directly on each container in the list.
Best Practices and Common Troubleshooting
To maximize your Home Server’s efficiency, follow these best practices: Always use version control for your docker-compose.yml files, regularly back up your ~/docker directory, and monitor resource usage to avoid overloading your Raspberry Pi.
Common issues include:
- Permission Denied Errors: Ensure you’re in the Docker group and have rebooted.
- Port Conflicts: Check if port 9443 is in use with
sudo netstat -tuln | grep 9443and free it if necessary. - Image Pull Failures: Verify your internet connection and try pulling the image manually with
docker pull portainer/portainer-ce:latest.
These tips will help you troubleshoot effectively and maintain a smooth-running system.
Conclusion
By following this guide, you’ve transformed your Raspberry Pi into a professional-grade Home Server using Docker and Portainer. This organized approach with Docker Compose not only simplifies management but also scales effortlessly for future projects like web servers or file sharing. Embrace the power of containerization and continue experimenting—your smart home journey has just begun!