How to Configure Static IP Address on Raspberry Pi OS Lite
Raspberry Pi is a versatile single-board computer often used for projects like web servers, NAS setups, VPN servers, home automation systems, or internal network services. In these scenarios, configuring a static IP address is essential to ensure stability and easy access. Unlike dynamic IP addresses assigned via DHCP, which can change after reboots, a static IP remains constant, making it easier to connect via SSH, set up port forwarding, or access services like databases and monitoring tools.
This guide focuses on Raspberry Pi OS Lite, the version without a graphical user interface (GUI). All steps will be performed via the terminal using command-line tools. We’ll use Netplan, the network configuration tool in modern Raspberry Pi OS versions, to manage settings through YAML files in the /etc/netplan directory.
Check Current Network Configuration
Before setting up a static IP, it’s important to review your current network settings to gather necessary details like your existing IP address and gateway.
To view network interfaces, run the following command:
ip aThis will display information about your network interfaces. Typically, eth0 is for Ethernet (LAN), and wlan0 is for Wi-Fi. Look for lines like this:
inet 192.168.1.22/24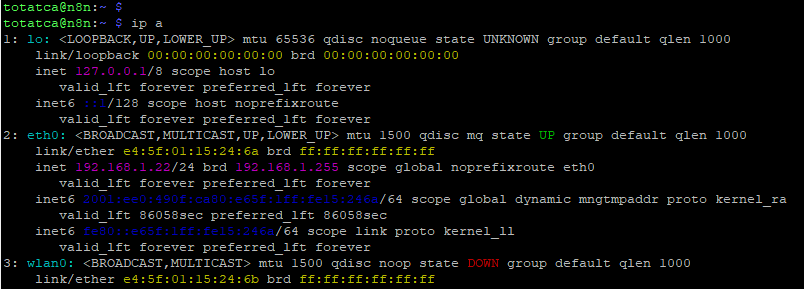
Next, check your gateway with:
ip routeThe output might show something like:
default via 192.168.1.1 dev eth0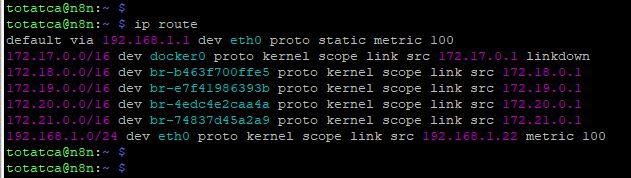
From this, note your current IP (e.g., 192.168.1.22) and gateway (e.g., 192.168.1.1). These details will be used in the static IP configuration.
Check Netplan Configuration File
Netplan manages network settings on Raspberry Pi OS. Configuration files are stored in the /etc/netplan directory.
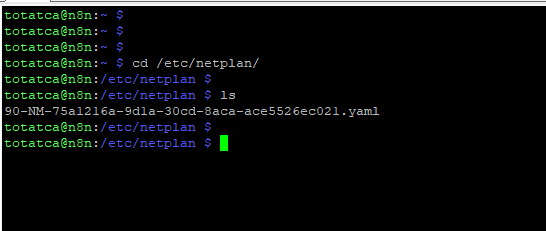
Navigate to this directory with:
cd /etc/netplanList the files inside:
lsYou might see a file like 90-NM-75a1216a-9d1a-30cd-8aca-ace5526ec021.yaml.
Edit the Configuration for Static IP
Now, edit the Netplan file to set a static IP. Open it with a text editor like nano:
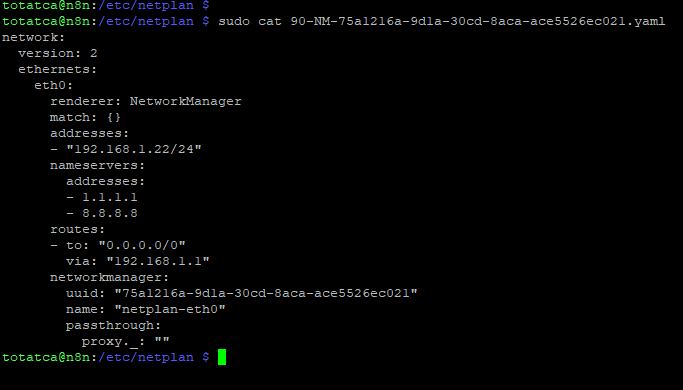
sudo nano /etc/netplan/90-NM-75a1216a-9d1a-30cd-8aca-ace5526ec021.yamlModify the file to include your static IP settings. Here’s an example:
network:
  version: 2
  ethernets:
    eth0:
      renderer: NetworkManager
      addresses:
        - 192.168.1.22/24
      nameservers:
        addresses:
          - 1.1.1.1
          - 8.8.8.8
      routes:
        - to: 0.0.0.0/0
          via: 192.168.1.1
Key parameters include:
- addresses: Your static IP address (e.g., 192.168.1.50) with subnet mask (/24 equals 255.255.255.0).
- via: The gateway IP (e.g., 192.168.1.1).
- nameservers: DNS servers for domain resolution (e.g., 1.1.1.1 and 8.8.8.8).
Save the file (in nano, press Ctrl+O, then Enter, and Ctrl+X to exit).
Apply the Network Configuration
After editing, apply the changes with:
sudo netplan applyIf there are syntax errors in the YAML file, the system will notify you, allowing you to correct them.
Verify the New IP Address
Confirm that the static IP has been applied by checking your network interfaces again:
ip aOr use:
hostname -IYou should see your new IP, such as 192.168.1.22.
Check Internet Connectivity
To ensure everything is working, test your internet connection:
ping -c 4 google.comIf you receive responses, your network configuration is successful.
Important Notes on Netplan Configuration
- YAML files are sensitive to spacing and indentation. Ensure proper formatting to avoid errors.
- Avoid IP conflicts by choosing an address outside your router’s DHCP range.
- For a safer approach, test configurations with
sudo netplan try. This applies changes temporarily and reverts if there are issues.
Conclusion
Configuring a static IP on Raspberry Pi OS Lite via Netplan is a straightforward process that enhances network stability for server-based projects. By editing the YAML file in /etc/netplan and applying the changes, you can ensure reliable access to your Raspberry Pi. This method is ideal for modern Linux environments, making your setup more manageable and efficient.