Introduction to Self-Hosting n8n on Windows
If you’re using Windows and want full control over your data and workflows, self-hosting n8n is a great solution. This guide will walk you through the process of installing n8n on Windows using a Linux environment provided by Windows Subsystem for Linux (WSL), along with Docker to manage containers efficiently. Whether you are a beginner or have experience, this step-by-step tutorial will help you get n8n up and running smoothly.
Understanding the Setup Architecture
The setup involves several components working together to run n8n on Windows:
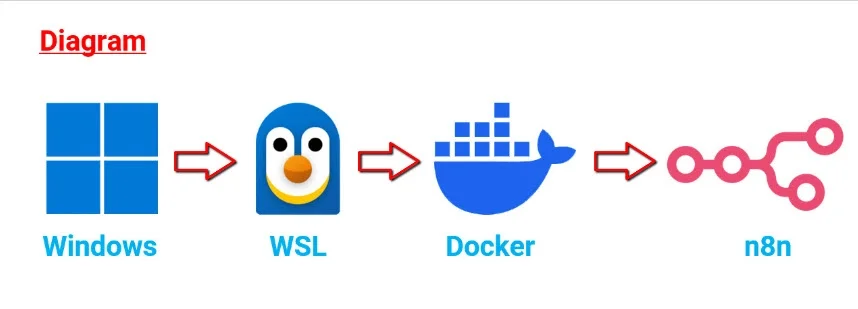
- Windows: Your main operating system.
- WSL: Creates a Linux environment inside Windows.
- Docker: Runs inside the Linux environment to manage containers.
- n8n: Runs inside a Docker container.
If you have not installed WSL or Docker yet, it is recommended to check installation guides before proceeding.
Watch more:
- Install Linux distro on Windows 👉 Youtube
- How to Assign a LAN IP to WSL2 on Windows 11 👉 Youtube
- Install Docker & Portainer on Windows 10/11 👉 Youtube
Preparing Your Linux Environment
Start by opening your installed Linux distribution, such as Ubuntu.
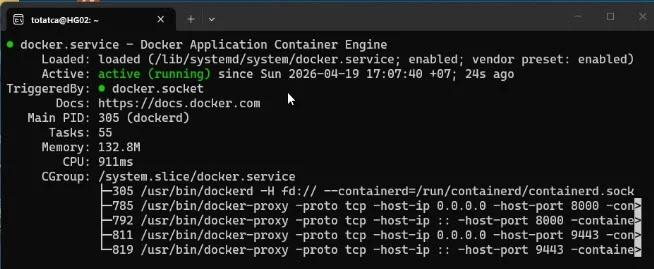
Check if Docker is running properly by executing the following command:
sudo systemctl status dockerIf Docker shows as “active“, you are ready to continue.
Folder Structure and Key Components
To organize your setup, create a folder named docker which will hold all container data, including n8n.
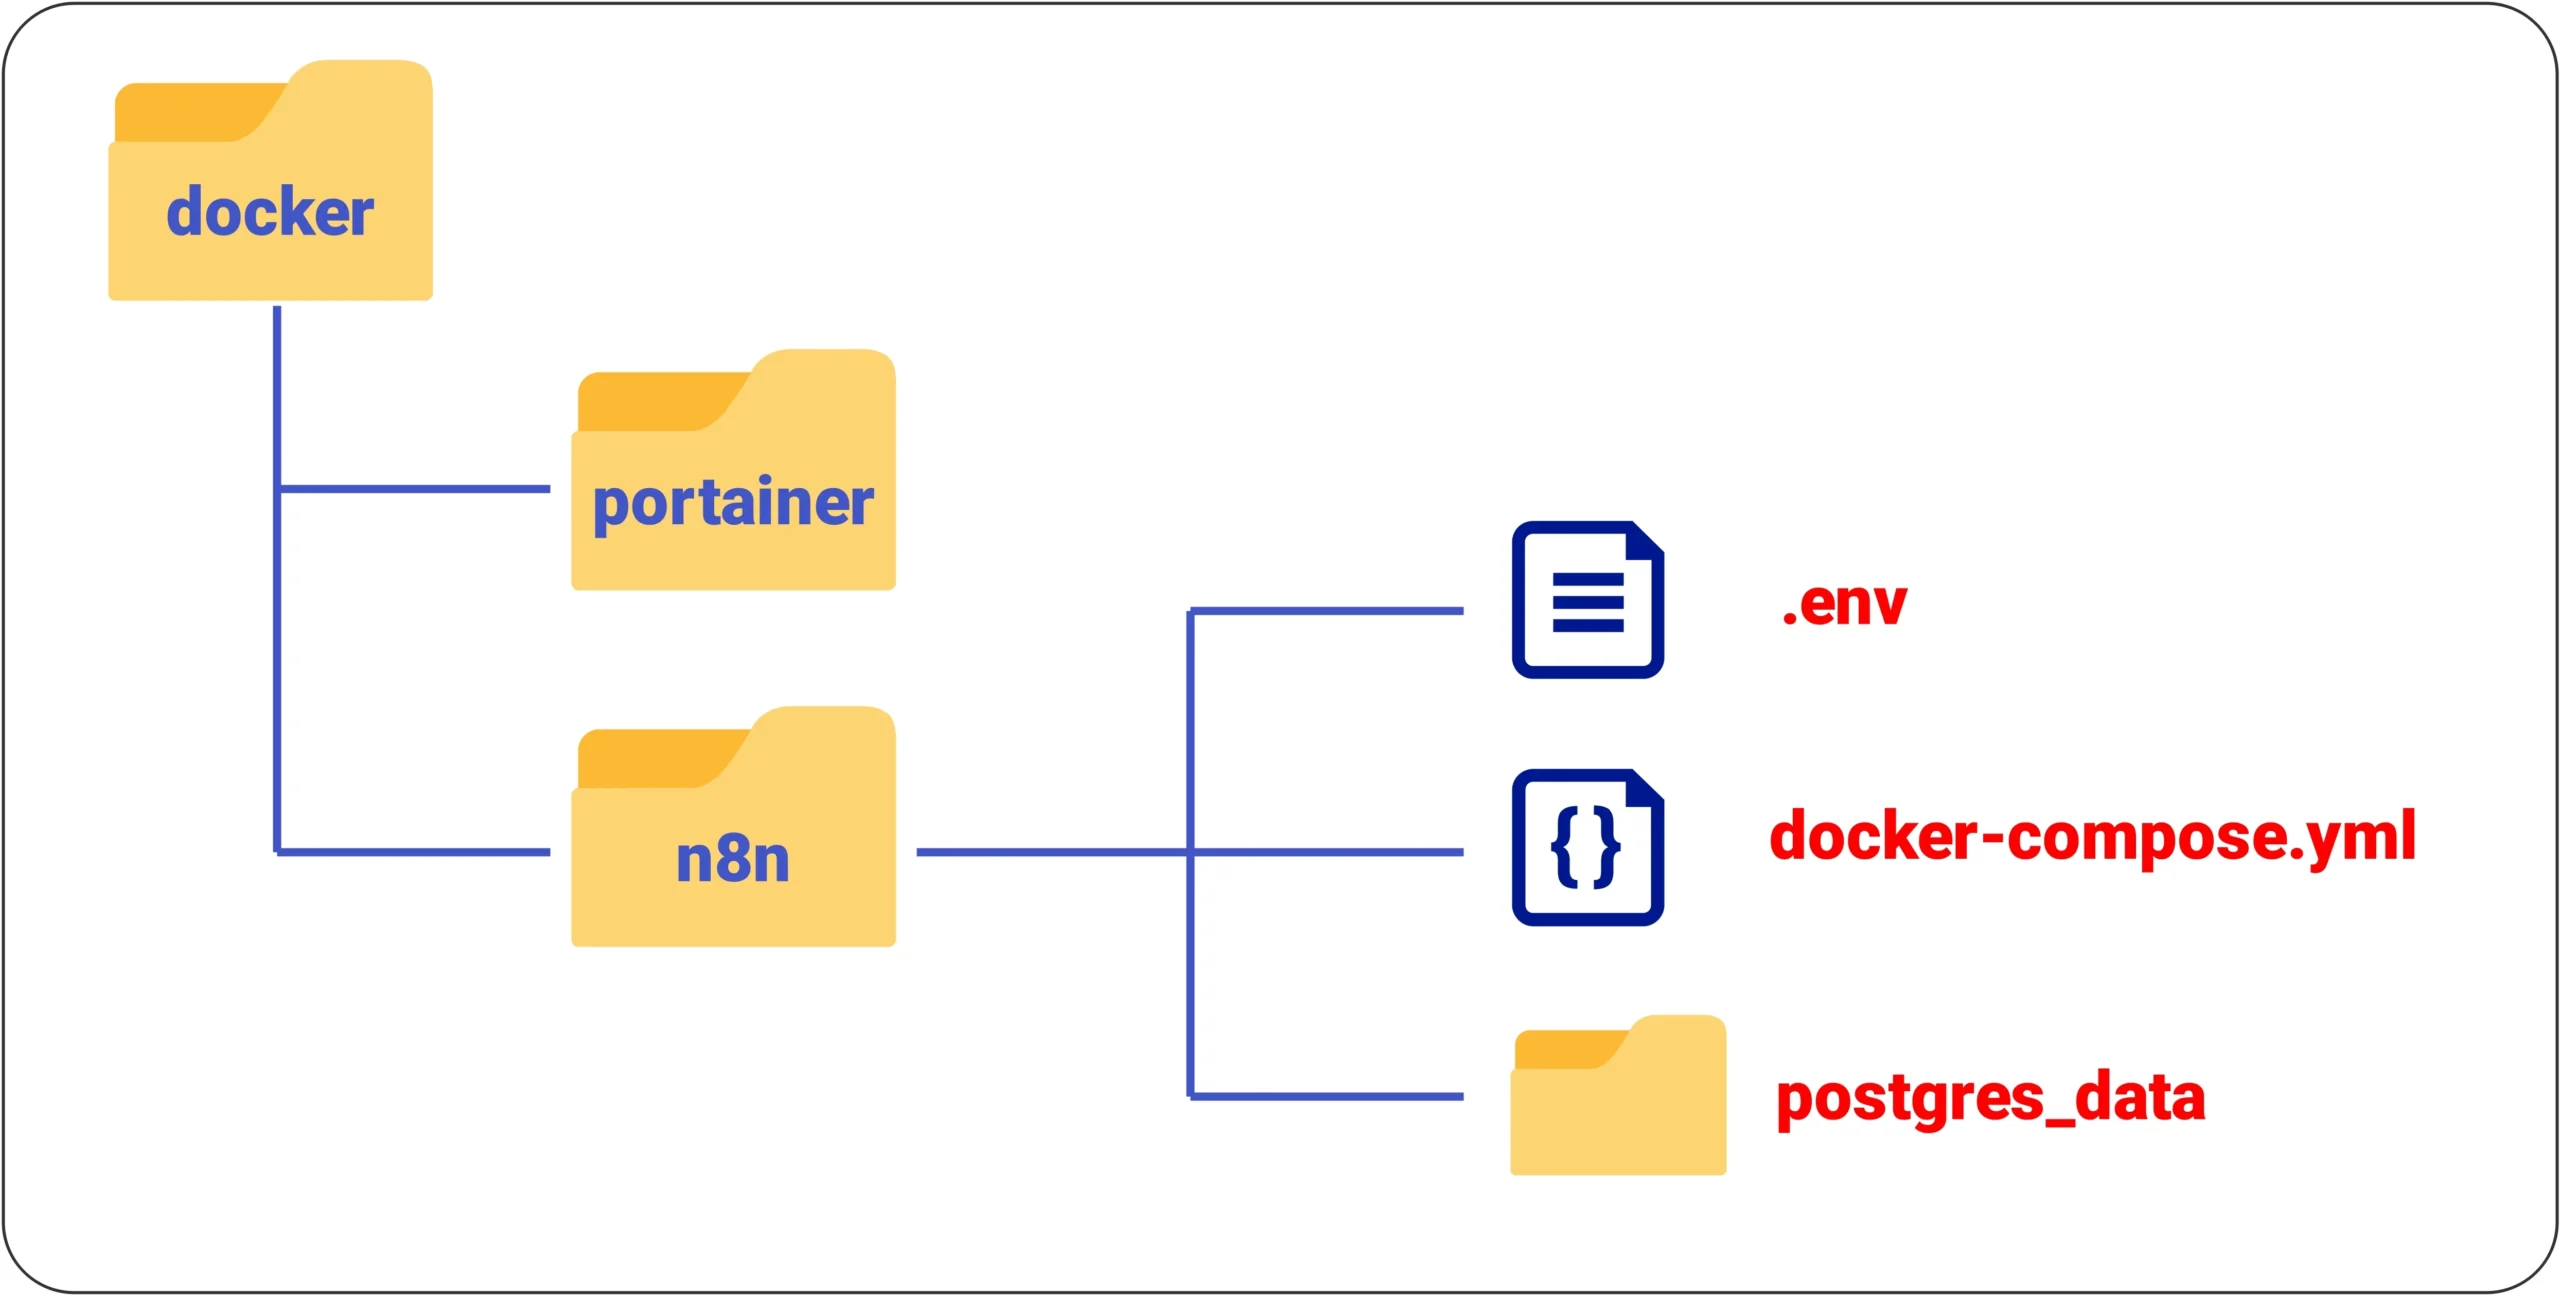
The important components inside this folder include:
- .env file: Contains environment variables such as credentials and configuration settings.
- docker-compose.yml file: Defines and runs the entire system including n8n and the database.
- postgres-data folder: Stores the PostgreSQL database data to ensure persistence across container restarts.
Maintaining exact file names is crucial for proper system recognition.
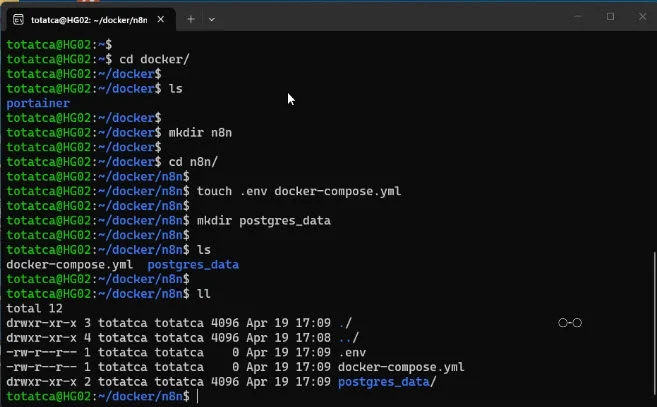
Creating Folder Structure and Configuration Files
Begin by creating the necessary directories and files inside the docker folder.
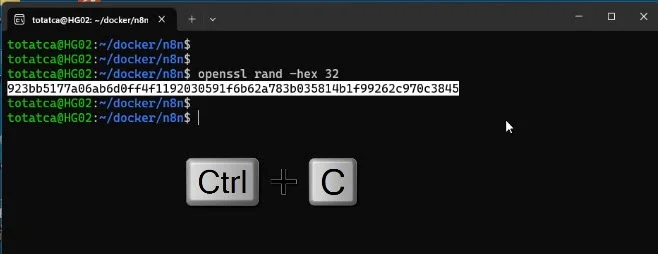
Generate a secure 32-character string with OpenSSL for data encryption by running:
openssl rand -hex 32Copy the generated string and paste it into the N8N_ENCRYPTION_KEY variable in the .env file.
Configuring the .env File
Open the .env file and add the following content, updating values as needed:
POSTGRES_DB=n8n_db
POSTGRES_USER=n8n_db_user
POSTGRES_PASSWORD=n8n_db_PWD

N8N_PORT=5678
N8N_PROTOCOL=http
N8N_HOST=0.0.0.0

GENERIC_TIMEZONE=Asia/Ho_Chi_Minh
TZ=Asia/Ho_Chi_Minh

N8N_ENCRYPTION_KEY=your_secret_key_here

N8N_EDITOR_BASE_URL=http://IP-WSL:5678
WEBHOOK_URL=http://IP-WSL:5678
This configuration sets up PostgreSQL credentials, basic authentication for n8n, system timezone, webhook URL (replace IP-WSL with your WSL IP address), and the encryption key for sensitive data.
Setting Up the docker-compose.yml File
Edit the docker-compose.yml file and paste the following configuration:
services:
  postgres:
    image: postgres:16
    container_name: n8n_postgres
    restart: unless-stopped
    environment:
      POSTGRES_DB: ${POSTGRES_DB}
      POSTGRES_USER: ${POSTGRES_USER}
      POSTGRES_PASSWORD: ${POSTGRES_PASSWORD}
      TZ: ${TZ}
    volumes:
      - ./postgres_data:/var/lib/postgresql/data

  n8n:
    image: n8nio/n8n:latest
    container_name: n8n
    restart: unless-stopped
    ports:
      - "${N8N_PORT}:5678"
    environment:
      DB_TYPE: postgresdb
      DB_POSTGRESDB_HOST: postgres
      DB_POSTGRESDB_PORT: 5432
      DB_POSTGRESDB_DATABASE: ${POSTGRES_DB}
      DB_POSTGRESDB_USER: ${POSTGRES_USER}
      DB_POSTGRESDB_PASSWORD: ${POSTGRES_PASSWORD}

      N8N_HOST: ${N8N_HOST}
      N8N_PORT: ${N8N_PORT}
      N8N_PROTOCOL: ${N8N_PROTOCOL}
      WEBHOOK_URL: ${WEBHOOK_URL}
      N8N_EDITOR_BASE_URL: ${N8N_EDITOR_BASE_URL}

      GENERIC_TIMEZONE: ${GENERIC_TIMEZONE}
      TZ: ${TZ}

      N8N_ENCRYPTION_KEY: ${N8N_ENCRYPTION_KEY}

    depends_on:
      - postgres
This defines the PostgreSQL database service and the n8n service, linking them and ensuring persistent data storage.
Launching n8n
With all configurations in place, start the containers by running:
docker-compose up -dThe initial run may take a few minutes as Docker downloads necessary images and initializes containers.
Verify that n8n has started successfully when you see the appropriate startup messages.
To check running containers, execute:
docker psFor a more visual management experience, you can install and use Portainer to monitor your containers easily.
Accessing and Setting Up the n8n Web Interface
Open your web browser and navigate to the address configured in the WEBHOOK_URL environment variable (e.g., http://IP-WSL:5678).
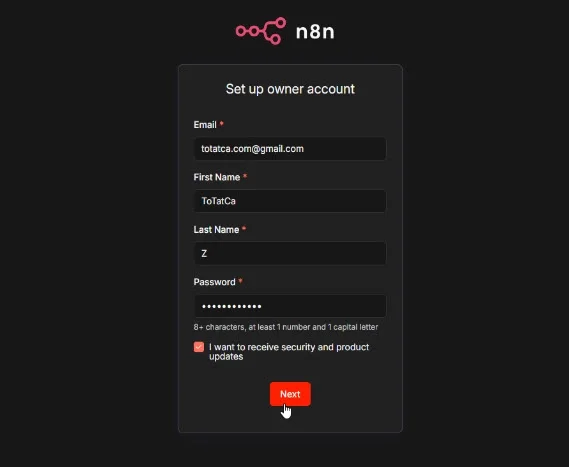
On the first screen, create your user account by entering the required information and proceed.
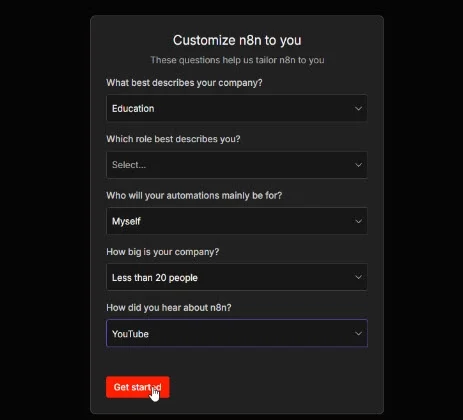
Answer the setup questions according to your preferences.
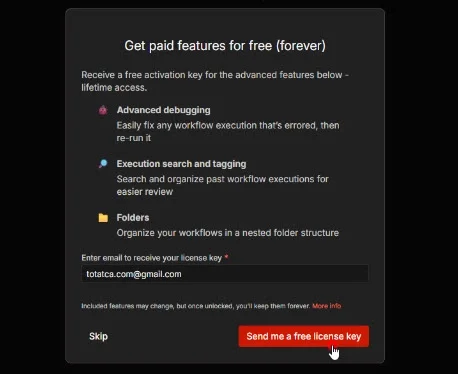
Request a free license key by clicking “Send me a free license key” and check your email inbox for the key.
Activate the license key on the interface to complete the setup.
After activation, a confirmation message stating “You’re on the Community Edition (registered)” indicates successful installation and registration.

Conclusion
You have now successfully self-hosted n8n on your Windows machine using WSL and Docker. This setup offers you full control over your automation workflows and data. In upcoming guides, we will explore how to create workflows with n8n. If this tutorial helped you, consider subscribing to support further content. Thank you for following along!