Windows Subsystem for Linux (WSL) is a powerful feature that allows users to run a Linux environment directly on Windows without the need for virtual machines or dual booting. This integration enables you to run popular distributions like Ubuntu and Debian efficiently, making it an essential tool for developers, system administrators, and DevOps professionals.
Why Use WSL?
WSL offers numerous advantages over traditional virtualization methods:
- No need for VMware or VirtualBox: WSL runs natively on Windows, eliminating the need for third-party virtualization software.
- Lower resource usage: Compared to full virtual machines, WSL consumes fewer system resources, allowing for better performance.
- Seamless integration: Easily run Linux tools such as Docker, Python, and Bash alongside your Windows applications.
- Ideal for developers: WSL is particularly beneficial for developers and system administrators who work across both Windows and Linux environments.
Enable WSL on Windows
To start using WSL, you need to enable it in your Windows settings. Follow these steps:
Open the Control Panel – select Programs and Features – click on Turn Windows features on or off.
In the Windows Features dialog, enable the following options:
- Virtual Machine Platform: Required for running WSL 2 with improved performance.
- Windows Subsystem for Linux: This is the core component that allows Linux to run on Windows.
- Windows Hypervisor Platform: Ensures compatibility with virtualization tools like Docker and VMware.
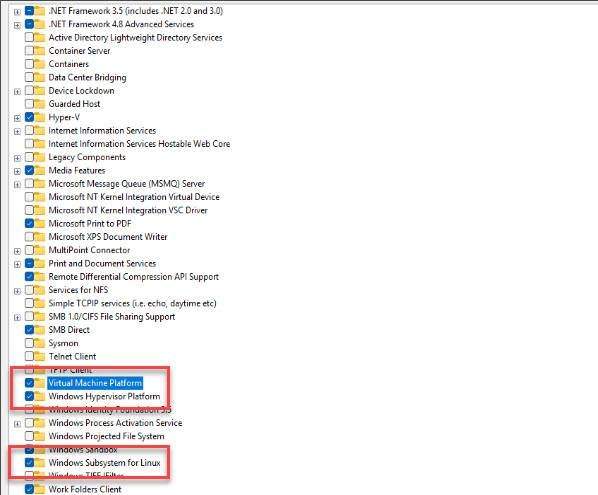
Click OK to finish.
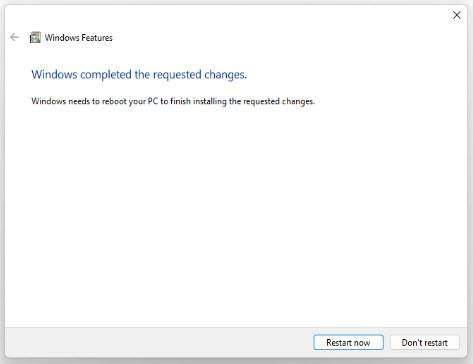
Wait for the installation to complete. Then restart your computer to apply the changes.
Verify WSL Installation
After rebooting your computer, you need to verify that WSL has been installed correctly:
Open the Command Prompt (CMD) as an Administrator and run the following command:
wsl --versionYou should see output similar to the following:
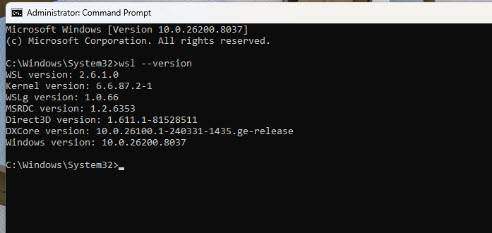
Explanation:
- WSL version: Ensure it shows WSL 2.
- Kernel version: Displays the Linux kernel version.
- WSLg: Indicates support for GUI applications.
Update WSL
To ensure you have the latest features and fixes, it’s important to update WSL regularly, run the following command in CMD:
wsl --updateThis command will:
- Fix any bugs.
- Update the kernel.
- Improve overall performance.
Basic WSL Commands
Familiarize yourself with some basic commands to manage WSL effectively:
List installed distributions: Displays all installed Linux distributions along with their current WSL version (WSL 1 or WSL 2).
wsl -l -v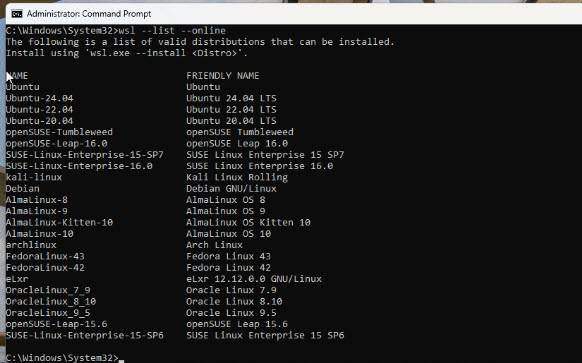
Install Ubuntu: Quickly installs the Ubuntu distribution via the command line.
wsl --install -d Ubuntu-24.04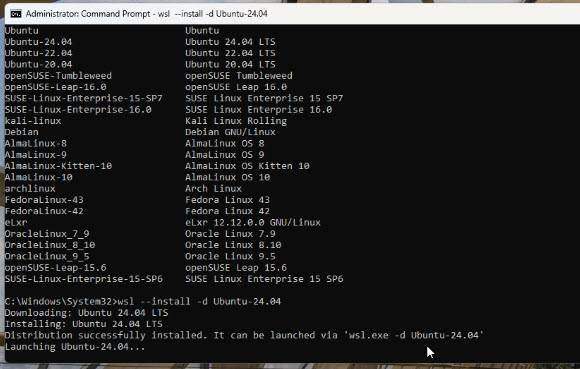
Set WSL 2 as default: Sets WSL 2 as the default version for any new distributions you install.
wsl --set-default-version 2Convert WSL version: Converts a specific distribution (e.g., Ubuntu) to WSL 2 for better performance and compatibility.
wsl --set-version Ubuntu 2Shutdown WSL: Completely stops all running WSL instances, useful when applying changes or freeing system resources.
wsl --shutdownConclusion
WSL is a powerful tool that bridges the gap between Windows and Linux, providing a versatile environment for developers and IT professionals. By following the steps outlined in this guide, you can set up WSL on your Windows machine and begin leveraging the capabilities of Linux alongside your existing Windows applications.
Read more
- Step-by-Step Guide to Installing OpenClaw on Ubuntu Linux
- Top 10 Linux Server Management Tools for Efficient Administration
- Guide to Installing n8n Server on Ubuntu Using Docker
- Install Docker and Portainer on Raspberry Pi
- How to Install GLPI with NGINX on Ubuntu