How to Flash Raspberry Pi OS on an SD Card: A Step-by-Step Guide
Whether you’re troubleshooting issues or setting up a fresh system, flashing Raspberry Pi OS on an SD card is a straightforward process that can restore your Raspberry Pi to optimal performance. In this guide, we’ll walk you through the steps using the official Raspberry Pi Imager tool. This method ensures your device runs smoothly and efficiently, making it essential for Raspberry Pi enthusiasts and beginners alike.
What You’ll Need
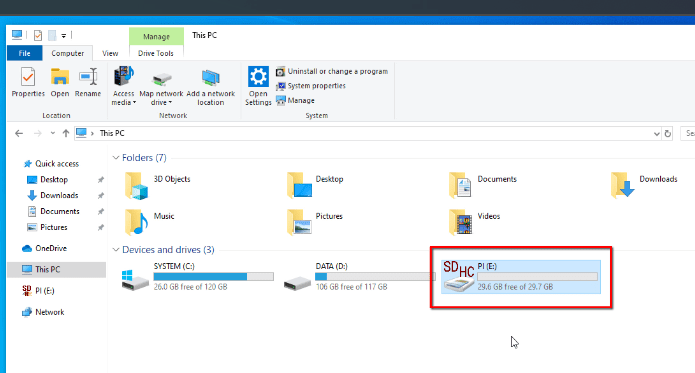
Before you begin, gather the necessary items: a Raspberry Pi device, an SD card (at least 8GB recommended), a computer with an SD card slot or a card reader, and a stable internet connection. This setup allows you to download and install Raspberry Pi OS without any complications.
Connecting Your SD Card
First, connect your SD card to your computer. If your computer has a built-in SD card slot, insert it directly. Otherwise, use an external card reader for convenience. This step is crucial to ensure you can access the SD card for flashing Raspberry Pi OS.
Downloading and Installing Raspberry Pi Imager
Head to the official Raspberry Pi website to get the Raspberry Pi Imager tool. Look for the section titled Install Raspberry Pi OS using Raspberry Pi Imager and download the version compatible with your operating system, such as the Windows installer.
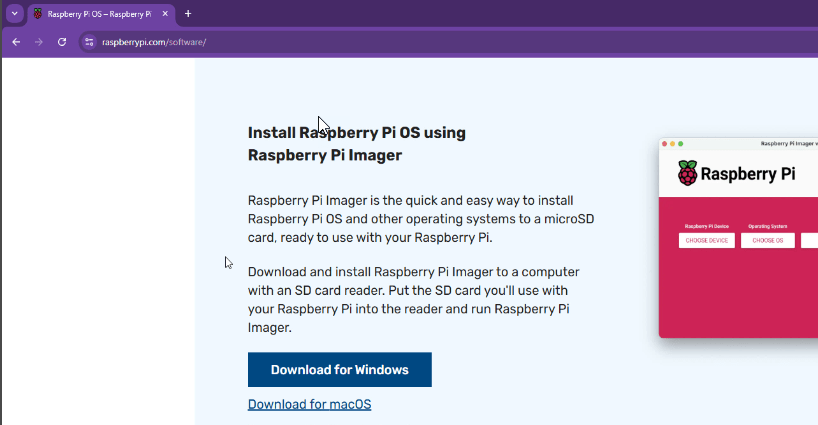
Once downloaded, install it like any other software on your computer.

Configuring Raspberry Pi Imager
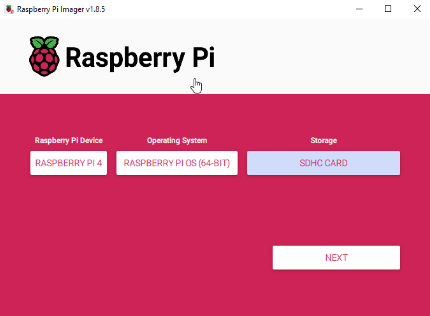
After installation, open Raspberry Pi Imager. Follow these steps to configure it:
- Choose Device: Select your Raspberry Pi model, for example, Raspberry Pi 4, to match your hardware.
- Choose OS: Pick the operating system from the available options. For most users, Raspberry Pi OS 64-bit is a great choice for better performance.
- Choose Storage: Select the connected SD card. Double-check this to avoid accidentally overwriting important data on another drive.
Starting the Flashing Process
Once your selections are complete, click Next to review.
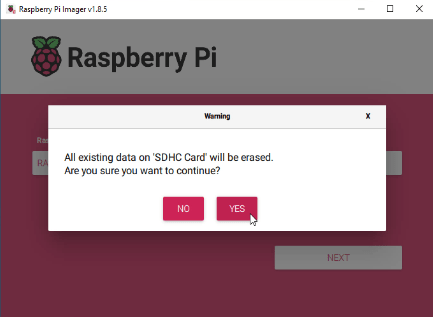
You’ll be prompted to confirm erasing the SD card, so ensure you’ve backed up any data first. Click Yes to proceed.
The flashing process will begin, downloading necessary files from the internet. This might take a few minutes, depending on your connection speed.
Completing the Setup
After the process finishes, you’ll see a confirmation message. Safely eject the SD card from your computer and insert it into your Raspberry Pi. Power on the device, and it should boot up with the newly flashed Raspberry Pi OS.
Final Tips
Flashing Raspberry Pi OS on an SD card is a simple way to maintain your device’s performance. Always back up data before starting, and if you encounter issues, refer to the official Raspberry Pi resources. If you found this guide helpful, consider sharing it or subscribing for more tech tutorials.
Read more
- Flashing Raspberry Pi OS on an SD Card
- Install Docker and Portainer on Raspberry Pi
- How to Install LEMP Stack on Ubuntu/Debian
- Understanding TrueNAS RAID Levels: Stripe, Mirror, RAIDZ, and dRAID Explained
- Samba – Part 3 – Set Up Samba with Separate Read/Write Access for Each User