In today’s digital landscape, harnessing the power of AI can significantly enhance your projects, whether for personal use or business applications. One of the first steps in utilizing OpenAI’s capabilities is to create an API Key. This guide will walk you through the process, ensuring you can easily generate your key and start integrating AI into your applications.
Step 1: Access the OpenAI Platform
Your journey begins at the official OpenAI website. Here, you need to log in to your account. If you don’t have an account yet, you’ll need to sign up first.
After logging in, go to Login – navigate to the API Platform by selecting it from the dashboard.

Step 2: Navigate to API Keys
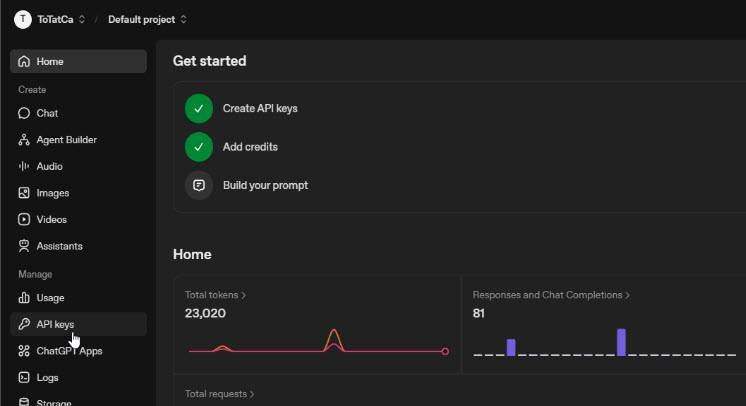
Once you’re in the API dashboard, look for the left-hand menu.
Click on API Keys. This section is where you will manage your keys.
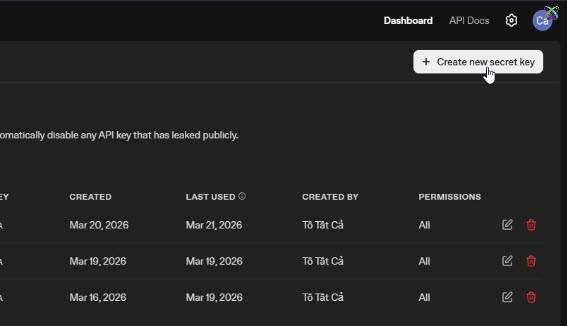
To create a new API Key, click on the Create new secret key button.
Step 3: Create an API Key
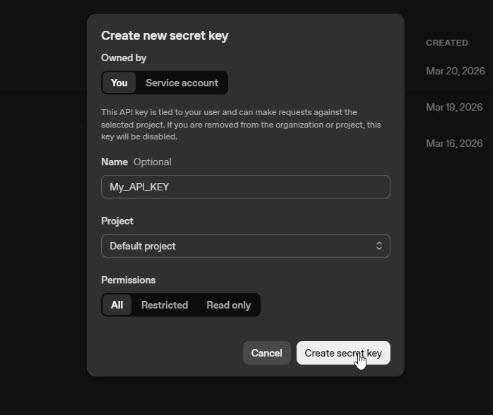
A new window will pop up prompting you to name your API Key.
Choose a name that is memorable and relevant to its purpose.
In the Project section, you can either create a new project or select Default for simplicity.
Next, you will configure the permissions for your API Key. You have three options:
- Restricted: Customize access based on your needs.
- Read only: Limit access to viewing capabilities.
- All: Grant full access to all functionalities.
After setting the permissions, click on Create secret key to finalize the process.
Step 4: Save and Secure Your API Key
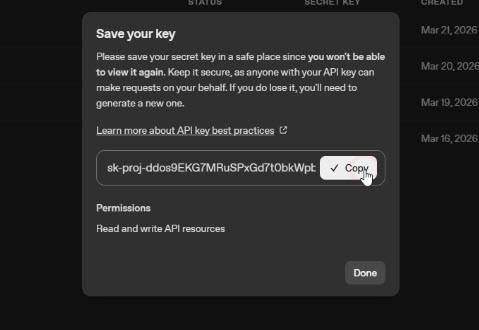
Your API Key will be generated as a string of characters. It’s crucial to save it immediately because you won’t be able to view it again later. Ensure you store it in a secure location, as sharing it can compromise your account’s security.
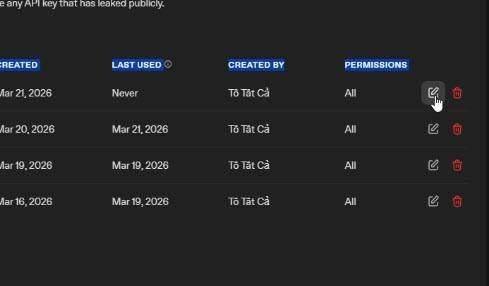
Once created, your API Key will appear in the list for easy management. You can edit its name or permissions later if needed, but remember that the key value itself cannot be changed.
If you no longer require the key, delete it to enhance your account’s security.
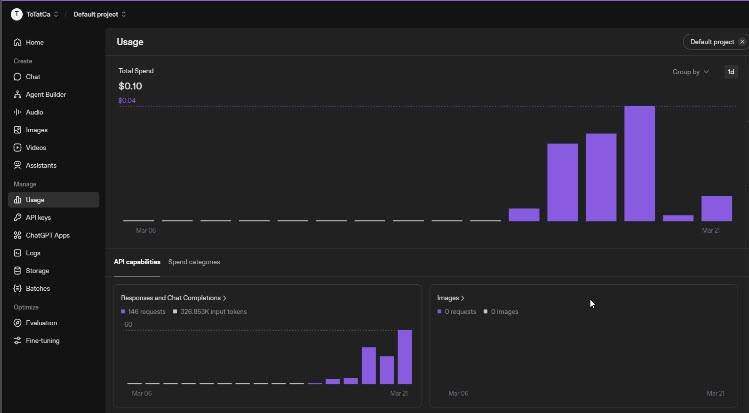
Step 5: Monitor Usage and Costs
Keeping track of your API usage is essential for managing costs and ensuring that you stay within budget. Navigate to the Usage tab in the dashboard. Here, you can monitor:
- Your total number of requests
- Associated costs
- Your activity history
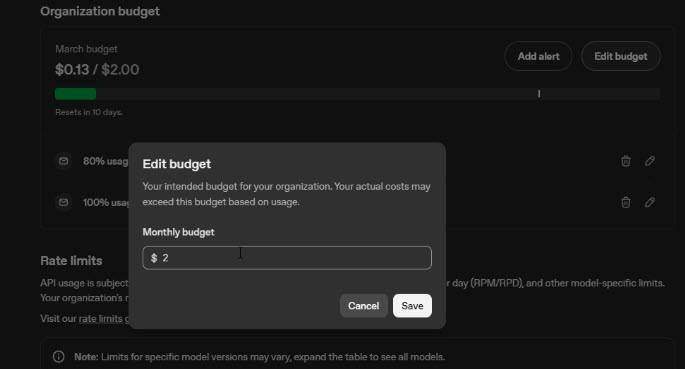
For better financial control, consider setting a monthly budget limit. This feature allows you to manage your spending effectively and reduces risks if your API Key is exposed.
Common Mistakes to Avoid
As you create your API Key, be mindful of these common pitfalls:
- Forgetting to save the API Key immediately after creation.
- Using a generic name makes it hard to identify later.
- Neglecting to set appropriate permissions, which could lead to unauthorized access.
Expected Results
By following these steps, you will successfully create your OpenAI API Key. You will be equipped to start leveraging AI technologies in your projects, enhancing functionality and user experience. With careful monitoring and management, you can maximize the benefits of using OpenAI while keeping your account secure.
Read more
- How to Install MongoDB Community Edition 5/6 on Ubuntu 22.04 20.04 18.04 LTS
- How to Enable Grok’s Memory Feature for a Truly Personalized AI Assistant
- 80 AI Tools You Must Not Miss in 2026
- OpenClaw vs Nanobot: Which AI Agent Framework Should You Use in 2026?
- What Is OpenClaw? The AI Agent Automating Workflows in 2026