Usually, when a client system connects to a network via WiFi or an ethernet cable, it automatically picks an IP address from the router. This is made possible through the DHCP server which auto-assigns IP addresses to clients from a pool of addresses.
A Static IP address is recommended for servers as the static address does not change as oppose to a dynamic IP address assignment via DHCP server.
In this guide, We will learn How to Configure a Static IP Address on Ubuntu Server 22.04 | 20.04 LTS with Netplan
Step 1 – Check the name of Network interface
First of all, We need to check the name of Network interface by execute following command below:
ip addr
#or
ip link
#or
ifconfig
Output as below:
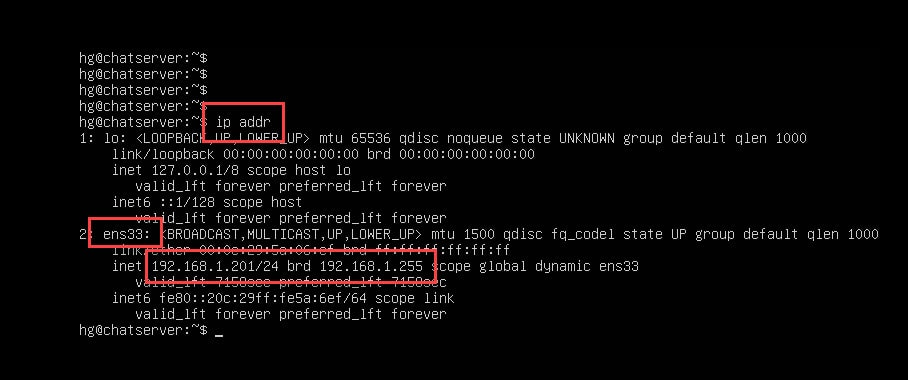
From the output, my network interface is ens33 and IP Address as 192.168.1.201
Step 2 – Configure static IP Address
Go to the /etc/netplan directory and find YAML configure file
cd /etc/netplan
ll
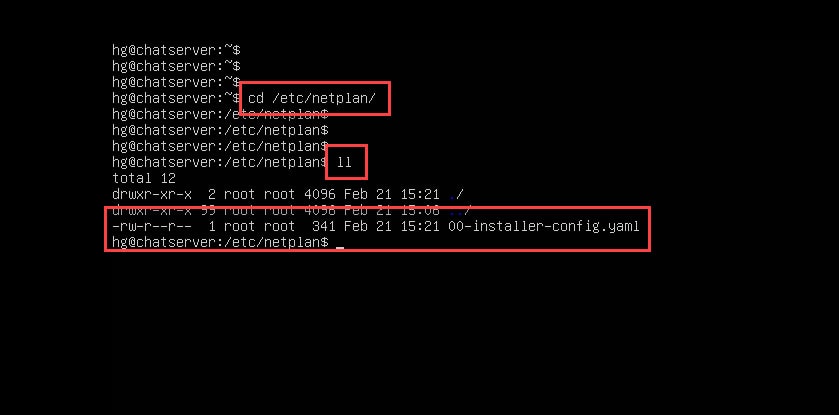
In this case, my YAML file is 00-installer-config.yaml
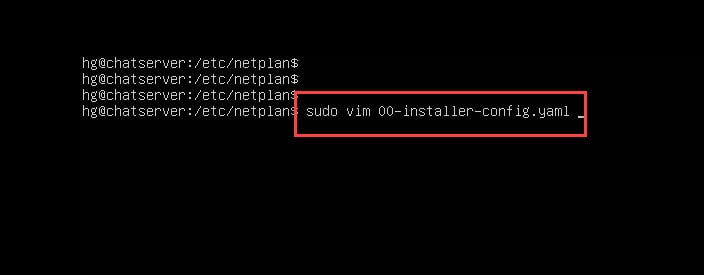
Now, open 00-installer-config.yaml file by execute the command below:
sudo vim 00-installer-config.yaml
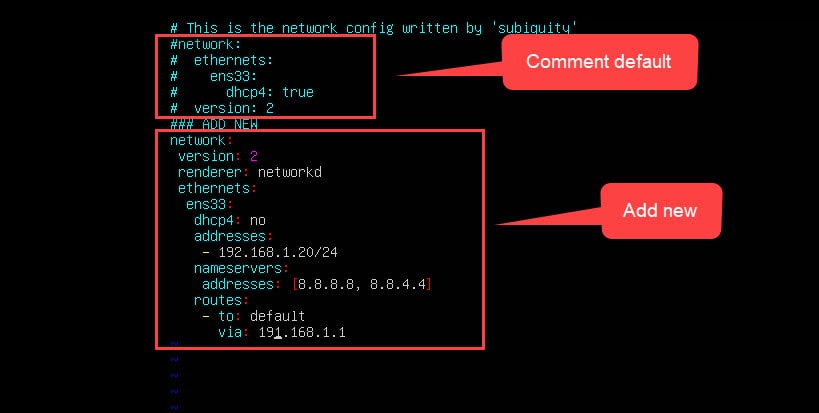
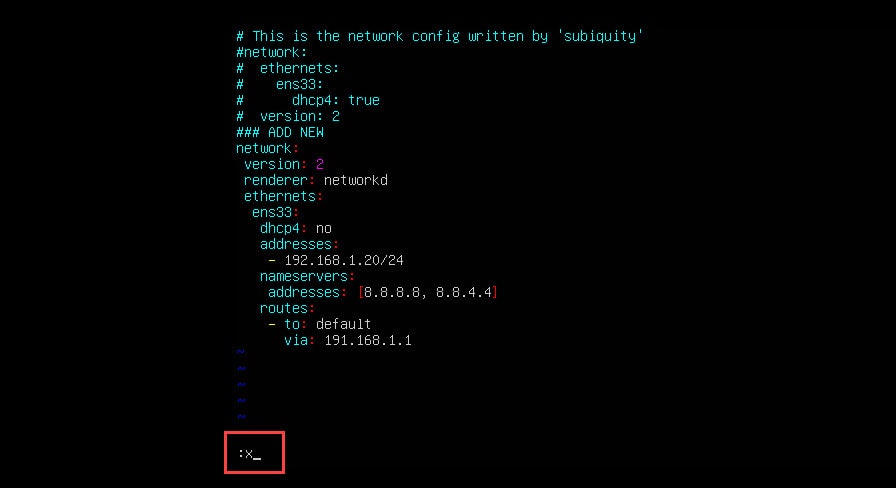
Comment default lines and add new content below. Be mindful of the spacing in the YAML file.
network:
 version: 2
 renderer: networkd
 ethernets:
  ens33:
   dhcp4: no
   addresses:
    - 192.168.1.20/24
   nameservers:
    addresses: [8.8.8.8, 8.8.4.4]
   routes:
    - to: default
      via: 192.168.1.1
Configuration file like below:
Save and exit file by press Esc Shift :x Enter
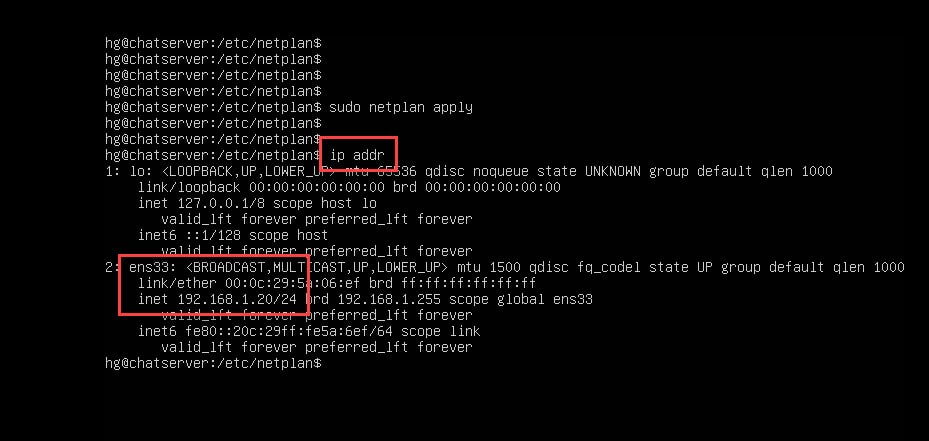
And run the command below for the change to take effect:
sudo netplan appy

Then finally, you check the new IP address using the command below:
ip addr
Perfect! The IP address has now changed successfully.
Thank you for reading !!!
Hello to all, it’s truly a fastidious for me to go to see this site,
it contains useful Information.
Thank you for your feedback !!!
Wow, that’s what I was searching for, what a stuff!
existing here at this blog, thanks admin of this site.
Thank you for your feedback !!!