How to Install and Configure pfSense on VMware Workstation [Page 2]
Step 4 – Install pfSense on VMware
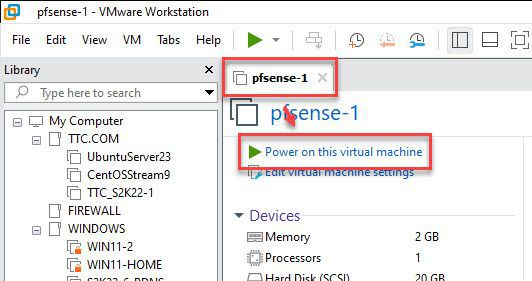
A virtual machine for pfSense has been created. Now, click on Power on this virtual machine to start installing pfSense on VMware.
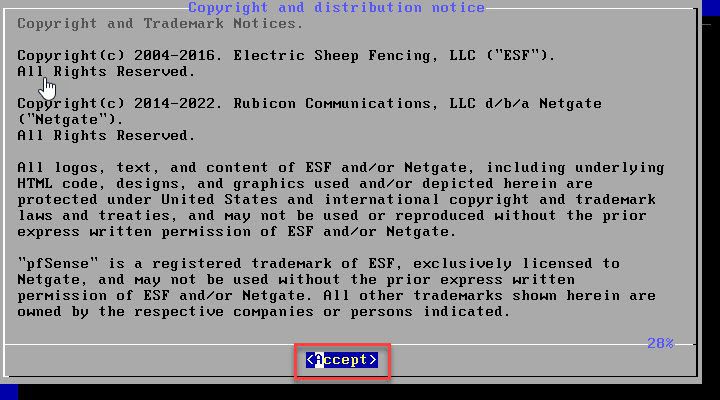
Press Enter to the next step in the Copyright and distribution notice screen
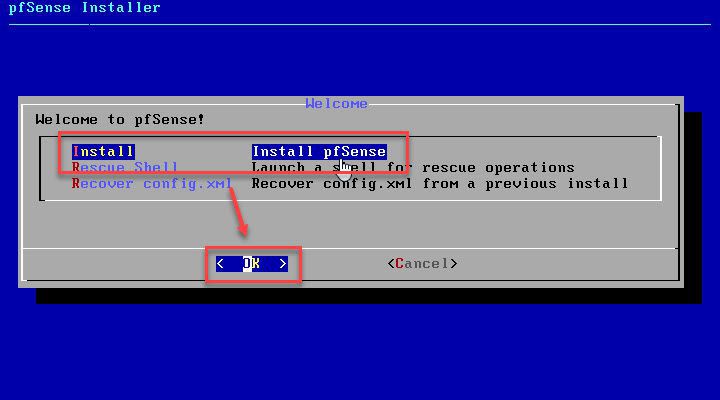
Select Install pfSenese option – select OK – press Enter to the next step.
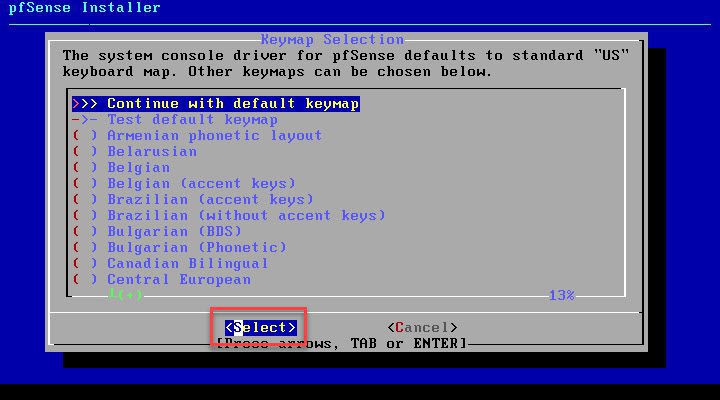
In the Keymap Selection screen, keep the default – select the Select button and press Enter
In the Partitioning screen, select the Auto (ZFS) option – select OK and press Enter to the next step
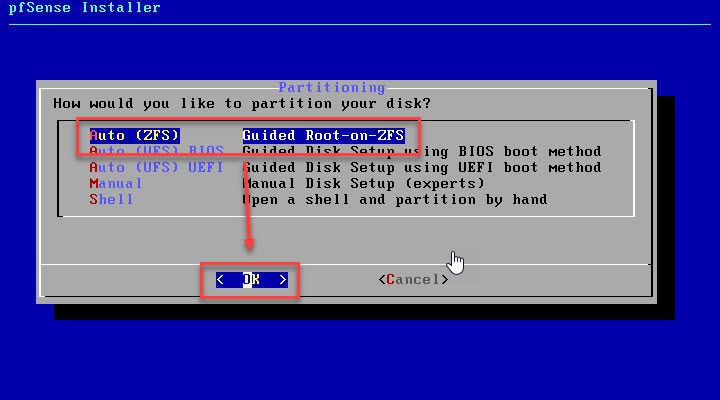
Select Install option – select the Select button – press Enter to the next step.
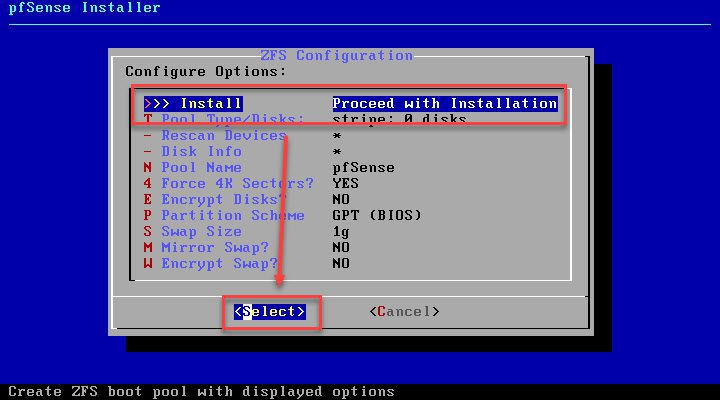
In the ZFS Configuration screen, select stripe option – select OK button and press Enter
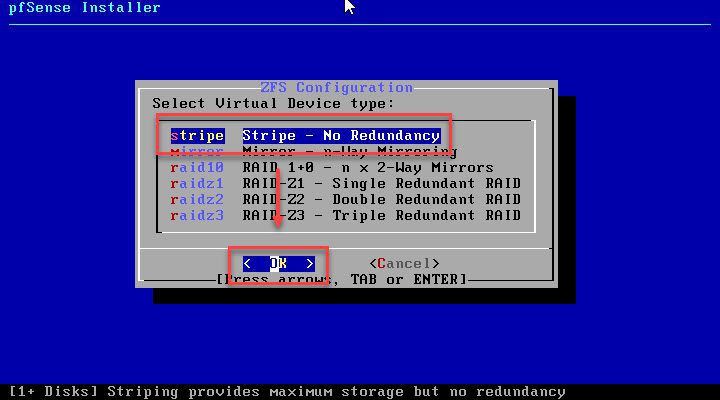
Press the Space key on the keyboard to select the virtual disk – select the OK button and press Enter.
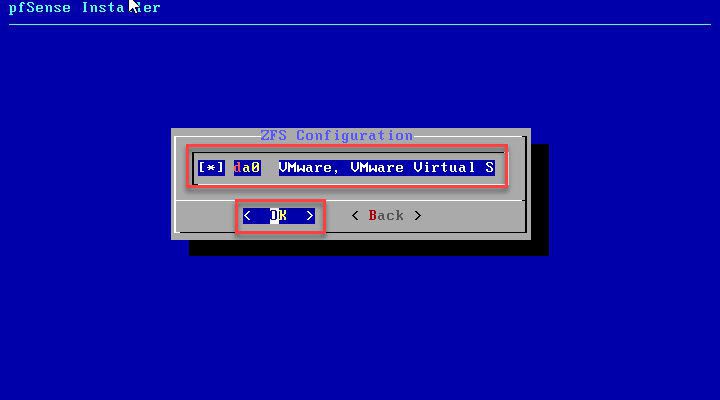
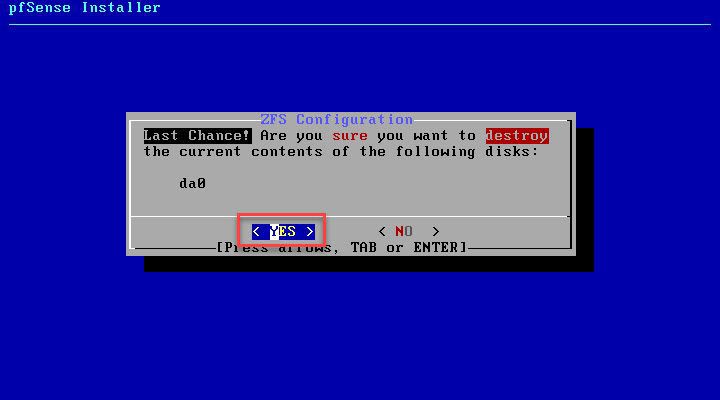
Select the YES button and press Enter.
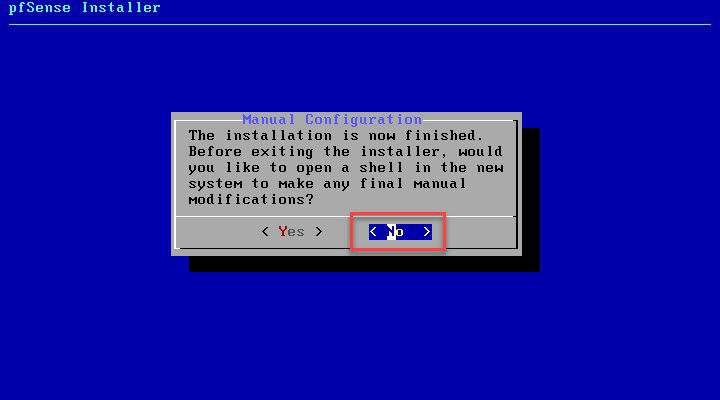
In the Manual Configuration screen, select No and press Enters
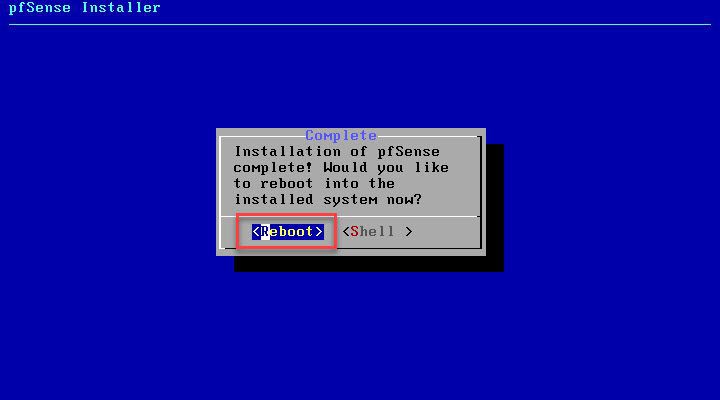
Select Reboot and press Enter to restart pfSense system.
Step 5 – Configure pfSense
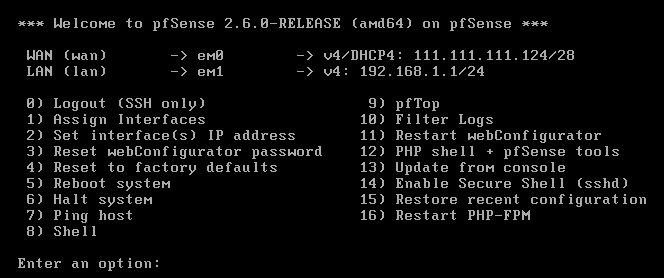
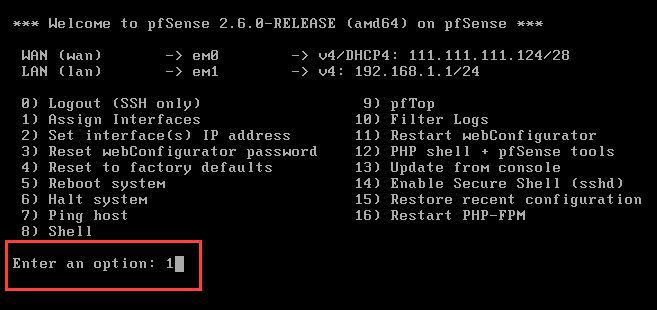
After the reboot is complete, the system will take us to the welcome screen. You will see:
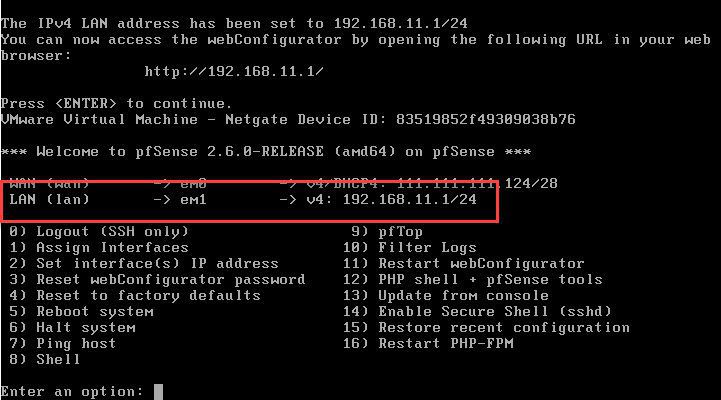
- The WAN interface (Network Adapter 1 = VMnet8) named em0 with the assigned IP address of 111.111.111.124/28 from the DHCP server.
- The default LAN interface (Network Adapter 2 = VMnet11) named em1 will be assigned the IP address 192.168.1.1/24 by the system (we will configure it according to the network diagram in the next step).
Check MAC Address
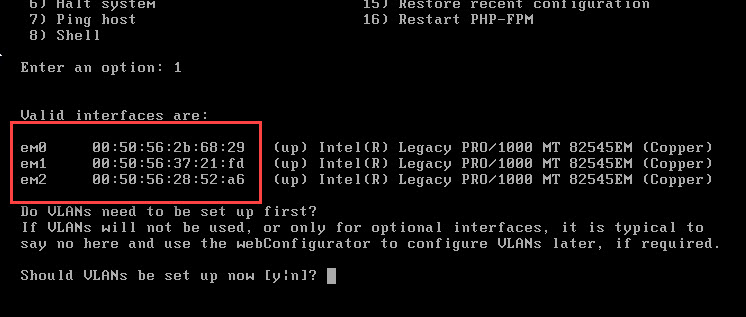
However, we need to verify whether the Virtual Networks correspond to our network diagram using the MAC addresses identified in step 3 by enter 1 ( Assign Interfaces) and press Enter
If correct, press Ctrl + C to exit.
- The MAC address of Network Adapter 1 (NIC1 = em0 = WAN ) is 00:50:56:28:68:29
- The MAC address of Network Adapter 2 (NIC2 = em1 = LAN11) is 00:50:56:37:21:FD
- The MAC address of Network Adapter 3 (NIC3 = em2 = LAN12 ) is 00:50:56:28:52:A6
Configure LAN11
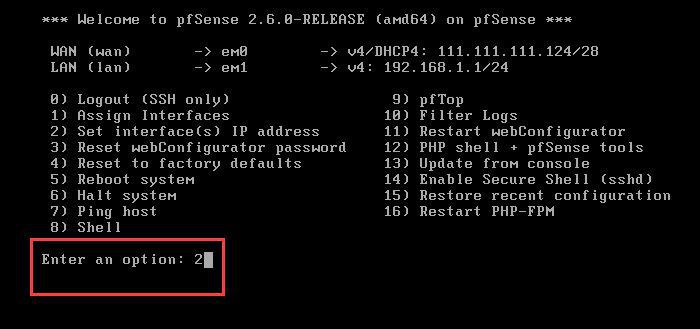
By default, pfSense does not allow access from the WAN interface, so we need to configure an IP address for the LAN11 interface. To do this, enter 2 ( Set interface(s) IP address) and press Enter.
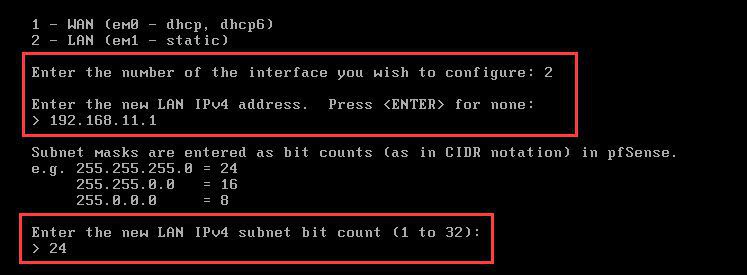
Enter 2 to select LAN ( Adapter Network 2 = VMnet11 = LAN11 = em1 ) interface and press Enter

Enter the IP address and Subnet mask for LAN11
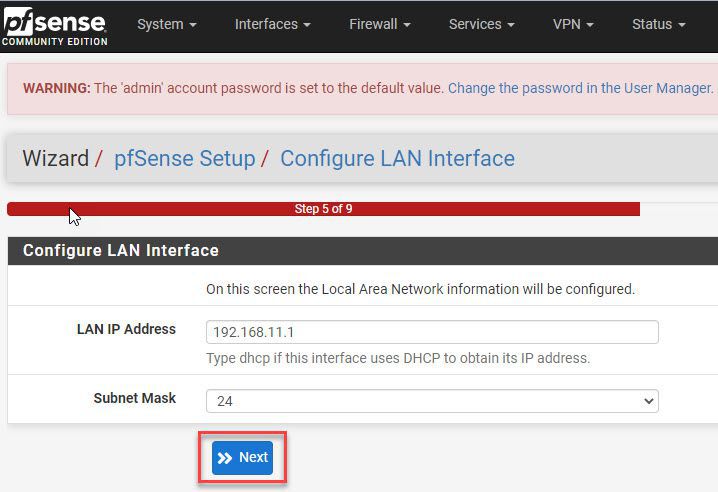
- Enter the new LAN IPv4 address: 192.168.11.1 then hit Enter
- Enter the new LAN IPv4 subnet bit count: 24 then hit Enter
- For a LAN, press <ENTER> for none: hit Enter
- Enter the new LAN IPv6 address. Press <ENTER> for none: hit Enter
- Do you want to enable the DHCP server on LAN? (y/n): type n and hit Enter

- Do you want to revert to HTTP as the webConfigurator protocol?(y/n): type y and hit Enter
- Press <ENTER> to continue. hit Enter
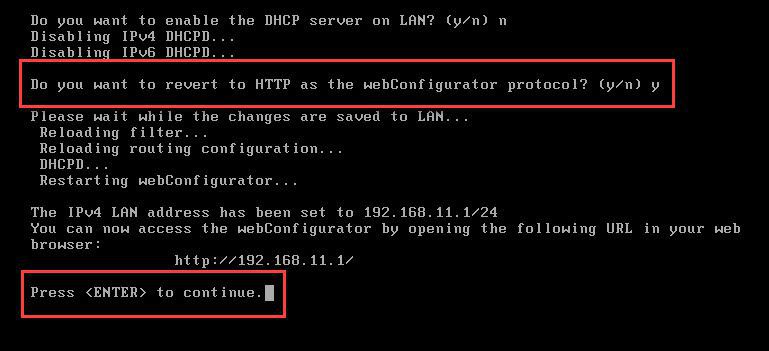
After completing the process, you will see that the IP address has been changed on the LAN interface. It also indicates that we can access the webConfigurator through the LAN interface ( http://192.168.11.1)
Step 6 – Setup pfSense
First, make sure that from the host, you can ping the IP address of the LAN interface on pfSense.
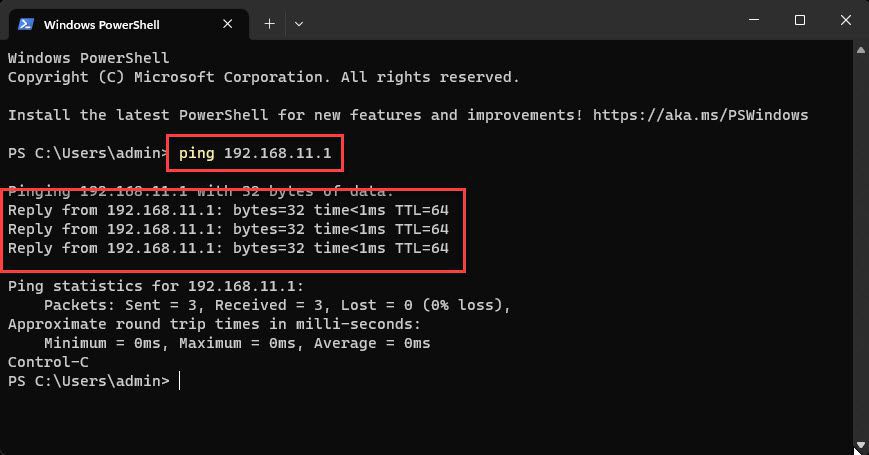
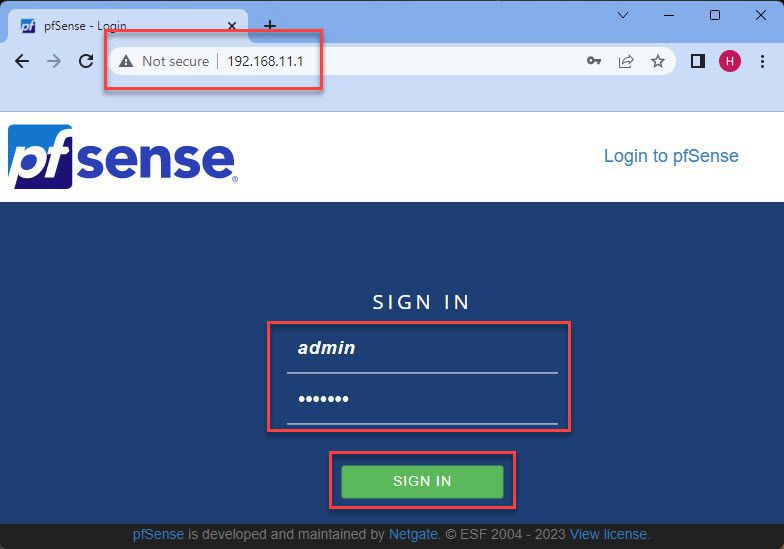
If you can do that, open your favorite web browser and enter the address http://192.168.11.1 then login with the following information:
- Username: admin
- Password: pfsense
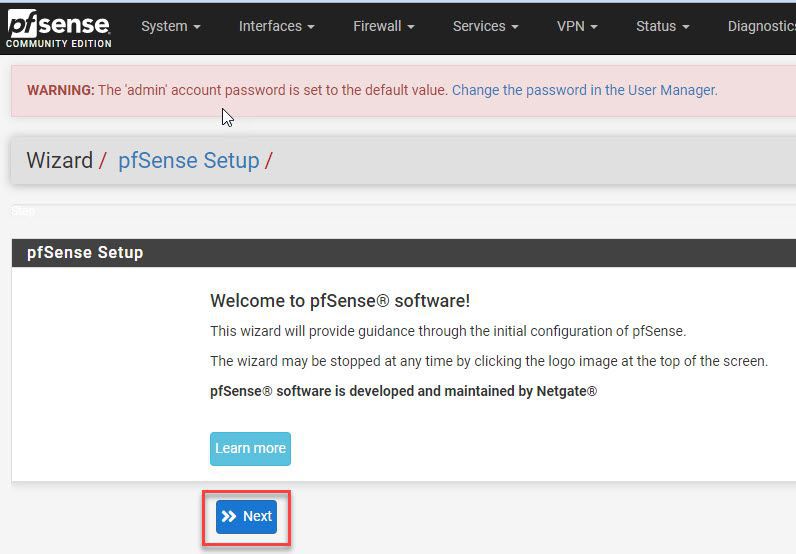
On the Welcome to pfSense software page, click Next
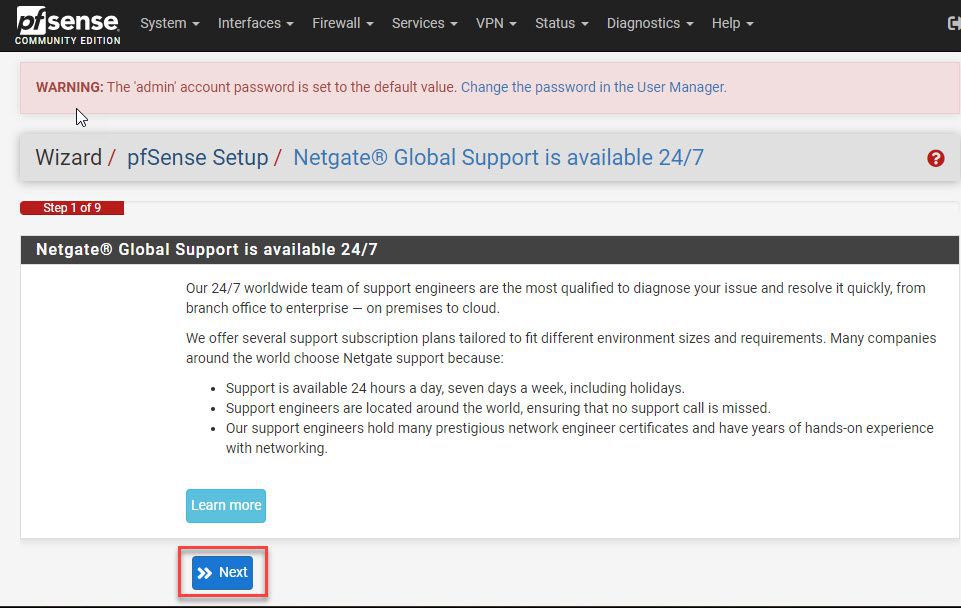
On Netgate Global Support is available 24/7 page, click Next
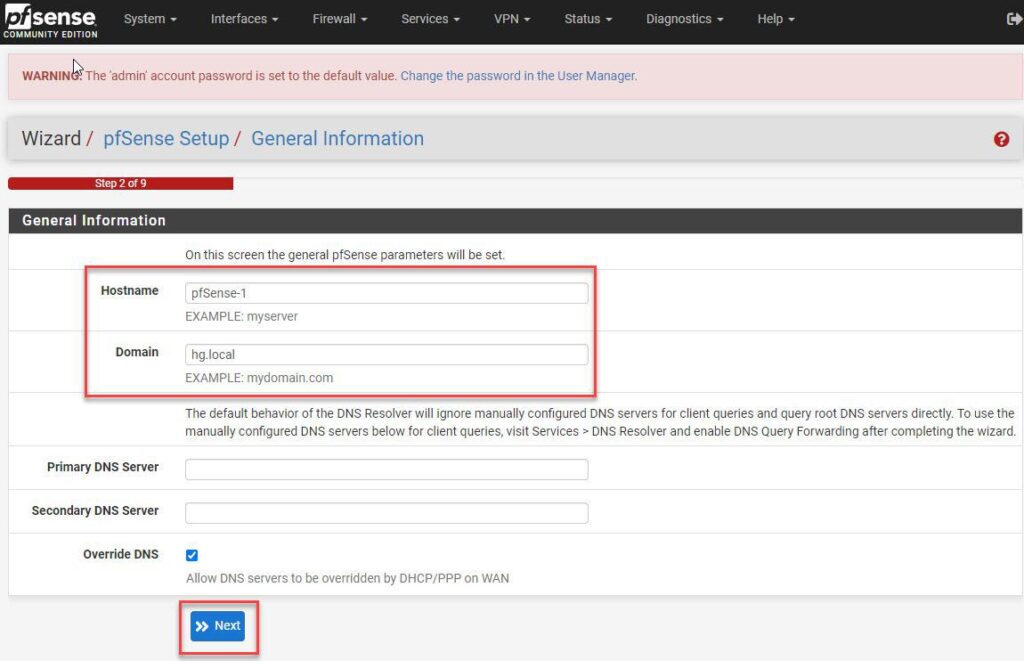
Enter the Hostname and Domain (if applicable), then click Next.
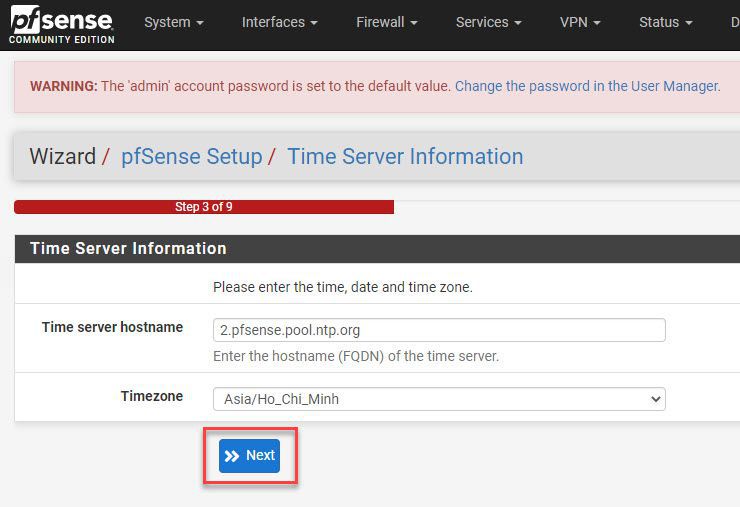
Choose your Timezone and click Next on the Time Server Information page.
On the Configure WAN Interface page, keep default and click Next
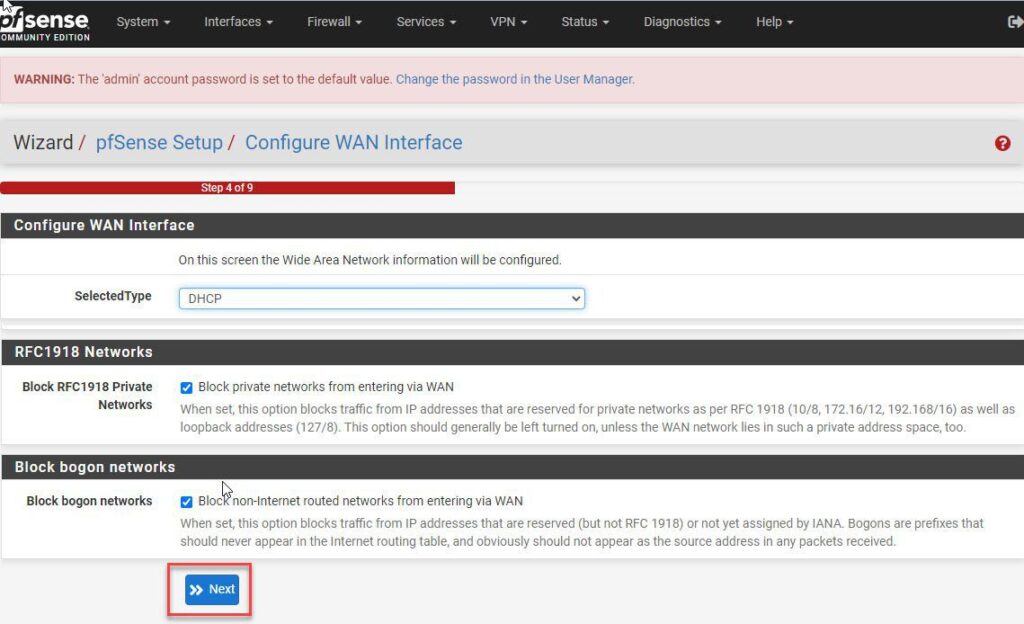
Click Next on the Configure LAN Interface page
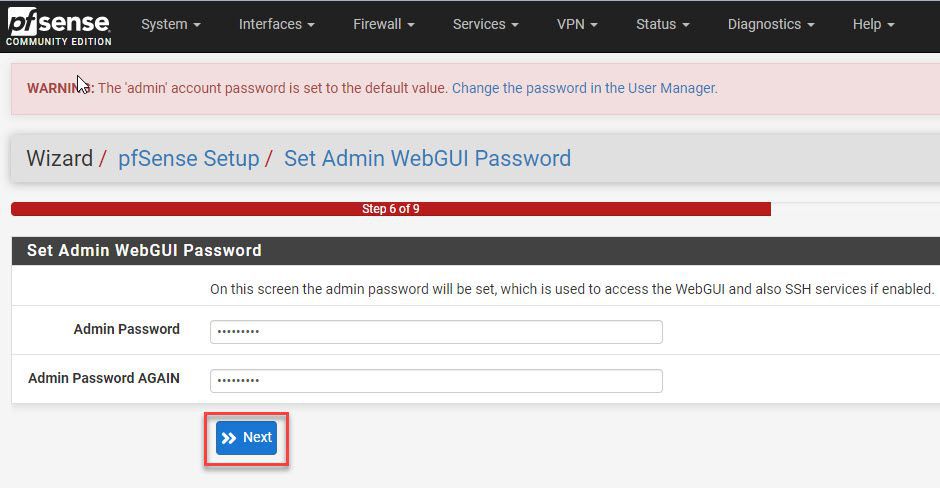
Enter a new password for the admin account and click Next
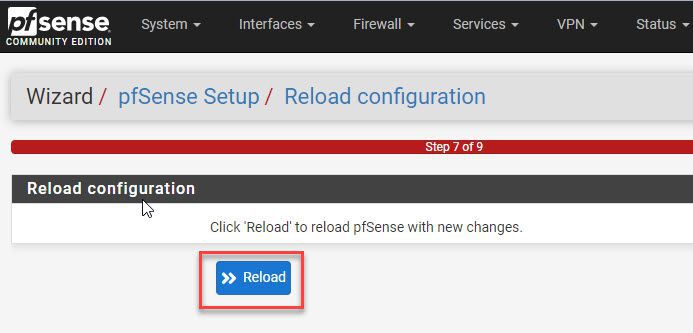
Click the Reload button to apply the changes.
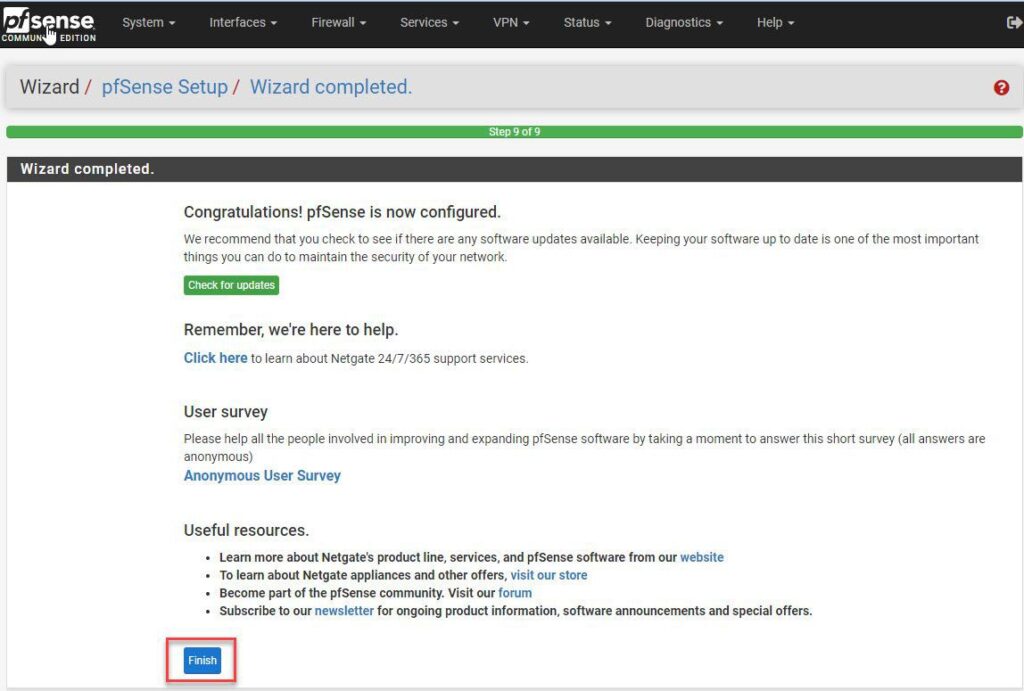
Finally, click on the Finish button.
Success !!!
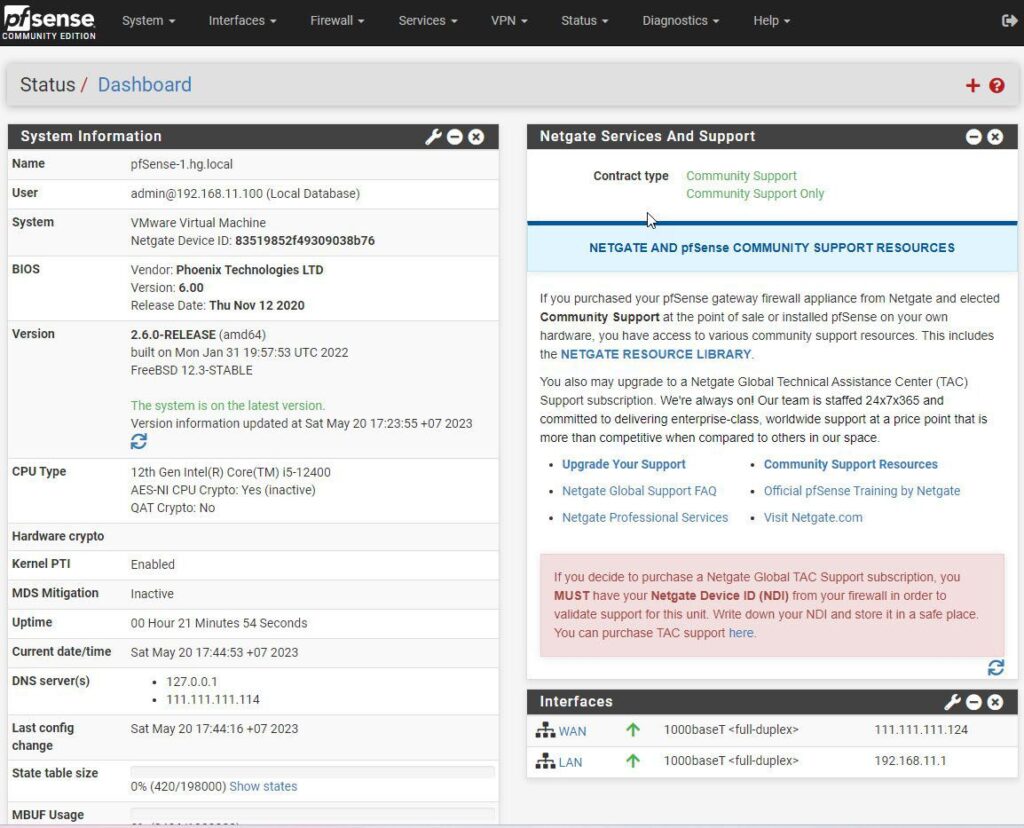
Step 7 – Configure LAN12
The WAN interface has been configured with an IP address assigned automatically from the DHCP server on VMnet8. The LAN11 interface has been configured in step 5. Now, let’s configure the IP address for the LAN12 interface.
Add LAN12
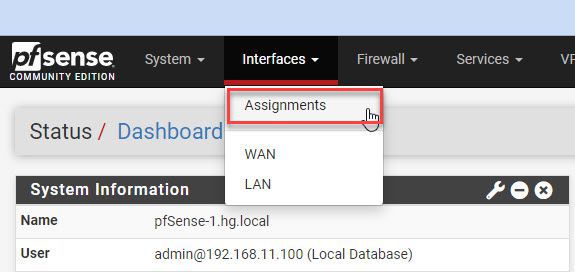
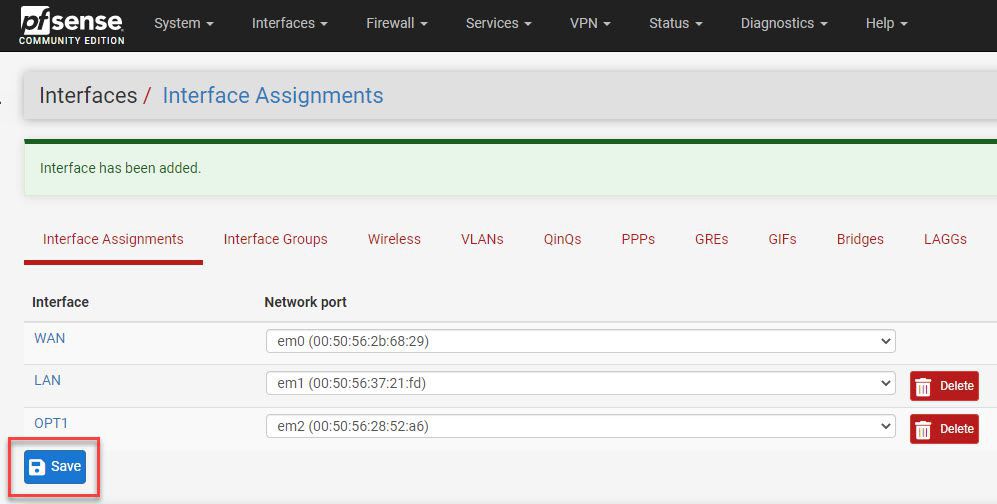
From the menu, select Interface and choose Assignments
Click on Add to add the em2 interface to the system.
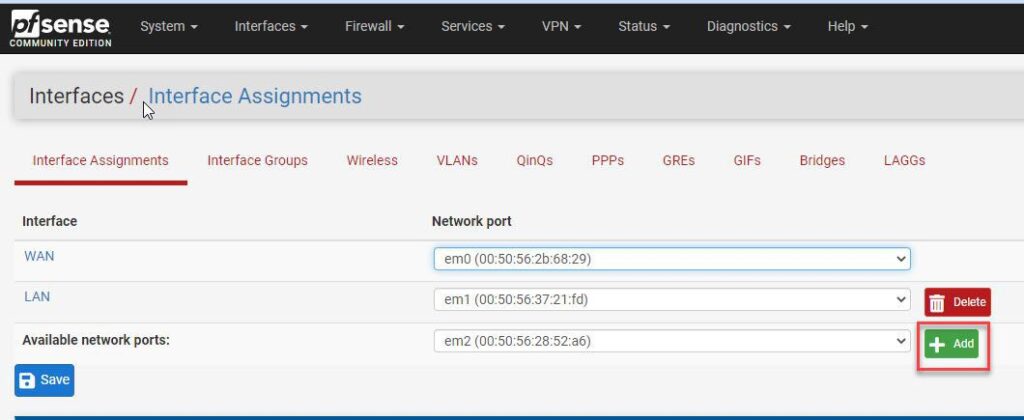
And then click Save
Configure LAN12
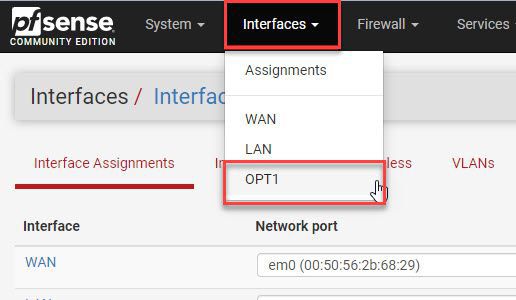
From menu – select Interface – choose OPT1
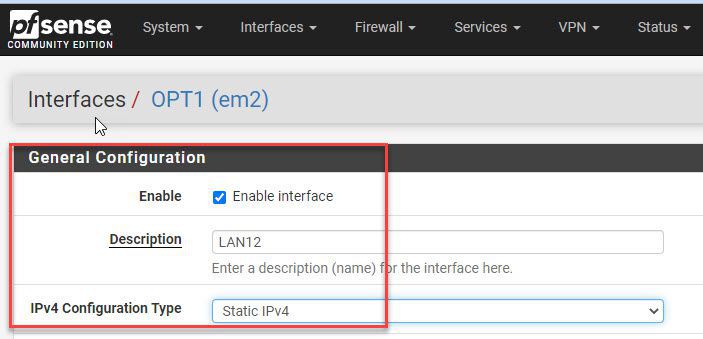
In the General Configuration section:
- Enable: check to Enable interface option
- Description: LAN12
- IPv4 Configuration Type: Static IPv4
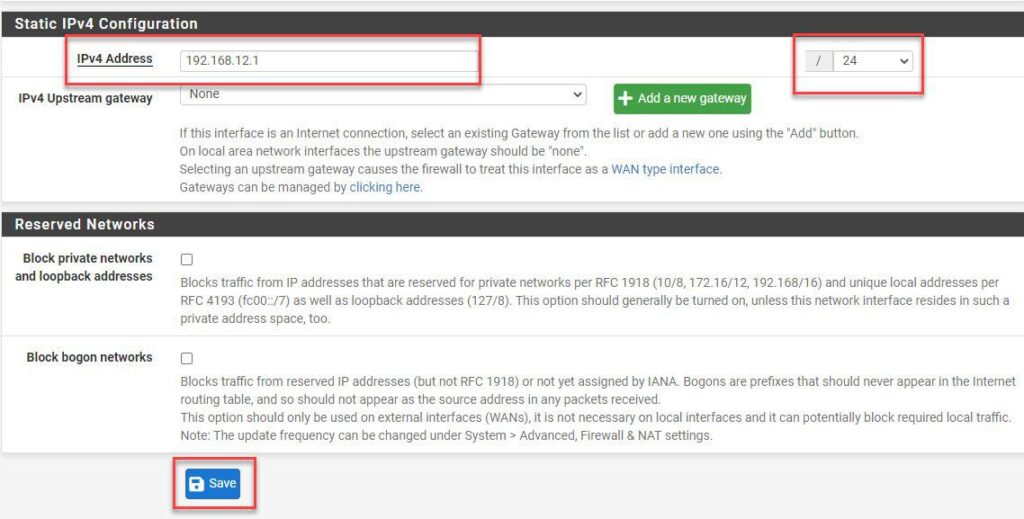
In the Static IPv4 Configuration section:
- IPv4 Address: 192.168.12.1
- Subnet mask: 24
and then click Save
Click Apply Changes button to apply the changes.

To synchronize the interfaces with the network diagram, select Interface – choose LAN
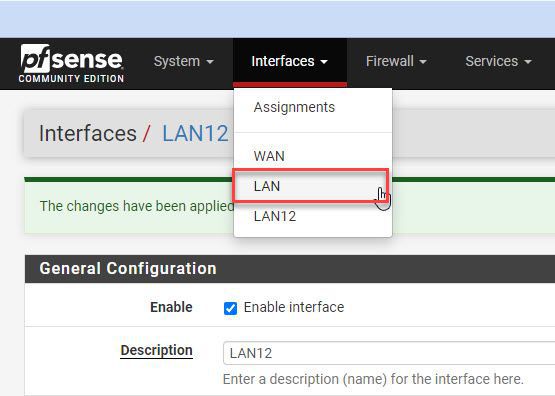
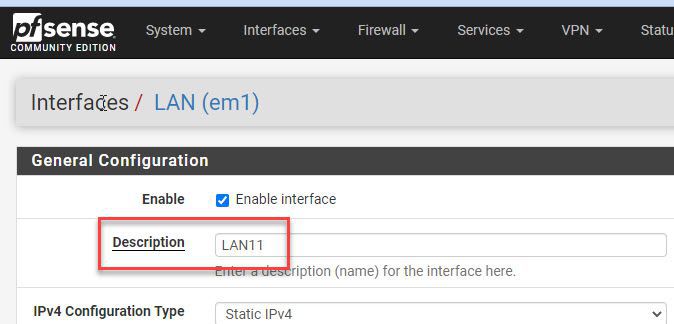
In the ABC section, enter the description for LAN11 as LAN11 and then click Save.
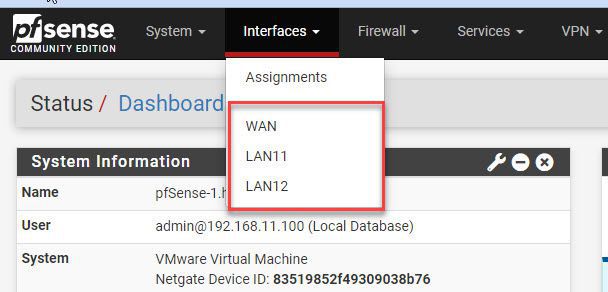
Done !!!
Great! You have now learned How to Install and Configure pfSense Firewall on VMware Workstation. Although the article may have been a bit long, it provides an overall understanding of the setup, configuration, and network diagram. If you have any questions or feedback, please feel free to leave a comment below.
Thank you for reading !!!
Video
How to Install and Configure pfSense Firewall on VMware Workstation