In this article, we will explore How to Create a Linux VPS on the Vultr platform. Vultr is one of the leading VPS service providers worldwide, offering multiple server locations and flexible features.
Creating a Linux VPS on Vultr is a straightforward and easy process, and this article will guide you through each step in detail.
Using a Linux VPS on Vultr brings numerous benefits. You can enjoy the flexibility and scalability of a virtual server, providing web services, applications, or data storage. You can also customize the server configuration according to your needs and manage it from anywhere using Vultr’s user-friendly management interface.
Let’s embark on the journey of creating a Linux VPS on Vultr to take advantage of its utilities and capabilities.
Read more
- How to Create a Custom Windows ISO Image to Upload Vultr
- How to Upload Custom Windows ISO Image to Vultr
- How to Install Windows 10 on Vultr
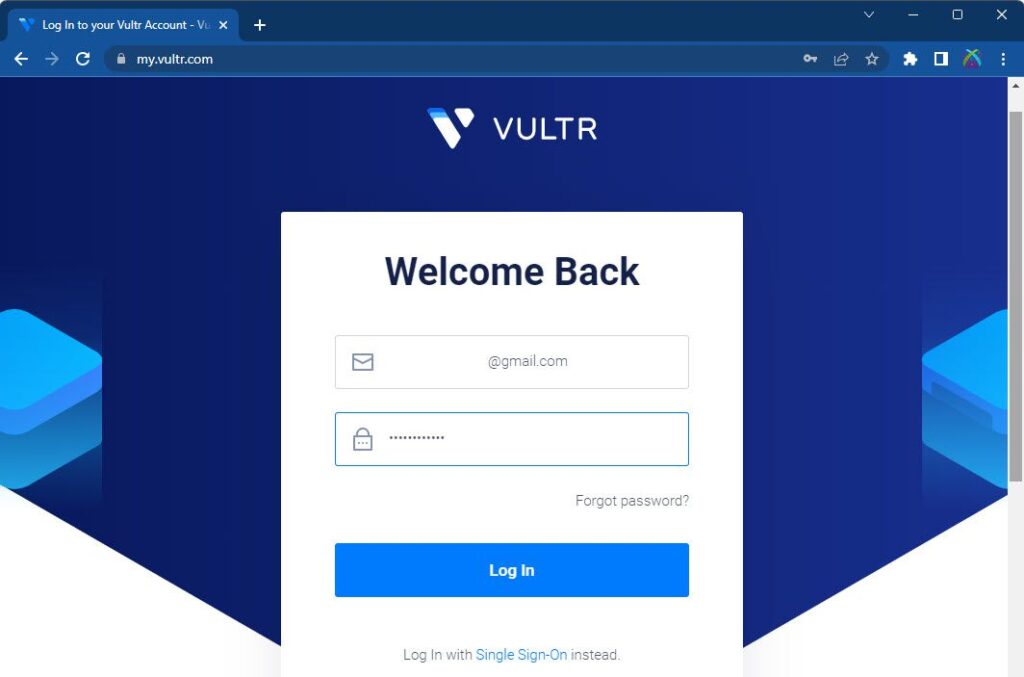
Step 1 – Login to Vultr
First, access the Vultr homepage and log in using your account credentials.
If you don’t have an account yet, click on the “Sign Up” button to create a new account. Take advantage of the special offer of $100 free credit for new users if it’s available (banner on the right bar).
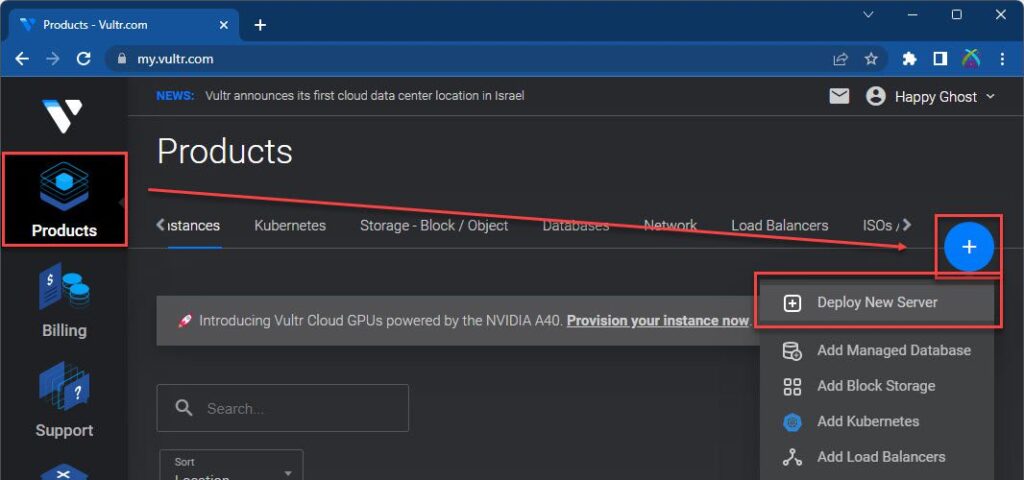
Step 2 – Deploy New Server
After logging in, you will be redirected to the Vultr dashboard. From the left panel, click on the Products tab – click Add icon – select the Deploy New Server option
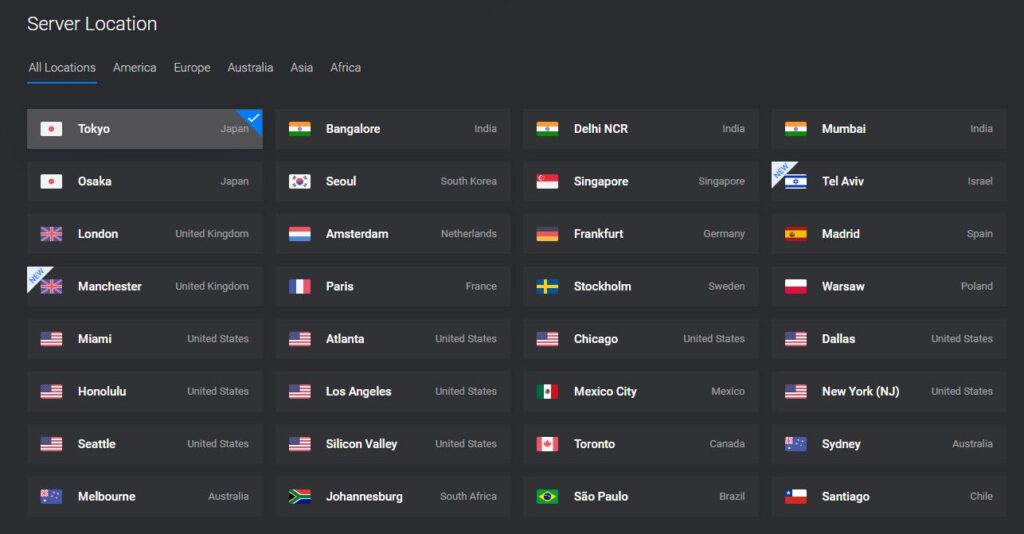
Server Location: Choose the desired region for your server. Vultr offers a wide range of locations across the globe.
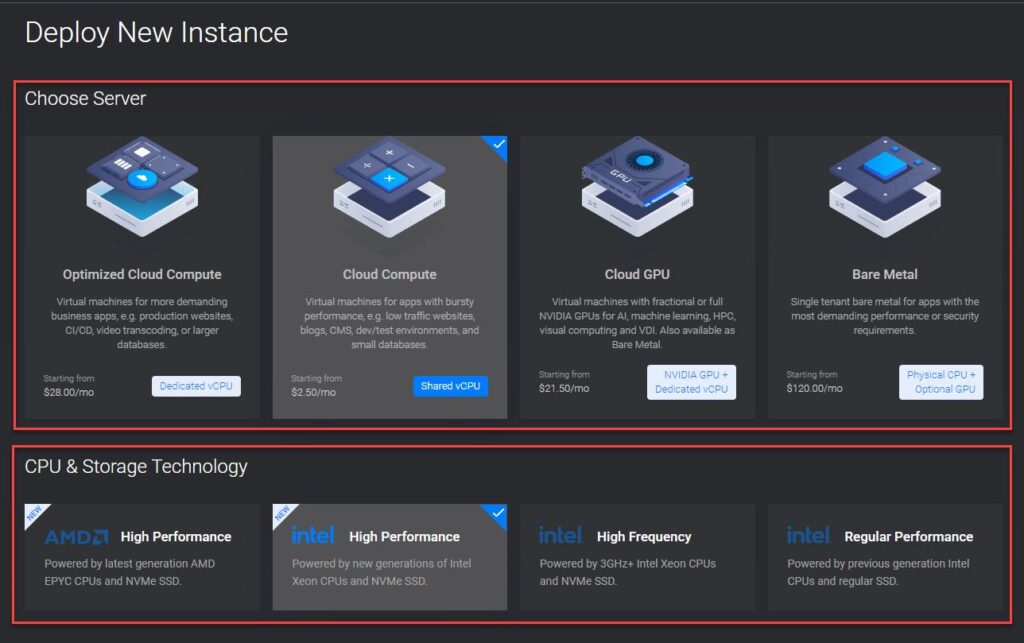
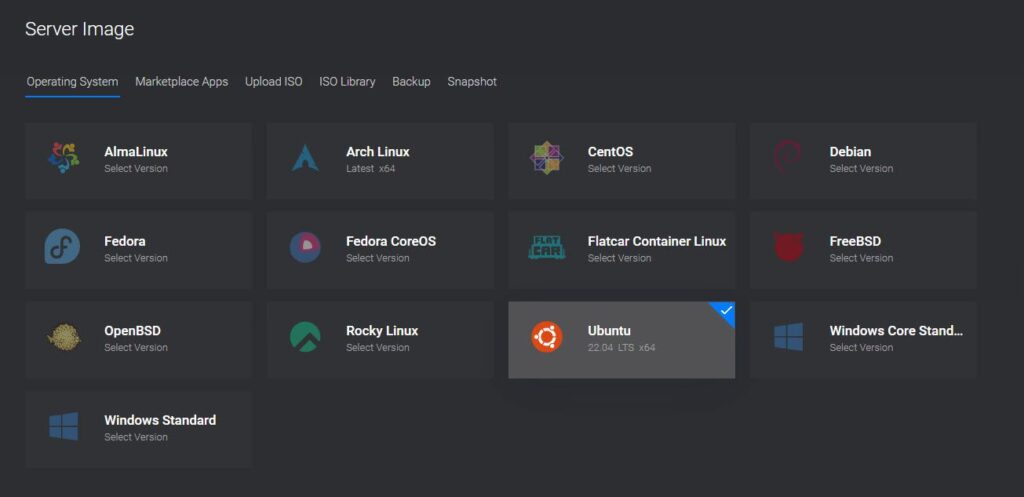
Server Image: Select the type of Linux distribution you want to use for your VPS, such as Ubuntu, CentOS, Debian, or Fedora ( In this example, I have chosen the Ubuntu OS)
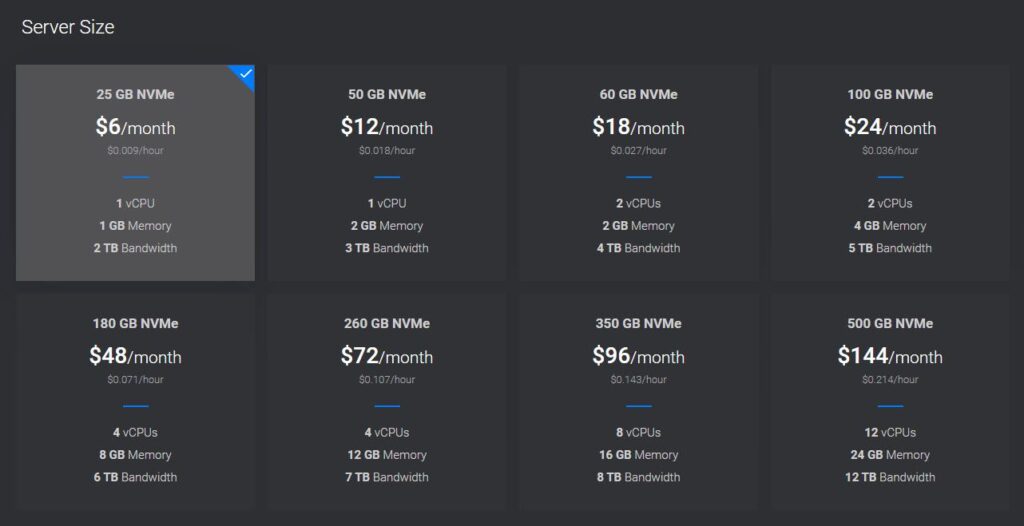
Server Size: Choose the appropriate server size based on your requirements. Vultr provides various plans with different specifications and pricing.
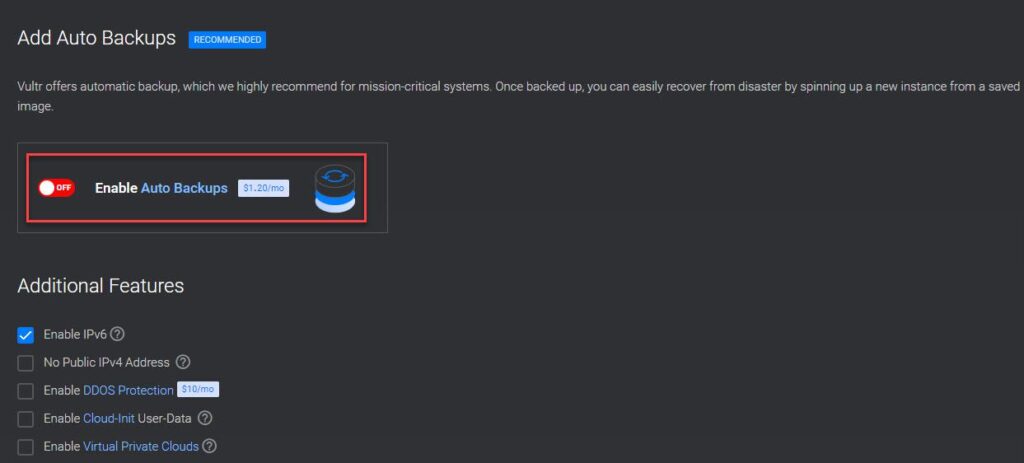
Add Auto Backups and Additional Features: You can enable additional features like IPv6, private networking, automatic backups, and more if needed.
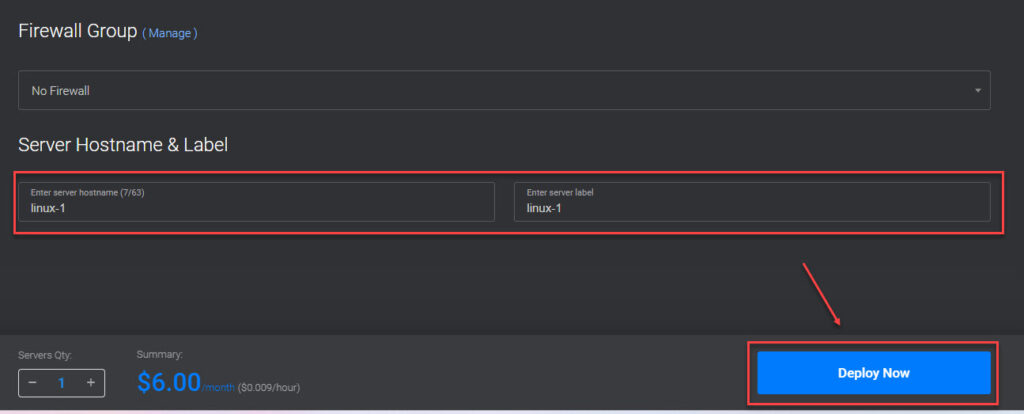
Server Hostname & Label: Enter your Hostname & Label for your server and click Deploy Now button.
Wait for the deployment process to complete and double-click on the VPS you just created
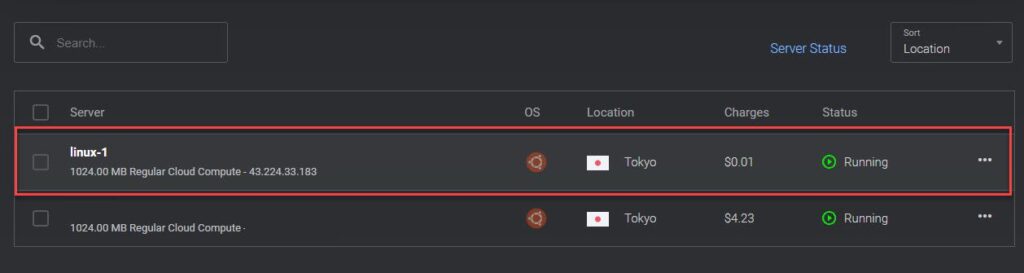
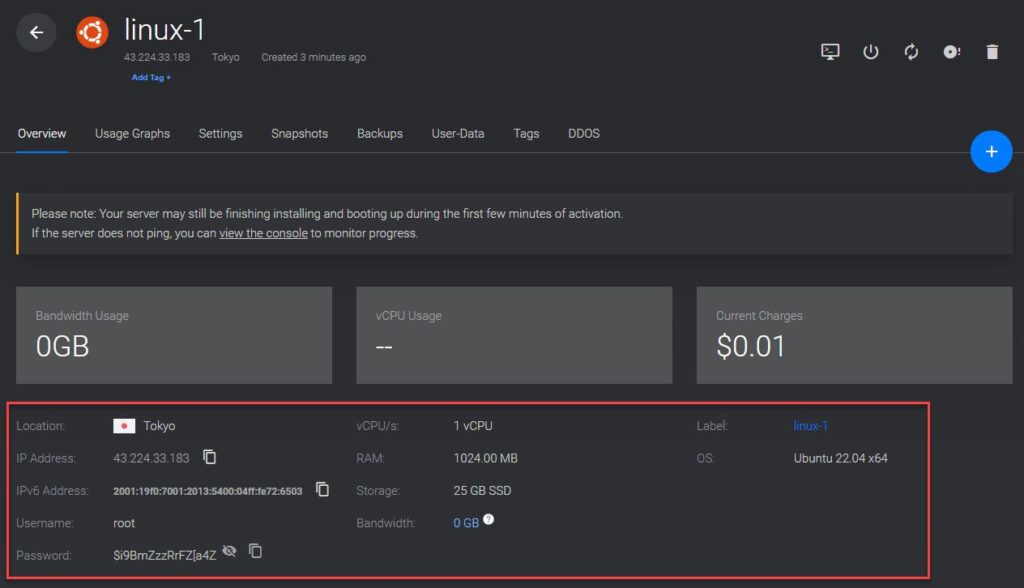
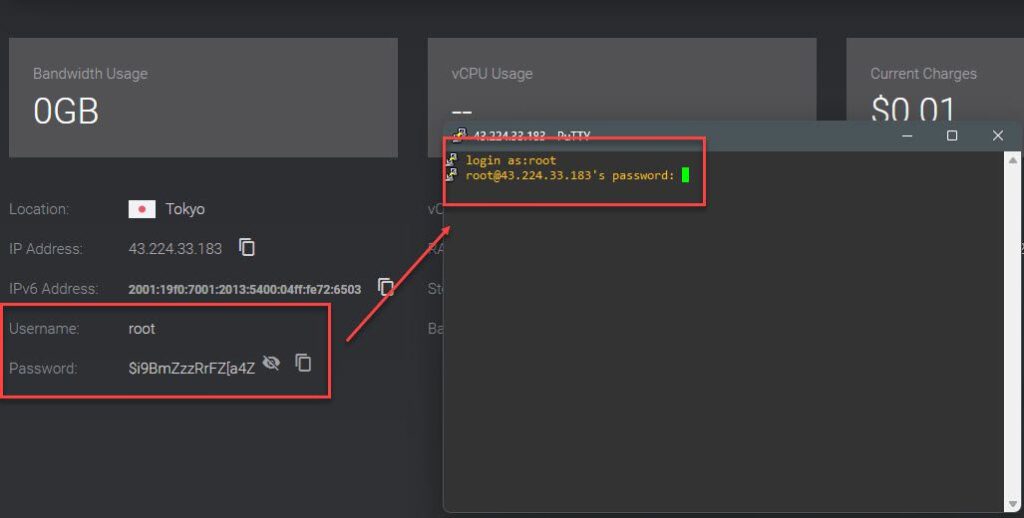
You will see its details listed on the Servers page, including the IP Address, Username, Password, and options to manage it as shown below:
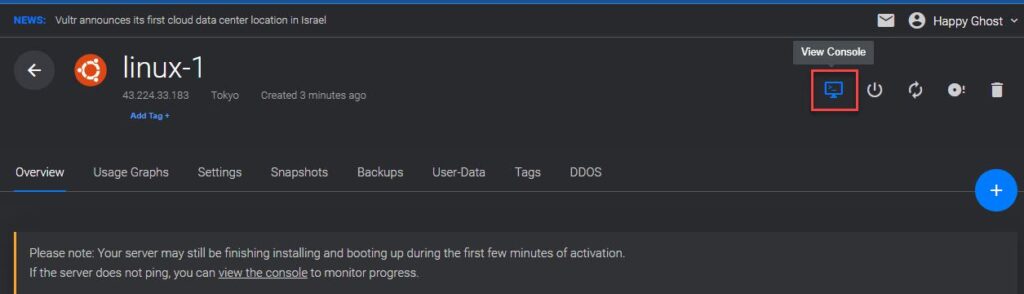
Step 3 – Access your VPS
Use the Vultr console
The Vultr console provides a web-based terminal emulator. It allows you to interact with your VPS directly through the Vultr interface.
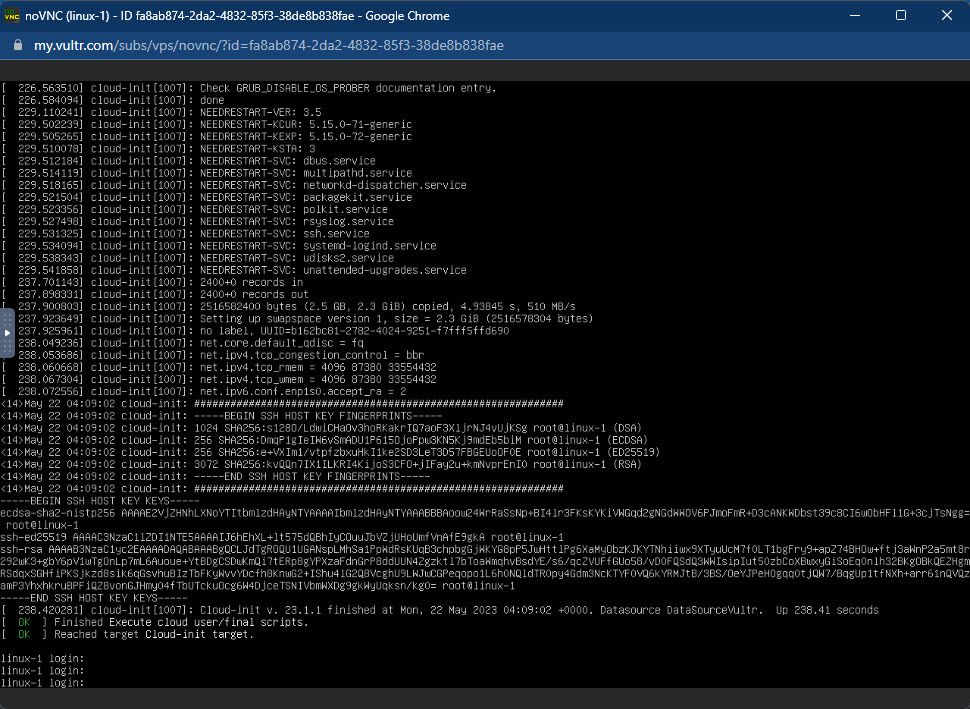
On the VPS management page, click on the View Console icon to access your VPS through the Vultr Console.
Immediately, the Vultr Console window will appear. Enter your username and password to start using your VPS.
Use the SSH
If you prefer to connect via SSH, you can use an SSH client like PuTTY (Windows) or Terminal (Mac/Linux)
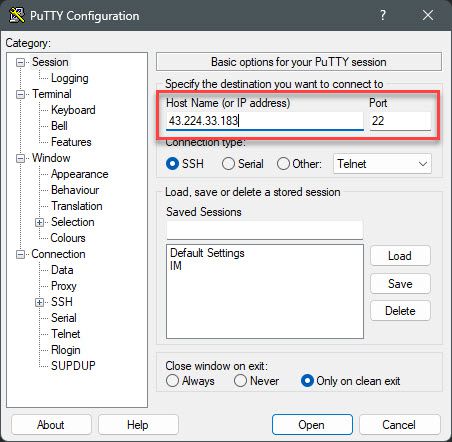
Open the Putty app, enter the IP-Address-of-VPS, set the default port to 22, choose SSH as the Connection type, and then click the Open button
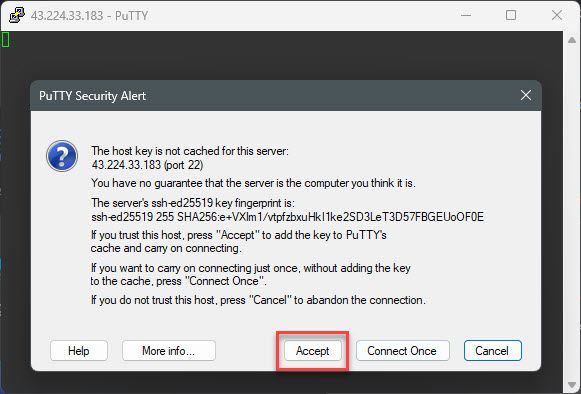
During the initial connection, click on Accept to continue
Enter your login credentials
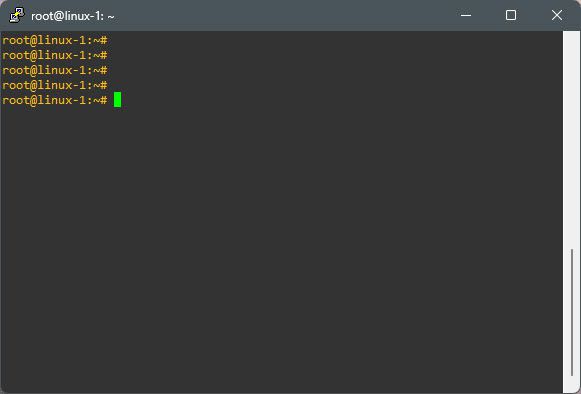
Success !!!!
That’s it! You have successfully created a Linux VPS on Vultr. Now you can begin utilizing your server for various purposes according to your needs.
Thank you for reading !!!