Welcome to the article How to Install RocketChat Server on Ubuntu/Debian using the Snap Store. In this guide, we will walk you through the step-by-step process of installing Rocket.Chat, a powerful open-source chat platform, on your Ubuntu or Debian server using the Snap Store.
Rocket.Chat provides a secure and feature-rich environment for team communication, allowing you to create channels, send direct messages, share files, and collaborate with your team members seamlessly. By leveraging the Snap Store, the installation process becomes simple and straightforward, ensuring you can quickly set up your own Rocket.Chat server.
Whether you are looking to enhance internal communication within your organization or seeking an alternative to proprietary chat platforms, this guide will provide you with all the necessary instructions to install Rocket.Chat on your Ubuntu or Debian server using the Snap Store.
Let’s dive in and get started with the installation process, empowering you to deploy your own powerful Rocket.Chat server and streamline your team’s communication.
Applies to :
- Ubuntu 22.04 LTS
- Ubuntu 20.04 LTS
- Ubuntu 18.04 LTS
- Debian 11
- Debian 10
Read more
- Samba – Part 3 – Set Up Samba with Separate Read/Write Access for Each User
- Samba – Part 2 – Share a Folder with Read and Write Access in LAN
- Samba – Part 1 – Install Samba Server on Linux Ubuntu | Debian
- How to Install Windows Server 2025 on Hyper-V (Step-by-Step Tutorial)
- How to Install Android on Hyper-V using BlissOS on Windows
Step 1 – Prerequisites
First, you need to update the version of the packages and dependencies on the system by following the command below :
sudo apt update
Next, install snap if it is not already installed on your system with the following command:
sudo apt install snapd -y
Step 2 – Install RocketChat Server using the Snap Store
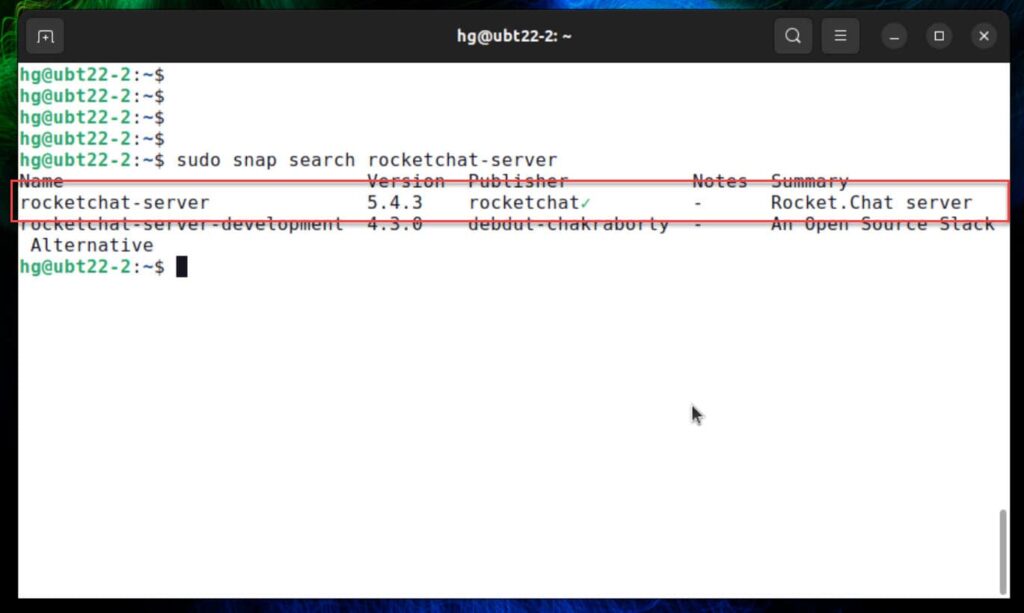
First search the Rocket.Chat server package, make sure it’s available on the Snap Store :
sudo snap search rocketchat-server
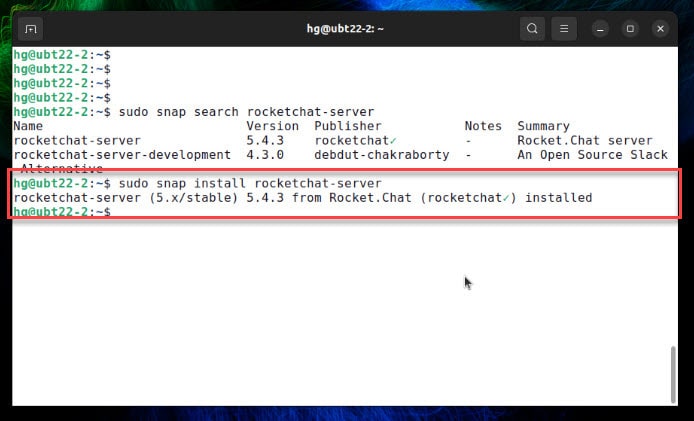
To install Rocket.Chat Server, simply use the following command:
sudo snap install rocketchat-server
Start and Enable Rocket.Chat server to auto-start on system restart or boot
sudo systemctl start snap.rocketchat-server.rocketchat-server
sudo systemctl enable snap.rocketchat-server.rocketchat-server
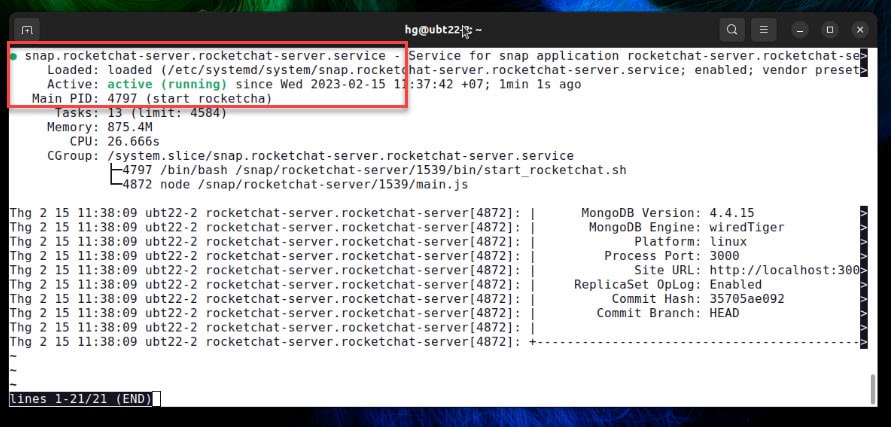
Check the status of Rocket.Chat server, make sure it’s running
sudo systemctl status snap.rocketchat-server.rocketchat-server
Step 3 – Configure Firewall
Note: Skip this step, If you don’t want the UFW firewall running on the system.
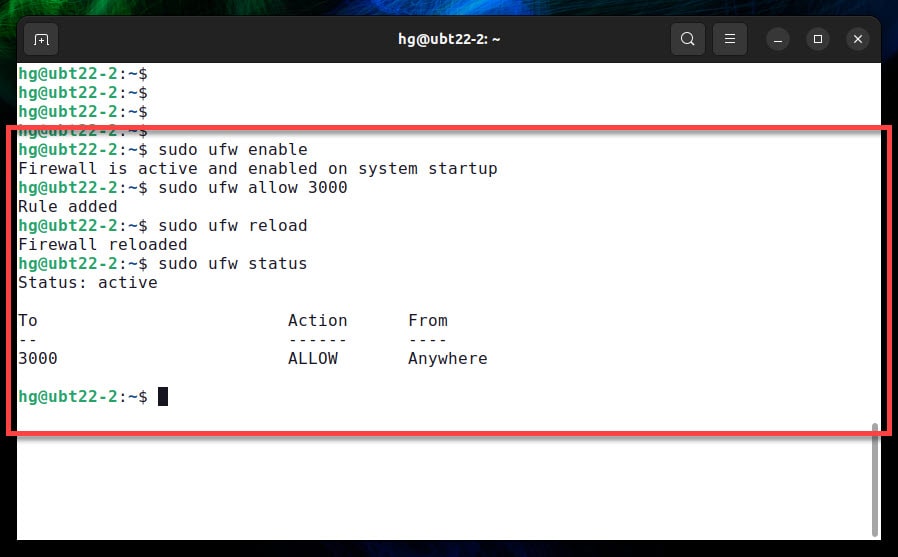
Enable UFW firewall
sudo ufw enable
Now, Open port 3000 for Rocket.Chat server
sudo ufw allow 3000
Reload UFW firewall
sudo ufw reload
Make sure port 3000 opened
sudo ufw status
Step 4 – Setup Rocket.Chat server via the web browser
Now, open web browser and access address :
http://IP-Server:3000
or
http://fqdn:3000
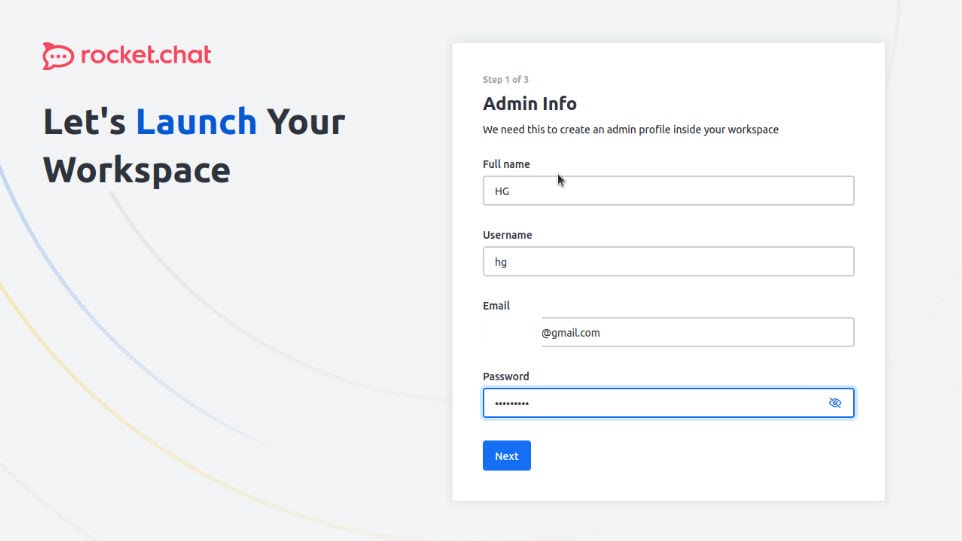
First of all, create an admin profile to manage the Rocket Chat server.
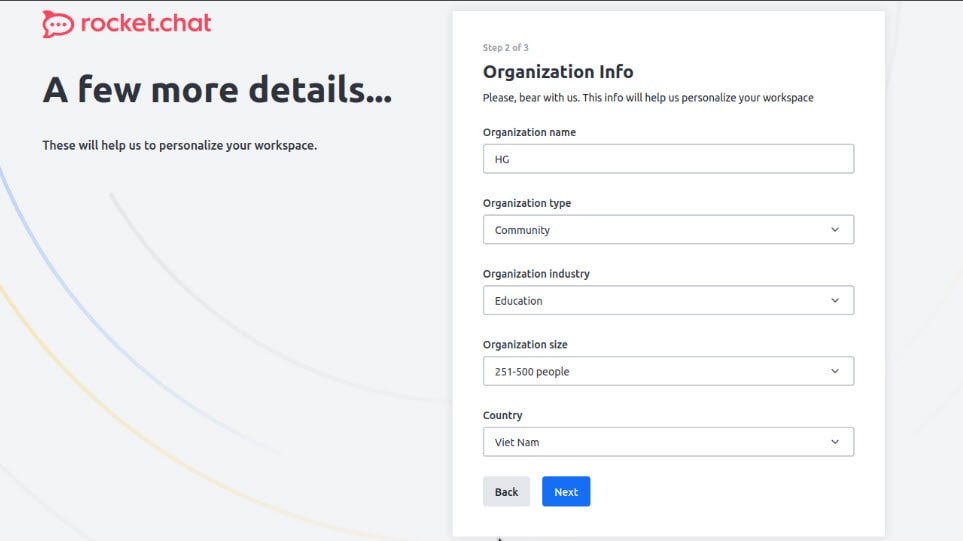
Next, you need to provide your Organization information as well
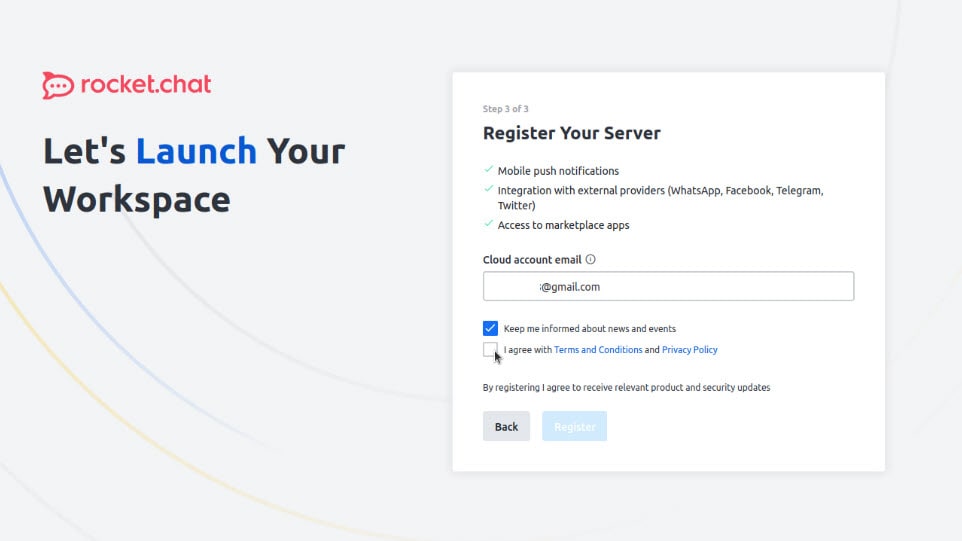
In this step, If you want access to the marketplace, integrations with external providers, and security updates, you can use your email addresses to register the Server with developers.
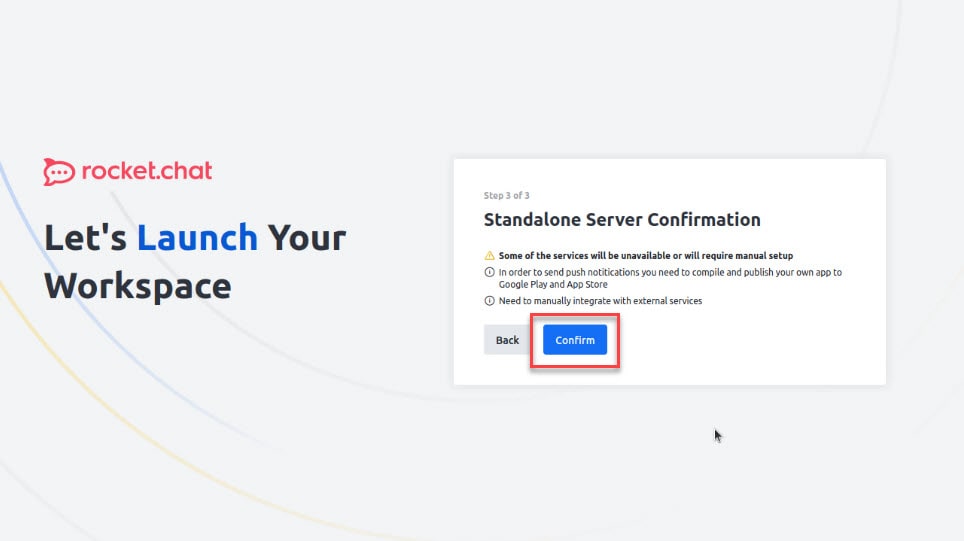
Otherwise, simply go for the Standalone server option. [ I chose Standalone ]
Standalone Server Confirmation
Success !!!
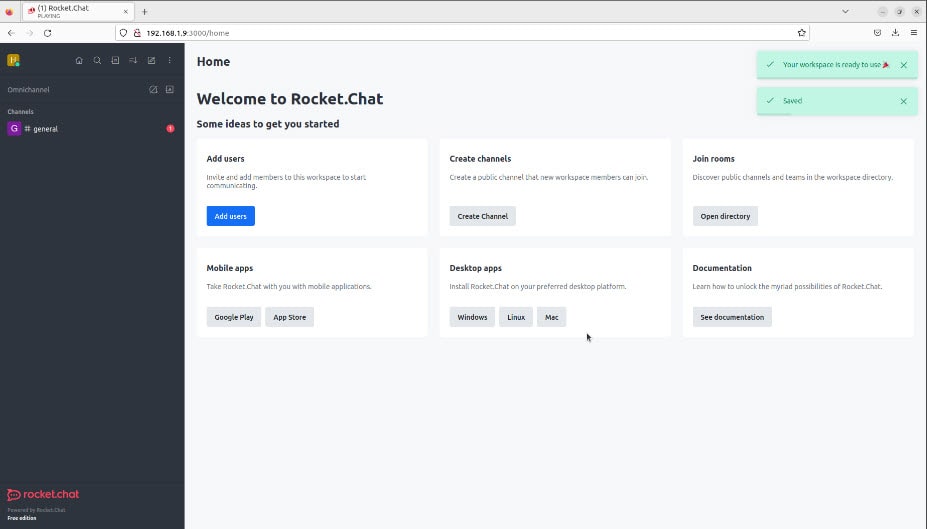
That’s it! Through this article, How to Install RocketChat Server on Ubuntu/Debian using the Snap Store, you now have the ability to check the ports of remote servers. If you have any questions or feedback, please feel free to leave a comment below
Thank you for reading !!!