Welcome to the article How to Install Webmin on Ubuntu/Debian/LinuxMint. In this guide, we will walk you through the process of installing and configuring Webmin on the Ubuntu/Debian/LinuxMint operating system. Webmin is a powerful web-based system management tool that allows you to manage and monitor servers through an intuitive and user-friendly web interface.
On Ubuntu/Debian/LinuxMint, installing and configuring Webmin can provide numerous benefits for managing your server. With Webmin, you can easily manage services such as Apache, MySQL, DNS, Quota, Firewall, and many other system components in a convenient and efficient manner.
Before we begin, make sure you have a Ubuntu/Debian/LinuxMint server installed and configured. If you’re ready, continue reading to explore the process of installing Webmin on Ubuntu/Debian/LinuxMint and take the first step towards managing your server more conveniently and effectively.
Applies to OS :
- Ubuntu 22.04 LTS | Ubuntu 20.04 LTS | Ubuntu 18.04 LTS
- Debian 11 | Debian 10
- Linux Mint 21 | Linux Mint 20 | Linux Mint 19
Prerequisites:
- A Linux server installed ( Ubuntu | Debian | Linux Mint)
- User privileges: root or non-root user with root privileges
Read more:
- How to Change the Default Webmin Port on Linux
- How to Install Webmin on CentOS | CentOS Stream | RockyLinux | AlmaLinux | RHEL 7/8/9
The simplest and best way to get Webmin is to use automatic setup-repos.sh script to configure official repositories on your systems.
Step 1 : Download and Install script setup-repos.sh from Official website
This script will automatically setup repository and install GPG keys on your system, and provide webmin package for installation and easy upgrades in the future.
sudo apt install curl -y
curl -o setup-repos.sh https://raw.githubusercontent.com/webmin/webmin/master/setup-repos.sh
Execute the script by run the following command
sudo sh setup-repos.sh
Step 2 : Install and Configure Webmin
Webmin repository was setup in step 1, Now to Install Webmin run the following command below :
sudo apt install webmin -y
After the installation is done, you need to start and enable Webmin to auto start after reboot time
sudo systemctl start webmin
sudo systemctl enable webmin
Check status of Webmin service, make sure it’s running
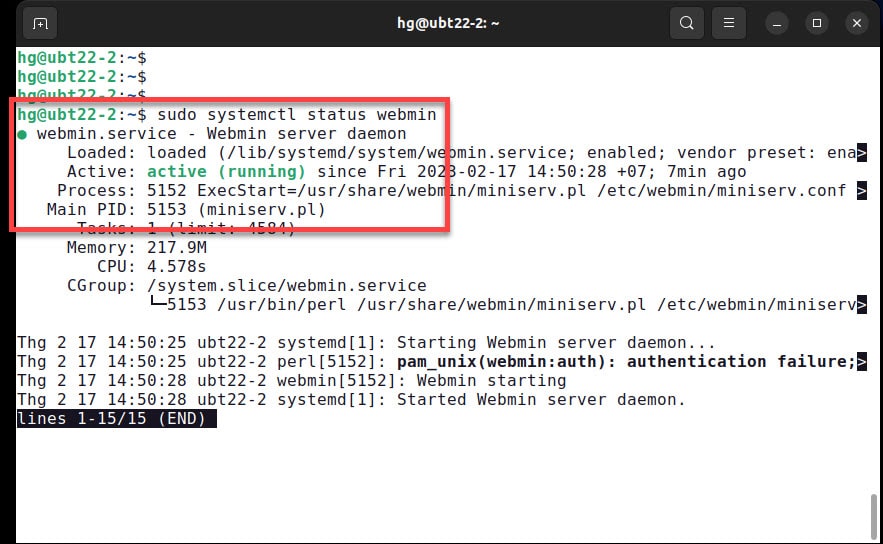
sudo systemctl status webmin
The output indicates that Webmin is up and running.
Step 3 : Open Webmin Port on the Firewall
By default, Webmin listens on TCP port 10000, you need to open the TCP port 10000 on the Firewall by following command below
sudo ufw allow 10000/tcp
sudo ufw reload
Skip this step. If UFW firewall not running on the system.
Step 4 : Access and Using Webmin Control
Final, We have installed Webmin and verified its status. The only thing remaining is to log into Webmin and manage your system via address below :
http://IP-Server:10000
or
http://FQDN:10000
When you browse the URL for the first time, you will get a “Warning: Potential Security Risk Ahead” alert on the browser click on the “Advanced” button as shown.
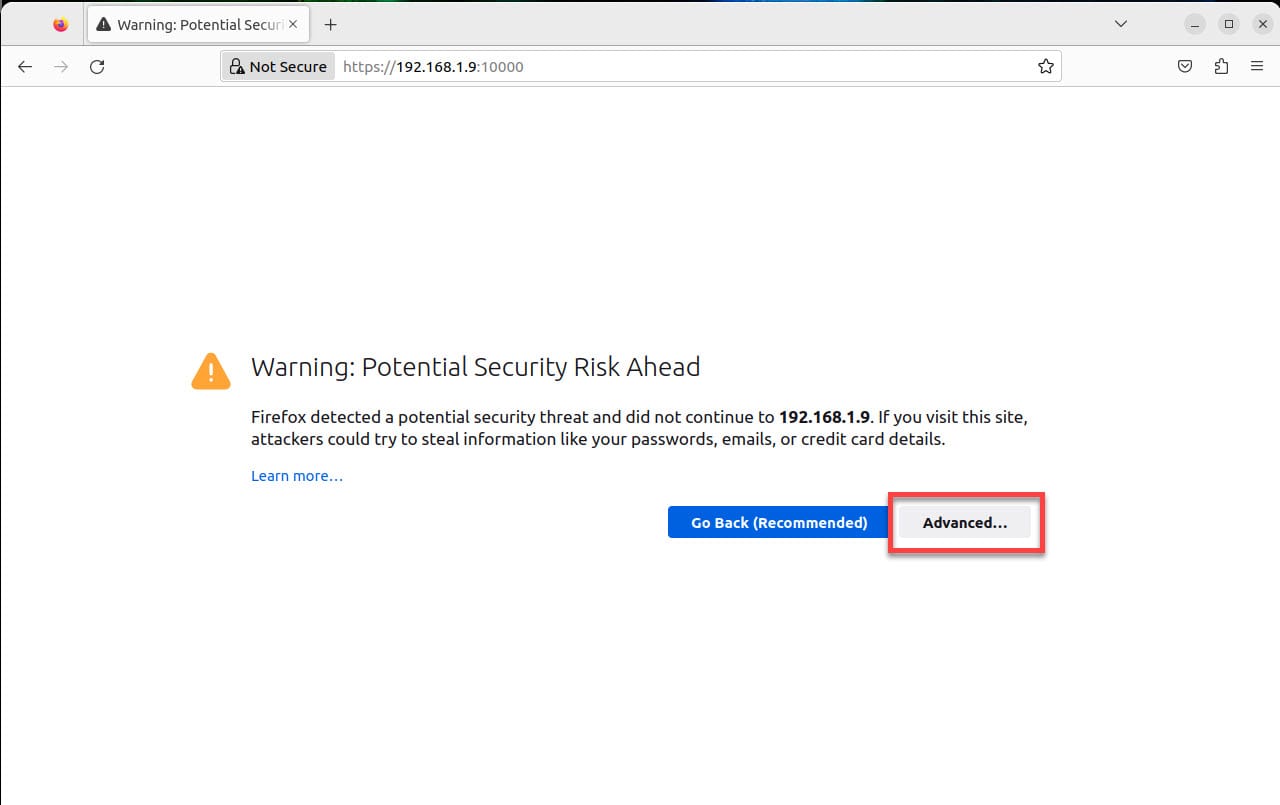
Then click to proceed to the server and click “Accept the risk and continues “

You will get the login page below. Use root credentials and click on “Sign In” to log in.

And here are your results:
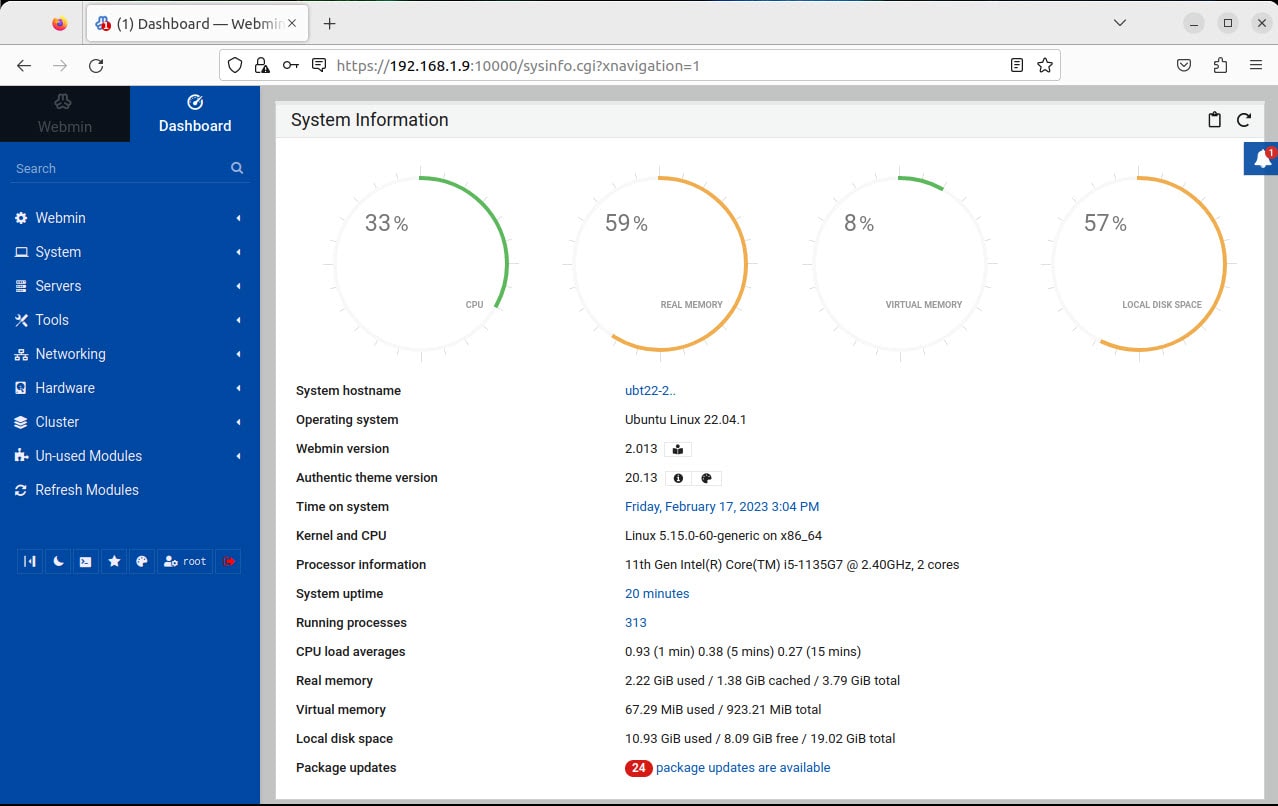
Thank you for reading!