Rocky Linux is a community-driven, enterprise-grade Linux distribution designed as a replacement for CentOS. It aims to provide a stable, reliable, and open-source operating system for servers, workstations, and cloud environments. Developed by the Rocky Enterprise Software Foundation, Rocky Linux is built upon the principles of open collaboration, transparency, and community involvement.
With its focus on long-term support and compatibility, Rocky Linux offers a seamless transition for those who were previously using CentOS. It aims to maintain API and ABI compatibility with Red Hat Enterprise Linux (RHEL), ensuring a familiar and stable environment for users. Rocky Linux also benefits from the vast ecosystem and software availability of RHEL, making it a suitable choice for enterprise applications and deployments.
In this guide, we will explore the step-by-step process of How to Install Rocky Linux 8/9 on VMware, enabling you to set up and experience the power of this enterprise-grade Linux distribution in your virtualized environment. Let’s dive in and get started with the installation process.
Read more
- How to Install Android on VMware Workstation
- How to Install Ubuntu 23 (Lunar Lobster) Desktop on VMware Workstation
- How to Install MX Linux on VMware Workstation
- How to Install CentOS Stream 8/9 on VMware Workstation
- How to Install VMware vSphere (ESXi) 8/7/6 on VMware Workstation
Step 1 – Prepare
- [1] Download Rocky Linux 8/9 ISO image from the official website here
- [2] VMware Workstation has been installed.
Step 2 – Create a new Virtual Machine for Rocky Linux
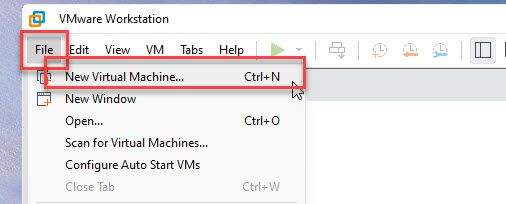
Open the VMware Workstation by right-click on VMware icon – select Run as administrator

From the menu, select File – select New Virtual Machine…
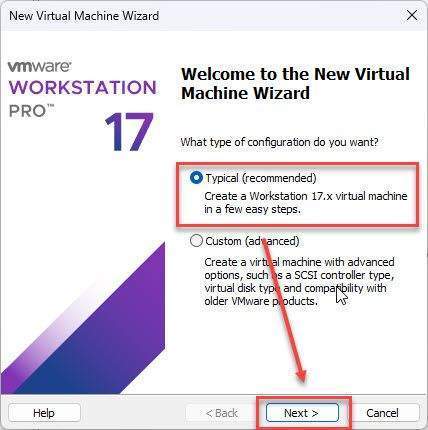
Select Typical and click Next in the Welcome to the New Virtual Machine Wizard window.
Select I will install the operating system later and click Next in the Guest Operating System Installation window.

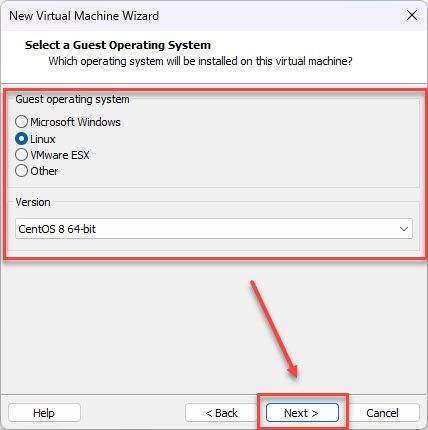
In the Select a Guest Operating System window, select as shown below:
- Guest operating system: Linux
- Version: CentOS 8 64-bit
and then click Next
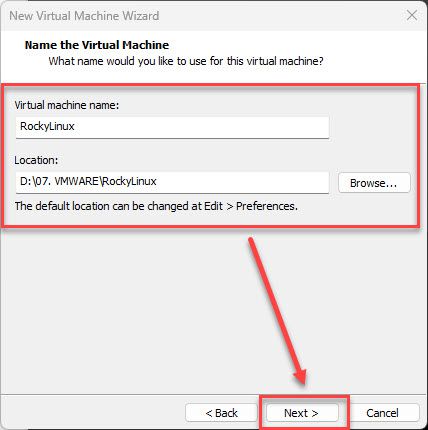
Set Name and Location for your virtual machine and click Next in the Name the Virtual Machine window.
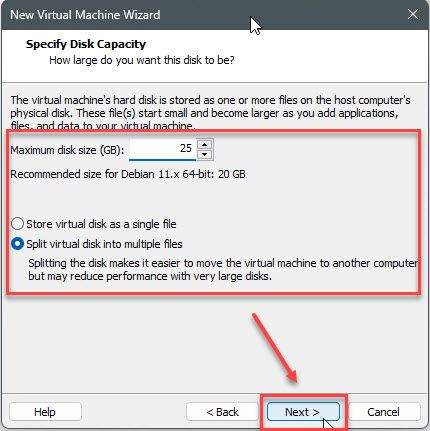
Set the disk capacity to be greater than or equal to 20GB and click Next in the Specify Disk Capacity window.
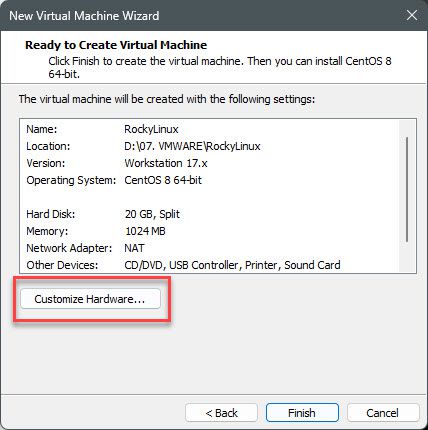
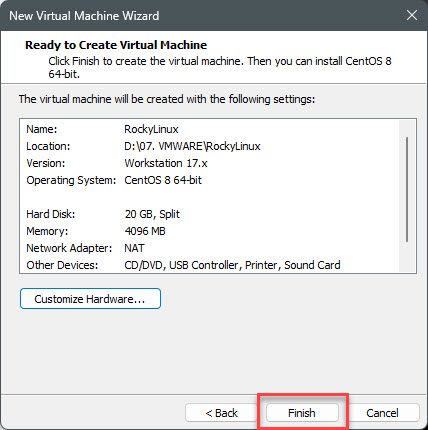
In the Ready to Create Virtual Machine window, click on Customize Hardware…button
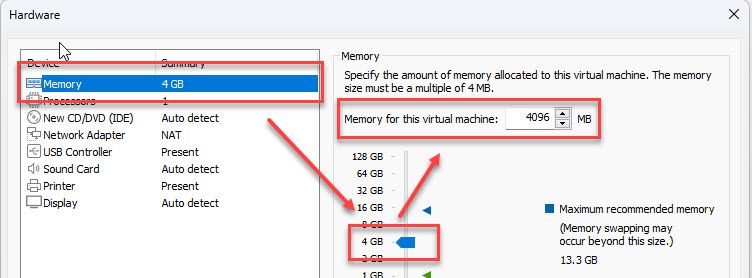
In the Hardware window, configure the settings as shown below.
- Memory (RAM): greater than or equal to 2 GB
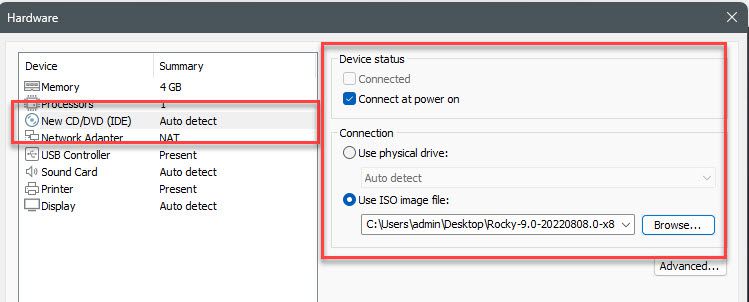
- New CD/DVD (IDE):
- In the Device status section check to Connect at power on option.
- In the Connection section check to Use ISO image file and select the Rocky Linux iso image that you downloaded in Step 1
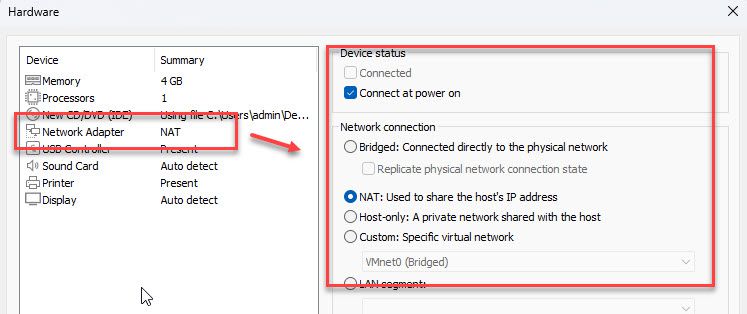
- Network Adapter: Choose NAT or another virtual network with internet connectivity.
and then click Close
Come back to Ready to Create Virtual Machine window, and click on the Finish button.
Step 3 – Install Rocky Linux 8/9 on VMware Workstation
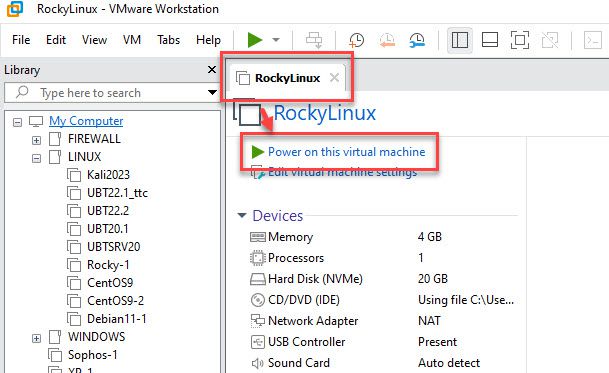
Now, click on the Power on this virtual machine button to start the system
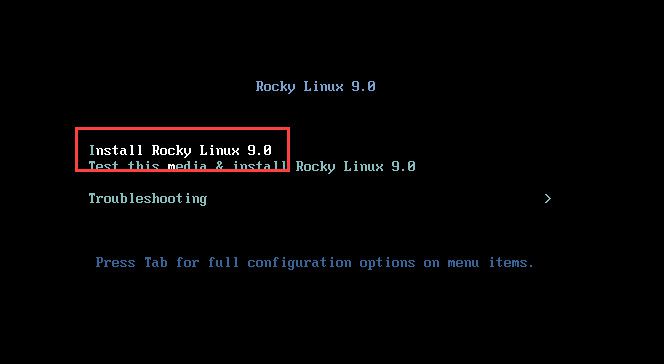
On the boot screen, select Install Rocky Linux 8/9 and press Enter
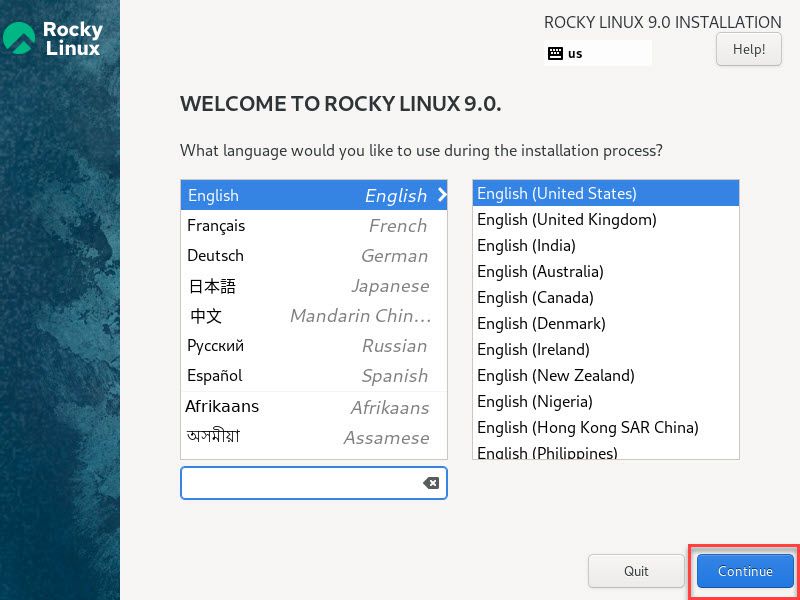
In the WELCOME TO ROCKY LINUX window, select the language you want to install and click Continue
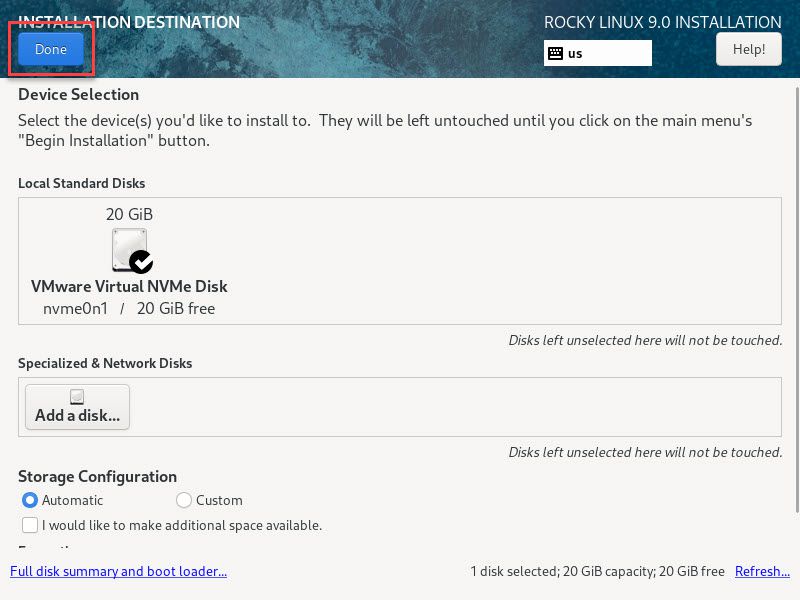
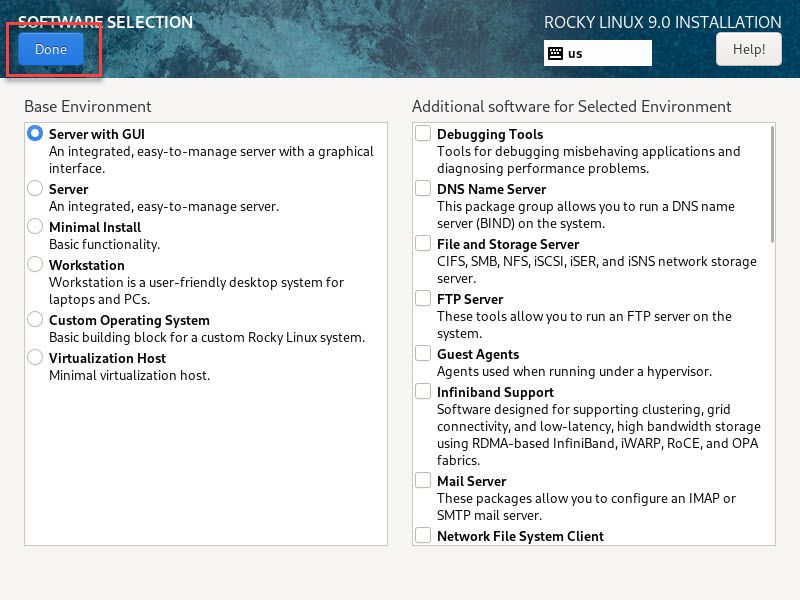
In the INSTALLATION SUMMARY section, configure the following settings as follows:

- Click on the SYSTEM section, keep default in the INSTALLATION DESTINATION window, and click Done
- Click on the Software Selection section, select the version you want to install, and click Done ( In this example, I choose Server with GUI version )
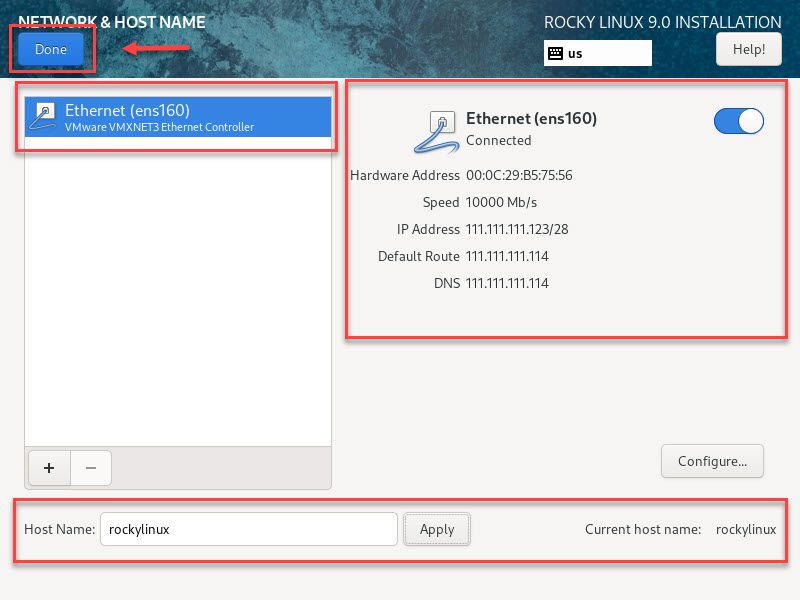
- Click on the Network & Host Name section, in the NETWORK & HOSTNAME window, enable network connection and set the hostname, then press Done.
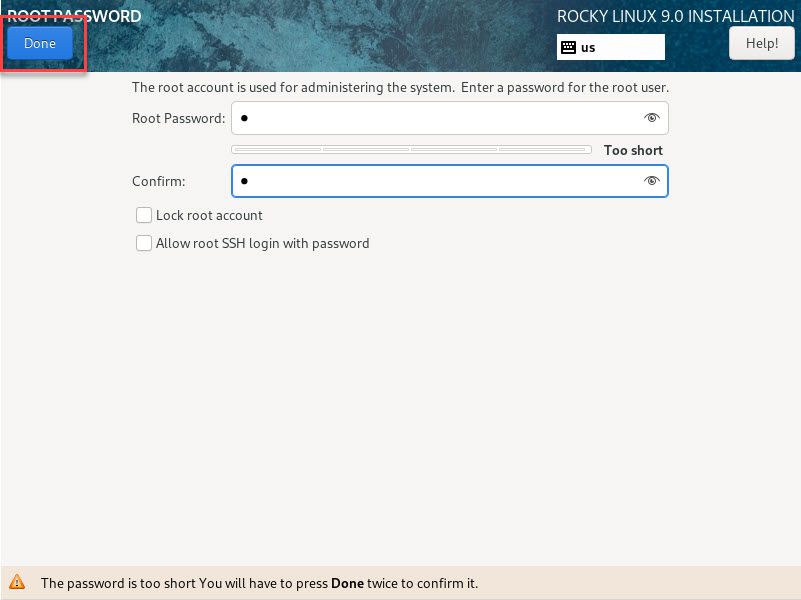
- Click on the Root Password section – in the ROOT PASSWORD window, set a strong password for the ROOT user and then click Done
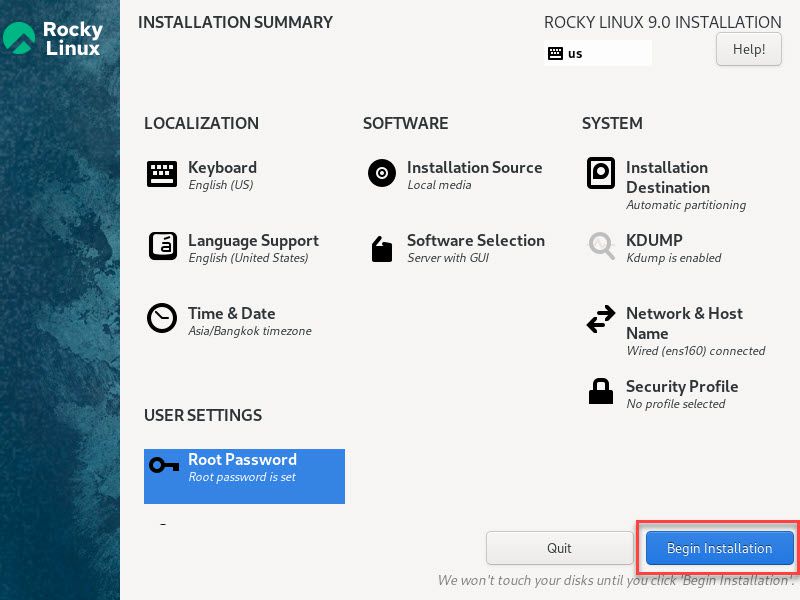
Finally, set up Keyboard, Language Support, Date & Time, and then press Begin Installation to proceed with the installation.
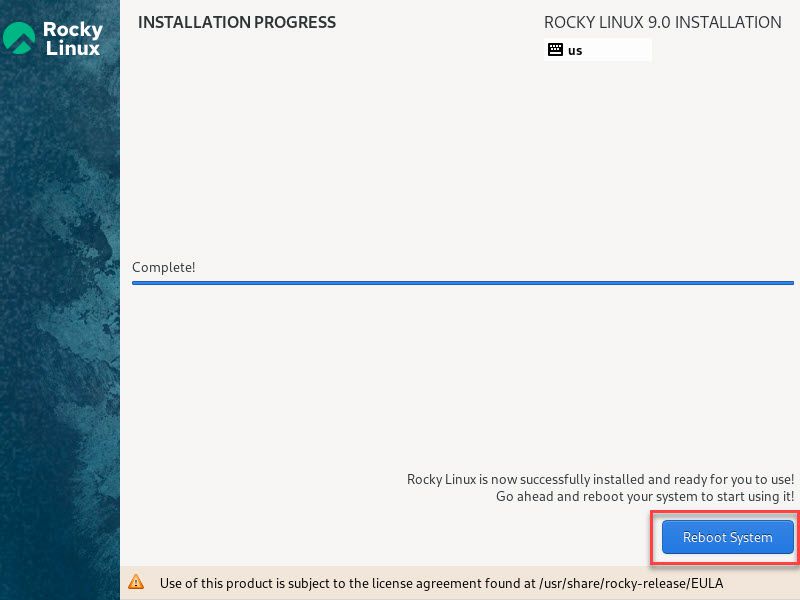
Please wait a few minutes for the installation process to complete…
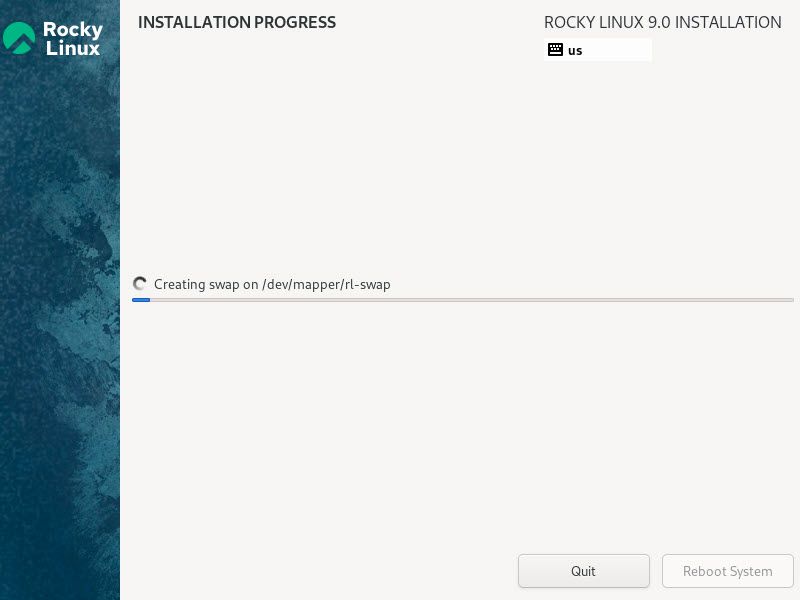
After completion, press Reboot System to restart the system.
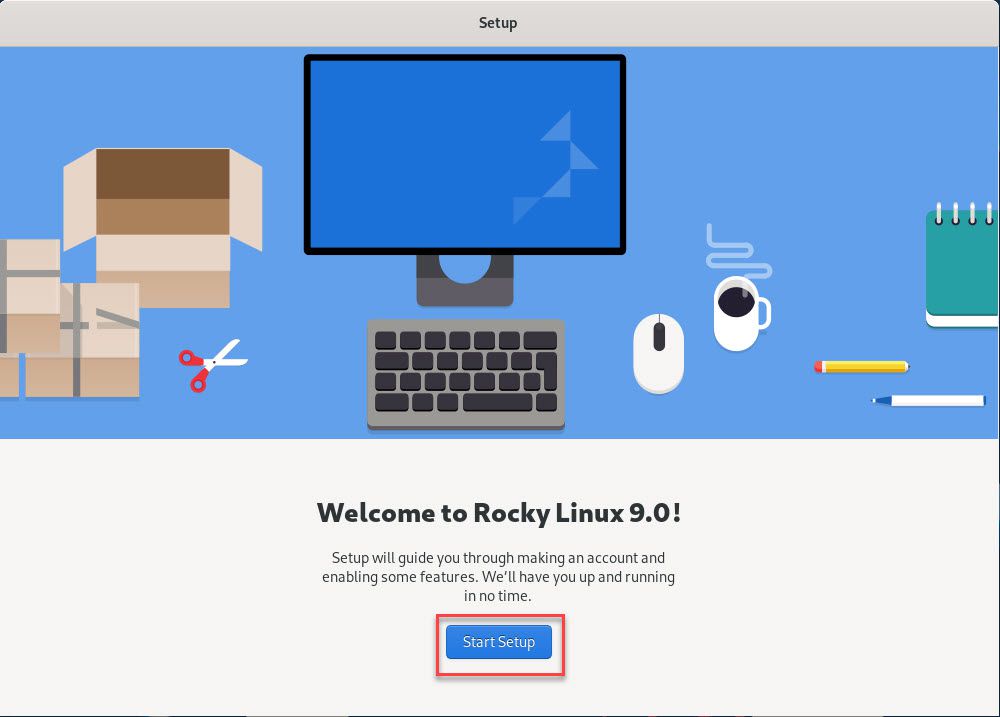
Step 4 – Initial Setup
After the system has finished booting, it will take you to the desktop screen. Please follow the steps below to complete the setup.
In the Welcome to Rocky Linux window, click Start Setup to the next step.
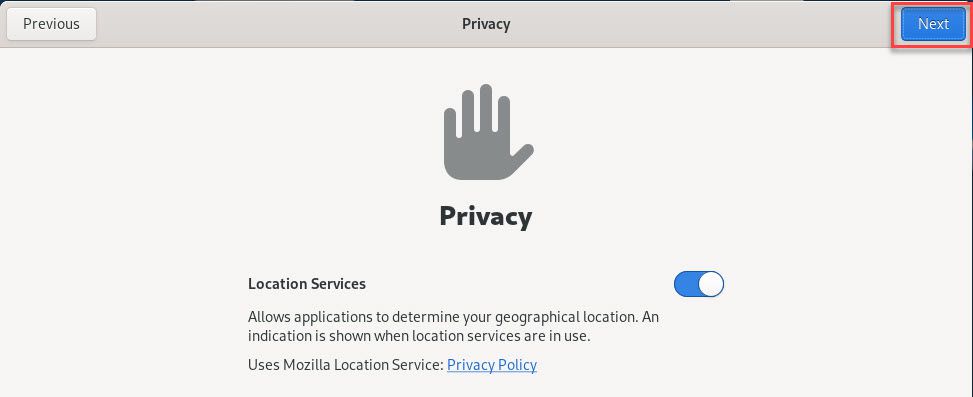
Click Next on the Privacy windows to the next step.
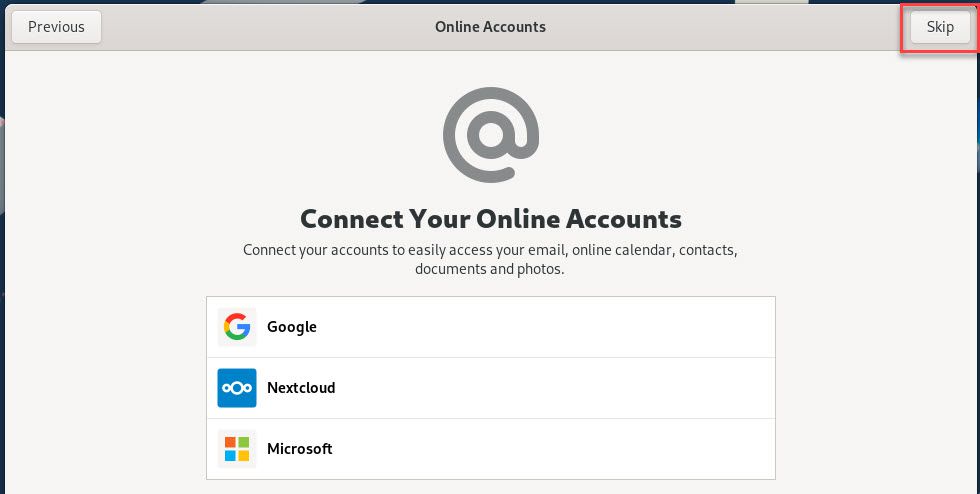
Click Skip to the next step.
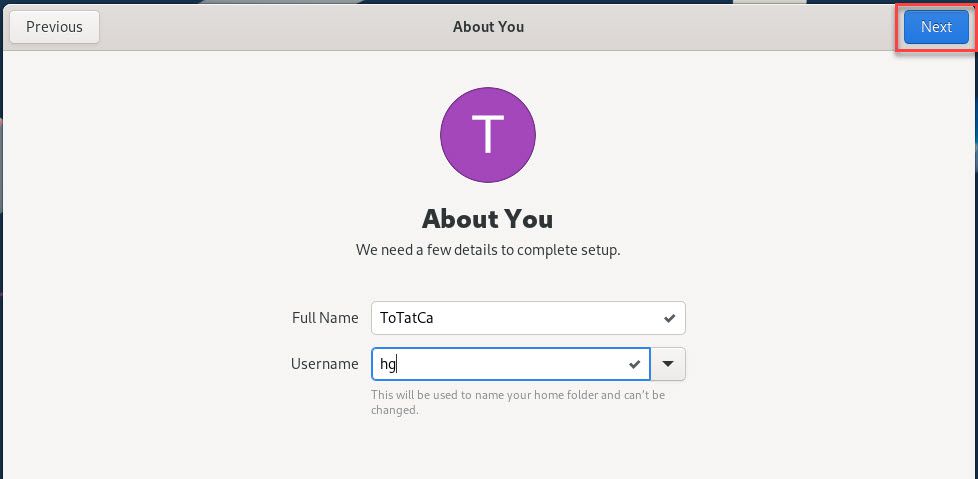
Create an account for yourself and click Next
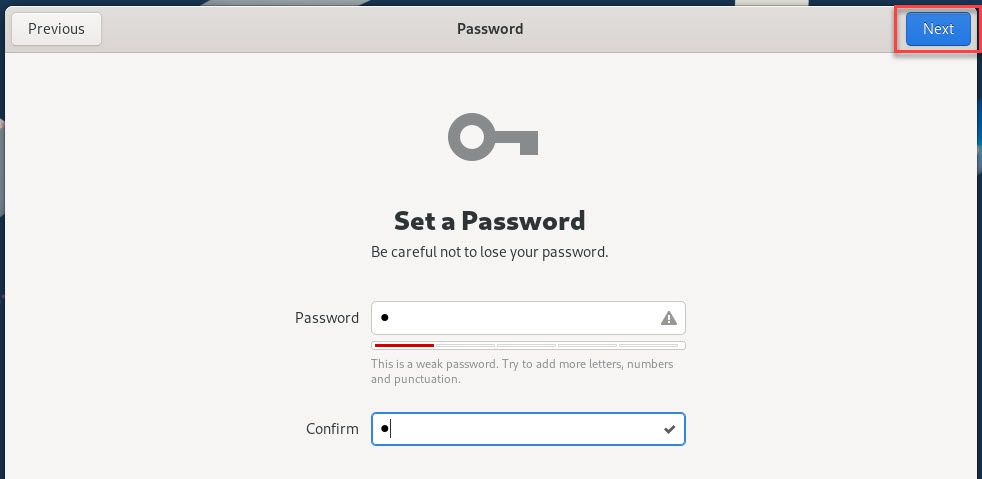
Set a strong password for your account and click Next
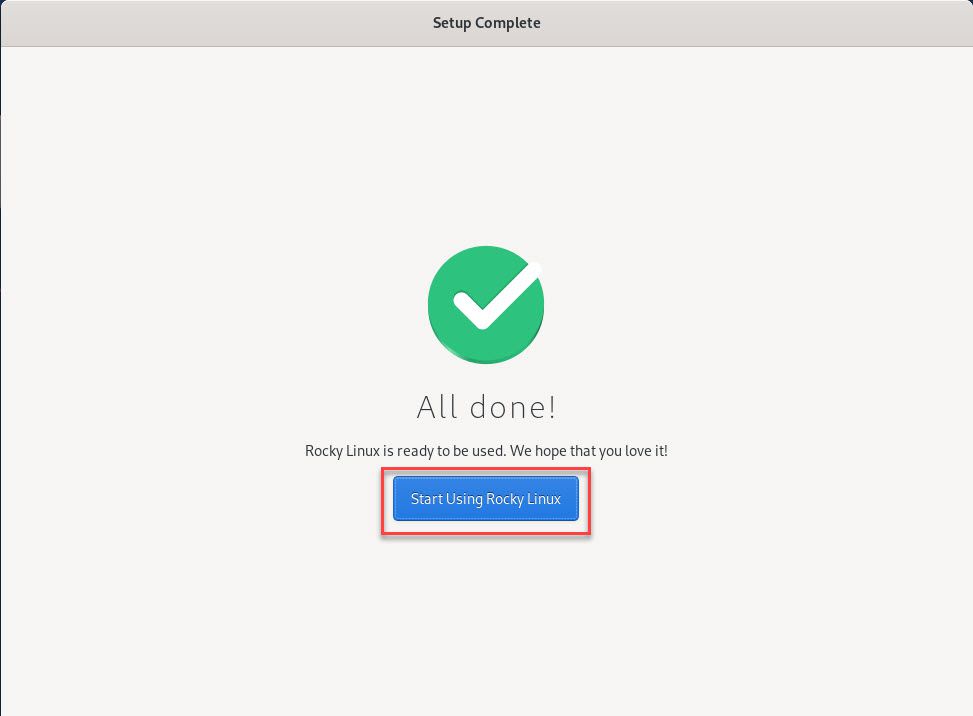
Everything is done. Click on Start Using Rocky Linux to start using and experiencing CentOS Stream
Success !!!

That’s it! You have successfully installed Rocky Linux on VMware Workstation. If you have any further questions or need assistance, feel free to ask. Enjoy using Rocky Linux!
Thank you for reading !!!