Android is a popular mobile operating system developed by Google. It is designed for smartphones, tablets, smart TVs, and other smart devices. Android is based on the Linux kernel and uses a modified version of the Linux operating system.
Running Android on VMware Workstation allows you to emulate an Android environment on your computer. This enables you to test and develop Android applications, explore the Android ecosystem, and experience Android functionality without the need for a physical Android device. VMware Workstation provides a virtualization platform where you can create virtual machines and install different operating systems, including Android.
In this guide, we will guide you step by step on How to install Android on VMware Workstation.
Read more
- How to Install Ubuntu Server 23 on VMware Workstation
- How to Install VMware vSphere (ESXi) 8/7/6 on VMware Workstation
- How to Install Windows Server 2022 on VMware Workstation
Prerequisites
- VMware Workstation has been installed on your system
- Android ISO image ( You can visit this page and download the Android ISO image from here )
Step 1 – Create a new Virtual Machine for Android
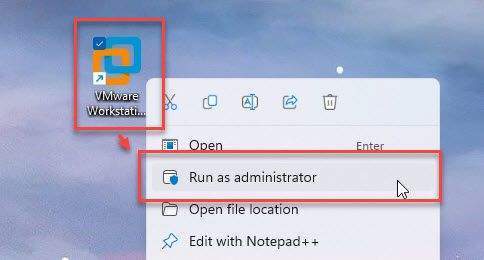
On the desktop, Right-click on the VMware icon – select Run as administrator
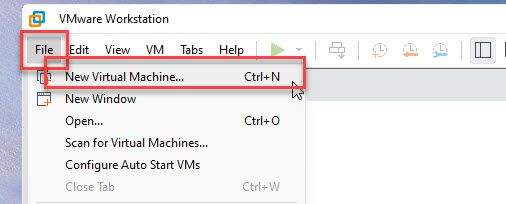
Open VMware Workstation and go to File then select New Virtual Machine.
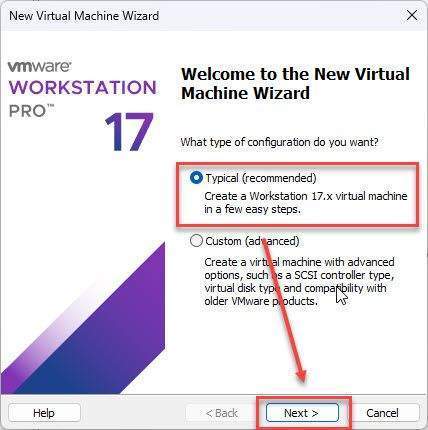
In the Welcome to the New Machine Wizard window, choose Typical and click Next
Choose I will install the operating system later and click Next in the Guest Operating System Installation window, c

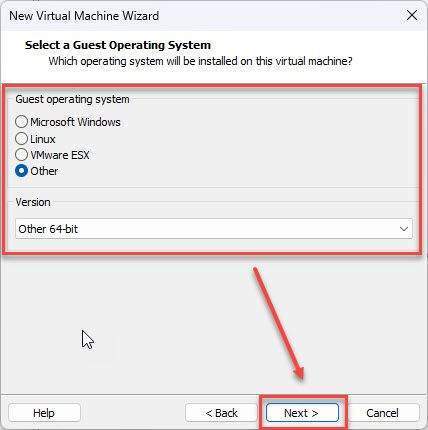
In the Select a Guest Operating System window:
- Guest operating system: Other
- Version: Other 64-bit
then click Next
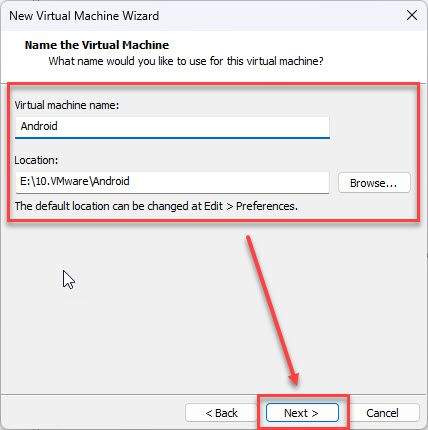
In the Name the Virtual Machine window:
- Virtual machine name: Set the name for your VM
- Location: choose the storage location for the virtual machine
and click Next
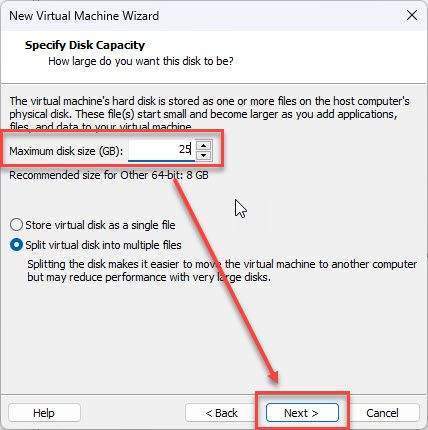
In the Specify Disk Capacity window:
- Maximum disk size (GB): >= 20GB
- Split virtual disk into multiple files
and click Next
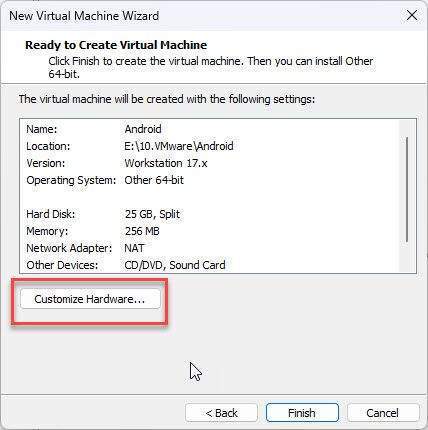
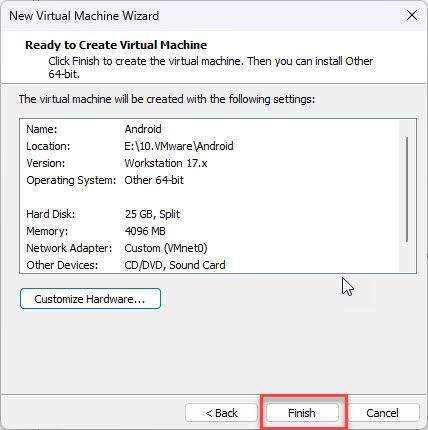
In the Ready to Create Virtual Machine window, click on Customize Hardware button:
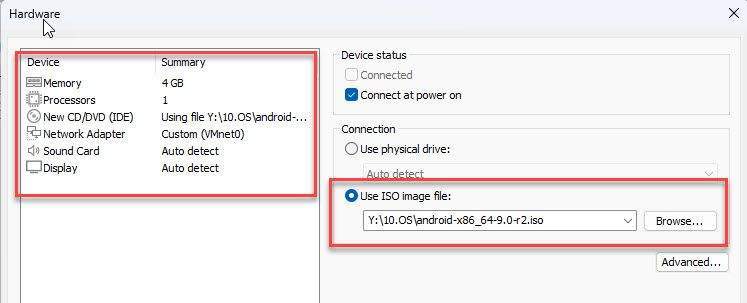
In the Hardware window choose:
- Memory: >= 4GB
- New CD/DVD(IDE): browse to Android ISO image
- Network Adapter: choose your virtual network
and click Close
Come back Ready to Create Virtual Machine window, click Finish
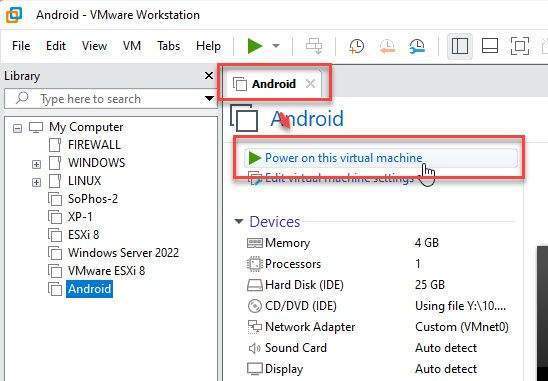
Step 2 – Install Android on VMware Workstation
In step 1, we created a VM for Android, now click on Power on this virtual machine to begin installing Android on VMware Workstation
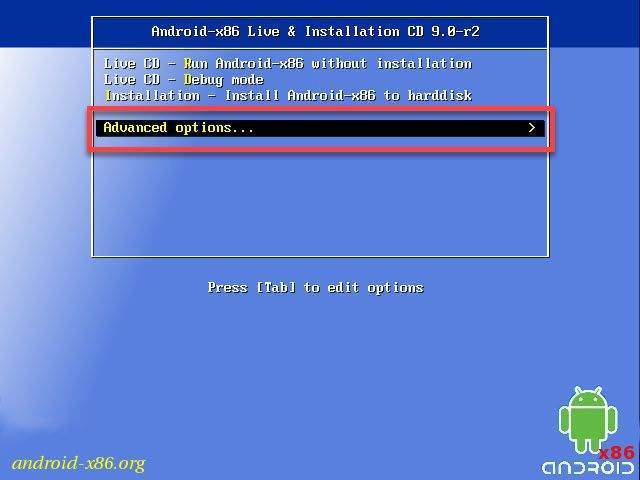
On the boot screen, select the Advanced option… and hit Enter
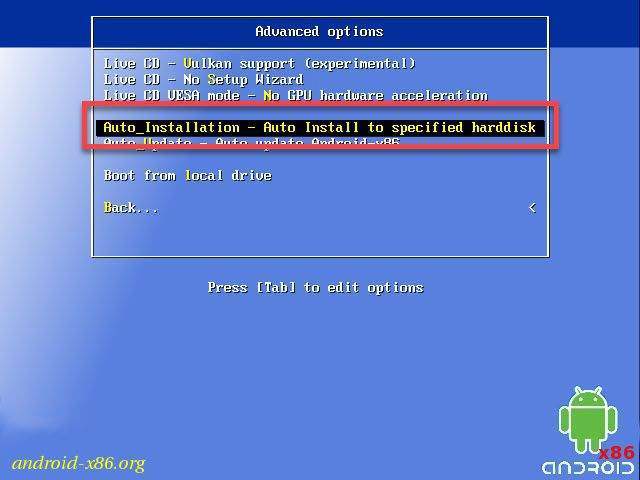
On the Advanced options screen, select Auto_Installation – Auto Install to specified harddisk and hit Enter
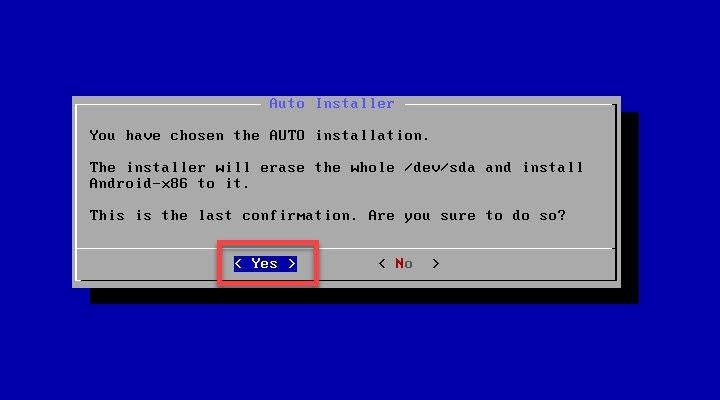
In the Auto Installer window, select Yes and hit Enter
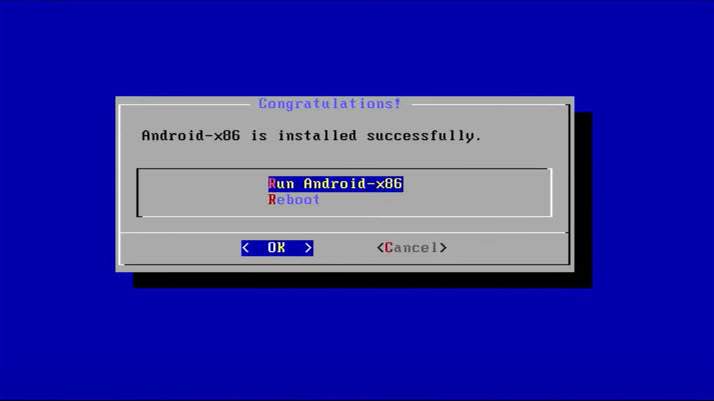
In the Congratulations! window, select Reboot – select OK then hit Enter
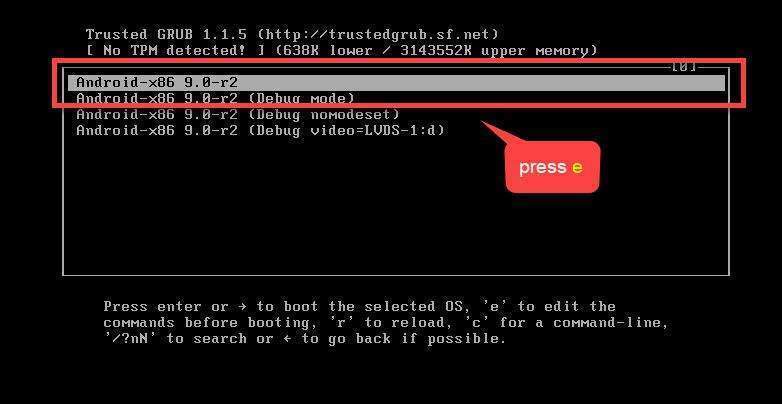
After restarting, press the up or down arrow key to end the automatic boot process.
At the boot selection screen, select the first boot option and press e to edit the boot commands before booting
Select the first boot option and press e to edit the boot command for GRUB
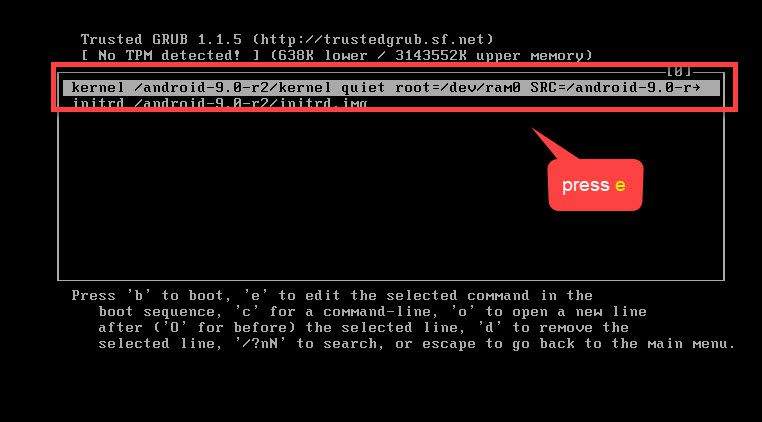
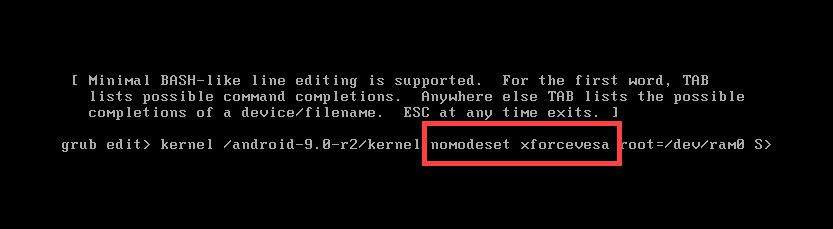
Press the left arrow key to move the mouse cursor to the left to find quiet and replace it with nomodeset xforcevesa
Before
grub edit> kernel /android-9.0-r2/kernel quiet root=/dev/ram0 androidboot.selinux=permissive SRC=/android-9.0-r2
After
grub edit> kernel /android-9.0-r2/kernel nomodeset xforcevesa root=/dev/ram0 androidboot.selinux=permissive SRC=/android-9.0-r2
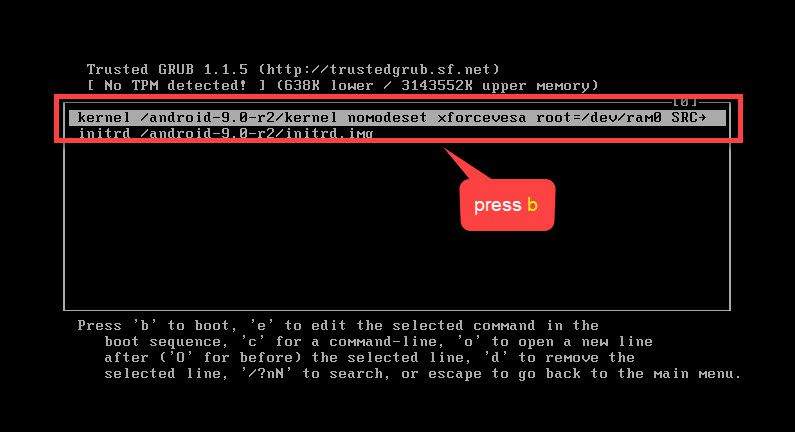
After done, press Enter to exit
Comeback the boot option screen, Select the first boot option that you have edited and press b to boot.
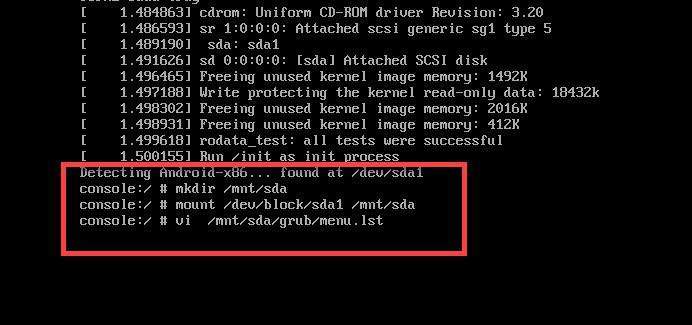
As you see the Android system screen, press Alt+F1 to open the console

Create a directory to which a virtual disk will be mounted using the command below:
mkdir /mnt/sda
Mount the virtual disk to the created directory:
mount /dev/block/sda1 /mnt/sda
and edit the GRUB bootloader boot menu with the text editor vi:
vi /mnt/sda/grub/menu.lst
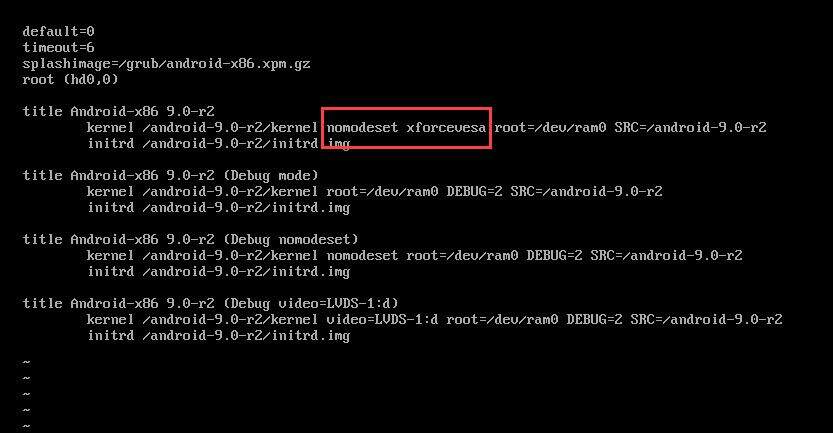
Press i to edit and find quiet and replace it with nomodeset xforcevesa
Before
kernel /android-9.0-r2/kernel quiet root=/dev/ram0 SRC=/android-9.0-r2
initrd /android-9.0-r2/initrd.imgAfter
kernel /android-9.0-r2/kernel nomodeset xforcevesa root=/dev/ram0 SRC=/android-9.0-r2
initrd /android-9.0-r2/initrd.img
After done, press Esc then type :wq and hit Enter to write changes to the file and quit

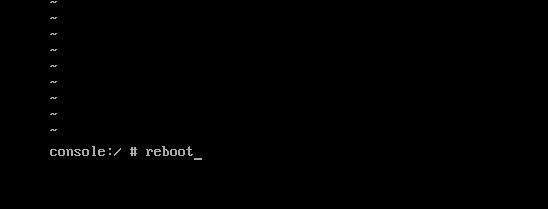
Comeback the console, and type the command reboot to reboot system
Step 3 – Setup Android
Now the Android VMware VM is booted and you can see the graphical user interface of Android, select your language and click Start

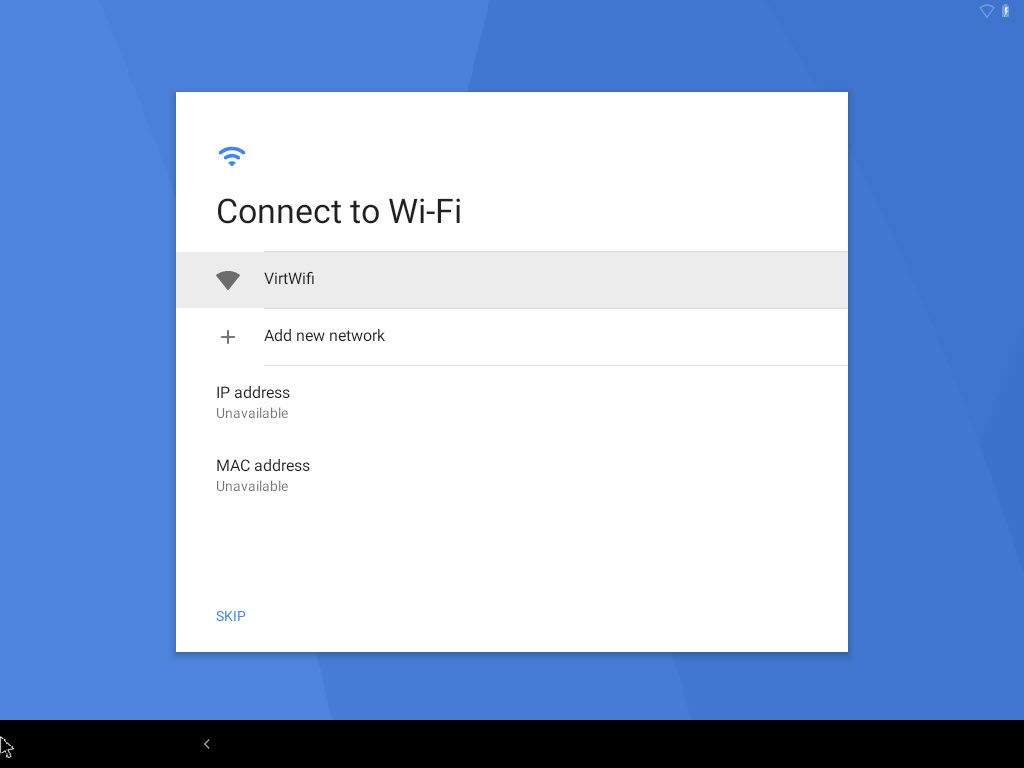
In the Connect to Wi-Fi window, click on See all Wi-Fi network option

and click on the VirtWifi option
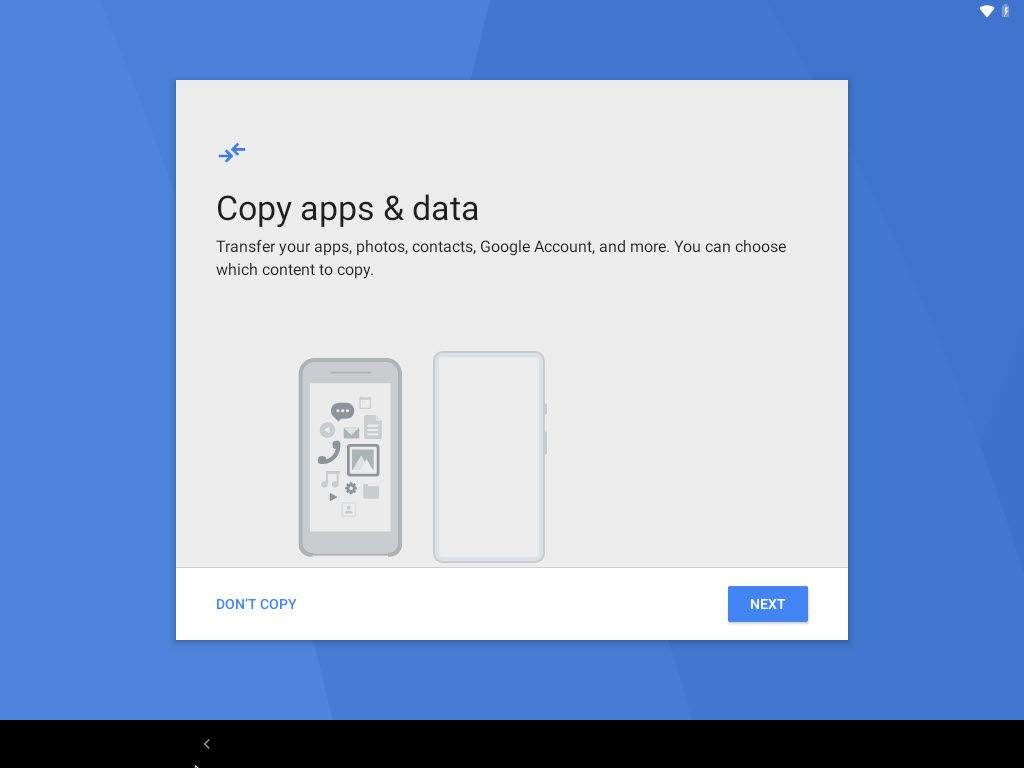
Next, in the Copy apps & data window, click on DON’T COPY button
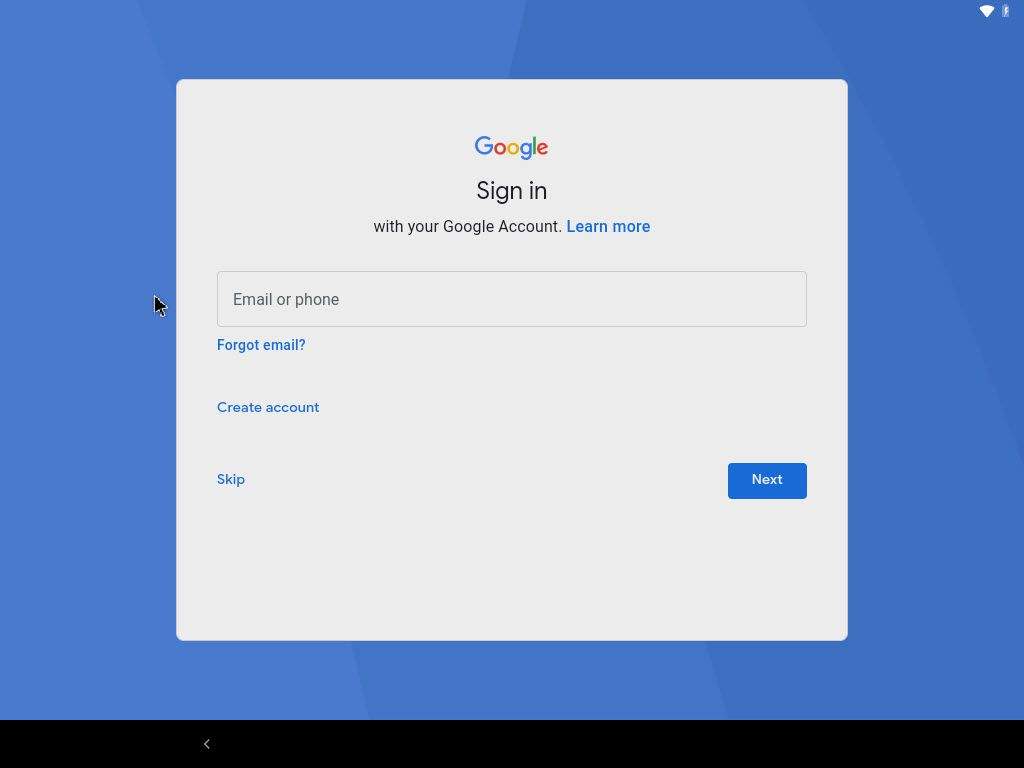
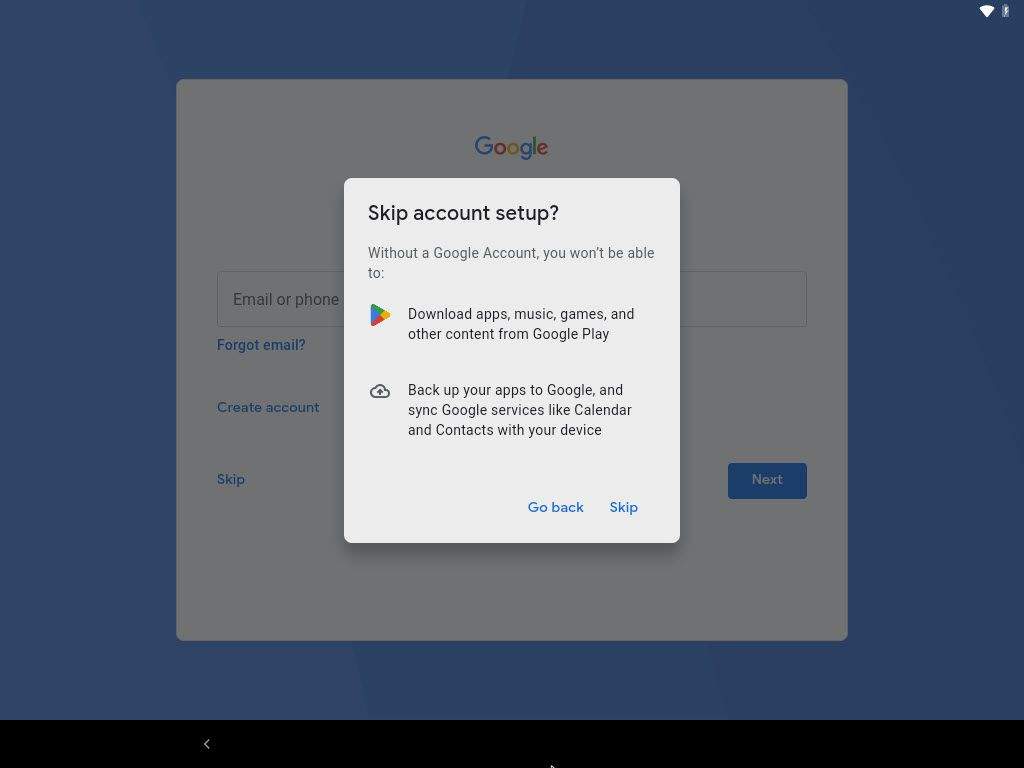
In the Google Sign window, click Skip button
Press Skip button to the next step
In the Google Services window, click More and then click Accept to the next step

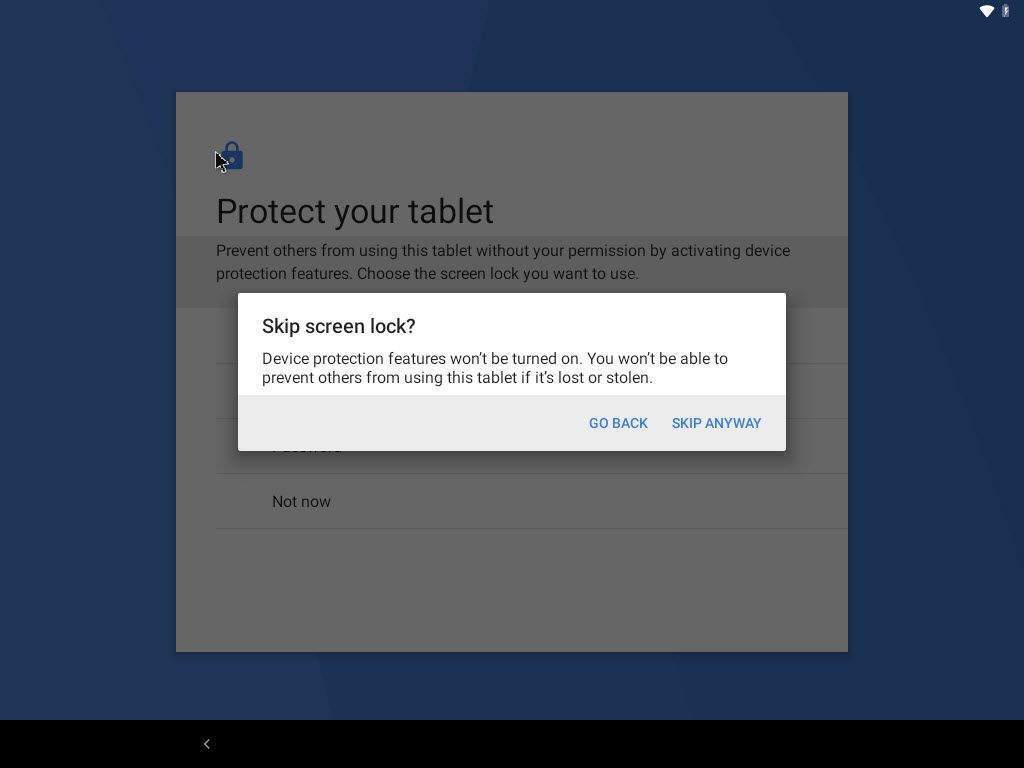
In the Protect your tablet window, choose Not now and then click SKIP ANYWAY button
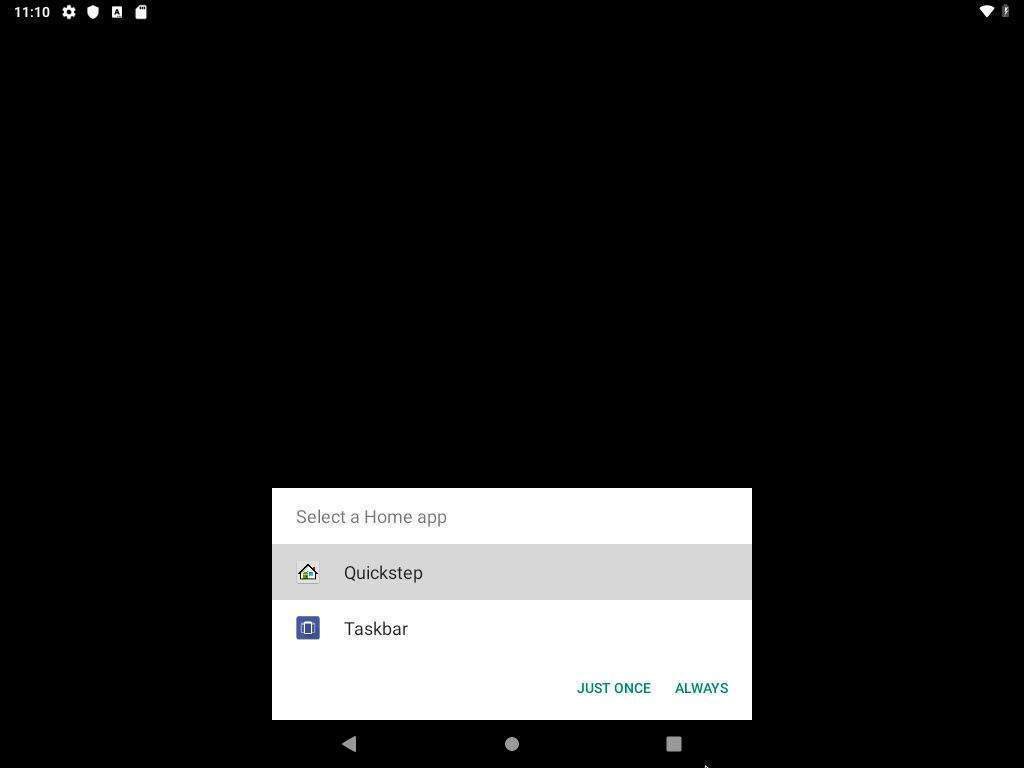
Finally, choose the interface you want to use.
Success !!!
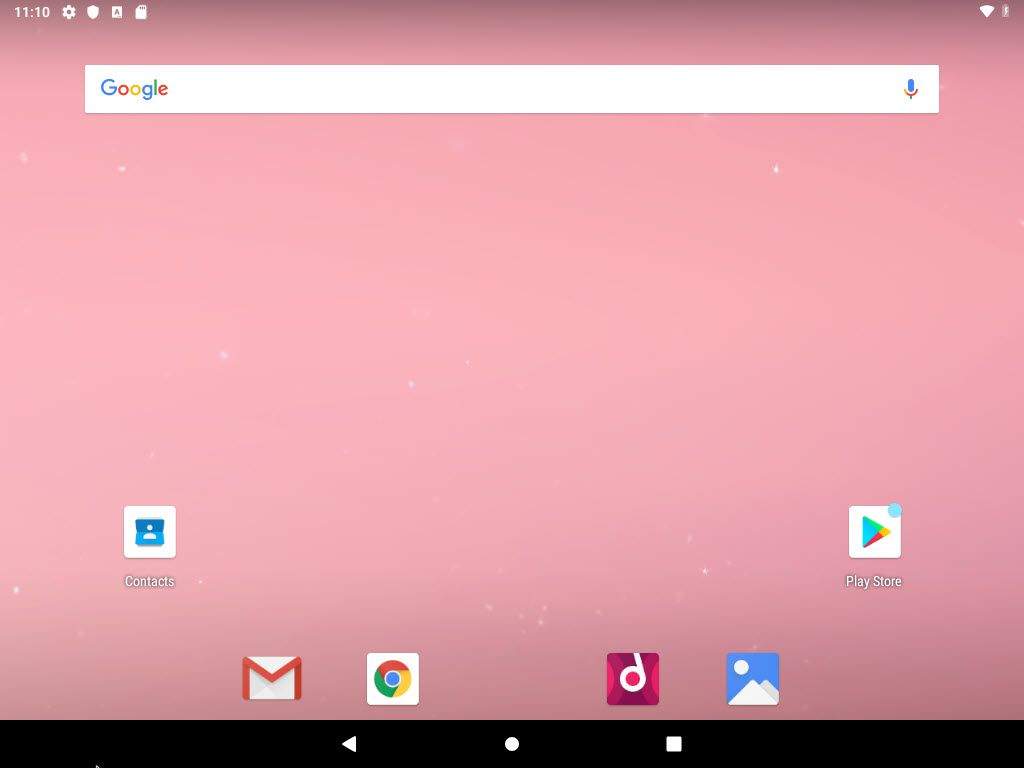
That’s it, you have successfully installed Android on VMware Workstation. If you have any further questions or need additional support, please feel free to leave a comment.
Video
Thank you for reading !!!