In this article, we will explore How to Install Android on the Hyper-V platform. Android-x86 is a version of the Android operating system optimized to run on x86-based computers, while Hyper-V is a powerful virtualization tool by Microsoft. By combining the two, you can create a virtual Android environment on your computer and experience Android applications and features directly on your computer interface.
In this guide, we will walk through each specific step to install Android-x86 on Hyper-V. You will start by downloading the Android-x86 ISO image, then create a virtual machine on Hyper-V and configure it to run Android-x86 smoothly.
Prerequisites
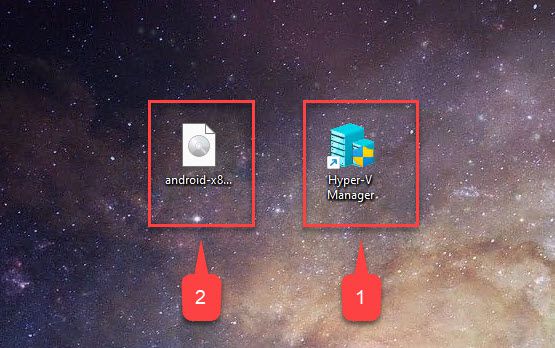
- Hyper-V has been enabled on your system
- Android ISO image
Read more
- How to Install Ubuntu Server 23 on VMware Workstation
- How to Install VMware vSphere (ESXi) 8/7/6 on VMware Workstation
- How to Install Windows Server 2022 on VMware Workstation
- How to Install Android on VMware Workstation
- How to Install and Configure pfSense Firewall on VMware Workstation
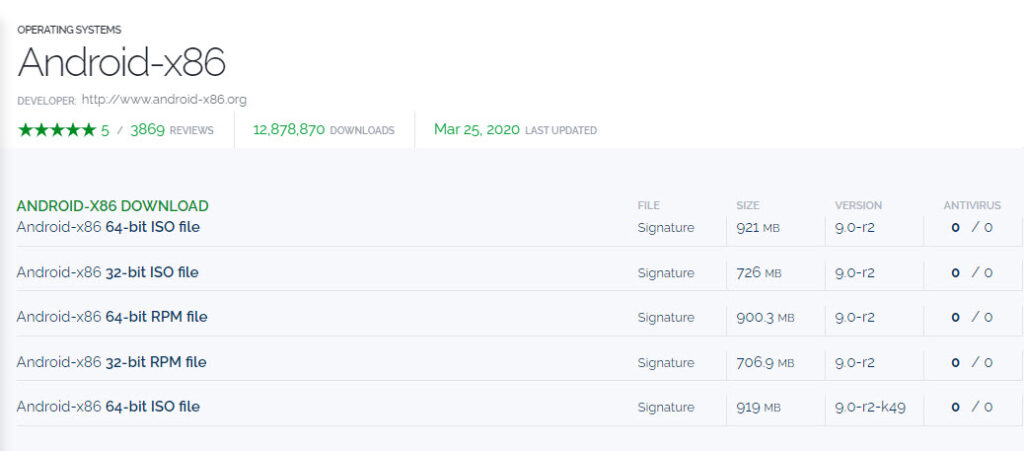
Step 1 – Download the Android ISO image
You can visit the Android-x86 website https://www.android-x86.org to select the version you wish to install and download the Android-x86 ISO image
Step 2 – Create a new Virtual Machine for Android
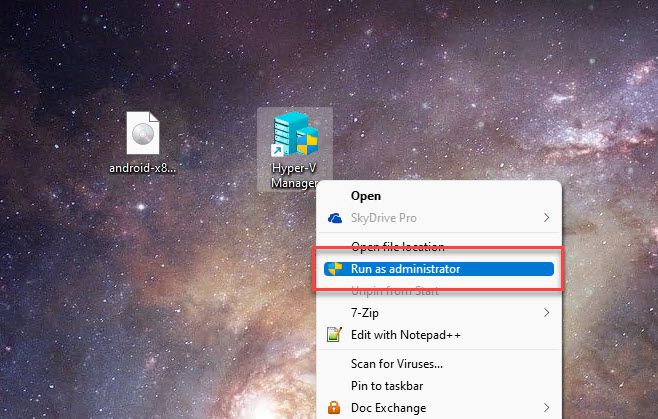
On the desktop, Right-click on the Hyper-V icon – select Run as administrator option
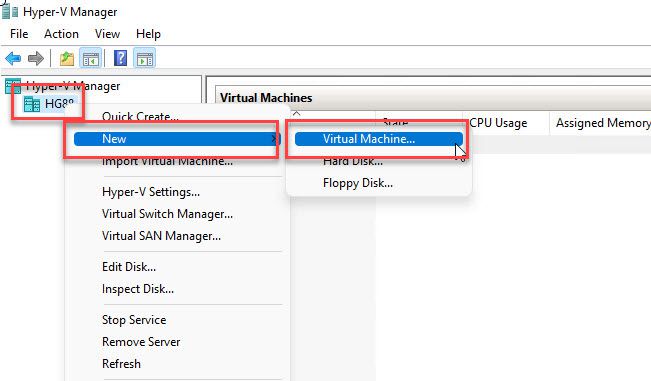
On the Hyper-V Manager window, right-click on your hostname – select New option – select Virtual Machine…
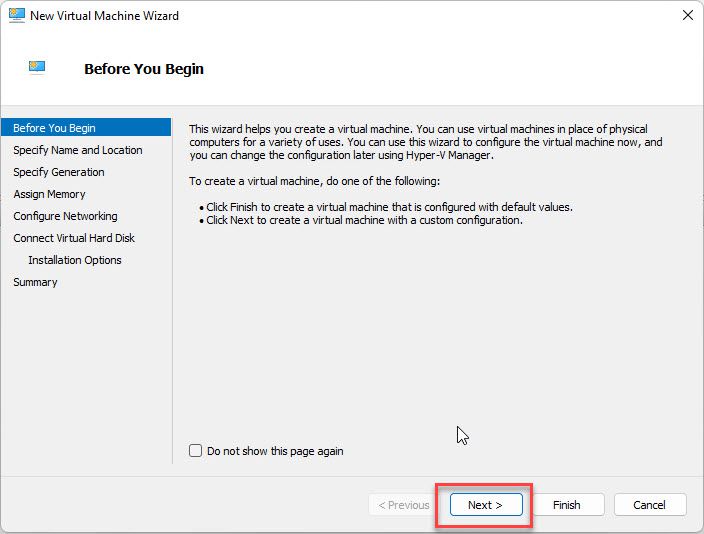
Click the Next button in the Before You Begin window.
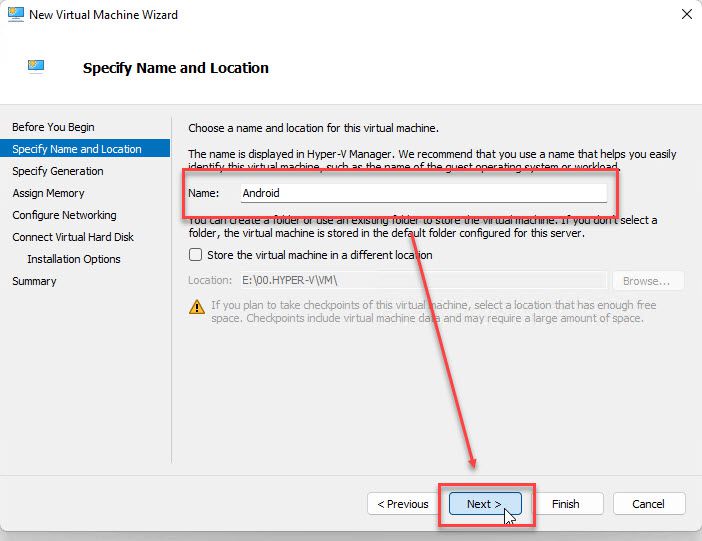
In the Specify Name and Location window, enter a name for the virtual machine and click Next
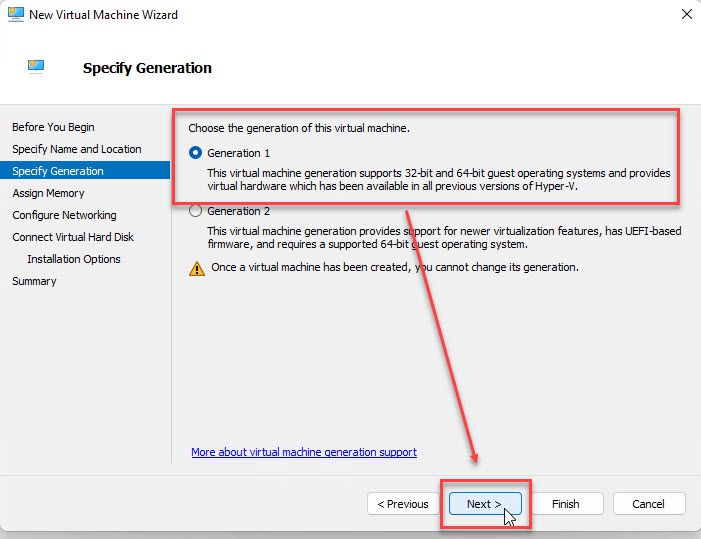
In the Specify Generation window, keep default and click the Next button.
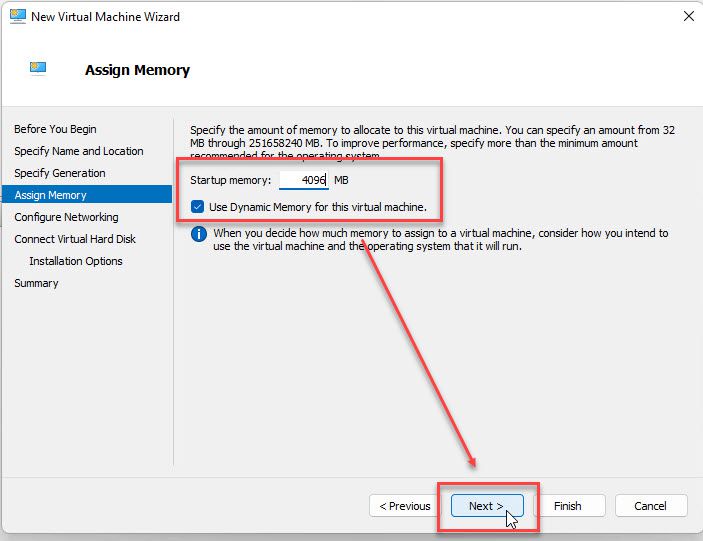
Set RAM greater than or equal to 2 GB and click the Next button in the Assign Memory window.
In the Configure Networking window, choose a Virtual Network with an internet connection and click Next button
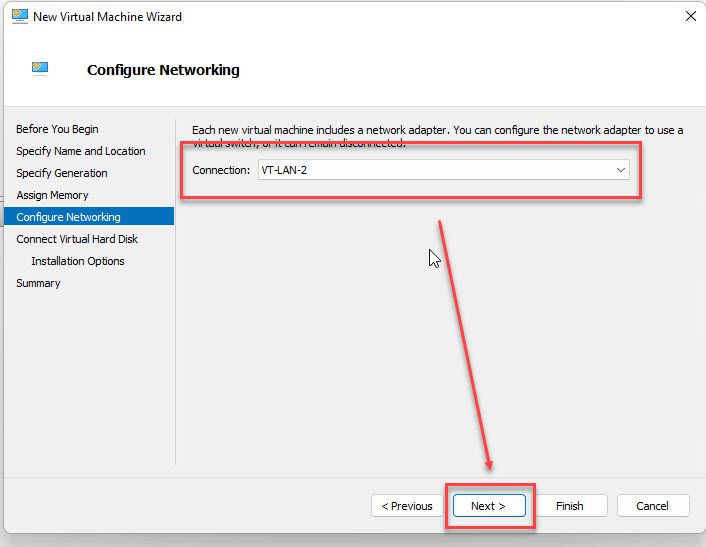
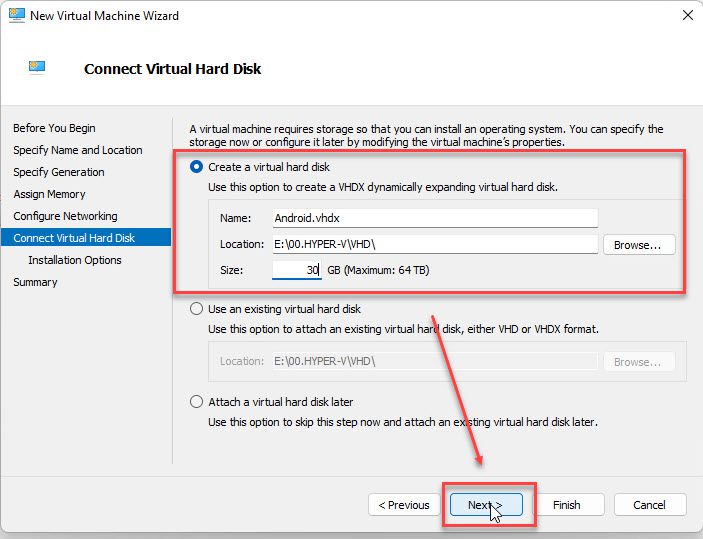
In the Connect Virtual Hard Disk window, create a virtual hard disk with a size greater than or equal to 20 GB and click Next
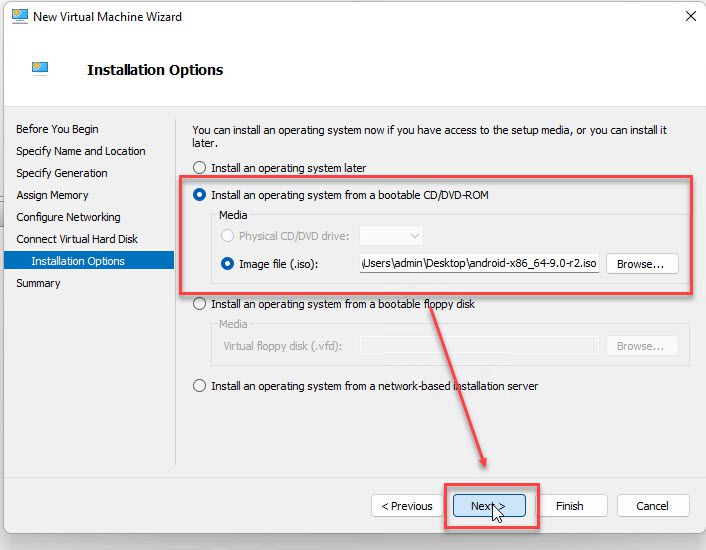
Select the Android-x86 ISO image you have downloaded in Step 1 and click Next
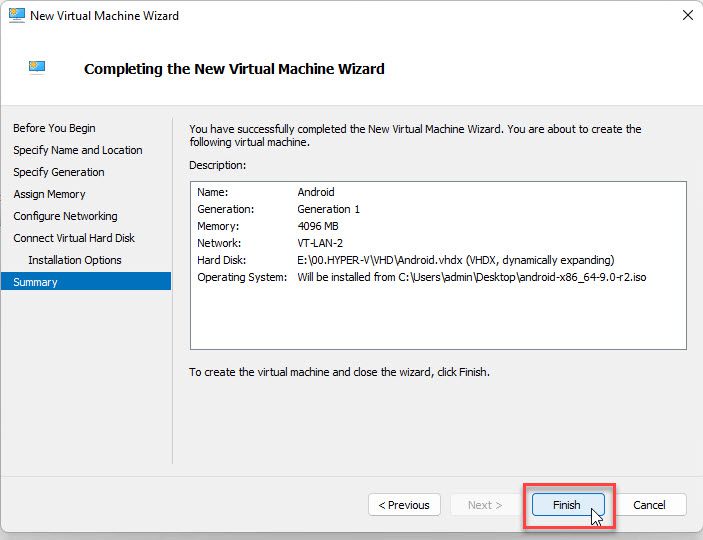
Finally, click Finish in the Completing the New Virtual Wizard window.
Step 3 – Install Android on VMware Workstation
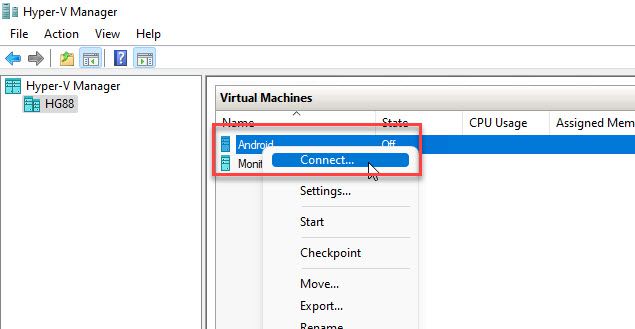
In step 1, we created a VM for Android. Now, right-click on it and select Connect option
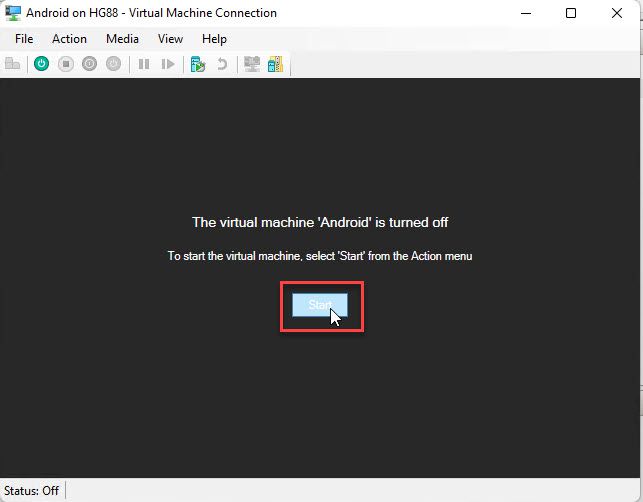
Click on Start to begin installing Android on Hyper-V
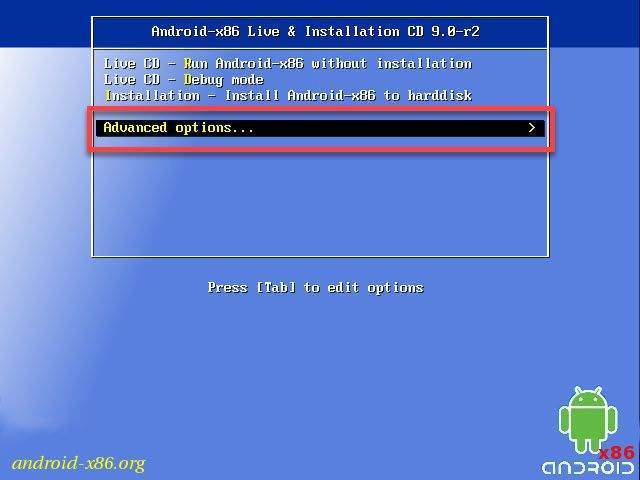
On the boot screen, select the Advanced option…from menu boot and hit Enter
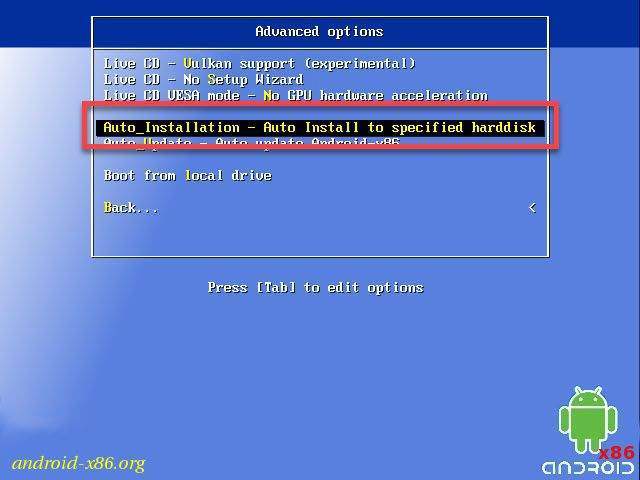
On the Advanced options screen, select Auto_Installation – Auto Install to specified harddisk option and hit Enter
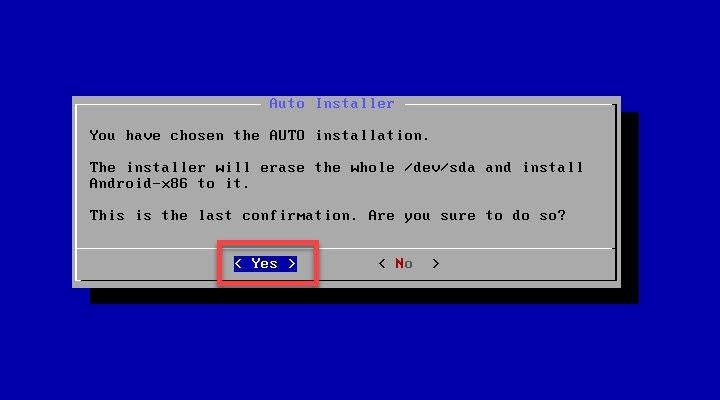
In the Auto Installer window, select Yes and hit Enter
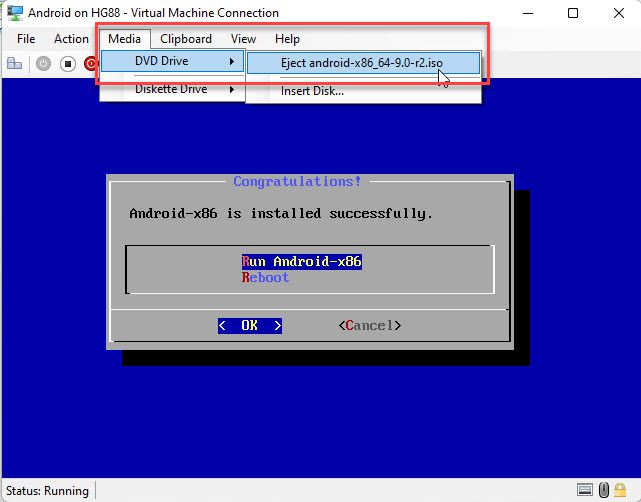
Before rebooting, please remove the Android-x86 ISO file by selecting Media – select DVD Drive – select Eject android-x86…iso
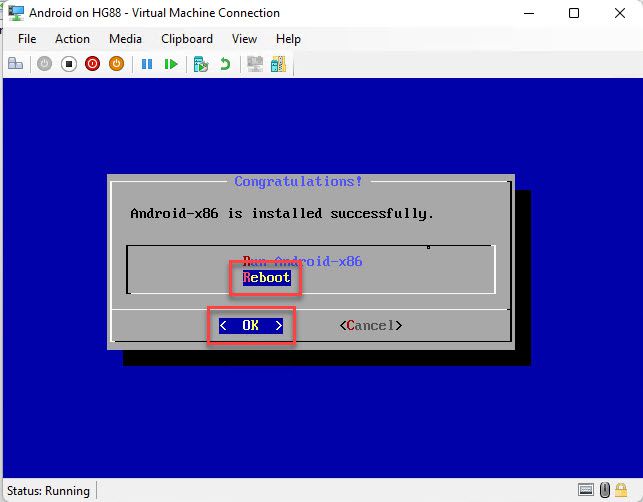
Now, select the Reboot option – select OK and then hit Enter in the Congratulations! window.
At the boot selection screen, press the up or down arrow key to end the automatic boot process and select the first boot option and then press e to edit the boot commands before booting
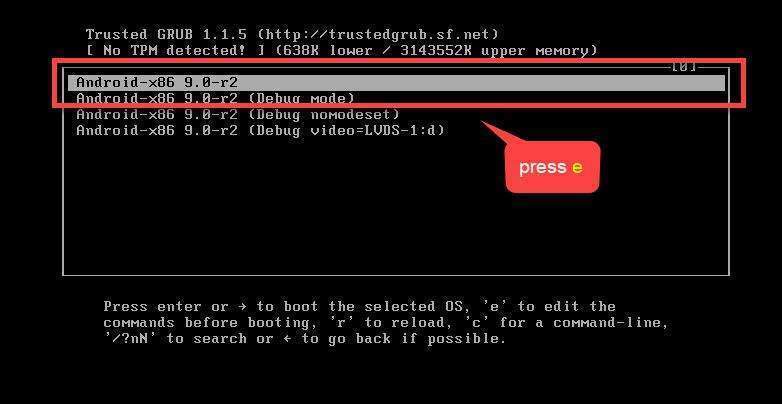
Select the first boot option and press e to edit the boot command for GRUB
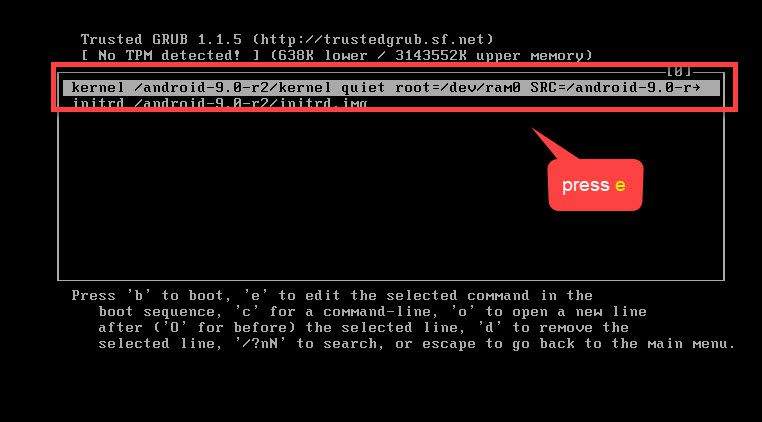
Press the left arrow key to move the mouse cursor to the left to find quiet and replace it with nomodeset xforcevesa
Before
grub edit> kernel /android-9.0-r2/kernel quiet root=/dev/ram0 androidboot.selinux=permissive SRC=/android-9.0-r2
After
grub edit> kernel /android-9.0-r2/kernel nomodeset xforcevesa root=/dev/ram0 androidboot.selinux=permissive SRC=/android-9.0-r2

After done, press Enter to exit
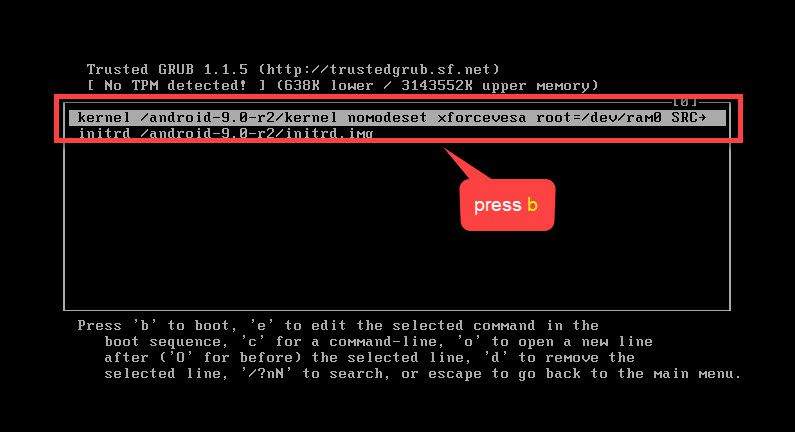
Comeback the boot option screen, Select the first boot option that you have edited and press b to boot.
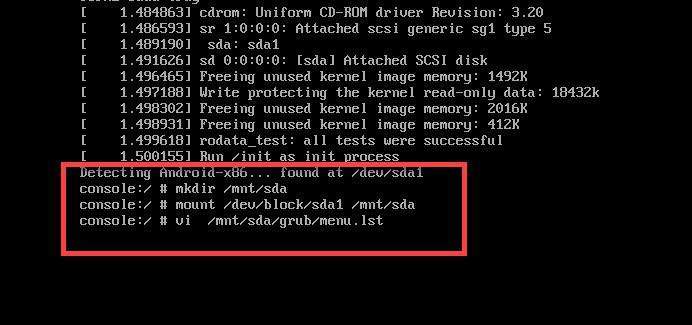
As you see the Android system screen, press Alt+F1 to open the console

Create a directory to which a virtual disk will be mounted using the command below:
mkdir /mnt/sda
Mount the virtual disk to the created directory:
mount /dev/block/sda1 /mnt/sda
and edit the GRUB bootloader boot menu with the text editor vi:
vi /mnt/sda/grub/menu.lst
Press i to edit and find quiet and replace it with nomodeset xforcevesa
Before
kernel /android-9.0-r2/kernel quiet root=/dev/ram0 SRC=/android-9.0-r2
initrd /android-9.0-r2/initrd.imgAfter
kernel /android-9.0-r2/kernel nomodeset xforcevesa root=/dev/ram0 SRC=/android-9.0-r2
initrd /android-9.0-r2/initrd.img
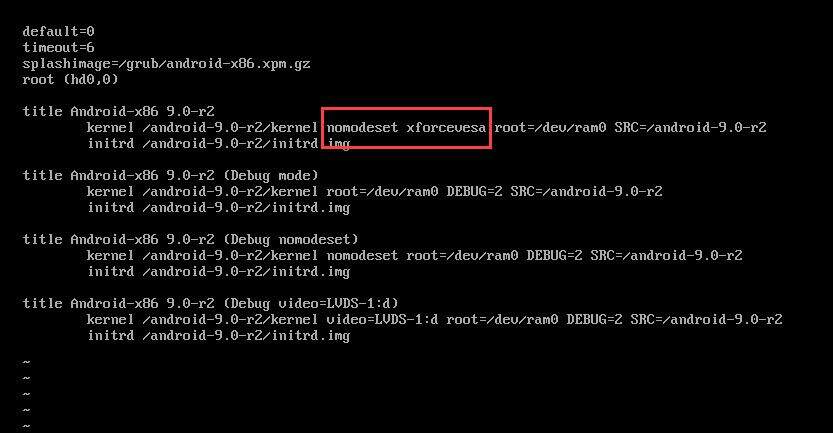
After done, press Esc then type :wq and hit Enter to write changes to the file and quit

Comeback the console, and type the command reboot to reboot system

Step 4 – Setup Android
Now the Android VMware VM is booted and you can see the graphical user interface of Android, select your language and click Start

In the Connect to Wi-Fi window, click on See all Wi-Fi network option
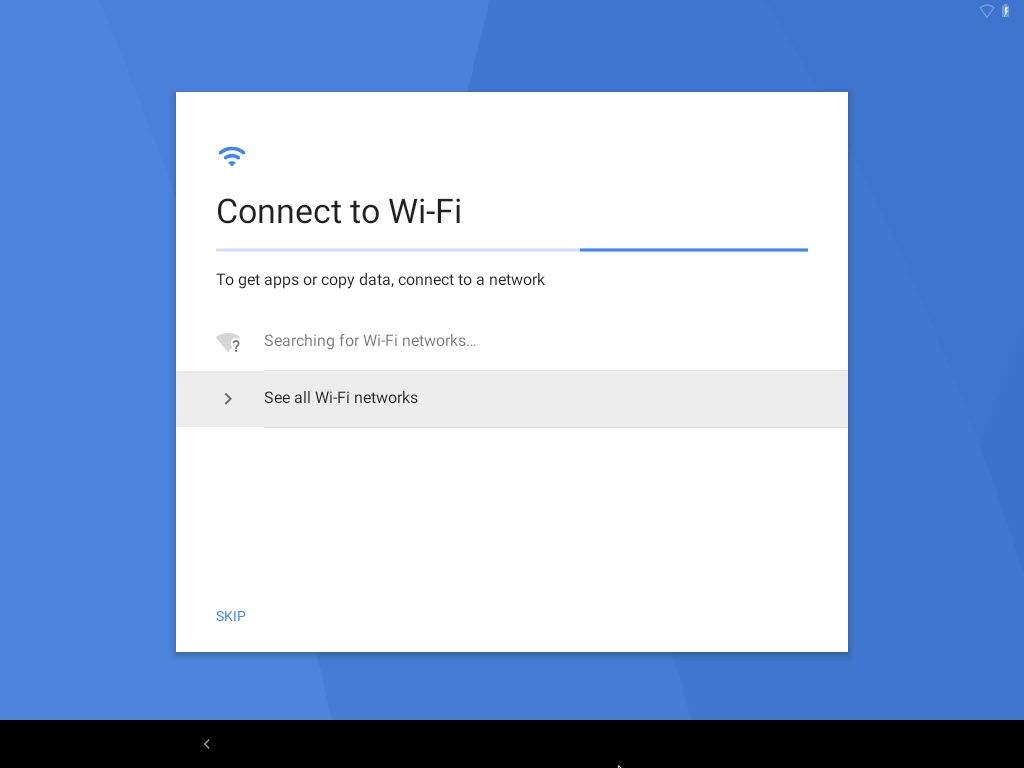
and click on the VirtWifi option
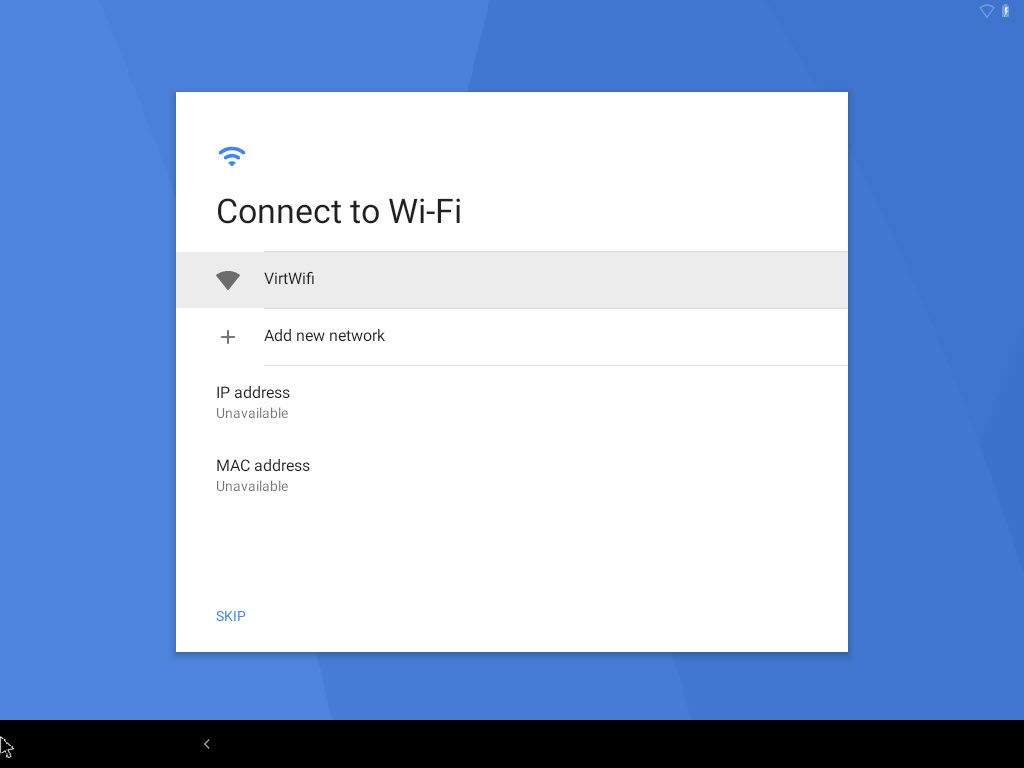
Next, in the Copy apps & data window, click on DON’T COPY button
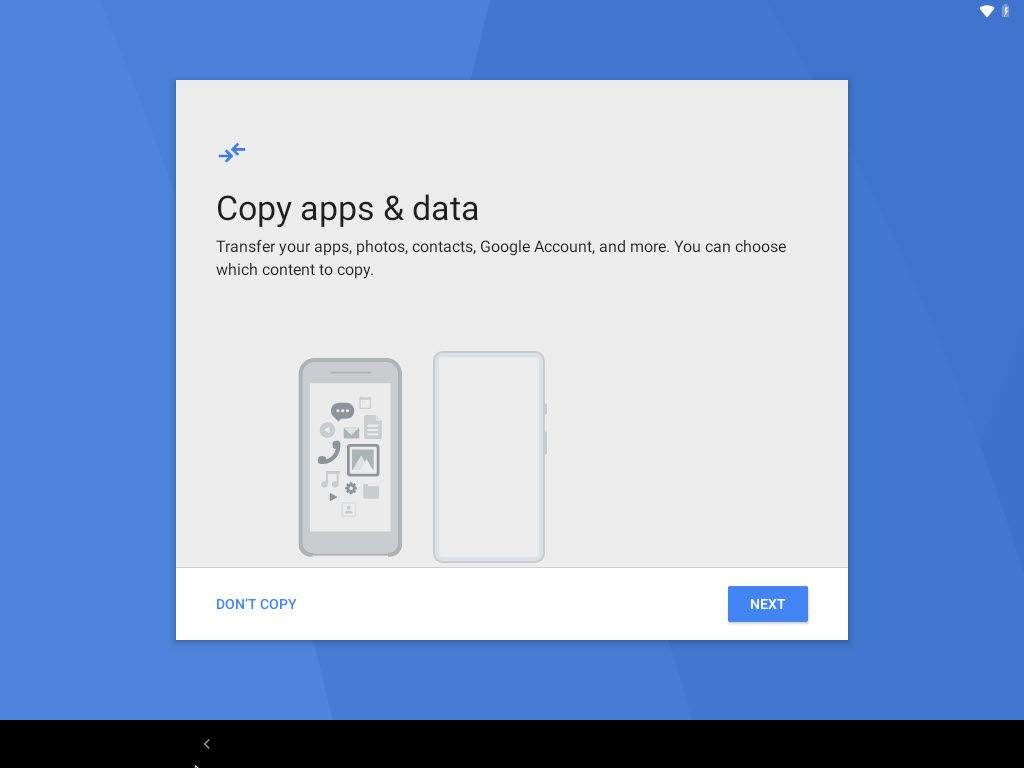
In the Google Sign window, click Skip button
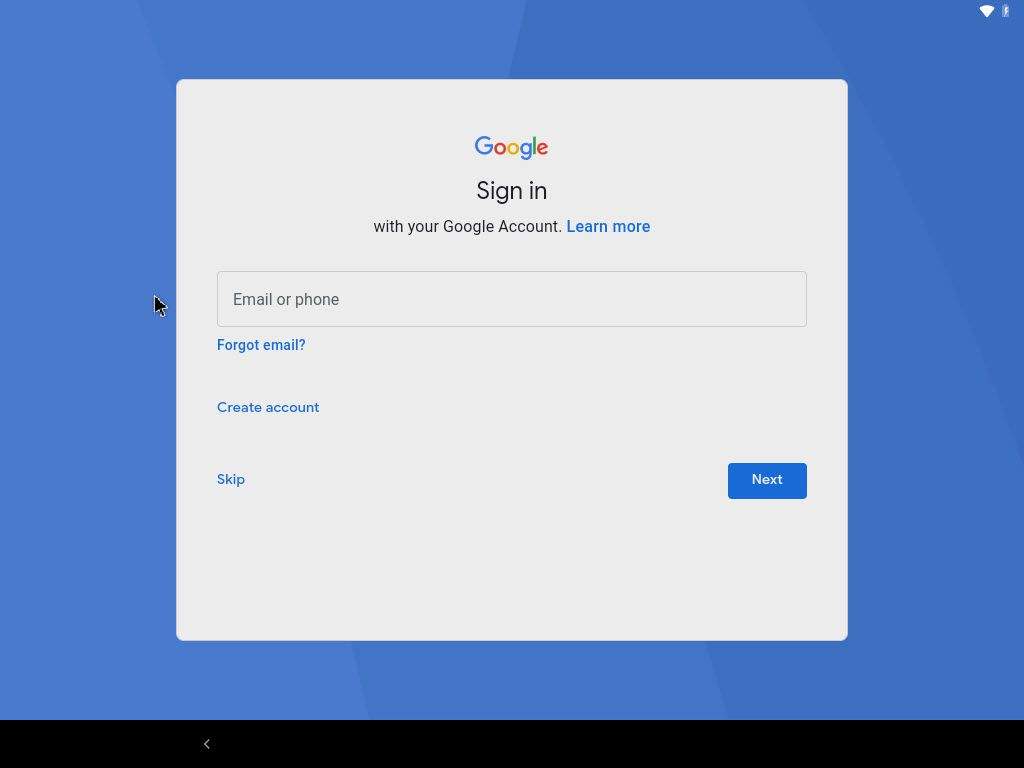
Press Skip button to the next step

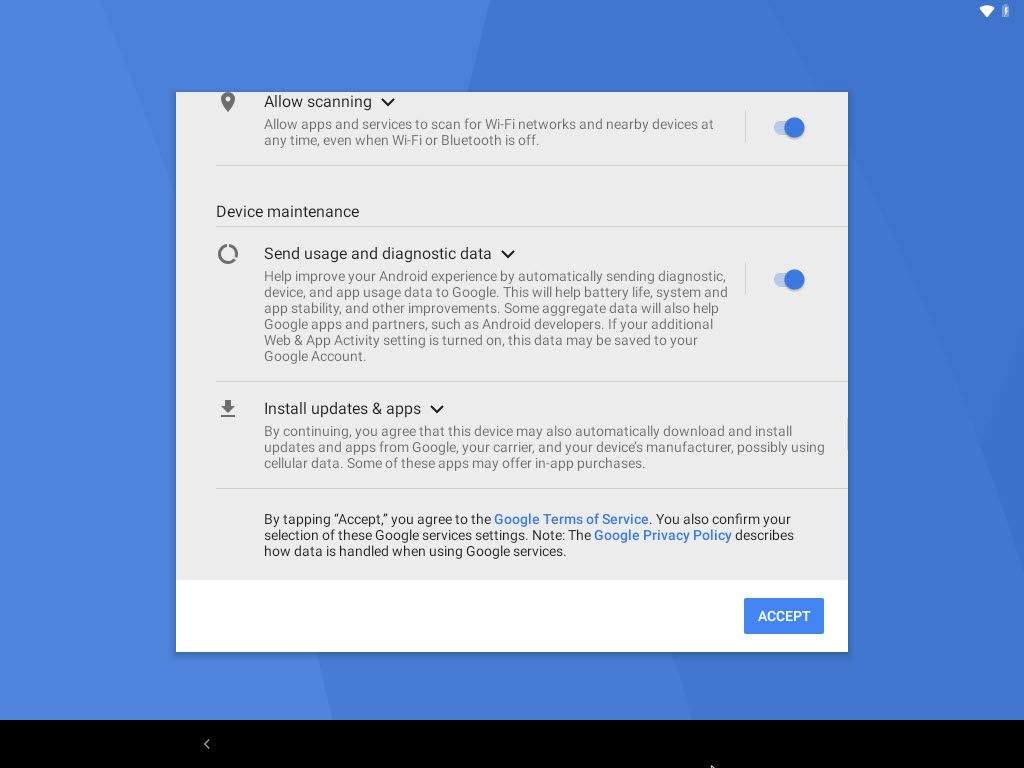
In the Google Services window, click More and then click Accept to the next step
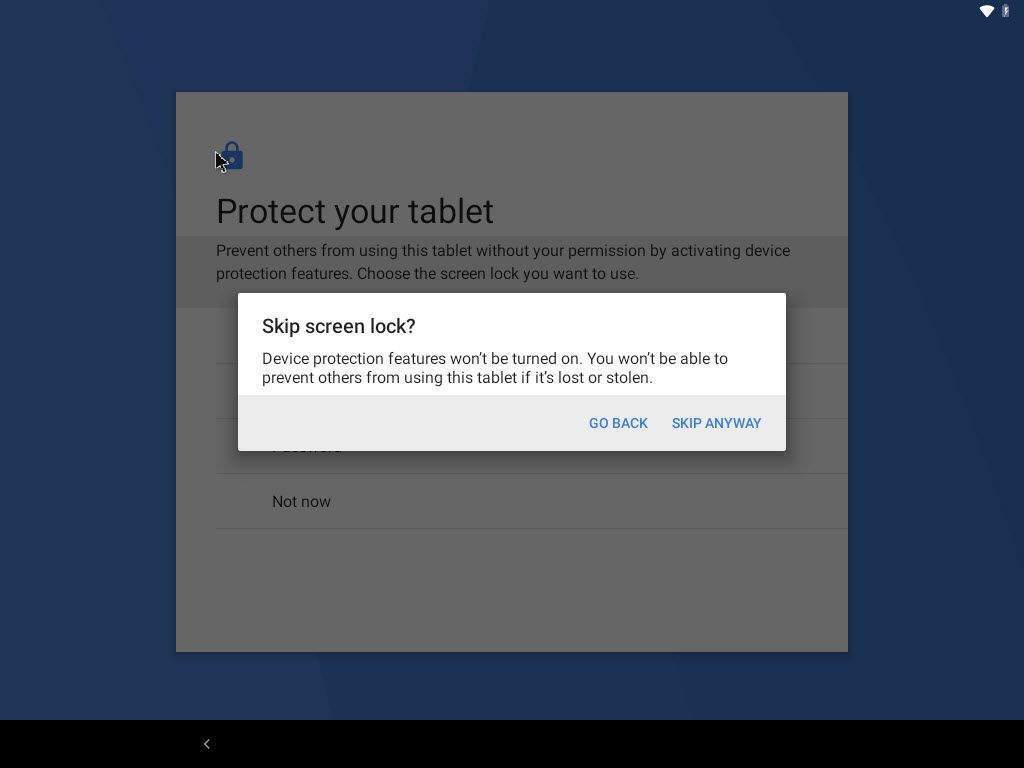
In the Protect your tablet window, choose Not now option and then click SKIP ANYWAY button
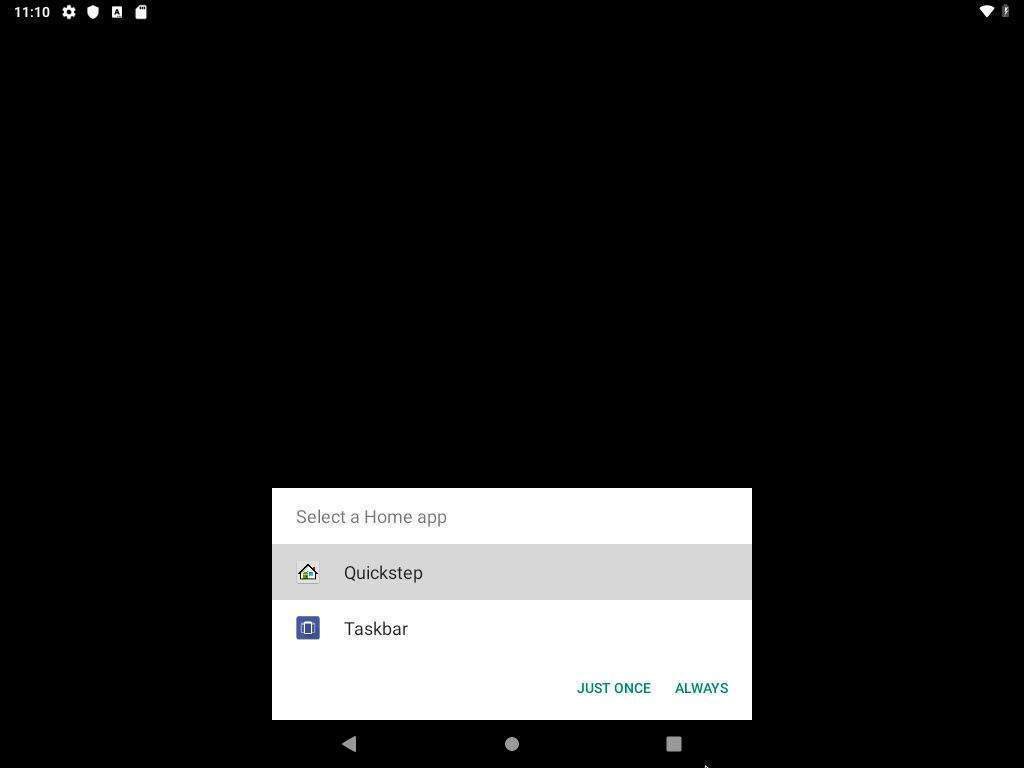
Finally, choose the interface you want to use.
Success !!!

That’s it, you have successfully installed Android on Hyper V. If you have any further questions or need additional support, please feel free to leave a comment.
Thank you for reading !!!