Welcome to this comprehensive guide on setting up an n8n server on Ubuntu using Docker. Whether you’re a beginner or have some experience, this tutorial will provide you with clear, actionable steps to create a powerful automation system.
Prerequisites
Before we dive into the installation process, ensure that you have the following prerequisites:
- Ubuntu or Debian operating system installed.
- Docker installed on your system. If you haven’t installed Docker yet, please refer to the Docker installation guide.
- Access to a terminal or command line interface.
- An email address for registration (Gmail, Outlook, etc.).
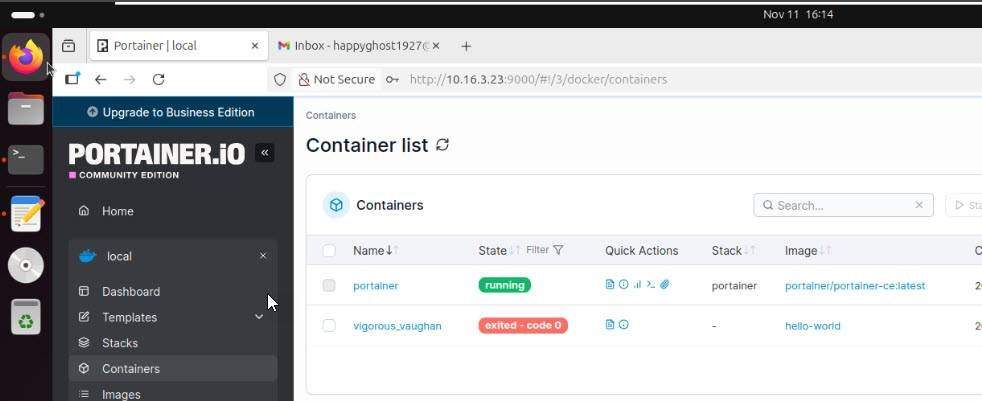
Step 1: Install Docker & Portainer
To manage your Docker containers easily, we recommend installing Portainer. This web-based tool allows you to monitor and control your containers without heavy reliance on the command line.
Read more: How to Install Docker & Portainer on Linux Ubuntu/Debian
Step 2: Prepare the Environment for n8n
Now, let’s prepare the environment for n8n installation:
Create a directory to store n8n configurations and data. You can name it n8n or any name of your choice.
mkdir ~/n8n

cd ~/n8n
Create a subdirectory named n8n-data to ensure persistent data storage.
mkdir n8n-dataSet the appropriate permissions for these folders to allow n8n to run smoothly. Use the following command:
sudo chown -R 1000:1000 n8n-data

sudo chmod -R 755 n8n-data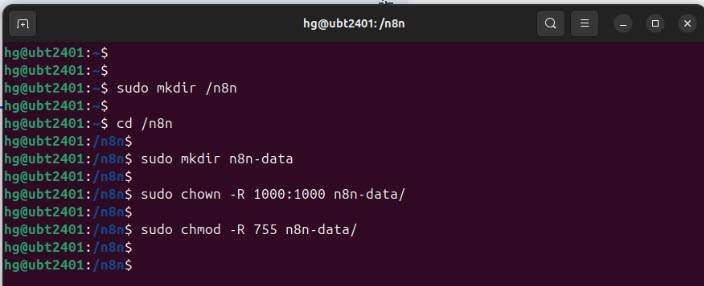
Step 3: Create Configuration Files
Next, you will need to create two essential files:
- .env: This file will store sensitive environment variables.
- docker-compose.yml: This file will contain the configuration for the n8n container.
touch .env docker-compose.ymlStep 4: Configure the .env File
Open the .env file
vim .envAnd declare the necessary environment variables:
### .ENV
N8N_HOST=0.0.0.0
N8N_PORT=5678
N8N_PROTOCOL=http
N8N_SECURE_COOKIE=false
NODE_ENV=production
GENERIC_TIMEZONE=Asia/Ho_Chi_Minh
Replace Your/Timezone with your actual time zone.
Step 5: Configure the docker-compose.yml File
Now, edit the docker-compose.yml file to set up the n8n container:
### YML
version: "3.8"

services:
  n8n:
    image: n8nio/n8n:latest
    container_name: n8n-server
    restart: always
    ports:
      - "5678:5678"
    env_file:
      - .env
    environment:
      - TZ=Asia/Ho_Chi_Minh
    volumes:
      - ./n8n-data:/home/node/.n8n
    user: "1000:1000"
Quick explanation of the components:
- version: “3.8”: Specifies the Docker Compose file format version being used.
- n8n: Defines a service named n8n that will run the application.
- image: n8nio/n8n:latest: Uses the official n8n image from Docker Hub.
- container_name: n8n-server: Assigns a custom name to the container for easier management.
- restart: always: Ensures the container automatically restarts if it stops or the system reboots.
- ports: “5678:5678”: Maps port 5678 on the host to port 5678 in the container for web access.
- env_file: .env: Loads environment variables from an external .env file.
- environment: TZ=Asia/Ho_Chi_Minh: Sets the container timezone to Vietnam time.
- volumes: ./n8n-data:/home/node/.n8n: Persists n8n data on the host to prevent data loss.
- user: “1000:1000”: Runs the container using a non-root user to avoid permission issues.
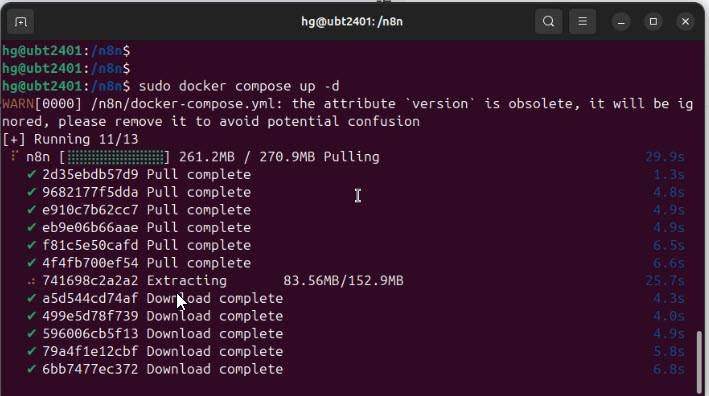
Step 6: Start the n8n Server
With all configurations set, it’s time to start the n8n server. Run the following command:
sudo docker-compose up -dThis command will download necessary files and set up the container. Wait for a few moments for the process to complete.
Step 7: Verify Container Status
Check if the n8n container is running properly with the command:
sudo docker ps -a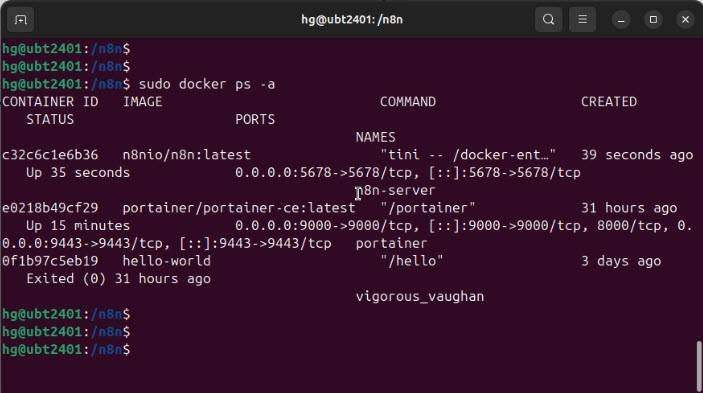
Step 8: Configure Firewall Settings
If your server has a firewall enabled, ensure that port 5678 is open:
sudo ufw status

sudo ufw allow 5678

sudo ufw reload

sudo ufw status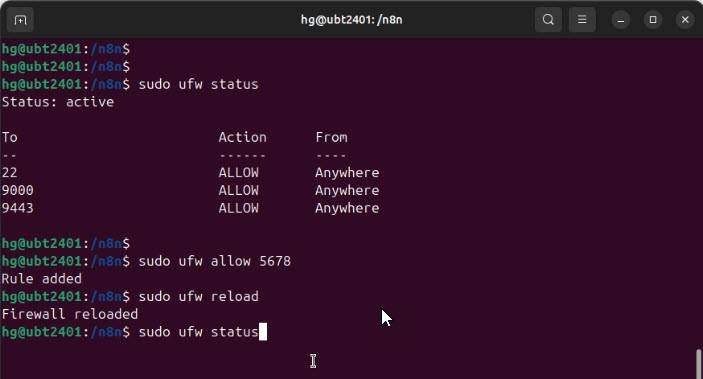
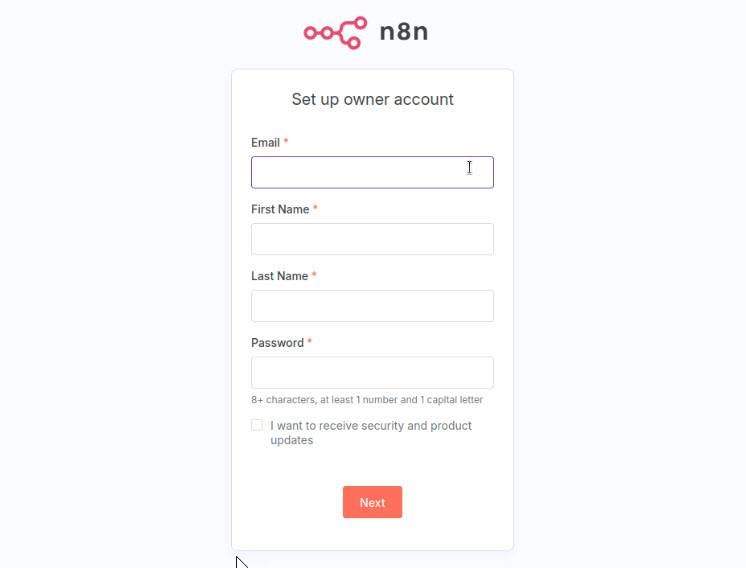
Step 9: Access n8n in Your Browser
Open your web browser and navigate to http://your-server-ip:5678.
You will be prompted to register using your email address. Fill in the required fields to create your account.
After account creation, n8n asks a few optional questions to personalize your setup:
- What best describes your company?
- Which role best describes you?
- Who will your automations mainly be for?
- How big is your company?
- How did you hear about n8n?
- These are used to tailor your experience but are not mandatory for functionality.

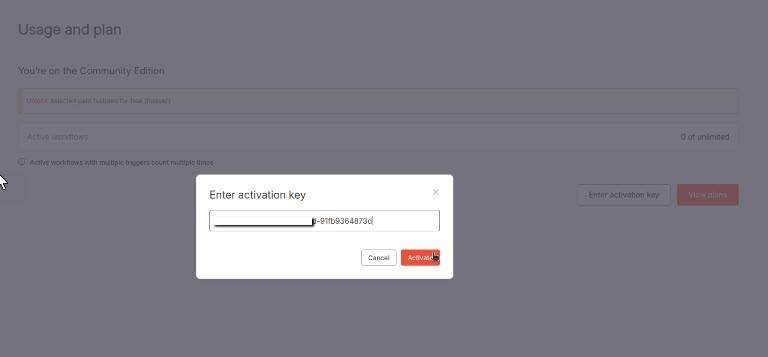
Step 10: Activate Advanced Features
After registration, check your email for a license key from n8n, navigate to: Settings – Usage and Plan –Enter Activation Key

Enter this key in the n8n interface to unlock advanced features like workflow history and debugging tools.
Conclusion
Congratulations! You have successfully installed the n8n server on Ubuntu using Docker. You can now create workflows and automate tasks efficiently. If you found this guide helpful, consider sharing it with others.
Read more
- Understanding n8n: The Automation Tool You Need
- Samba – Part 1 – Install Samba Server on Linux Ubuntu | Debian
- Set up a Mail Server with Postfix and Dovecot on Ubuntu/Debian
- Install and Configure OpenSSH Server on Ubuntu / Debian
- How to Install Ubuntu Server 22.04 LTS on VMware Workstation