Introduction
In our previous guide, we successfully Installed and Configured a WireGuard VPN Server on a Linux. Now, we will continue with the client-side setup for Windows. After completing these steps, your Windows computer will be able to connect securely to the WireGuard Server and route your internet traffic through the VPN tunnel.
Earlier, we created the client configuration profile, including the necessary .conf file and a QR code. For the Windows setup, we will use the .conf file that was downloaded from the server.

Read more
- WireGuard – Set Up a WireGuard VPN Server on a Linux VPS
- How to Set Up WireGuard VPN Client on Windows
- How to Set Up WireGuard VPN Client on Linux Ubuntu/LinuxMint/Debian-based
- How to Set Up WireGuard VPN Client on Linux CentOS/RockyLinux/AlmaLinux/RHEL-based
- How to Set Up WireGuard VPN Client on Android
Downloading and Installing WireGuard Client on Windows
Begin by visiting the official WireGuard website to download the WireGuard Client installer for Windows.
- Download the Windows installer from the official WireGuard website 👉 https://www.wireguard.com/install/
- Run the installer and follow the prompts to complete the installation just like any other standard Windows application.
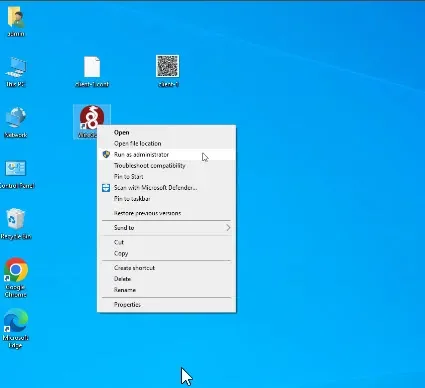
Once the installation finishes, the WireGuard application may launch automatically. For now, close the application.
Importing the Client Configuration Profile
Next, open the WireGuard application as an Administrator to ensure it has the permissions needed to manage VPN connections on your system.
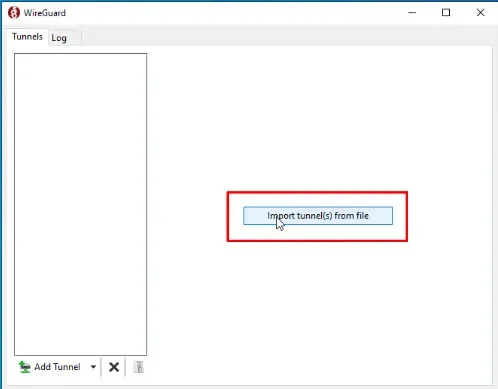
Within the main WireGuard interface, click Import tunnel from file.
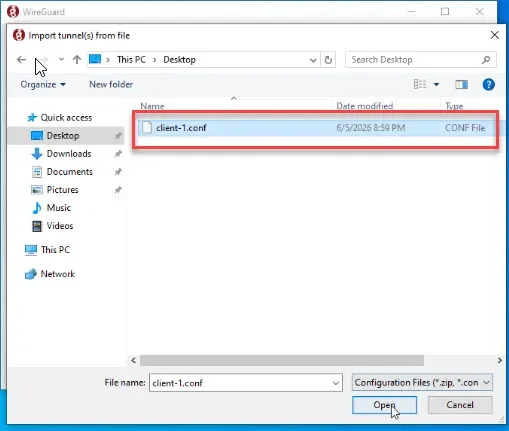
Select the client configuration file (.conf) that you previously downloaded from the server and import it.
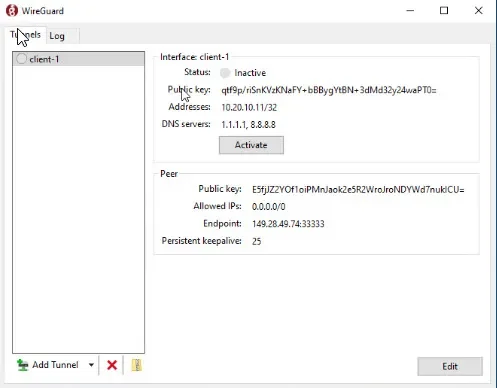
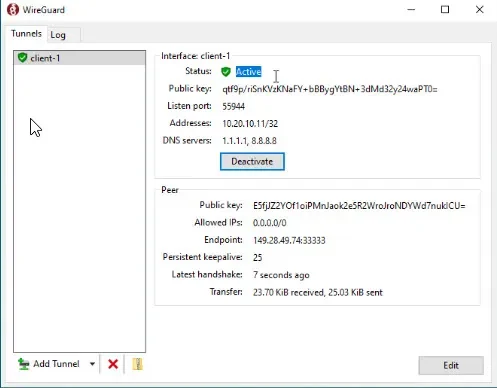
Upon successful import, the new tunnel will appear in the list with details such as the client IP address, DNS servers, server public key, endpoint, and the range of traffic routed through the VPN.
Activating and Verifying the VPN Connection
To start the VPN connection, simply click Activate. WireGuard will establish the tunnel to the VPN Server.
If the connection is successful, the status will display Active, and you will see data being transmitted and received in the Transfer section.
Testing the VPN Connection
Open the Windows Command Prompt to perform a basic connectivity test.
Ping the VPN IP address of the WireGuard Server to ensure your Windows machine can reach the server through the tunnel.
If the ping replies successfully, your connection to the VPN Server is confirmed.
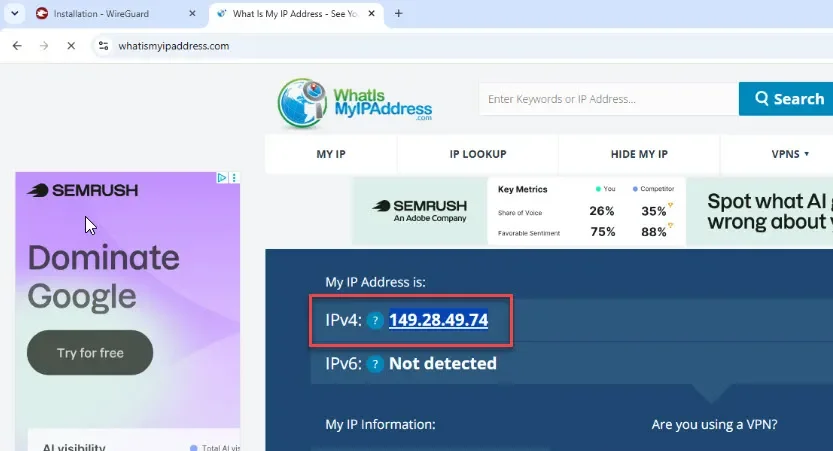
Another way to verify is by visiting a public IP checking website: https://www.whatismyip.com/
If the IP address shown matches the public IP of your VPS, it confirms that your Windows machine’s internet traffic is being routed through the WireGuard VPN Server.
Conclusion
With these steps, you have completed the installation of the WireGuard Client on Windows, imported the configuration profile, and successfully connected to your WireGuard VPN Server. You can now browse the internet securely through your VPN tunnel.
For those following along with this multi-part series, this guide completes the client-side setup on Windows following the server setup in Part 1. Stay tuned for further tutorials to enhance your VPN experience.