Introduction
SNMP (Simple Network Management Protocol) is a network protocol used to remotely monitor and manage network devices such as switches, routers, firewalls, and more. In this article, we’ll walk through the steps to configure SNMP version 2 on the Cisco CBS350 Series switch using its Web GUI interface, with no command-line interface (CLI) required.
This guide is ideal for system administrators, network engineers, or anyone looking to monitor a Cisco CBS350 switch using SNMP tools like Zabbix, PRTG, or SolarWinds.
Read more
- Install and Configure OpenLiteSpeed Webserver on Ubuntu/Debian
- Install and Configure OpenSSH Server on Ubuntu / Debian
- Zabbix – How to Monitor Linux Host via SNMP v3 on Zabbix Server
- How to Install and Configure ownCloud Server on Ubuntu/Debian
- How to Install and Configure Snipe-IT Tool on Ubuntu / Debian
Step-by-Step Configuration
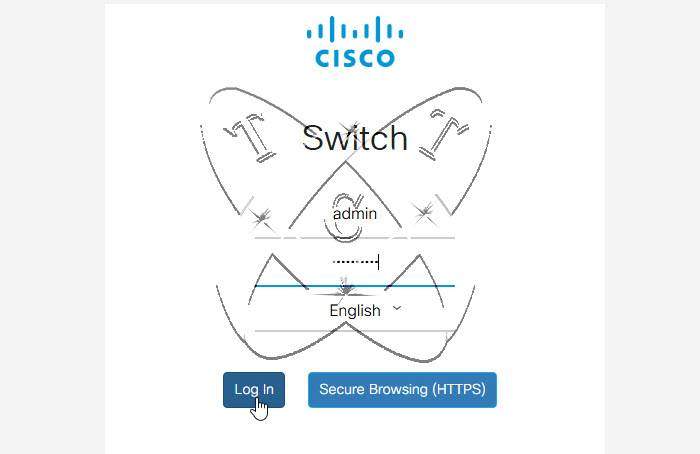
Access the Switch’s Web Management Interface
- Open your web browser and enter the IP address of the Cisco CBS350 switch into the address bar.
- Log in using the administrator username and password.
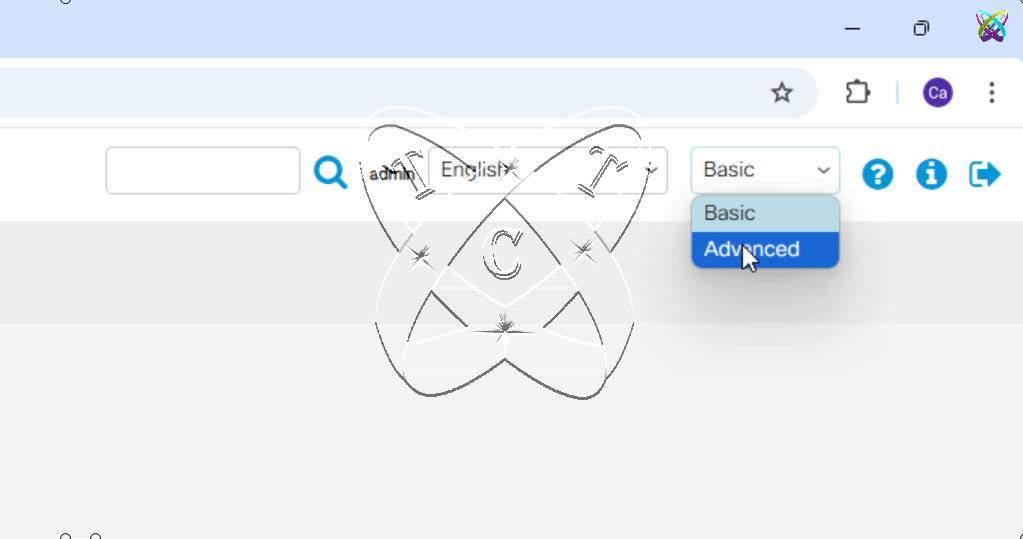
Switch to Advanced Mode
After logging in, switch to Advanced mode (top right corner) to gain access to all available configuration features.
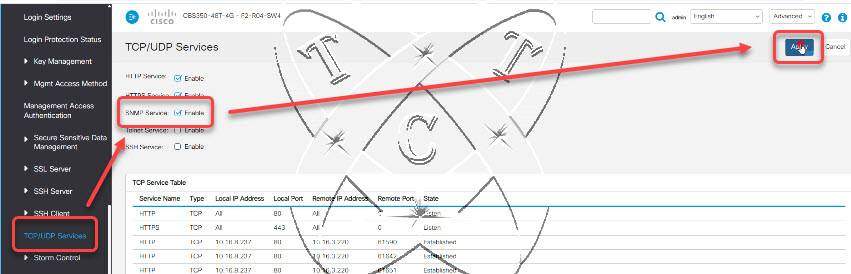
Enable SNMP Service
From the left sidebar, go to Security.
Scroll down and click TCP/UDP Services.
Check the box for SNMP Service to enable it.
Click Apply to save the changes.
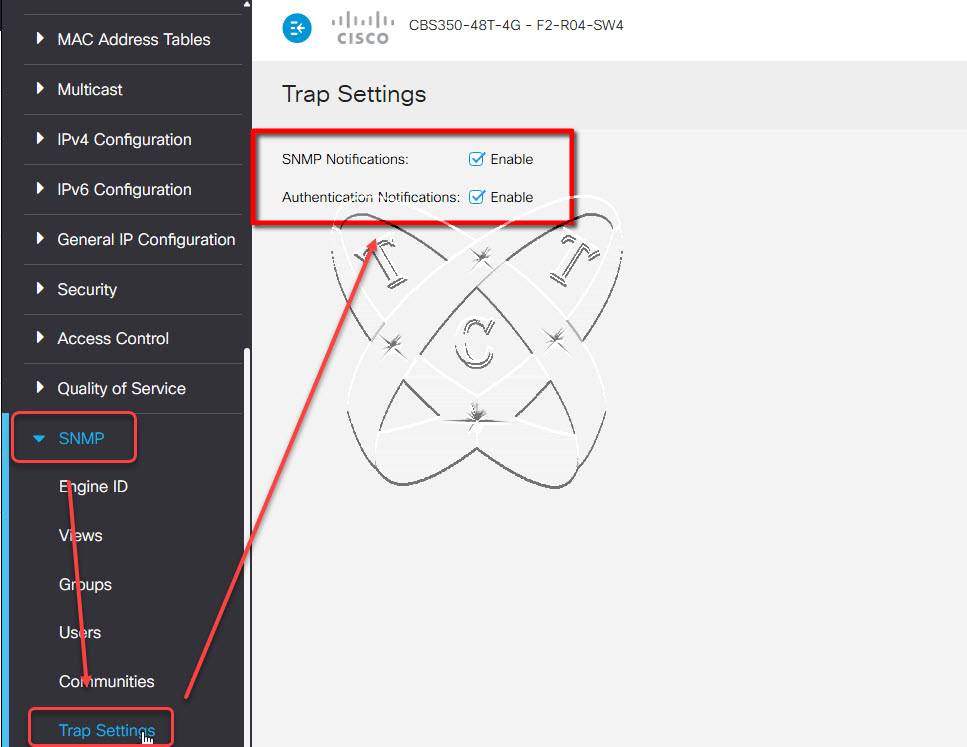
Configure Trap Settings
In the SNMP section, navigate to the Trap Settings tab.
Make sure the necessary options are checked so that the switch can send SNMP traps when network events occur.
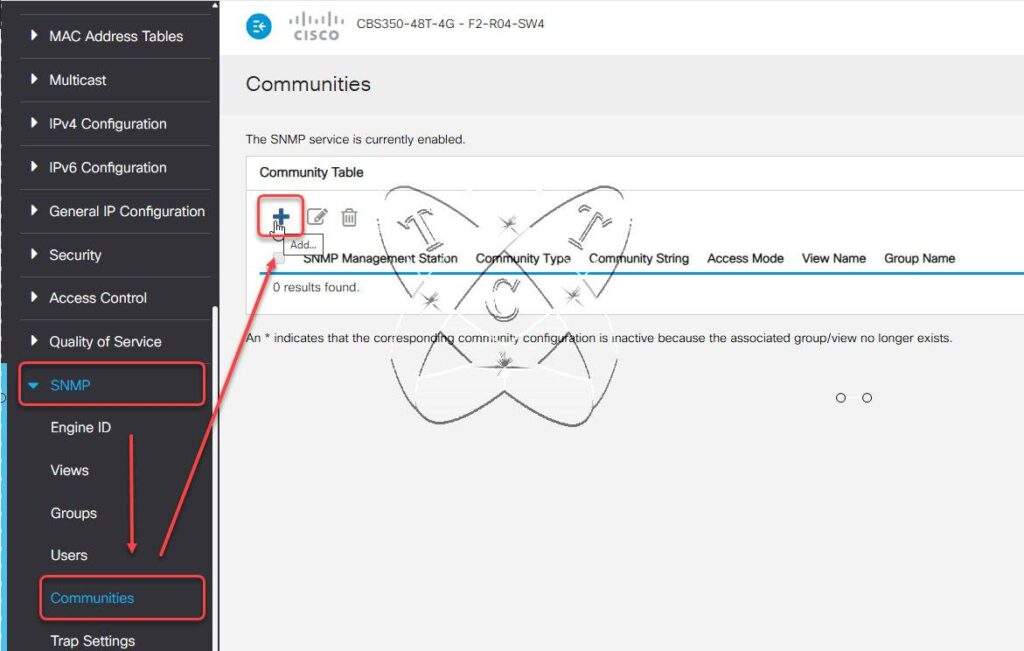
Create an SNMP Community
Switch to the SNMP Communities tab.
Click the + icon to add a new SNMP community.
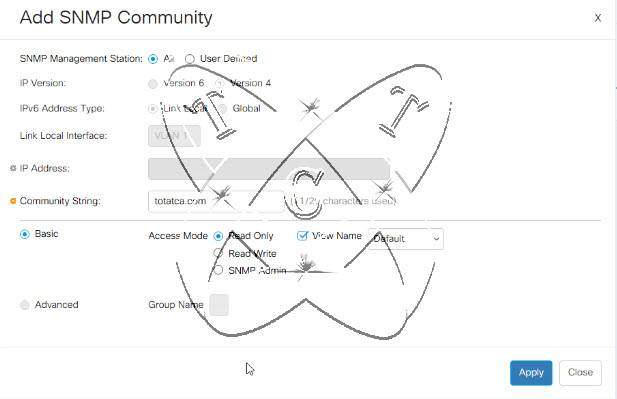
Configure the following parameters:
- SNMP Management Station: This setting defines which SNMP managers (monitoring systems) are allowed to query the device.
- All: Allows any SNMP manager (no IP restriction) to access SNMP data. Recommended for testing or small environments.
- User Defined: Lets you specify which IP addresses (or IP ranges) are permitted to access SNMP. Use this in production environments to limit access and improve security.
- In this example, we’ll choose All for simplicity and flexibility during monitoring setup.
- Community String: This is a shared password used by SNMP managers to authenticate when accessing the switch.
- Common default values: public (read-only), private (read-write).
- You can enter any string you want, but in production, avoid using default names like public.
- Example: Enter totatca.com as a custom string for read-only access.
- Basic Access Mode: This defines the permissions associated with the community string.
- Read Only: SNMP managers can retrieve (read) data, but cannot change anything. This is the most common and safest setting for monitoring.
- Read Write: SNMP managers can both read data and modify device settings (if supported). Use this only in highly trusted environments.
- For this guide, choose Read Only to ensure safe monitoring without risking configuration changes.
- View Name: The SNMP View limits which parts of the Management Information Base (MIB) the SNMP manager can access.
- Default – Grants access to the standard, most commonly needed SNMP objects (system info, interfaces, traffic counters, etc.).
- Custom View – You can define a more restricted view manually (requires prior setup in the SNMP Views section).
Once completed, click Apply to apply the settings.
Save the Configuration Permanently
Click the Save button at the top right corner of the interface.
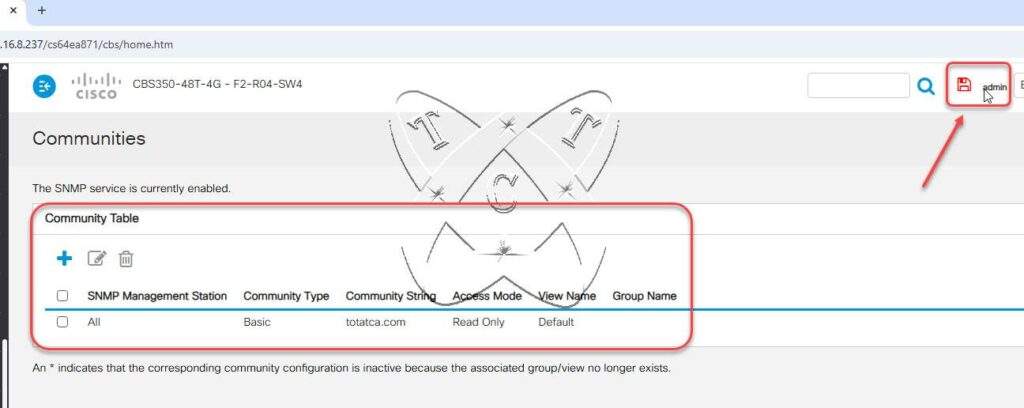
This step ensures your SNMP configuration is stored in the device’s memory and will not be lost after a reboot.
Summary
You’ve now successfully configured SNMP v2 on your Cisco CBS350 Series switch via the Web GUI. This setup allows for easier remote monitoring of your network devices, helps detect issues early, and enhances overall network infrastructure management.