Welcome to totatca.com !
In this post, we will together explore How to Install and Configure an ownCloud Server on the Ubuntu or Debian system.
ownCloud is an open-source data management and sharing system designed to provide a secure and efficient solution for storing and sharing files. Developed by ownCloud GmbH, ownCloud allows users to store their data on their servers or in a cloud environment, keeping data under control and secure.
Here are some key features of ownCloud:
- File Management and Sharing:
- ownCloud provides a user-friendly interface for uploading, downloading, and managing files online.
- Users can create and organize folders, share them with others, and manage access permissions.
- Data Synchronization:
- Synchronization features help users maintain synchronized backups of data across multiple devices.
- Changes made on one device will automatically update on all other devices.
- Security:
- ownCloud offers security features such as data encryption during transmission and storage.
- Administrators have the ability to control and monitor user access rights.
- Version Control:
- ownCloud automatically tracks previous versions of files, allowing users to restore to a previous version if needed.
- Integrated Applications:
- In addition to basic storage functions, ownCloud supports various additional applications such as calendars, contacts, notes, and more.
- Cloud Integration:
- Users can connect ownCloud with other cloud storage services like Dropbox or Google Drive to manage all data from one interface.
- Cross-Platform Support:
- ownCloud supports multiple platforms, including Windows, macOS, Linux, Android, and iOS.
- Easy Setup:
- Installing and deploying ownCloud is straightforward, allowing administrators to optimize system management.
ownCloud provides flexibility and significant control for users and businesses in managing, sharing, and securing their data.
Prerequisites
- Operating system: Applies to Ubuntu or Debian or Debian-based
- User privileges: root or non-root user with sudo privileges
- LAMP stack has been installed on the system
Read more: How to Install LAMP stack on Ubuntu or Debian - Others: At the time of writing, ownCloud requires PHP version 7.4 or lower.
Read more: How to Install Multi PHP version on Ubuntu or Debian
Step-by-step Install and Config ownCloud Server
Step 1 – Installing ownCloud dependencies
First, update the package repository for your system with the following command:
sudo apt update
Next, install the required ownCloud dependencies using the following command:
Note: In this guide, I’m using PHP version 7.4. If you are using a lower version, replace 7.4 with your PHP version number
sudo apt install -y vim unzip zip wget php7.4-apcu php7.4-bcmath php7.4-cli php7.4-common php7.4-curl php7.4-gd php7.4-gmp php7.4-imagick php7.4-intl php7.4-mbstring php7.4-mysql php7.4-zip php7.4-xml php7.4-ldap
Step 2 – Create a database for ownCloud
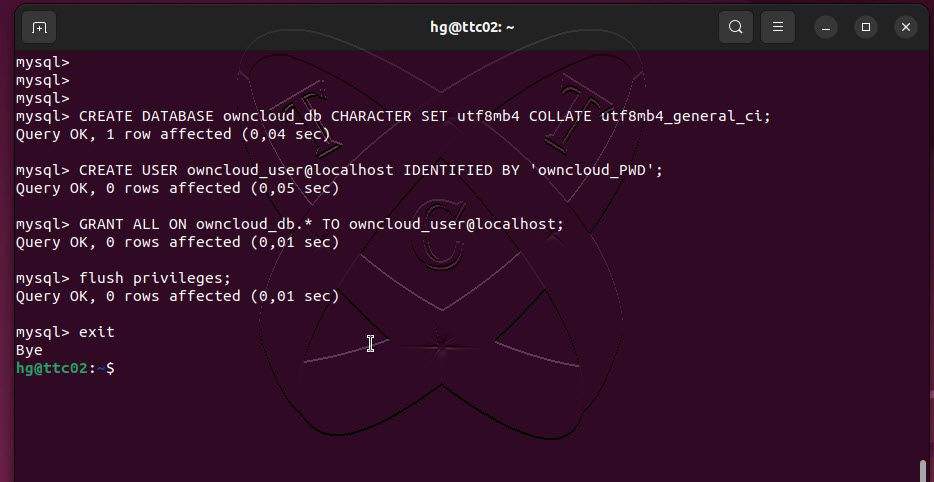
Log in to the MySQL/MariaDB server using the following command:
sudo mysql -uroot -p
Create a new database for ownCloud named owncloud_db:
CREATE DATABASE owncloud_db CHARACTER SET utf8mb4 COLLATE utf8mb4_general_ci;
Create a new user database named owncloud_user with the password owncloud_PWD:
CREATE USER owncloud_user@localhost IDENTIFIED BY
'owncloud_PWD';
Grant all access rights on the owncloud_db database to the user owncloud_user:
GRANT ALL ON owncloud_db.* TO owncloud_user@localhost;
Reload and exit the database server
FLUSH PRIVILEGES;
EXIT;
Step 3 – Download and Extract ownCloud
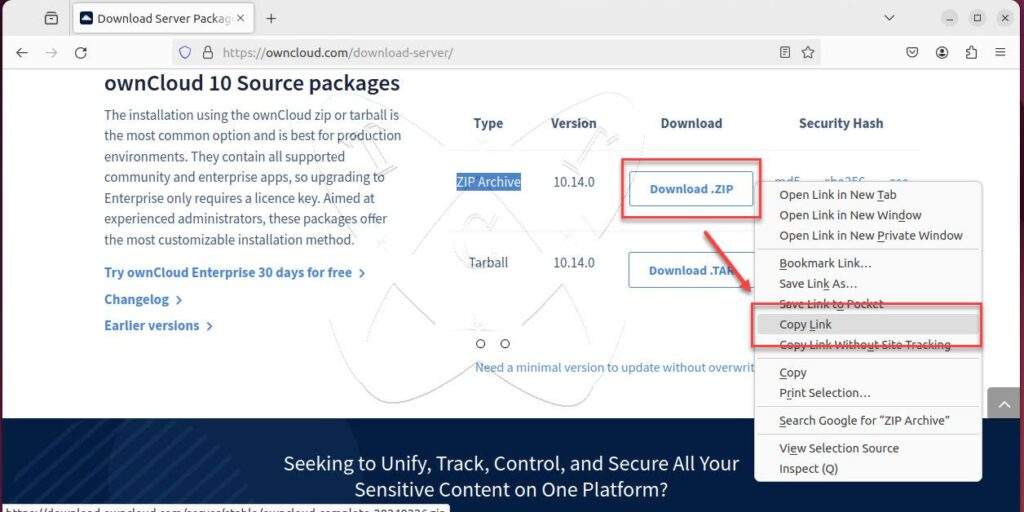
Open your preferred browser and go to the official ownCloud website here to download the latest version of ownCloud.
On the download page, scroll down to the ownCloud 10 Source packages section, right-click on Download .ZIP and choose Copy link.
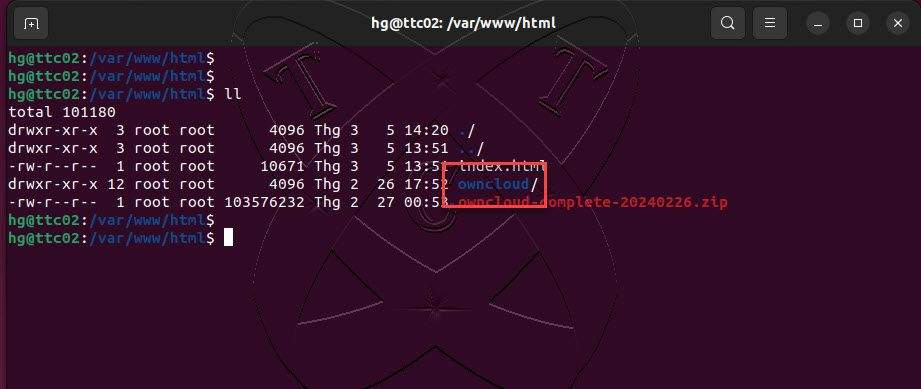
Return to the command line window and navigate to the root directory of the webroot with the following command:
cd /var/www/html
Execute the following command to download the compressed file of ownCloud
sudo wget -O owncloud.zip Paste_link_to_here
Extract the downloaded file:
sudo unzip owncloud.zip
Verify that the directory has been successfully extracted:
ll
Step 4 – Configure ownCloud
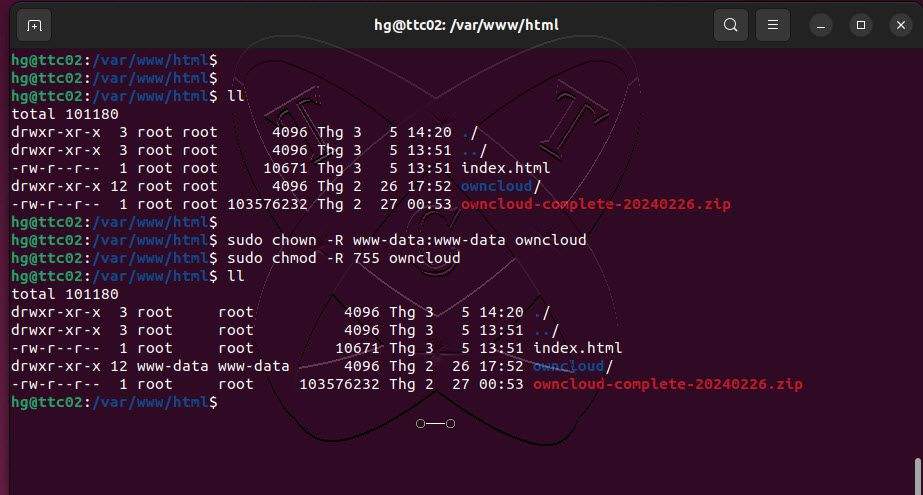
Next, change ownership and permissions on the owncloud directory:
sudo chown -R www-data:www-data owncloud
sudo chmod -R 755 owncloud
ll
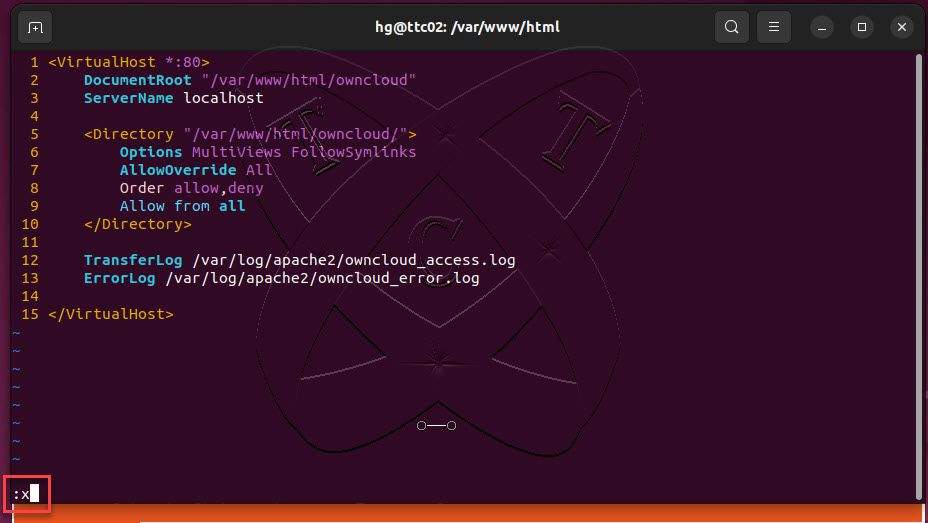
Create a virtual host configuration file for ownCloud named owncloud.conf
sudo vim /etc/apache2/sites-available/owncloud.conf
Add new content below:
<VirtualHost *:80>
    DocumentRoot "/var/www/html/owncloud"
    ServerName localhost

    <Directory "/var/www/html/owncloud/">
        Options MultiViews FollowSymlinks
        AllowOverride All
        Order allow,deny
        Allow from all
    </Directory>

    TransferLog /var/log/apache2/owncloud_access.log
    ErrorLog /var/log/apache2/owncloud_error.log

</VirtualHost>
Save and exit the file
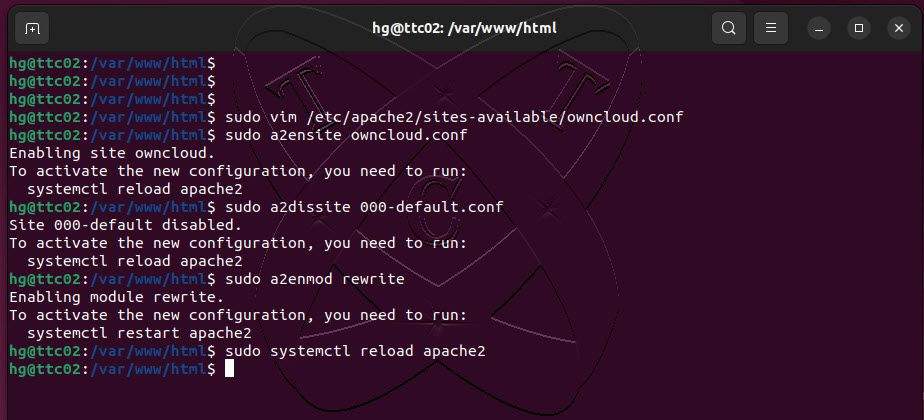
Next, activate the virtual host configuration file you just created while disabling the default configuration of the Apache service:
sudo a2ensite owncloud.conf
sudo a2dissite 000-default.conf
Finally, enable the rewrite mode and reload the Apache service to apply the changes:
sudo a2enmod rewrite
sudo systemctl reload apache2
Step 5 – Complete ownCloud Server Installation
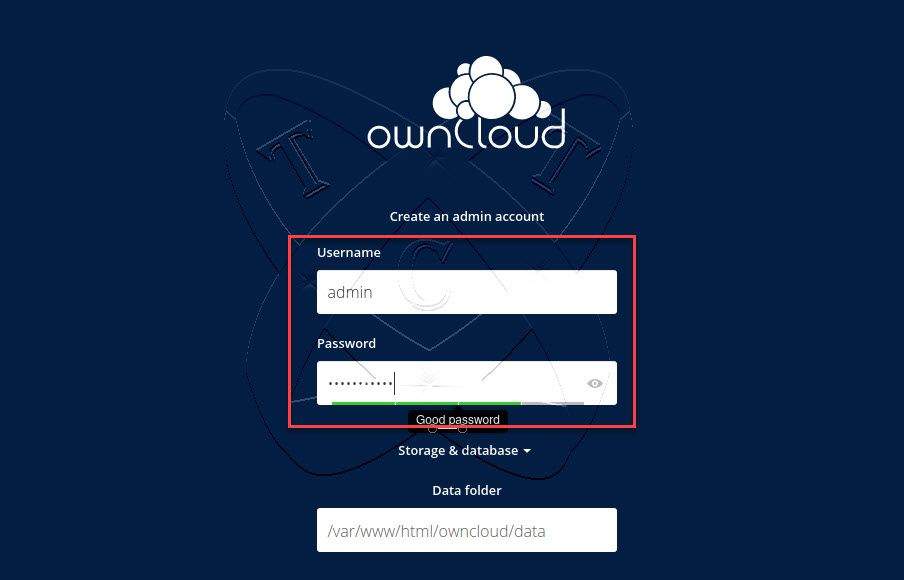
At this point, the configurations are complete. Use your preferred browser to access the address http://Server-IP to complete the ownCloud server installation process.
On the first page, please provide the username and password for your administrator account:
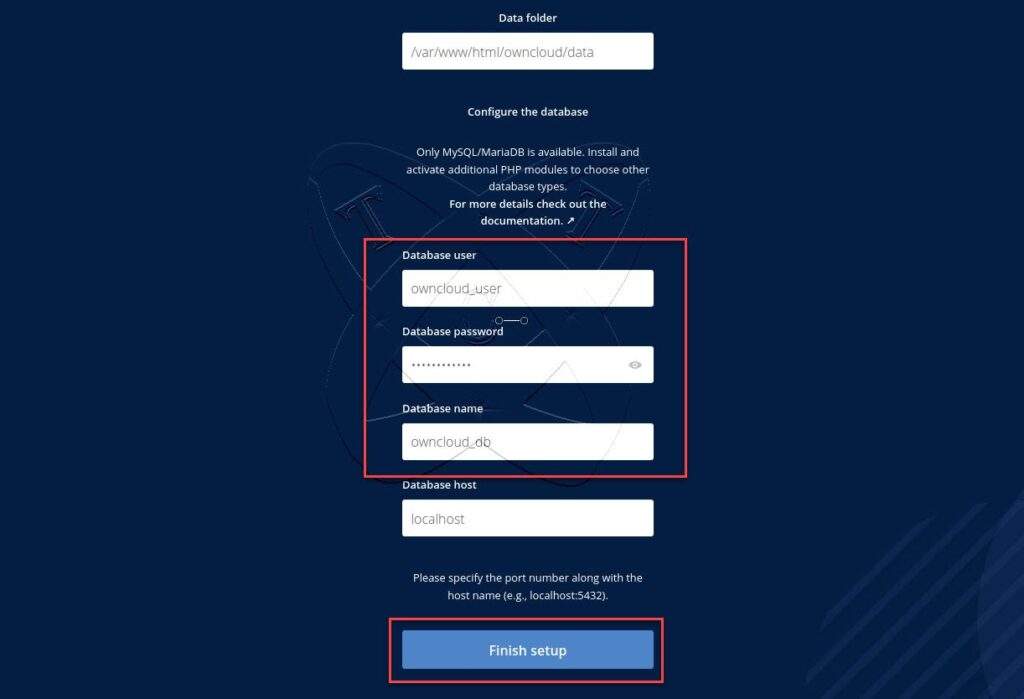
Next, fill in the information about the database created in Step 2
- Database Name: owncloud_db
- Database User: owncloud_user
- Database Password: owncloud_PWD
After completing, click on the Finish setup button to finish the installation
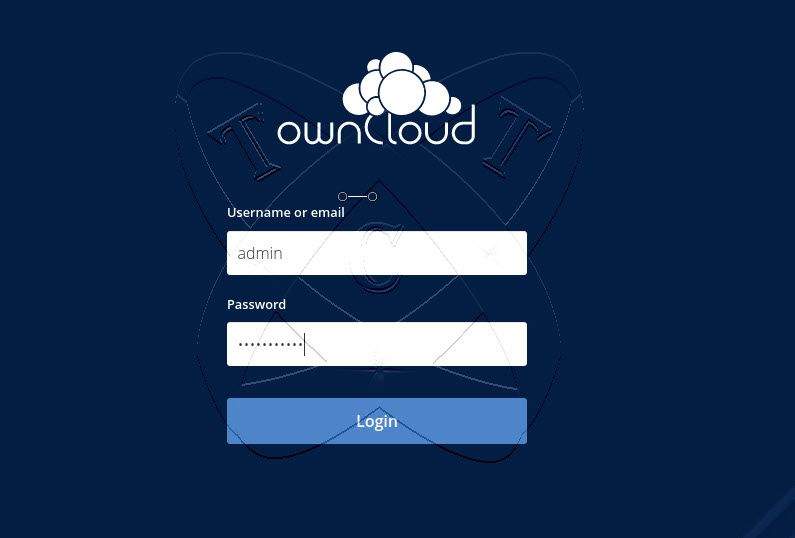
The installation process is successful, and the system will take you to the login page. Enter the username and password you provided earlier and click Login:
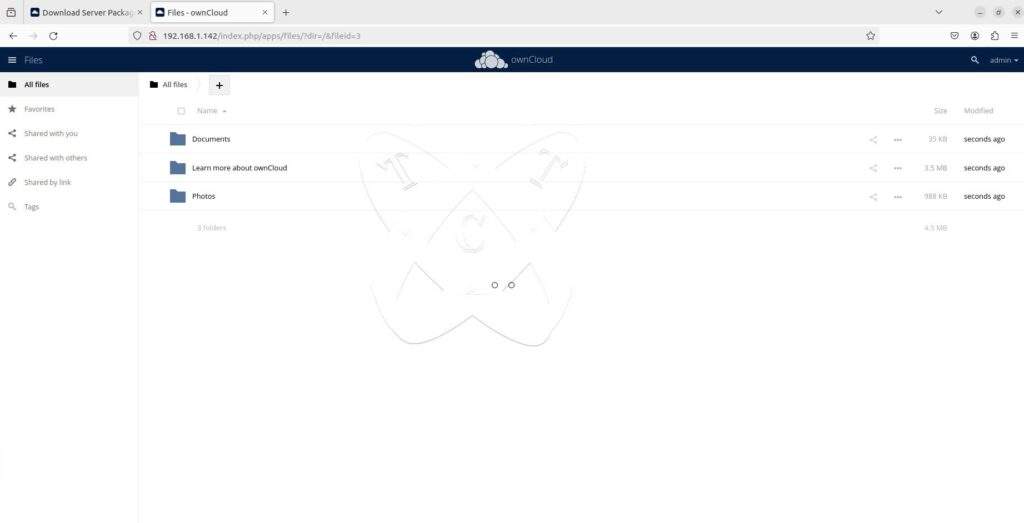
And here is the admin page of your ownCloud server:
Conclusions
Once completed, users can access the ownCloud admin page to manage and share their files, leveraging the platform’s features for secure and efficient data storage and collaboration. The flexibility and control provided by ownCloud make it a valuable solution for individuals and businesses seeking a self-hosted file-sharing and management system