OpenLiteSpeed is a lightweight, high-performance, and easy-to-manage web server. It provides fast processing speeds, supports various website optimization features, and offers an intuitive admin interface. This article will guide you through installing OpenLiteSpeed on Ubuntu/Debian in a detailed and easy-to-understand manner.
Step 1 – Update the System
Before installing any software, ensure your system is fully updated to avoid unexpected errors. Run the following command to update the package list and security patches:
sudo apt update
This command will check and fetch the latest package list from Ubuntu’s repositories.
Step 2 – Install Required Tools
Some essential tools like net-tools, curl, and wget facilitate a smooth installation process. These tools are used for downloading and checking network connections. Run the following command to install them:
sudo apt install net-tools curl wget -y
Step 3 – Download and Install OpenLiteSpeed
To install OpenLiteSpeed, we will use the official script from the LiteSpeed Repository. First, download the script:
wget -O openlitespeed.sh https://repo.litespeed.sh
The wget command will download the script and save it as openlitespeed.sh.
After downloading, execute the script to add the OpenLiteSpeed repository to the system:
sudo bash openlitespeed.sh
Next, proceed with the OpenLiteSpeed installation using the command:
sudo apt install openlitespeed -y
This process may take some time, so please wait until it completes.
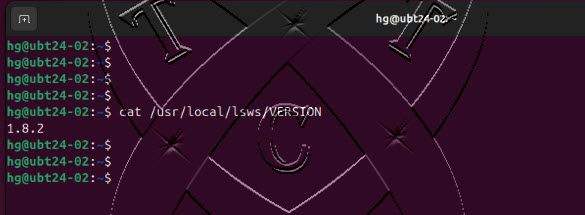
After a successful installation, you can verify the installed version of OpenLiteSpeed using the following command:
cat /usr/local/lsws/VERSION
This helps confirm that OpenLiteSpeed is installed with the correct version.
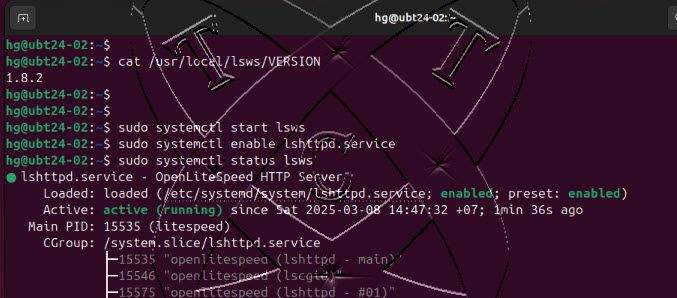
Step 4 – Enable and Start OpenLiteSpeed
Once installed, ensure OpenLiteSpeed is set to start automatically when the system boots. To do so, run the following command:
sudo systemctl enable lshttpd.service
This ensures the OpenLiteSpeed service runs automatically upon system restart.
sudo systemctl start lsws
To check the status of OpenLiteSpeed, use the following command:
sudo systemctl status lsws
If everything is functioning properly, you will see a message indicating that the service is running.
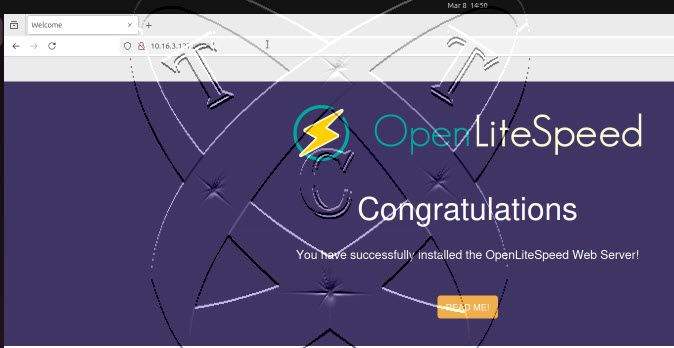
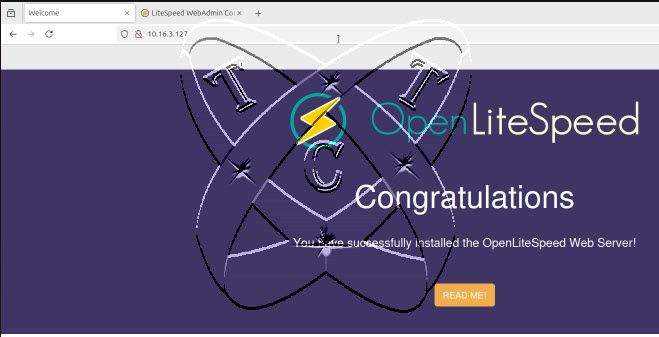
At this point, the OpenLiteSpeed web server is up and running. By default, the web server listens on port 7080. You can access the admin panel at http://IP-Server:7080.
Step 5 – Access the OpenLiteSpeed Admin Panel
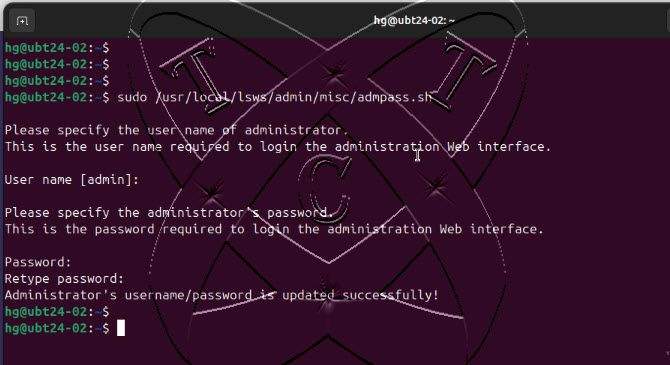
5.1. Set Admin Password
To access the OpenLiteSpeed admin panel, you need to set a password for the admin account by running:
sudo bash /usr/local/lsws/admin/misc/admpass.sh
You will be prompted to enter and confirm a new password. Remember this password, as it will be required to access the admin panel.
5.2. Access the OpenLiteSpeed Admin Panel
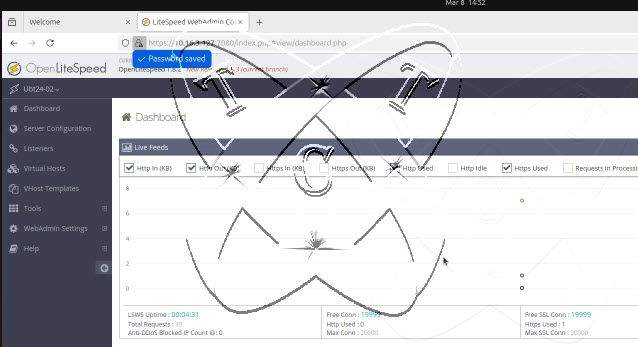
Now, please visit http://IP-Server:7080 to log in to the OpenLiteSpeed Admin Panel. Here, you can easily manage and configure OpenLiteSpeed: set up virtual hosts, configure HTTP/HTTPS, manage PHP, optimize performance, and monitor server activity.
5.3. Change Default Port from 8088 to 80
By default, OpenLiteSpeed serves websites on port 8088. However, you can change this to port 80 so that users can access the website without specifying a port number.
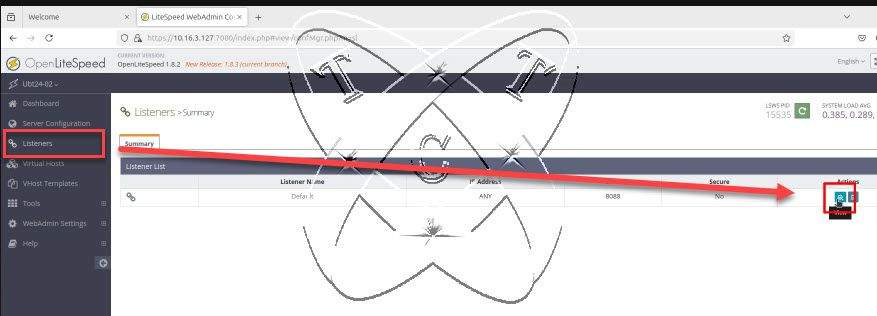
In the OpenLiteSpeed dashboard, navigate to Listeners and click View.
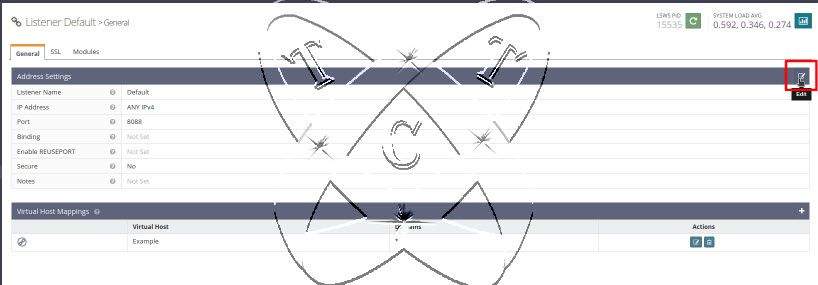
In the Listerner Default page, click Edit
In the Address Settings section, change the port value from 8088 to 80.
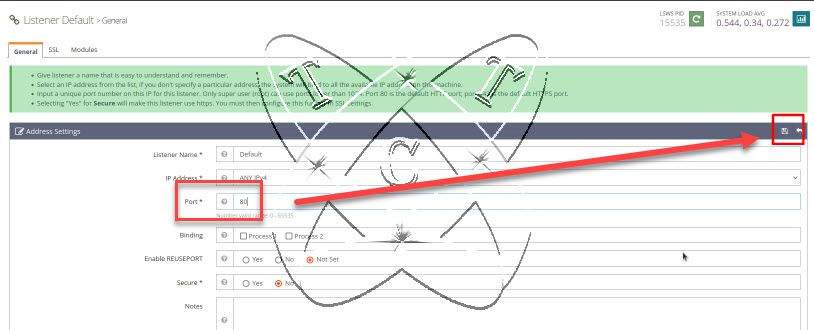
Click Save to apply the changes.
Now, you can access your website directly using its IP address or domain without specifying a port number.
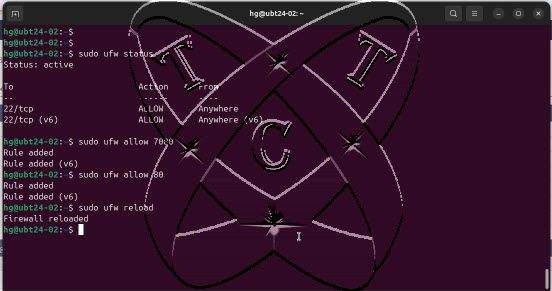
Step 6 – Configure Firewall
By default, OpenLiteSpeed uses specific ports for management and website serving. We need to open these ports to allow access. Skip this step if the UFW firewall is not enabled on your system.
sudo ufw enable
sudo ufw status
sudo ufw allow 80
sudo ufw allow 7080
sudo ufw reload
Explanation:
- Port 7080: Used for accessing the OpenLiteSpeed admin panel.
- Port 80: Default HTTP port for serving websites.
Conclusion
You have now successfully installed OpenLiteSpeed on Ubuntu. This is a powerful, flexible, easy-to-use, and high-performance web server. You can further configure features such as setting up Virtual Hosts, installing PHP, or optimizing website performance.
Good luck!