In this guide, we will walk through the steps to connect ChatGPT (via OpenAI) with n8n using the OpenAI API. After successfully creating your OpenAI API Key, you can integrate it into n8n for utilizing GPT models in your workflows. This process involves setting up an OpenAI Credential, which is a one-time setup that can be reused across all workflows in n8n.
Note: If you haven’t created your OpenAI API Key yet, please refer to the previous guide: How to Create Your OpenAI API Key: A Step-by-Step Guide
Step 1: Access the Credentials Page
Log in to the n8n management interface. From the left-side menu, select Credentials.
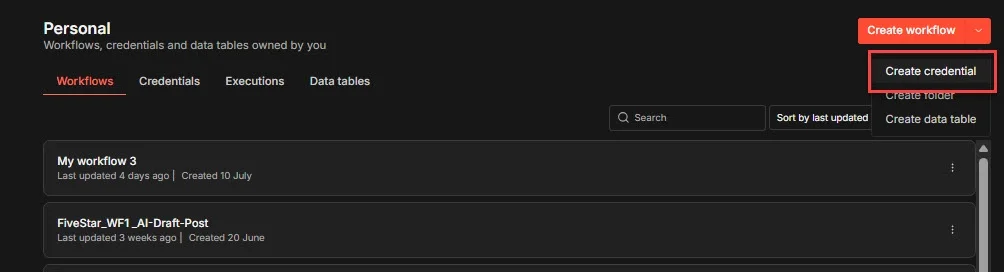
This section stores connection information for various services such as OpenAI, Google Drive, Gmail, Telegram, and Microsoft 365. Setting up credentials prevents the need to re-enter your API Key every time you create a new workflow.
Step 2: Create a New Credential
Click on the Create Credential button located in the top right corner. In the search box, type: OpenAI
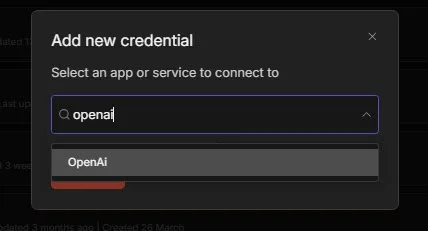
Then select OpenAI account. This action will open a credential configuration window.
Step 3: Configure Your OpenAI
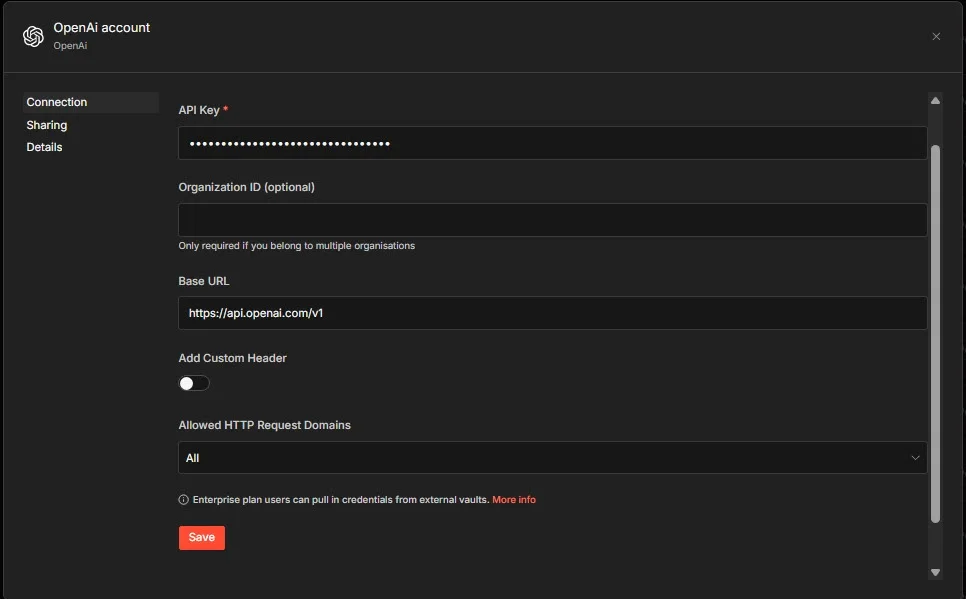
- In the field labeled API Key , paste the OpenAI API Key that you generated earlier. For example:
sk-proj-xxxxxxxxxxxxxxxxxxxxxxxxThis information is essential for n8n to authenticate and communicate with OpenAI.
- The field Organization ID (optional) can be left blank unless your OpenAI account is associated with multiple organizations. Most individual users or small businesses will not need to configure this field.
- The default Base URL should be:
https://api.openai.com/v1This is the official API address for OpenAI. It is advisable to keep this value unchanged unless using a compatible OpenAI API service (such as Azure OpenAI or other API providers).
- The section Add Custom Header is set to Off by default. You do not need to enable this option when connecting directly to OpenAI. This option is only necessary when the API requires additional headers.
- In the section Allowed HTTP Request Domains, keep the value as:
AllIf you wish to enhance security, you can restrict the credential to send requests only to certain domains. However, the default setting is suitable for most users.
After filling out all the fields, click on Save. If your API Key is valid, the credential will be saved successfully and will appear in the credential list.
Step 4: Use the Credential in a Workflow
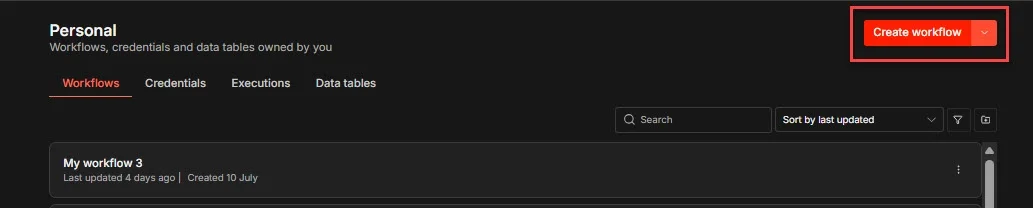
Return to the main screen of n8n and select Create Workflow to start a new workflow.
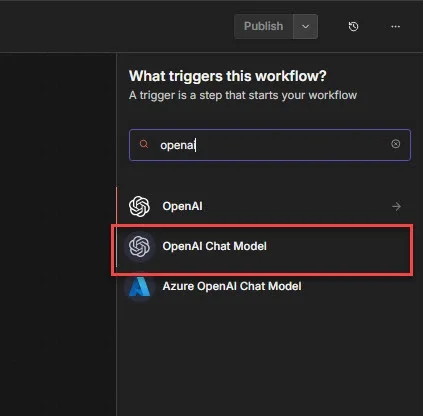
Click the + button and search for OpenAI Chat Model, then add this node to your workflow.
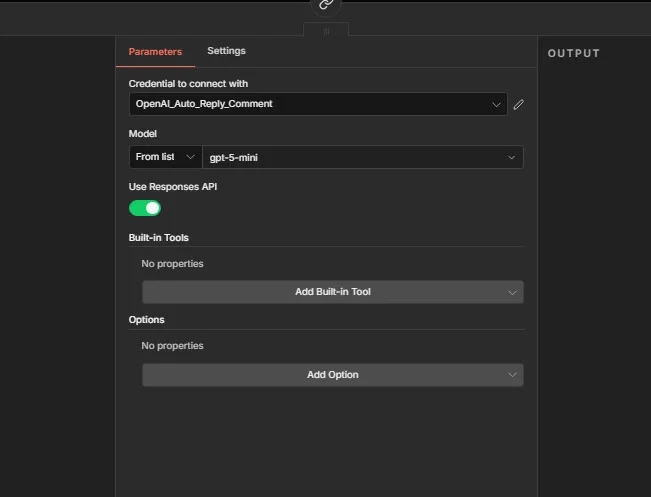
Within the OpenAI Chat Model node, select the credential you just created from the Credential dropdown menu. For example: OpenAI account
You won’t need to re-enter the API Key.
In the Model section, choose the desired model you want to use. For instance:
- GPT-5
- GPT-5 Mini
Afterward, connect this node with the AI Agent or other AI nodes to begin building your workflow.
Troubleshooting Common Issues
- Invalid API Key: This error indicates that the API Key is incorrect or has been deleted. Generate a new API Key on the OpenAI platform and update your credentials.
- Insufficient quota: This message means your OpenAI API account has no credit left. Please add more funds to your API account.
- 401 Unauthorized: OpenAI has refused authentication, usually due to an invalid or incorrectly entered API Key.
- Model list not displaying: Some versions of n8n may not load the model list. In such cases, update n8n to the latest version, or manually enter the model name if the node supports it.
Read more
- How to Create Your OpenAI API Key: A Step-by-Step Guide
- How to Create a Claude API Key: A Comprehensive Guide
- OpenAI Officially Introduces GPT-5.6: Sol, Terra, and Luna – Which Model Should You Choose?
- What is n8n? An Introduction to the Workflow Automation Tool
- Understanding n8n: The Automation Tool You Need
Conclusion
Once you have successfully created the OpenAI credential, you can simply select this credential in nodes such as the OpenAI Chat Model, AI Agent, or other AI nodes without re-entering the API Key. This method of managing credentials is recommended in n8n, making it easier, safer, and more convenient to build and manage your workflows.