Desktop Client for GLPI connects directly to your GLPI 10.x server via the official GLPI REST API.
Follow this 3-minute guide to enable the REST API on your GLPI server, generate your App-Token and User-Token, and sign in from Windows.
Requirements: GLPI 10.x with administrator access to enable the API (or ask your GLPI administrator for your server’s
apirest.phpURL andApp-Token).
Read more
- How to Install and Configure GLPI 10 on Debian
- How to Install GLPI with NGINX on Ubuntu
- How to Synchronize Users from Active Directory to GLPI
Step 1: Enable the REST API in GLPI
- Sign in to your GLPI web interface with an administrator account.
- In the left navigation menu, go to Setup → General.
- Open the API tab.
- Set the following options to Yes:
- Enable Rest API:
Yes - Enable login with external token:
Yes(required for User-Token login — recommended) - Enable login with credentials:
Yes(optional — only needed if you prefer Username & Password)
- Enable Rest API:
- Note the URL of the API shown at the top of the page (for example:
https://glpi.yourcompany.com/apirest.phporhttp://10.16.1.9/glpi/apirest.php). - Click Save.
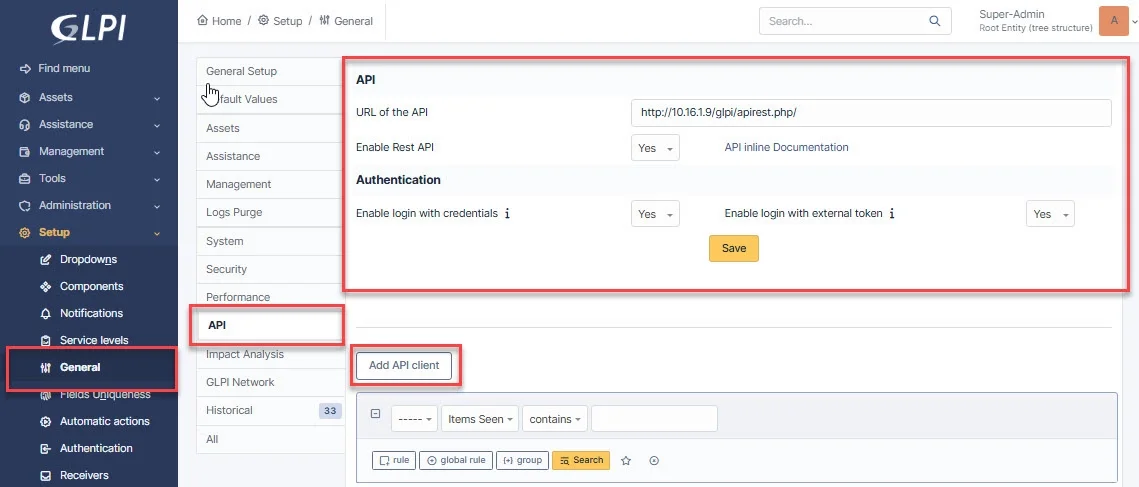
Step 2: Create an API Client & Copy the App-Token
- Still on the Setup → General → API page, scroll down to API clients and click Add API client.
- Fill in the details:
- Name:
Desktop Client for GLPI - Active:
Yes - IPv4 address range: Leave blank to allow connections from any IP, or enter your IT admin subnet (e.g.,
10.16.0.1–10.16.255.254). - Application token (app_token): Check Regenerate to generate a new token.
- Name:
- Click Add (or Save).
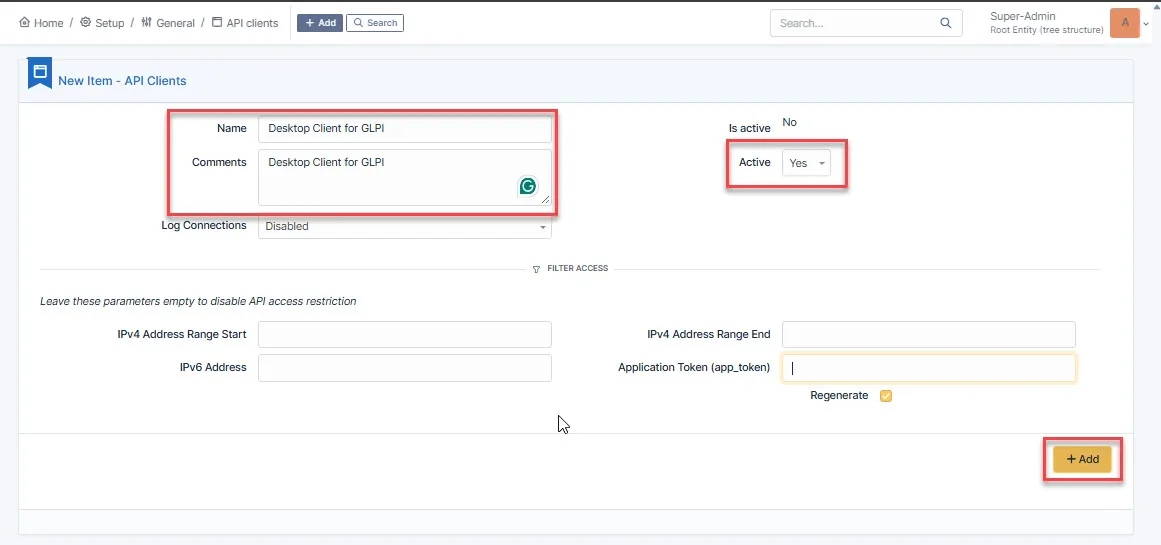
Re-open the API client you just created and copy the Application token (app_token)
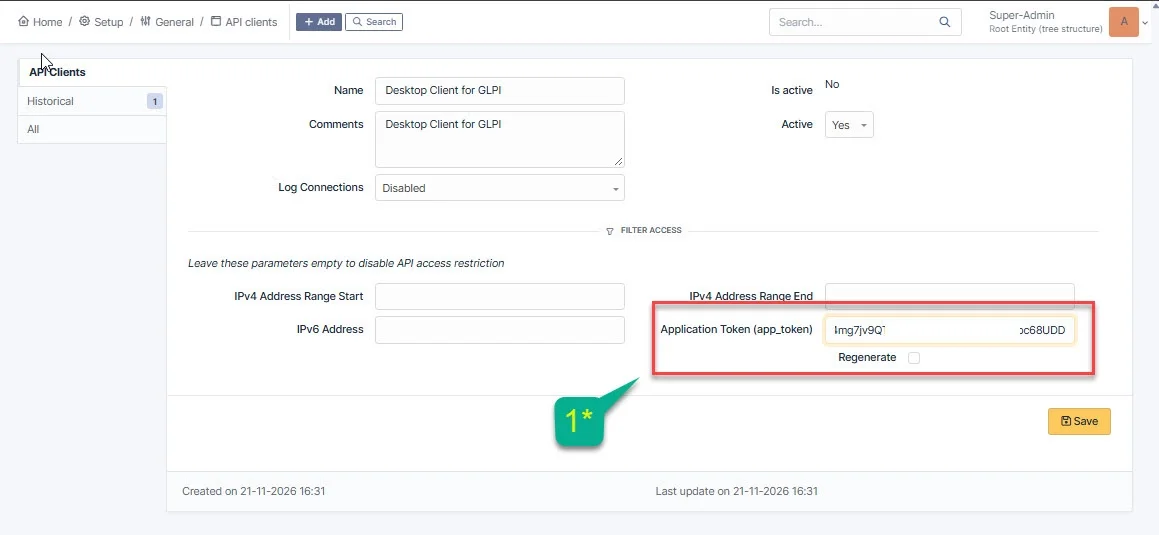
Step 3: Generate Your Personal User-Token
Each IT administrator uses their own User-Token so GLPI respects their exact profile permissions and active entities.
- Click your user avatar / name in the top-right corner of GLPI and select My settings.
- Under the Personalization / Main tab, scroll down to the Remote access keys section.
- Find API token:
- If empty, check Regenerate and click Save.
- Click the Copy icon next to API token — this is your User-Token.
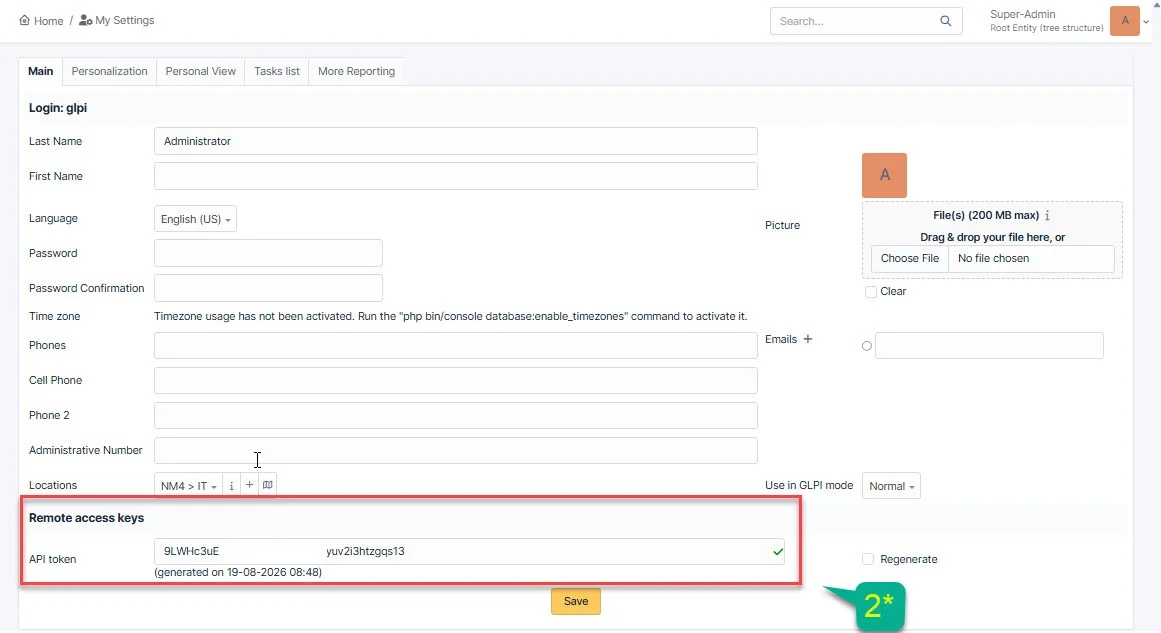
Step 4: Connect from Desktop Client for GLPI
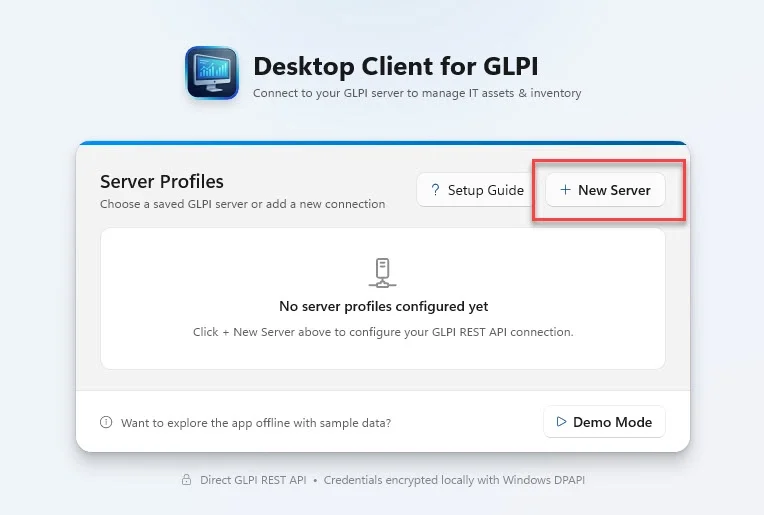
Open Desktop Client for GLPI on Windows. Click + New Server on the start screen.
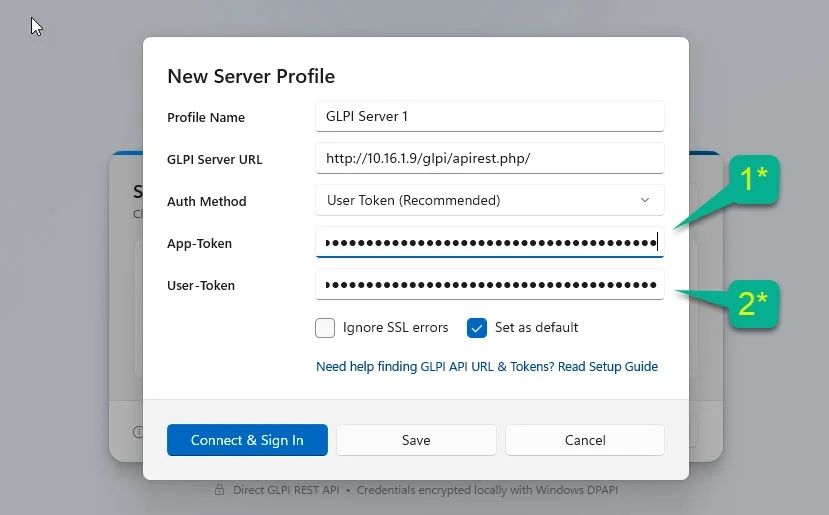
Enter your server details:
- Profile Name: Any friendly name (e.g.,
GLPI Production). - GLPI Server URL: Paste the API URL from Step 1 (e.g.,
https://glpi.yourcompany.com/apirest.php). - Auth Method: Select User Token (Recommended).
- App-Token: Paste the Application token from Step 2 (optional if your GLPI server does not enforce App-Token).
- User-Token: Paste your personal API token from Step 3.
- Ignore SSL errors: Check this box only if your internal GLPI server uses a self-signed HTTPS certificate.
Click Connect & Sign In.
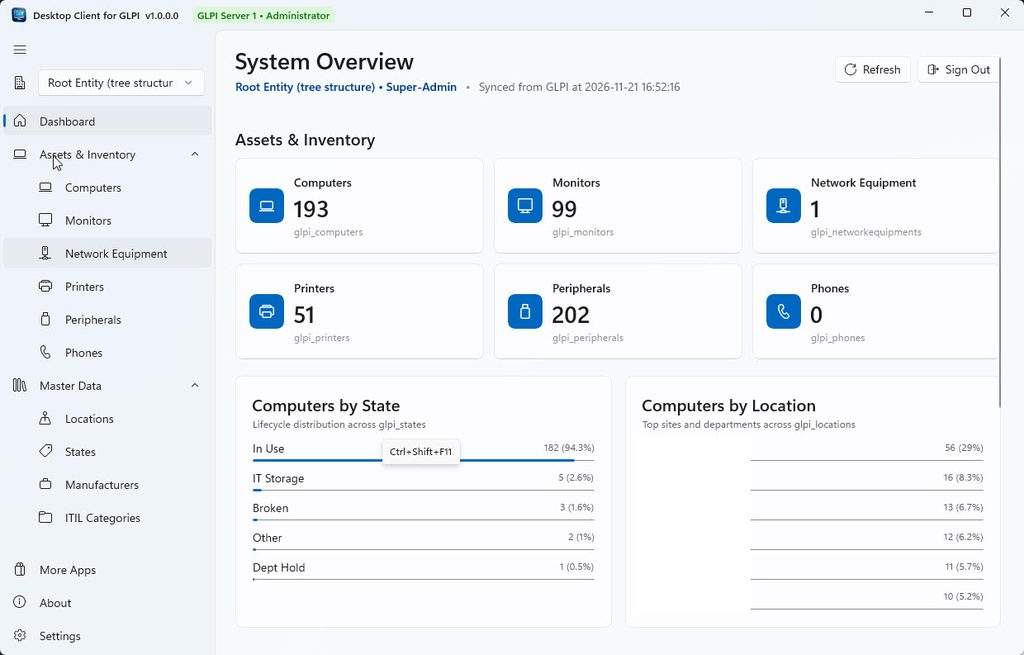
Your credentials are encrypted locally using Windows DPAPI and never leave your machine except to authenticate directly with your GLPI server.
Troubleshooting Common Errors
| Error / Symptom | Cause & Quick Fix |
|---|---|
ERROR_API_DISABLED | REST API is turned off. Go to Setup → General → API and set Enable Rest API = Yes. |
ERROR_APP_TOKEN_PARAMETERS_MISSING | Your GLPI server requires an App-Token. Create an API client in Step 2 and paste the app_token. |
ERROR_WRONG_APP_TOKEN_PARAMETER | The App-Token is incorrect or your PC’s IP address is outside the allowed IPv4 range in API clients. |
| Server response is not valid JSON | Double-check that your URL ends with /apirest.php (e.g., http://10.16.1.9/glpi/apirest.php). |
| SSL / TLS certificate error | For internal servers using a self-signed certificate, enable Ignore SSL errors in the server profile. |
Need more IT utilities for Windows? Check out all apps by ToTatCa on the Microsoft Store or subscribe to our YouTube channel (@totatca).