Welcome to the article How to Add Linux Host to Nagios Server! In the previous article, we successfully installed Nagios Server together. In this guide, we will explore how to add a Linux server to the Nagios Server, expanding the monitoring and management capabilities of the Nagios system. Adding hosts to the Nagios Server enables you to effectively and reliably monitor and track resources and services on your Linux server.
We will proceed step by step, from setting up the environment to configuring Nagios and connecting to the Linux server. By following this detailed tutorial, you will gain the ability to easily and efficiently manage Linux servers within the Nagios system.
Prerequisites
- Nagios Server has been installed.
- User privileges: root or non-root user with sudo privileges
In this guide, let’s assume the following scenario:
- Nagios Server
- IP Address: 192.168.1.16/24
- Linux Host
- Operating system
- Ubuntu
- Debian
- Linux Mint
- Hostname: linuxhost-1
- IP Address: 192.168.1.126/24
- Operating system
Read more
- How to Install and Configure Nagios Core Server on Ubuntu/Debian/Linux Mint
- How to Set Up a Static IP Address on Ubuntu Desktop
- How to Change Hostname and FQDN/Fullname on Linux
- How to Install and Configure NextCloud Server on Ubuntu
- Squid Proxy – Install and Configure Squid Proxy Server on CentOS | RockyLinux | AlmaLinux
On the Linux Host
Step 1 – Install Nagios Plugins and NRPE on the Linux host
To ensure seamless monitoring and efficient communication between your Linux host and the Nagios Server, it is essential to install NRPE (Nagios Remote Plugin Executor) and Nagios Plugins.
NRPE allows the Nagios Server to execute checks on remote hosts, enabling the monitoring of various services and resources on the Linux host. It acts as a bridge between the Nagios Server and the target host, facilitating real-time monitoring and data collection.
With NRPE and Nagios Plugins installed on your Linux host, you can enhance the monitoring capabilities of Nagios Server, enabling comprehensive monitoring, timely alerts, and effective troubleshooting. This combination ensures that you have the necessary tools to maintain the stability, reliability, and optimal performance of your Linux host within the Nagios monitoring environment.
Run the following command to install NRPE and Nagios Plugin on your Linux host:
sudo apt update
sudo apt install nagios-nrpe-server nagios-plugins -y
Step 2 – Configure Nagios NRPE Agent
Once NRPE has been installed, the next step is to configure the declaration of information for the Linux Host and Nagios Server by opening the configuration file /etc/nagios/nrpe.cfg
sudo vim /etc/nagios/nrpe.cfg
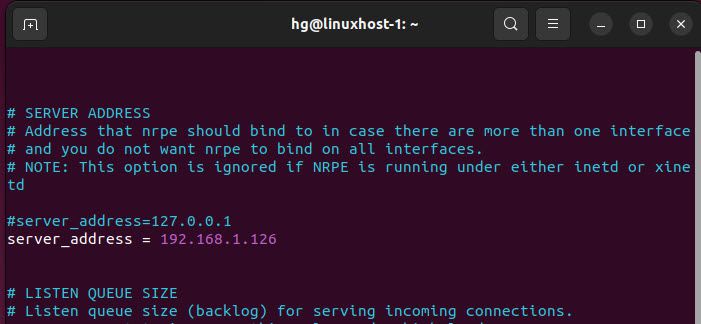
Locate the line server_address and add the following content:
server_address = 192.168.1.126 #IP of the Linux Host
Output:
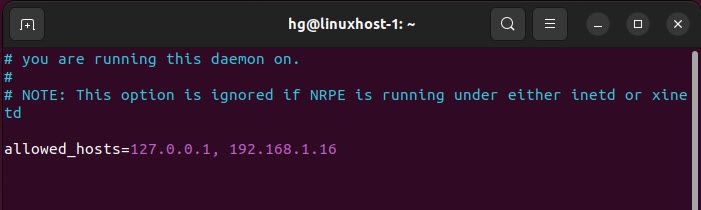
Next, locate the line allowed_hosts and add the IP address of the Nagios Server
allowed_hosts = 127.0.0.1, 192.168.1.16 #Add IP of the Nagios Server
After finishing, save the configuration and exit the file.
Output:
Now, restart the NRPE service to apply the changes:
sudo systemctl restart nagios-nrpe-server
sudo systemctl enable nagios-nrpe-server
Step 3 – Adjust Firewall on Linux Hosst
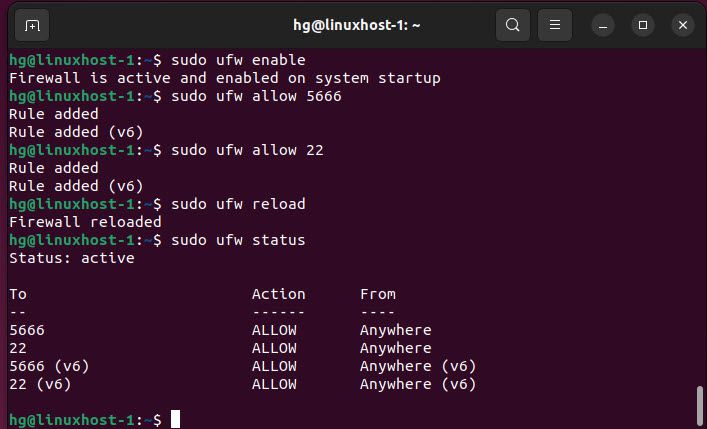
By default, the Nagios NRPE Agent listens on port 5666 to connect with the Nagios Server. We need to allow it through the UFW firewall by executing the following commands:
Note: Skip this step, If you don’t want the UFW firewall running on your system.
sudo ufw enable
sudo ufw allow 5666
sudo ufw reload
sudo ufw status
Output:
On the Nagios Server
Step 4 – Install NRPE on the Nagios Server
On the Nagios Server, first, let’s install the NRPE Server Plugin, similar to the one on the Linux Host, by executing the following command:
sudo apt install nagios-nrpe-server -y
Step 5 – Add Linux Host on Nagios Server
First, navigate to the directory /usr/local/nagios/etc/ and ensure that a directory named servers has been created. (For more details, please refer to the article How to Install and Configure Nagios Server on Ubuntu/Debian/LinuxMint).
cd /usr/local/nagios/etc/
ll

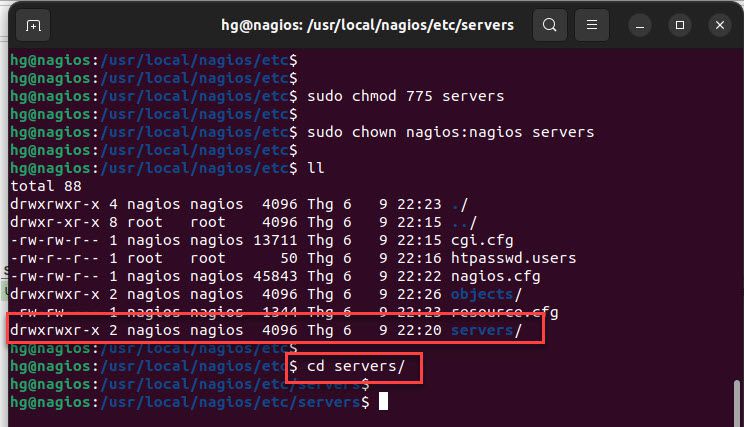
Next, change the permissions and ownership on the server directory
sudo chmod 775 servers
sudo chown nagios:nagios servers
ll
and then navigate servers directory
cd servers
Output:
Create a new configuration file named linuxhost-1.cfg for the Linux host that will be added to Nagios.
sudo vim linuxhost-1.cfg
Add the following content below:
#Replace :
# host_name = Your-Hostname
# alias = Your-Alias
# address = Your-IP address of host

define host{
use                     linux-server
host_name               linuxhost-1
alias                   LinuxHost-1
address                 192.168.1.126
}

define service{
use                             local-service
host_name                       linuxhost-1
service_description             Root / Partition
check_command                   check_nrpe!check_disk
}

define service{
use                             local-service
host_name                       linuxhost-1
service_description             /mnt Partition
check_command                   check_nrpe!check_mnt_disk
}

define service{
use                             local-service
host_name                       linuxhost-1
service_description             Current Users
check_command                   check_nrpe!check_users
}

define service{
use                             local-service
host_name                       linuxhost-1
service_description             Total Processes
check_command                   check_nrpe!check_total_procs
}

define service{
use                             local-service
host_name                       linuxhost-1
service_description             Current Load
check_command                   check_nrpe!check_load
}
After finishing, save and exit the file
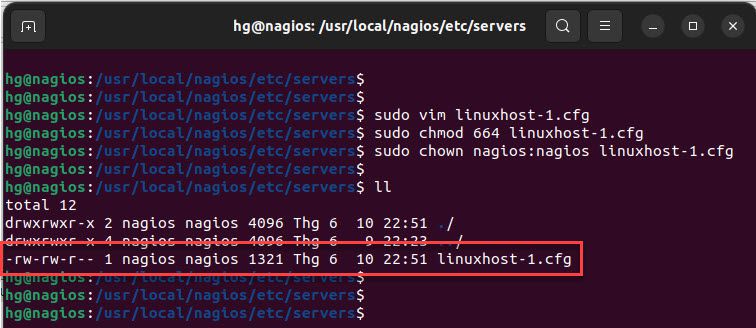
Next, change the permission and ownership on the linuxhost-1 file
sudo chmod 664 linuxhost-1.cfg
sudo chown nagios:nagios linuxhost-1.cfg
ll
Output:
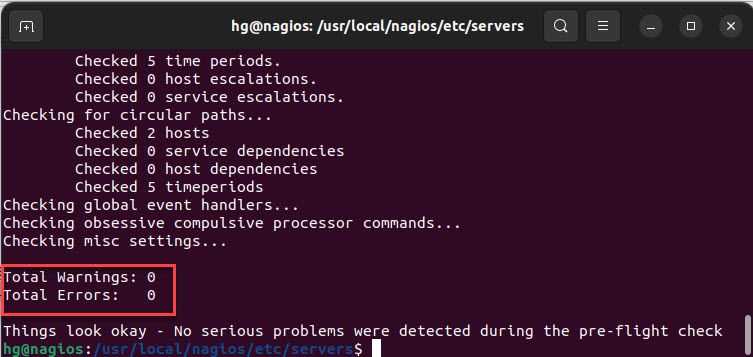
Make sure that the configuration is correct by executing the command below:
sudo /usr/local/nagios/bin/nagios -v /usr/local/nagios/etc/nagios.cfg
If everything is correct, you should see a similar result as shown below:
Now, restart Nagios Server to apply the changes:
sudo systemctl restart nagios
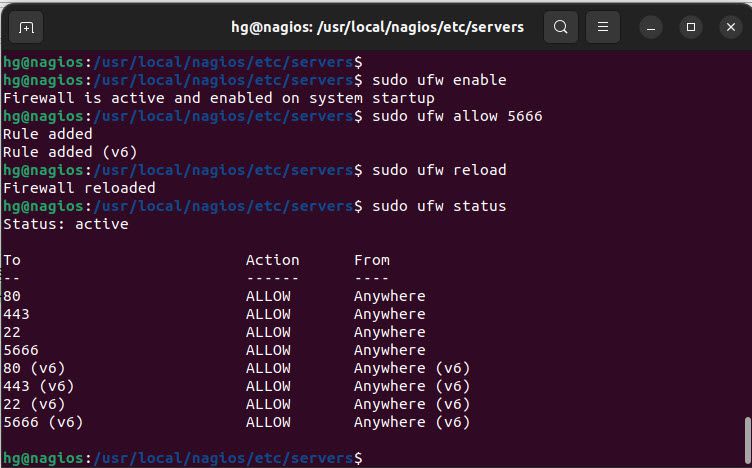
Step 6 – Adjust Firewall on the Nagios Server
Similarly to the Linux Host, we also need to allow port 5666 through the UFW firewall.
sudo ufw enable
sudo ufw allow 5666
sudo ufw reload
sudo ufw status
Output:
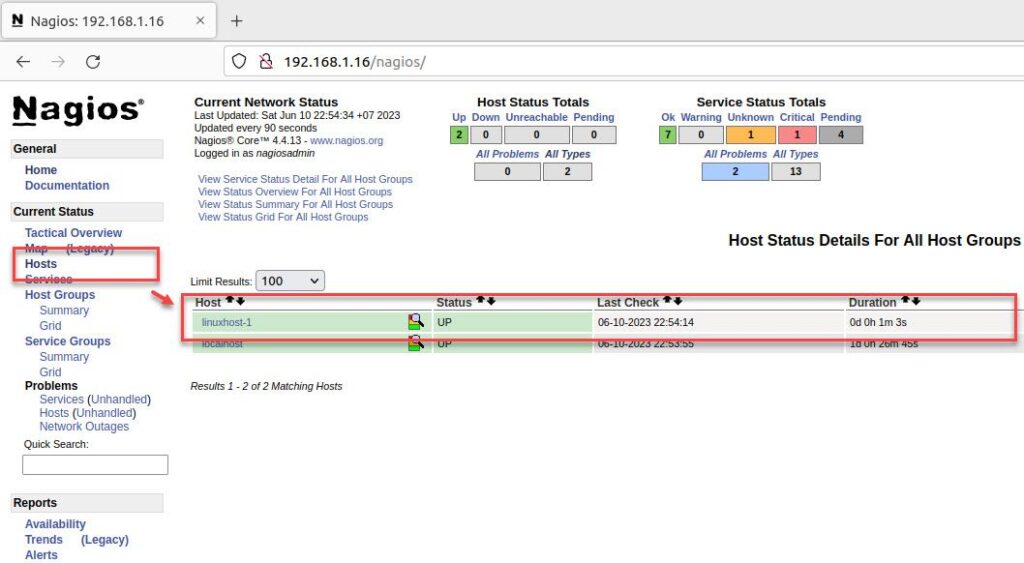
Step 7 – Verify
Finally, access the Nagios Server administration page. If everything is set up correctly, you should see the Linux host being monitored by the Nagios Server as shown below:
Conclusion
That’s all! Through this article, we have successfully set up monitoring for the Linux Host using Nagios Server. If you have any questions or suggestions, please feel free to leave a comment below.
Thank you for reading !!!