Welcome to the article How to Change Default Remote Desktop Port on Windows. In this guide, we will walk you through the process of changing the default port of Remote Desktop on the Windows operating system. Remote Desktop is a powerful feature that allows you to remotely connect to and control a computer from another computer.
By default, Remote Desktop on Windows uses port 3389 to establish a connection. However, in some cases, you may want to change this port to enhance security or avoid conflicts with other applications on your system.
In this article, we will provide you with a detailed step-by-step guide to change the Remote Desktop port on the Windows operating system, allowing you to customize the connection port according to your preferences. Continue reading to discover how to change the default port of Remote Desktop on Windows and take advantage of this feature in a flexible and secure manner.
Applies to :
- Windows 11 | Windows 10 | Windows 8 | Windows 7
- Windows Server 2022 | Windows Server 2019 | Windows Server 2016 | Windows Server 2012
Read more:
Step 1 – Change Default Remote Desktop Port
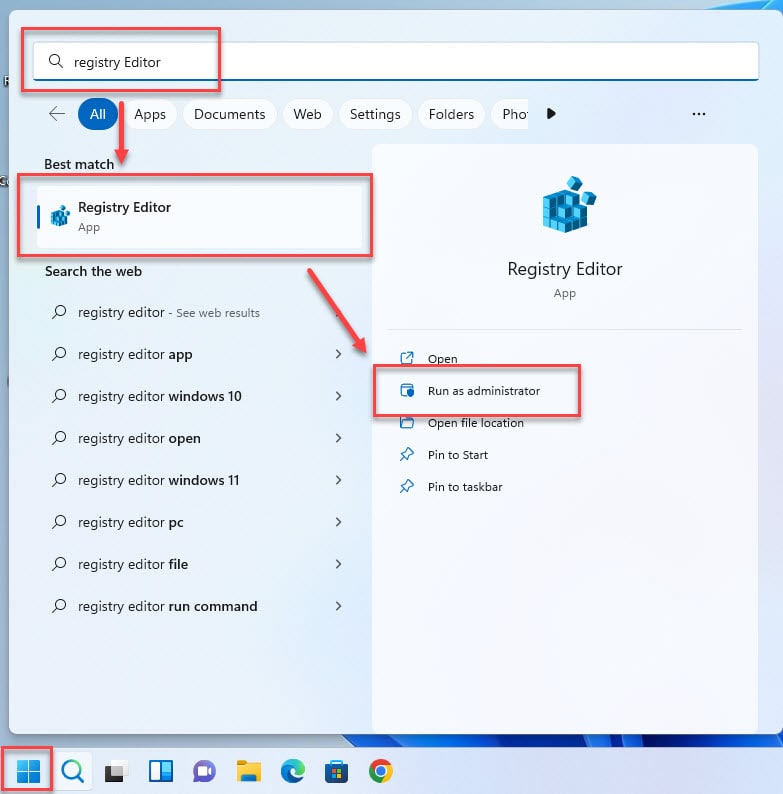
First, to open the Registry Editor, you can follow the following steps. On the Desktop screen, click to Start button, search Registry Editor and select Run as administrator
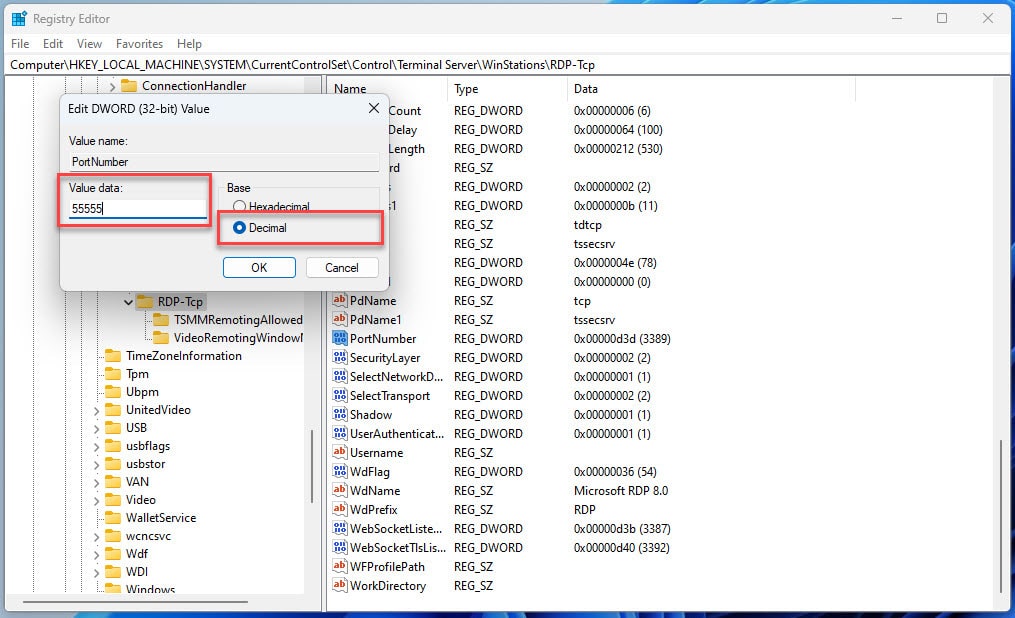
In the Registry Editor, browse to the following Registry Sub Key
HKEY_LOCAL_MACHINE\System\CurrentControlSet\Control\Terminal Server\WinStations\RDP-Tcp
Find the key PortNumber, Right-click on the PortNumber key, and select Modify in the right panel.

In the Edit DWORD (32-bit) Value window, section Base select Decimal and type the new port number to Value data and then click OK
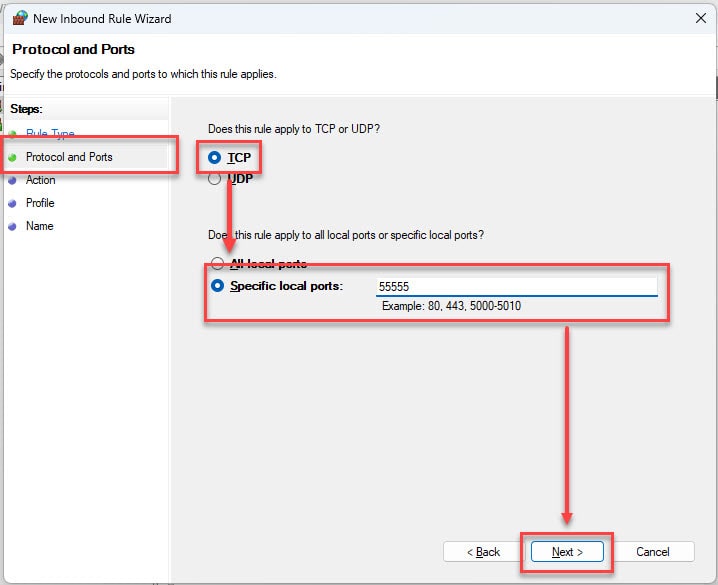
Note: I change from default port 3389 to New port 55555, replace 55555=Your-Port
After you’re finished, close the Registry Editor
Step 2 – Configure Firewall
If you’re using a firewall, make sure to configure your firewall to permit connections to the new port number. Skip this step if the Firewall is Turn Off on your system.
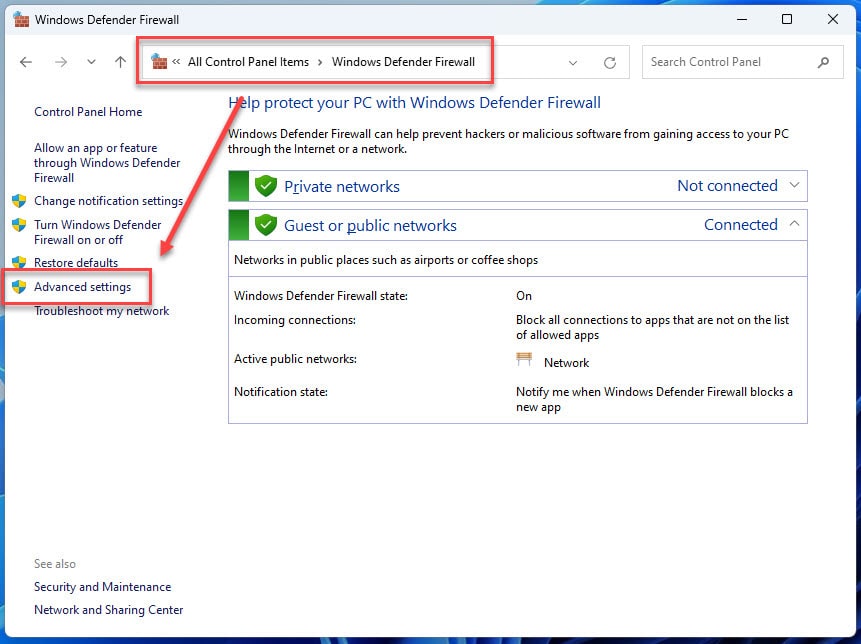
Open Windows Defender Firewall by accessing the path below and select Advanced settings
Control Panel\All Control Panel Items\Windows Defender Firewall
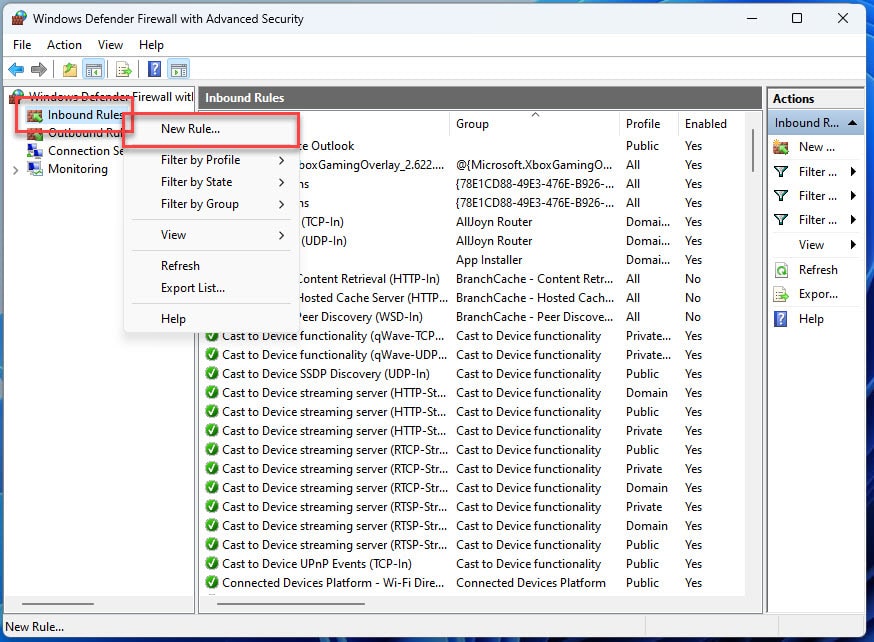
In the window, Windows Defender Firewall with Advanced Security, right-click on Inbound Rules and select New Rule..
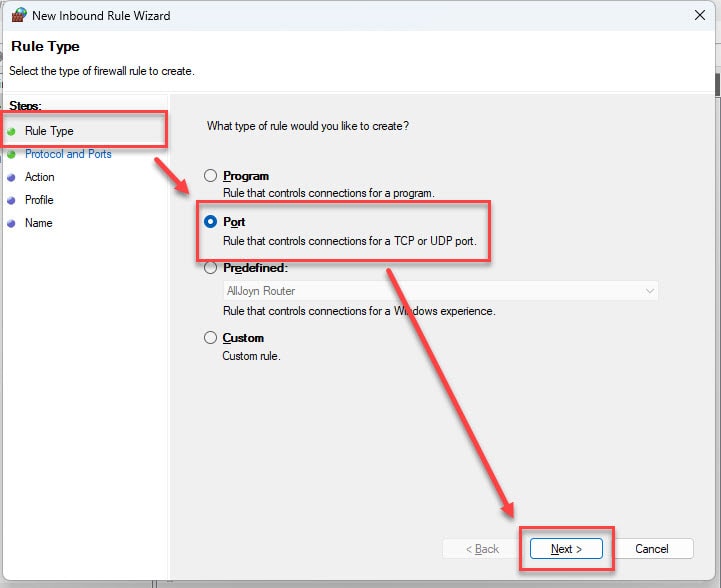
Select Port and click Next in the Rule Type window.
In the Protocol and Ports window, select TCP and type new port to Specific local ports and click Next
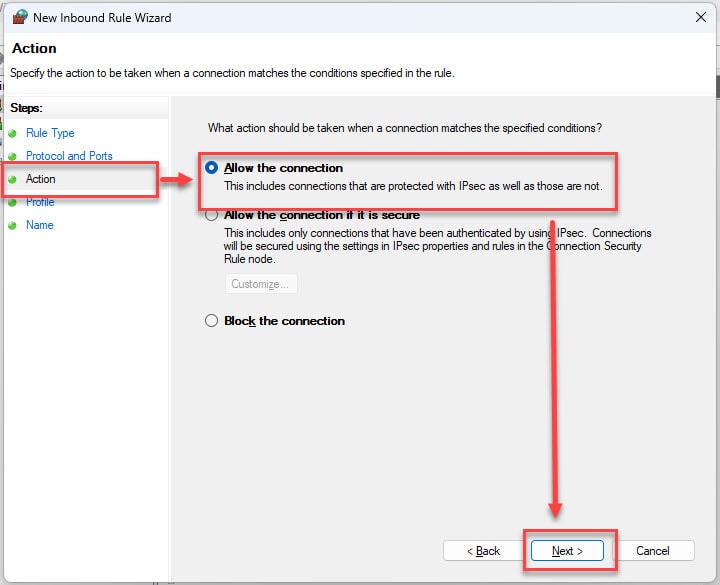
In the window Action select Allow the connection and click Next
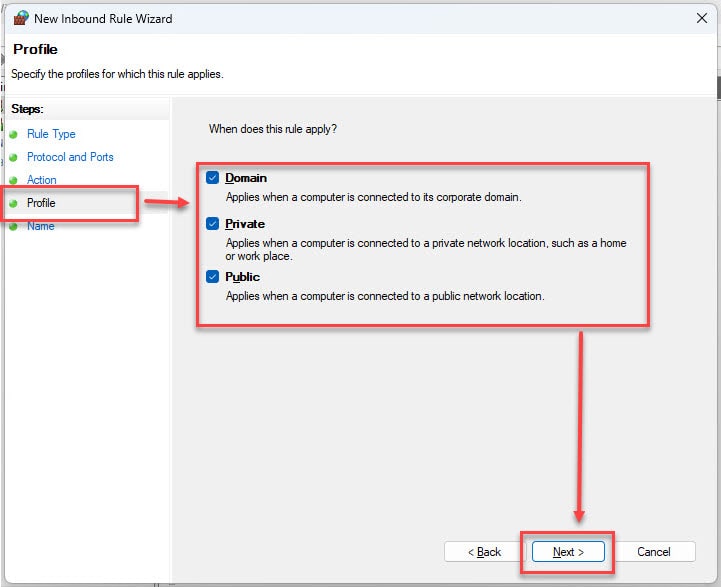
Keep default and click Next In the Profile window.
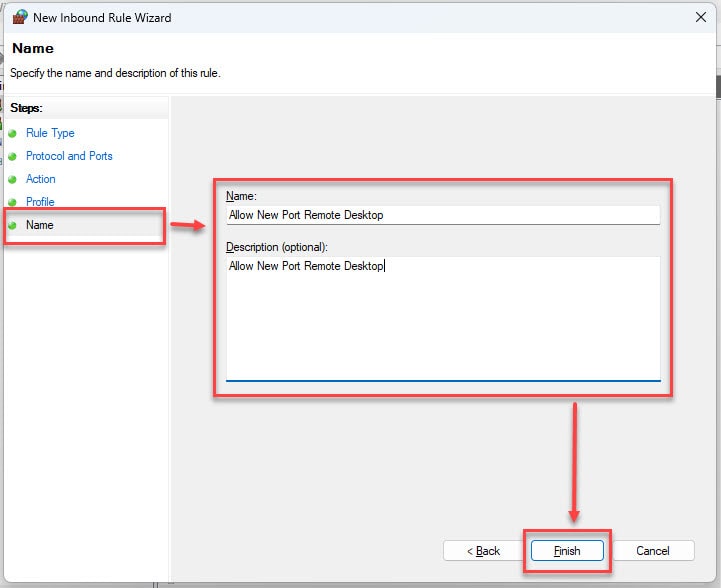
In the window Name set name and description for new Rule and click Finish
Finally, restart your computer to apply your changes
Step 3 – Testing
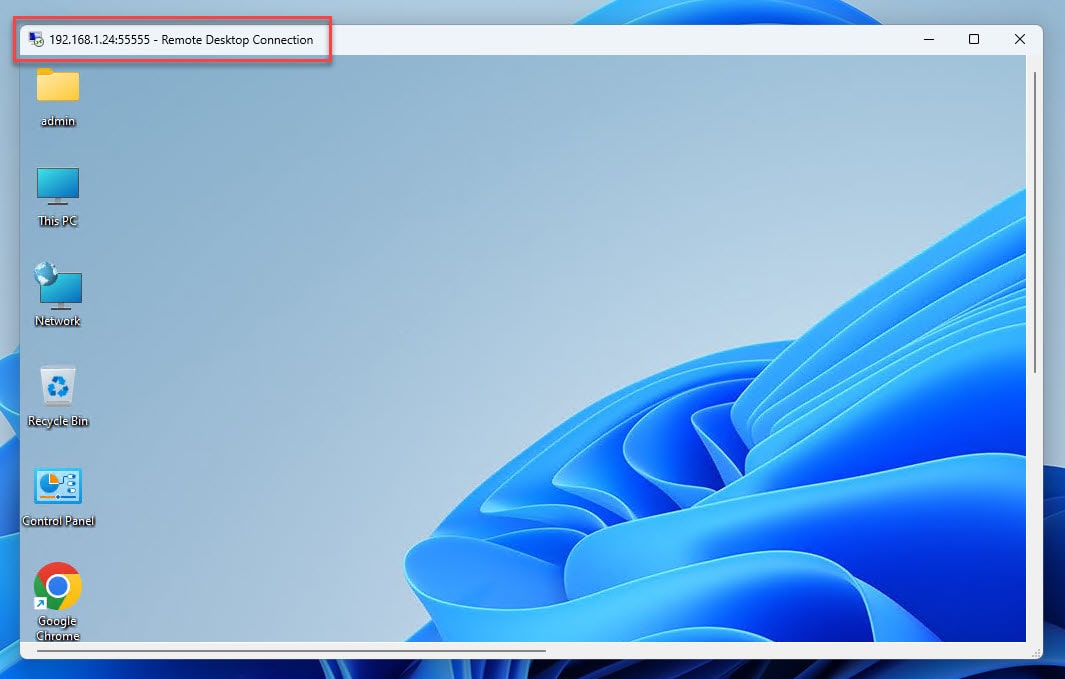
Open Remote Desktop Connection and type IP and New port
Syntax : IP:Port

And here is your result
Thank you for reading !!!