By default, the system hostname is set during the installation process, or if you are creating a virtual machine it is dynamically assigned to the instance at startup, but there are situations when you need to change it.
In this tutorial, We will learn How to Change Hostname & FQDN/Full-name on Linux
Prerequisites
- Operating system: Linux ( Ubuntu, Debian, CentOS, CentOS Stream, RockyLinux, AlmaLinux,…)
- User privileges: root or non-root user with root privileges
- Recommend: Your server already configure the static IP address
- VIM editor installed
Step 1 – Check the current Hostname & FQDN/Fullname
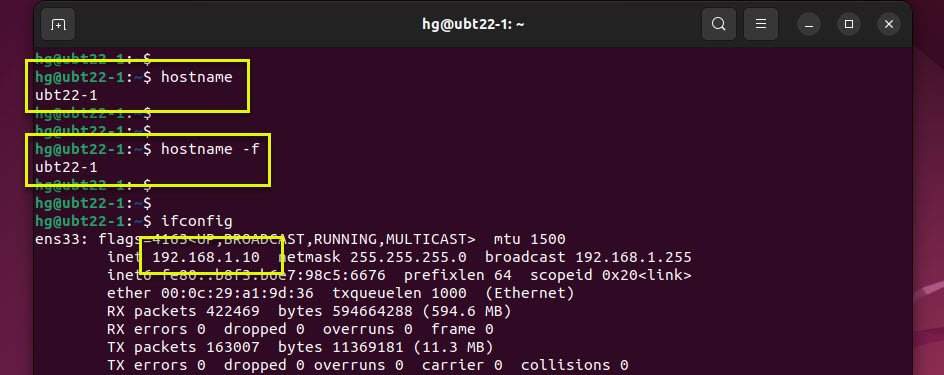
To check the current Hostname and FQDN/Full-name of your system execute the following command below:
### Check the current hostname
hostname
### Check the current FQDN/Full-name
hostname -f
And also check the IP address of your system:
ifconfig

From output:
- Current Hostname: ubt22-1
- Current FQDN/Full-name: ubt22-1
- IP address: 192.168.1.10
Step 2 – Change Hostname & FQDN/Full-name
For this example, We will change as below:
- New Hostname: server-1
- New FQDN/Full-name: server-1.totatca.local
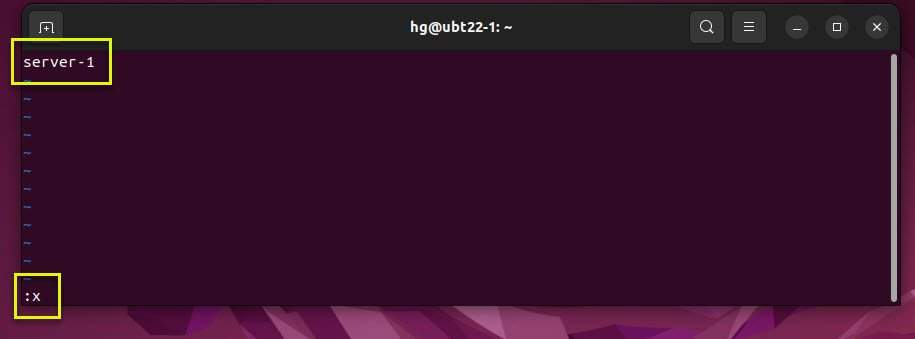
First, open the /etc/hostname file to change the Hostname of the system:
sudo vim /etc/hostname
Replace the current hostname with the new hostname:
Save and exit the file when you are done.

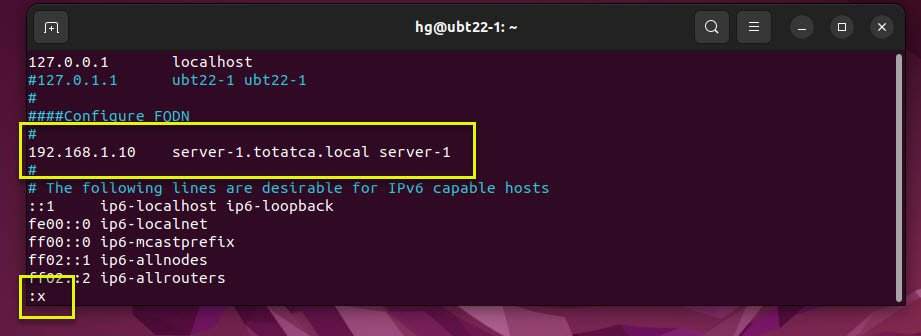
Next, open the /etc/hosts file to change the FQDN/Full-name of the system:
sudo vim /etc/hosts
Add new content below:
### Synx
### IP-Server FQDN/Full-name Hostname
###
192.168.1.10 server-1.totatca.local
Save and exit the file when you are done.

Lastly, restart the systemd-hostnamed service to apply the changes:
sudo systemctl restart systemd-hostnamed
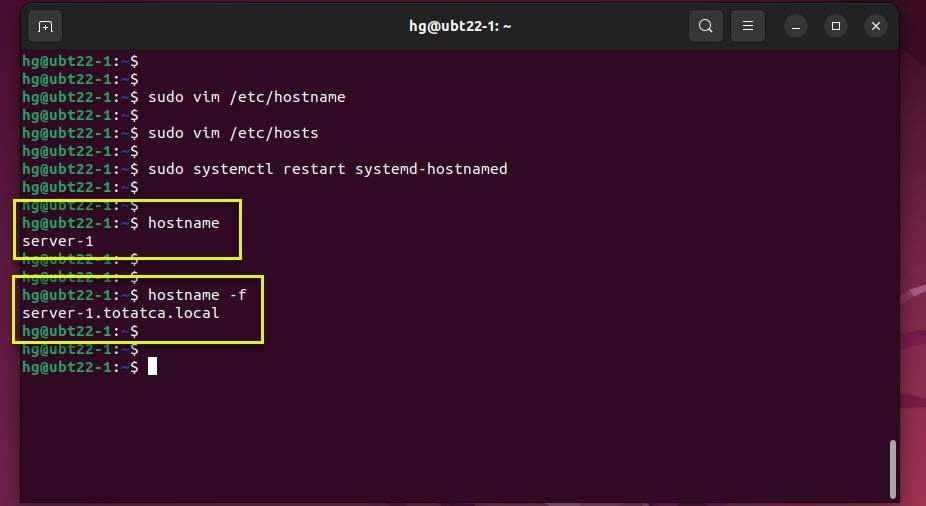
Now, verify changes with the new Hostname and FQDN/Full-name:
hostname
hostname -f
Sample output:

Don’t forget to replace New Hostname = Your-Hostname and New FQDN = Your-FQDN !!!
Thank you for reading !!!
Thank you,
clear, concise, and accurate.
What a delight.
Thank you for your feedback !!!