If you cloned a VM, you will have to sometimes generate a new SID. This usually occurs with VMware ESXi, Workstation, Fusion, Proxmox, and other virtual machine servers and software. If 2 systems have the same SID this will show errors trying to join domains or host services.
The System Preparation tool (Sysprep) is a utility used for deployment purposes but can be used to generate a new system SID with little to no loss of Windows data or settings.
In this tutorial, we will step-by-step learn How to Change SID in Windows 11/10 | Windows Server 2022/2019/2016/2012 with the System Preparation tool
Applies to:
- Windows Server 2022/2019/2016/2012
- Windows 11/10/8/7
Step by step Change SID on your system
First of all, backup your data in the folders Desktop, Document, Download…to another drive or your USB, because when you change SID with the System Preparation tool it deletes data on that.
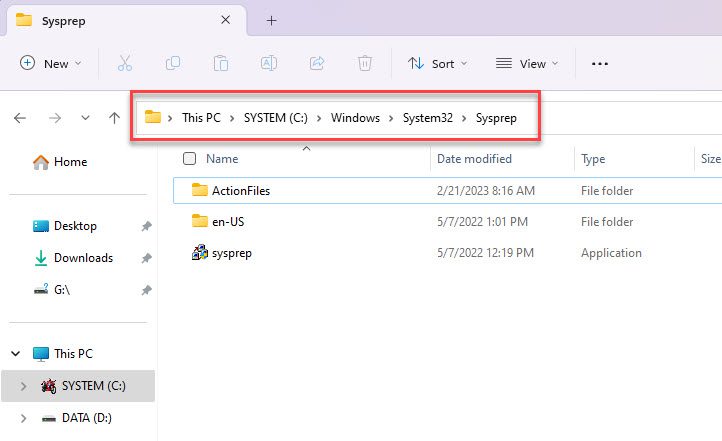
On the keyboard, pressing at the same time two keys Windows + E to open File Explorer

File Explorer is opened, go to the directory C:\Windows\System32\Sysprep to open the location of the System Preparation tool
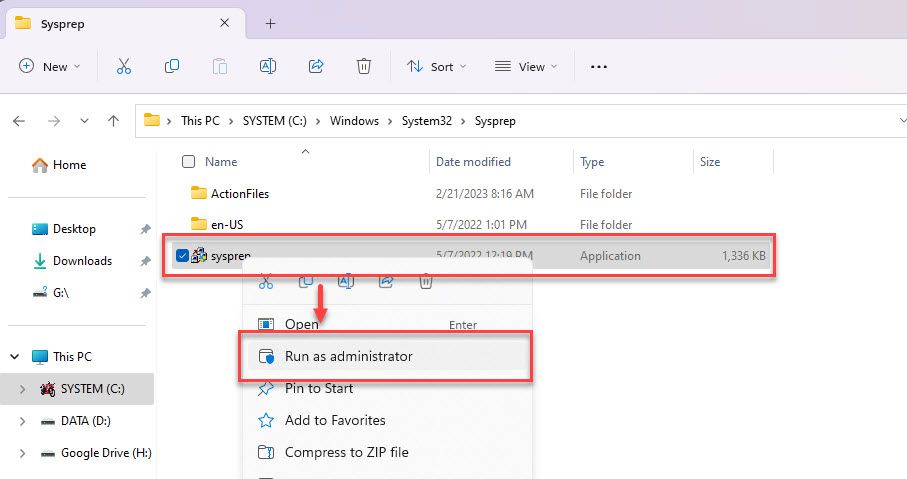
Right-click to sysprep.exe application and choose Run as Administrator
In the window System Preparation Tool choose like as below:
- System Cleanup Action:
- Check to Generalize box
- Shutdown options: Reboot
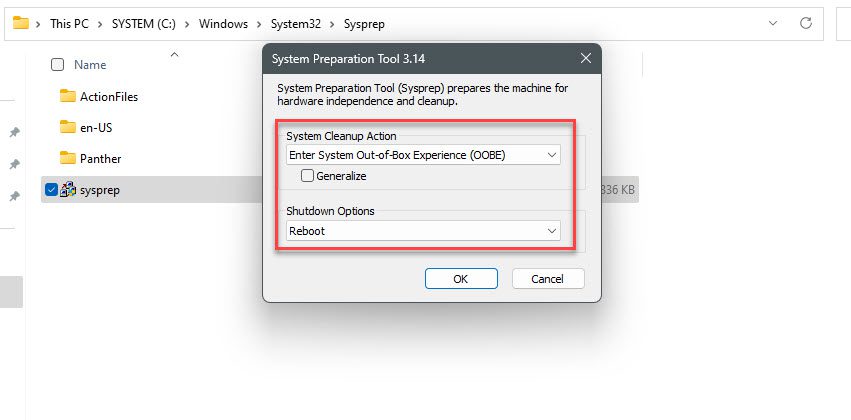
and click OK button to genera new SID:
After the system reboot, login to your system and follow the steps to change your profile.
Thank you for reading !!!