Zabbix is an open source, distributed monitoring system widely adopted in monitoring of Linux Infrastructures, Windows Systems, Network appliances and many applications. Zabbix is able to monitor numerous parameters of a network, health, and integrity of servers. Zabbix is used in small organisations with a few servers and for large companies with a multitude of servers.
In this tutorial, We will learn How to Install Zabbix Server 6 LTS on Ubuntu 22.04 LTS | 20.04 LTS | 18.04 LTS
Read more :
Prerequisites
- LAMP Stack installed on your system ( How to Install LAMP Stack on Ubuntu )
- User privileges: root or non-root user with sudo privileges
Step 1 – Update the system and install the required packages/dependencies
First of all, We need to update the system packages to the latest versions available
sudo apt update
Next, install packages/dependencies required by the Zabbix server
sudo apt install vim wget php-cgi php-common php-mbstring php-net-socket php-gd php-xml-util php-mysql php-bcmath php-imap php-snmp libapache2-mod-php libc6 -y
Step 2 – Configure PHP
PHP and PHP extensions installed, now Enable PHP CGI on the system
### If PHP 8 installed
sudo a2enconf php8.*-cgi
### If PHP 7 install
sudo a2enconf php7.*-cgi
Next, Using vim editor open and edit /etc/php/x/apache2/php.ini file (Replace x = PHP version installed on the system)
### PHP 8.1 installed on my system
sudo vim /etc/php/8.1/apache2/php.ini
- Find and edit lines as below :
- max_execution_time = 300
- max_input_time = 300
- memory_limit = 200M
- post_max_size = 32M
- upload_max_filesize = 16M
- date.timezone = Asia/Ho_Chi_Minh ( replace Asia/Ho_Chi_Minh = Your-TimeZone)
- After done, save and exit the file by pressing Esc Shift :x Enter
And don’t forget restart Apache service for the change to take effect:
sudo systemctl restart apache2
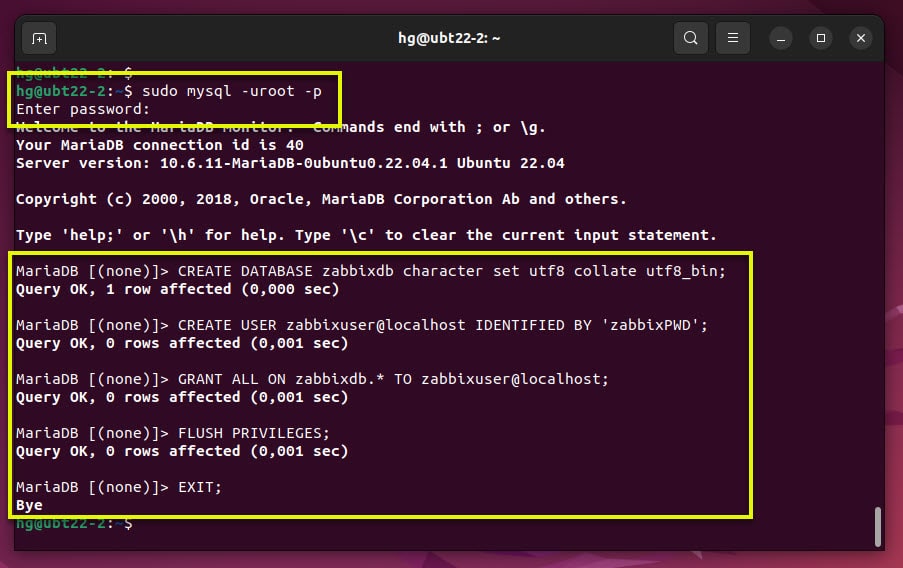
Step 3 – Create database for Zabbix Server
Login MariaDB/MySQL server
sudo mysql -uroot -p
Create a new database name called “zabbixdb“
CREATE DATABASE zabbixdb character set utf8 collate utf8_bin;
Create a new database user called "zabbixuser" and set password is “zabbixPWD“
CREATE USER zabbixuser@localhost IDENTIFIED BY
'zabbixPWD';
Grant all privileges on "zabbixdb" database to "zabbixuser" user
GRANT ALL ON zabbixdb.* TO zabbixuser@localhost;
Reload and exit
FLUSH PRIVILEGES;
EXIT;
Step 4 – Add Zabbix APT Repositories
Access Zabbix Official Repository choose the Zabbix version want to install and copy the linked repo correctly with your OS version
In this tutorials:
- I choose Zabbix 6.0 LTS
- My OS: Ubuntu 22.04 LTS
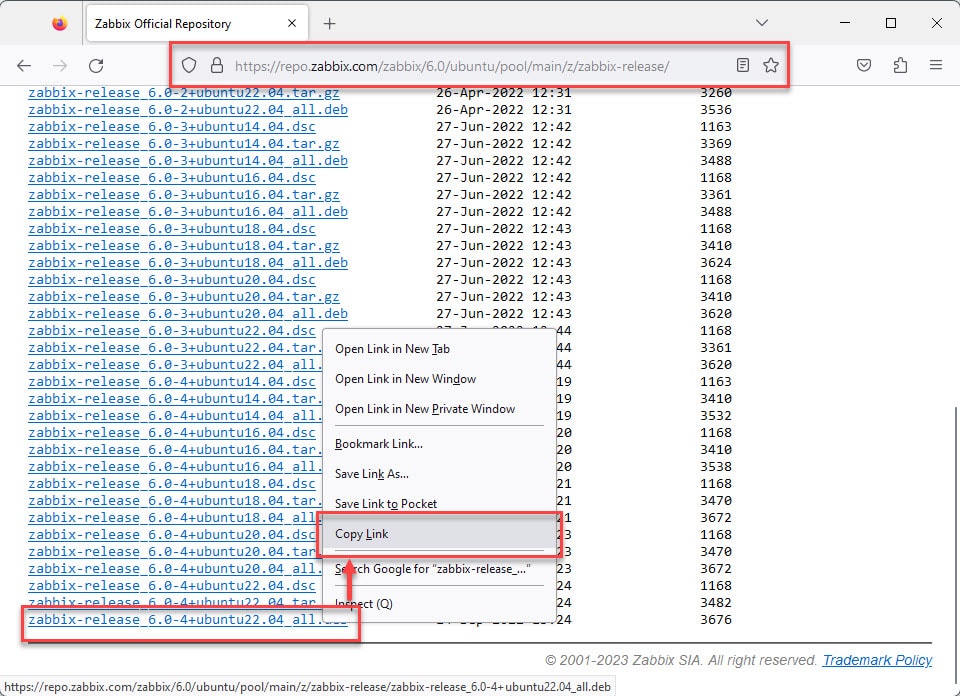
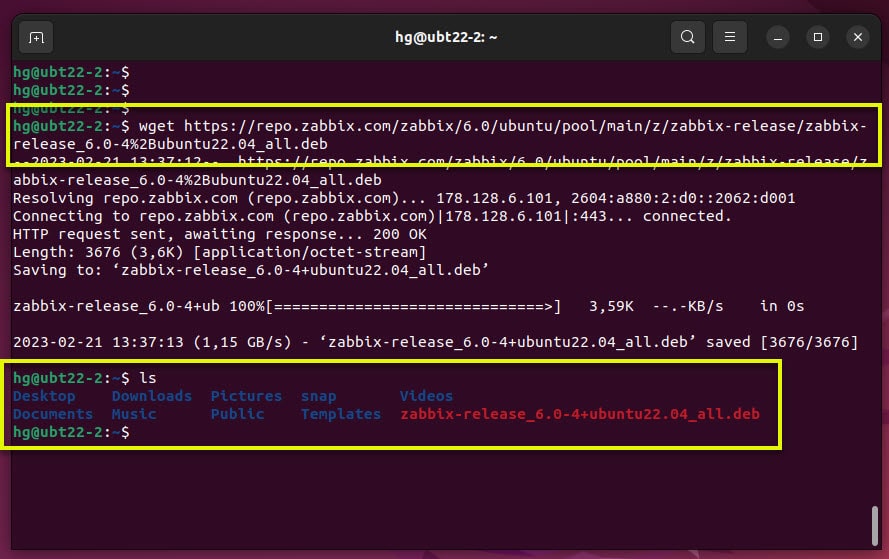
Next, download repository package file
wget link_in_step_above
### Example ( with Zabbix 6.0 LTS and Ubuntu 22.04 LTS )
wget https://repo.zabbix.com/zabbix/6.0/ubuntu/pool/main/z/zabbix-release/zabbix-release_6.0-4%2Bubuntu22.04_all.deb
Make sure it’s downloaded.
ls
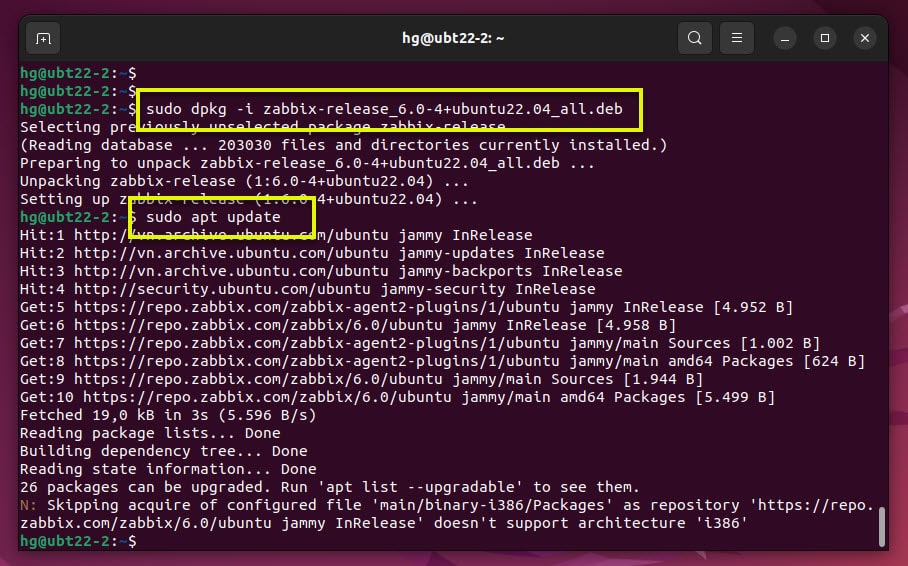
Now, install APT repositories
sudo dpkg -i Name_Of_Zabbix_Release_File
Next, Re-update system packages
sudo apt update
Step 5 – Install Zabbix Server
With the repository added and configured, Zabbix server packages can then be installed on your system
To install Zabbix Server and Zabbix Agent exucute the following command below:
sudo apt install zabbix-server-mysql zabbix-frontend-php zabbix-apache-conf zabbix-sql-scripts zabbix-agent -y
After install success, We need start and enable Zabbix Server and Zabbix Agent services to auto-start on system restart or boot
sudo systemctl start zabbix-server
sudo systemctl start zabbix-agent
sudo systemctl enable zabbix-server
sudo systemctl enable zabbix-agent
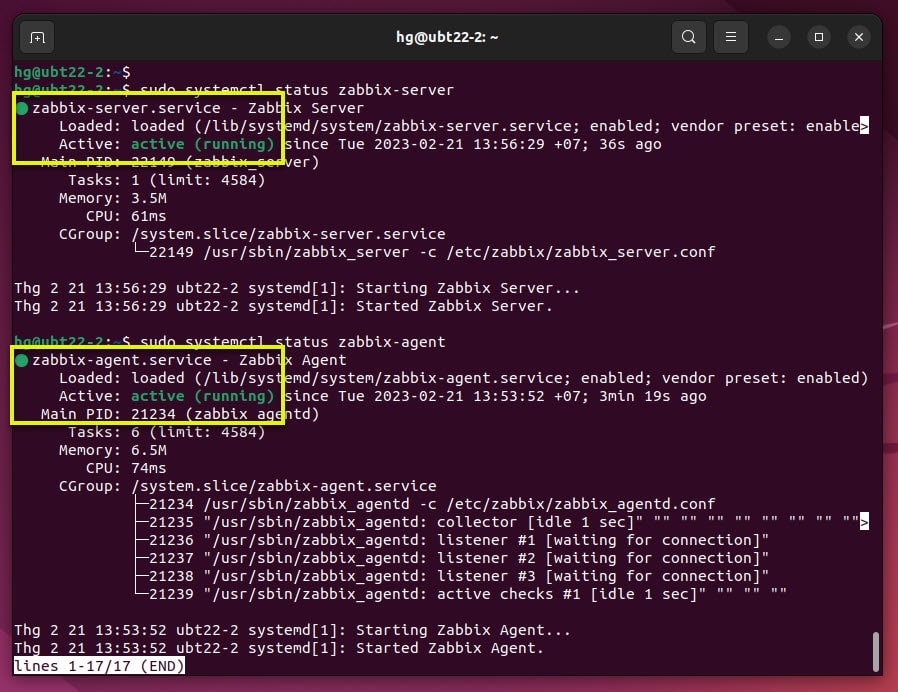
Check status of Zabbix Server and Zabbix Agent services, make sure it’s running
sudo systemctl status zabbix-server
sudo systemctl status zabbix-agent
Step 6 – Configure Zabbix Server
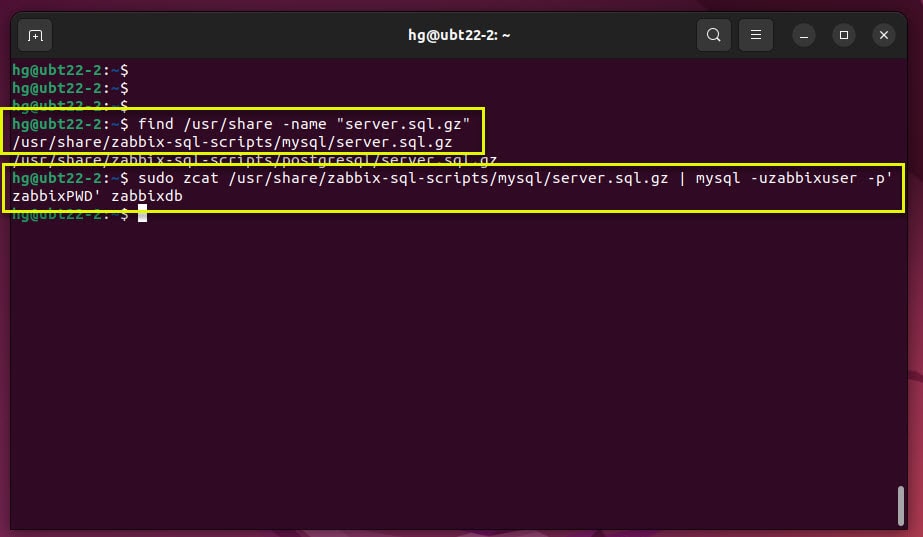
First, find the place of default database
find /usr/share -name “server.sql.gz”
My path : /usr/share/zabbix-sql-scripts/mysql/server.sql.gz
Import the default schema and data to the database created in step 3
sudo zcat /usr/share/zabbix-sql-scripts/mysql/server.sql.gz | mysql -uzabbixuser -p’zabbixPWD’ zabbixdb
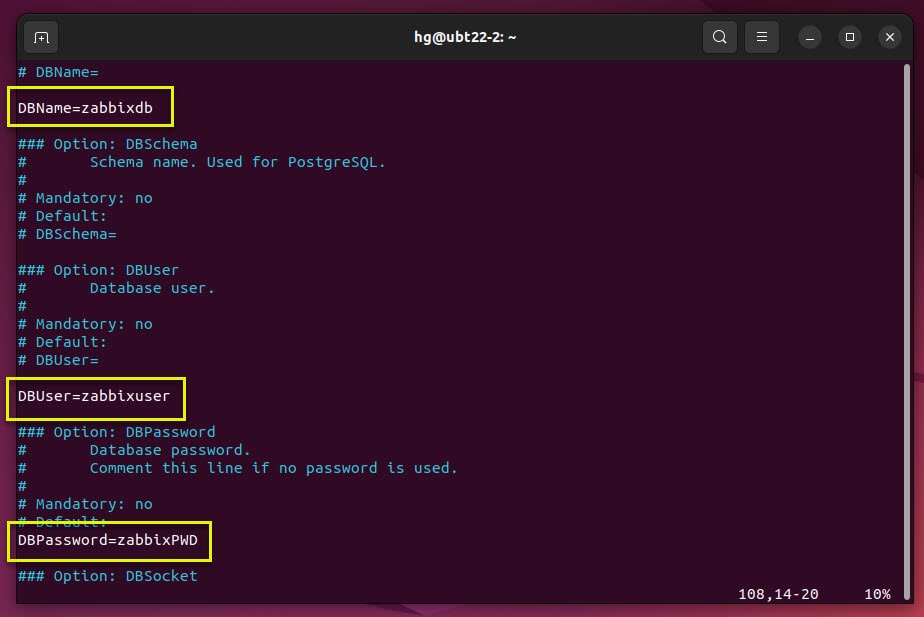
Next, using VIM editor open /etc/zabbix/zabbix_server.conf file
sudo vim /etc/zabbix/zabbix_server.conf
- Find and edit lines below:
- DBName=zabbixdb
- DBUser=zabbixuser
- DBPassword=zabbixPWD
- Save and exit file by press Esc Shift :x Enter
Now, Restart Zabbix-Server and Apache services for the change to take effect:
sudo systemctl restart zabbix-server
sudo systemctl restart apache2
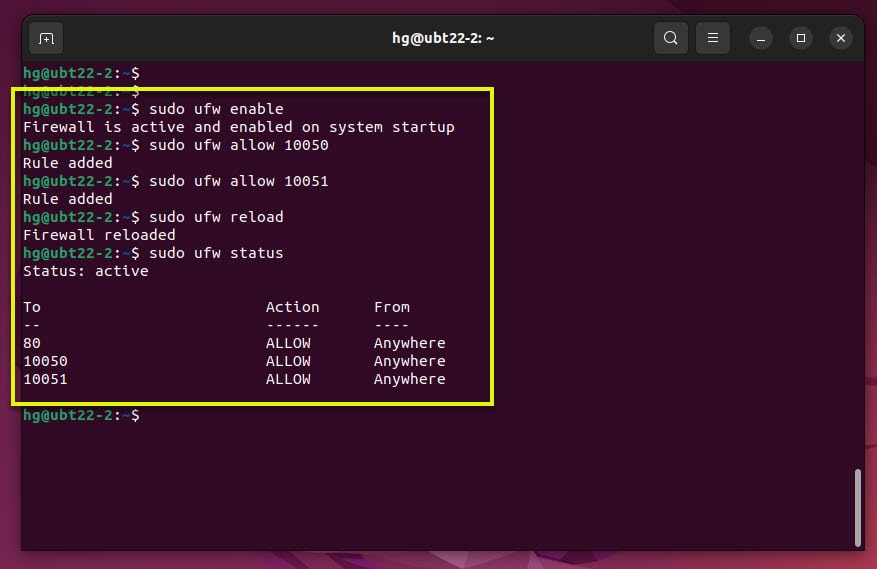
Step 7 – Configure Firewall
Note : Skip this step if you don’t want to UFW firewall running on the system
Zabbix server to passive agent and responds to agent on 10050
Active agent to Zabbix server and Active agents requests zabbix on port 10051.
Therefore, We need to allow ports 10050 and 10051 through the firewall
sudo ufw enable # Enable the firewall if it not yet running.
sudo ufw allow 10050 # Allow port 10050
sudo ufw allow 10051 # Allow port 10051
sudo ufw reload # Reload UFW fireall
sudo ufw status # Check status of UFW firewall
Step 8 – Setup Zabbix Server via web GUI
Open your browser and access the address http://IP-Server/zabbix or http://fqdn/zabbix to setup Zabbix Server
In the window, Webcome to Zabbix Server choose Your-language and click Next step

In the window Check of pre-requisites if all is OK, click Next step

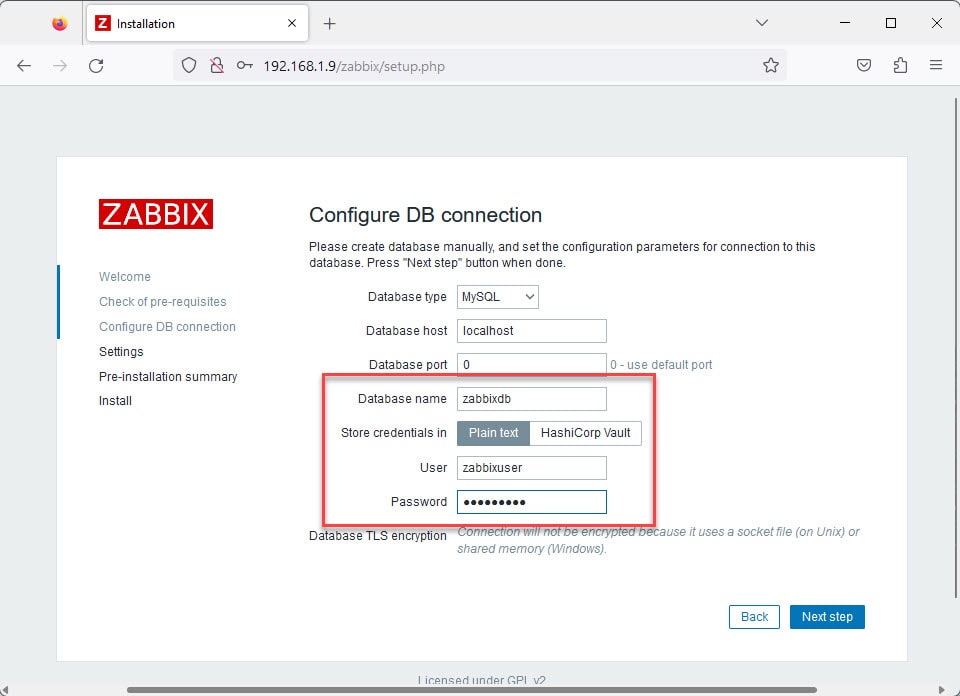
In the window, Configure DB Connection input database info in step 3 and click Next step
- Database name : zabbixdb
- User : zabbixuser
- Password : zabbixPWD
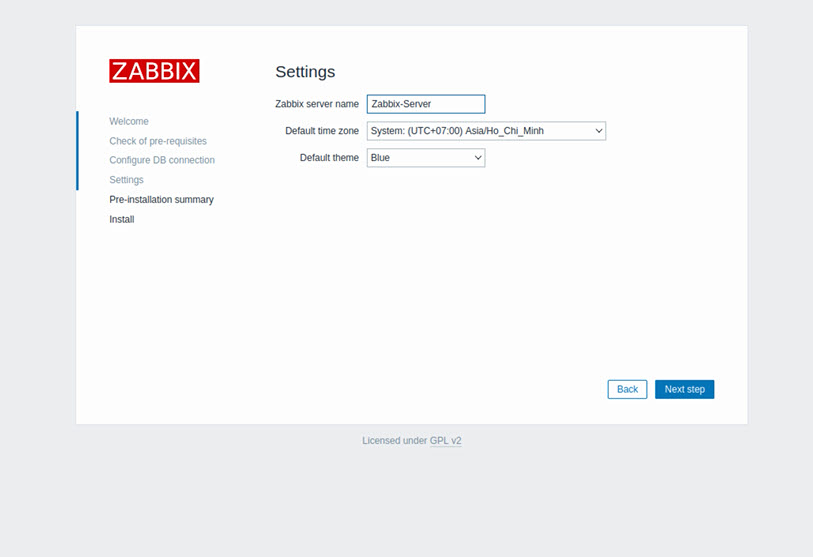
In the Settings window set a name for Zabbix Server and click Next step
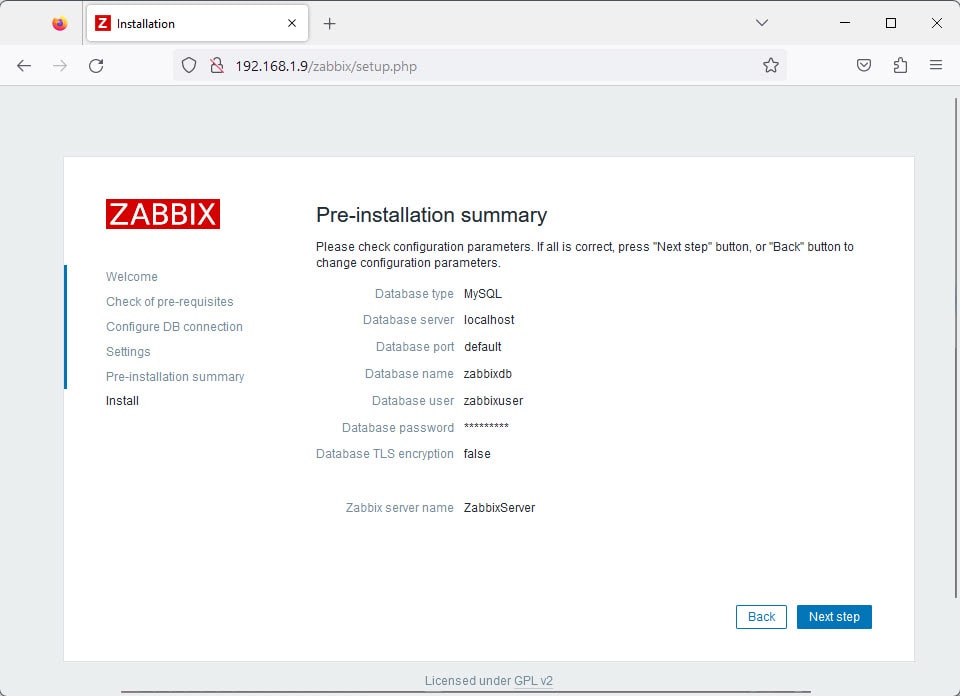
In the window Pre-installation summary click Next step
In the window Install a congratulations message is shown if everything went OK and click Finish
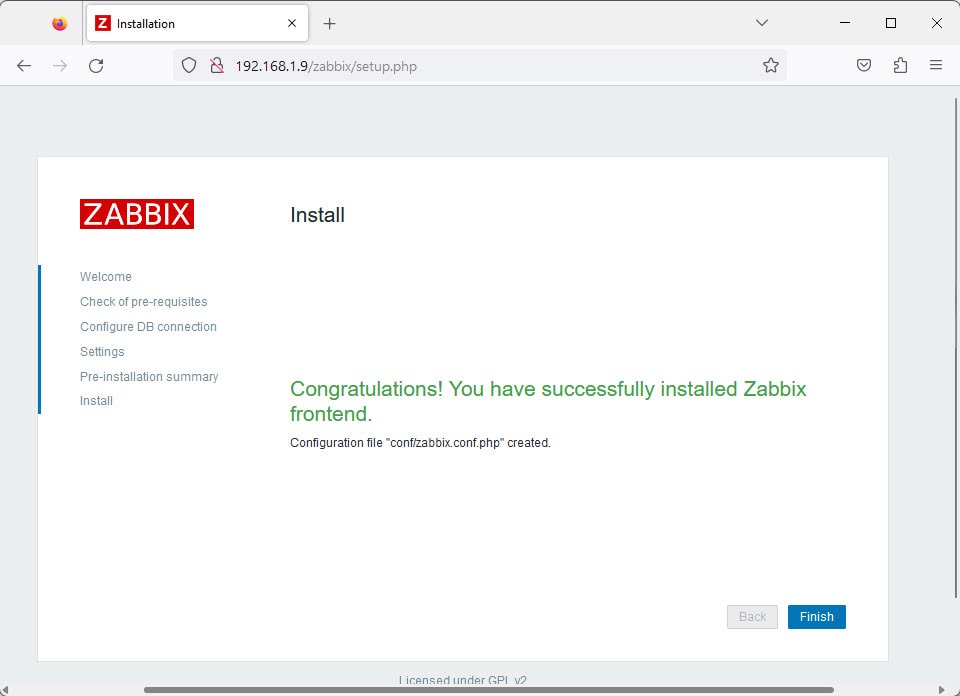
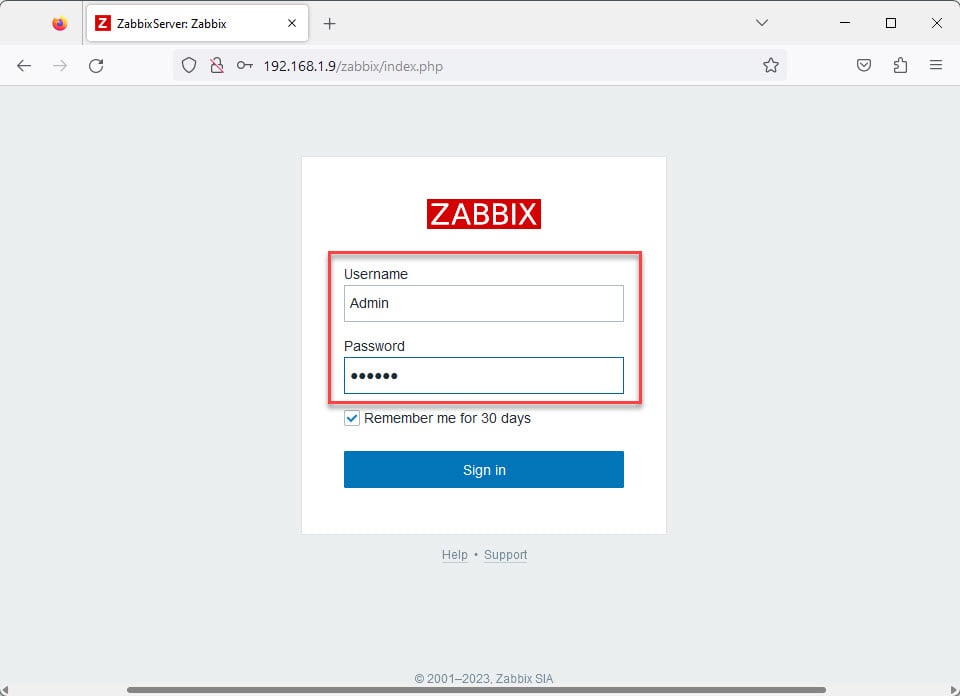
Go to the login page, The default login details are:
- Username : Admin
- Password : zabbix
Success !!!
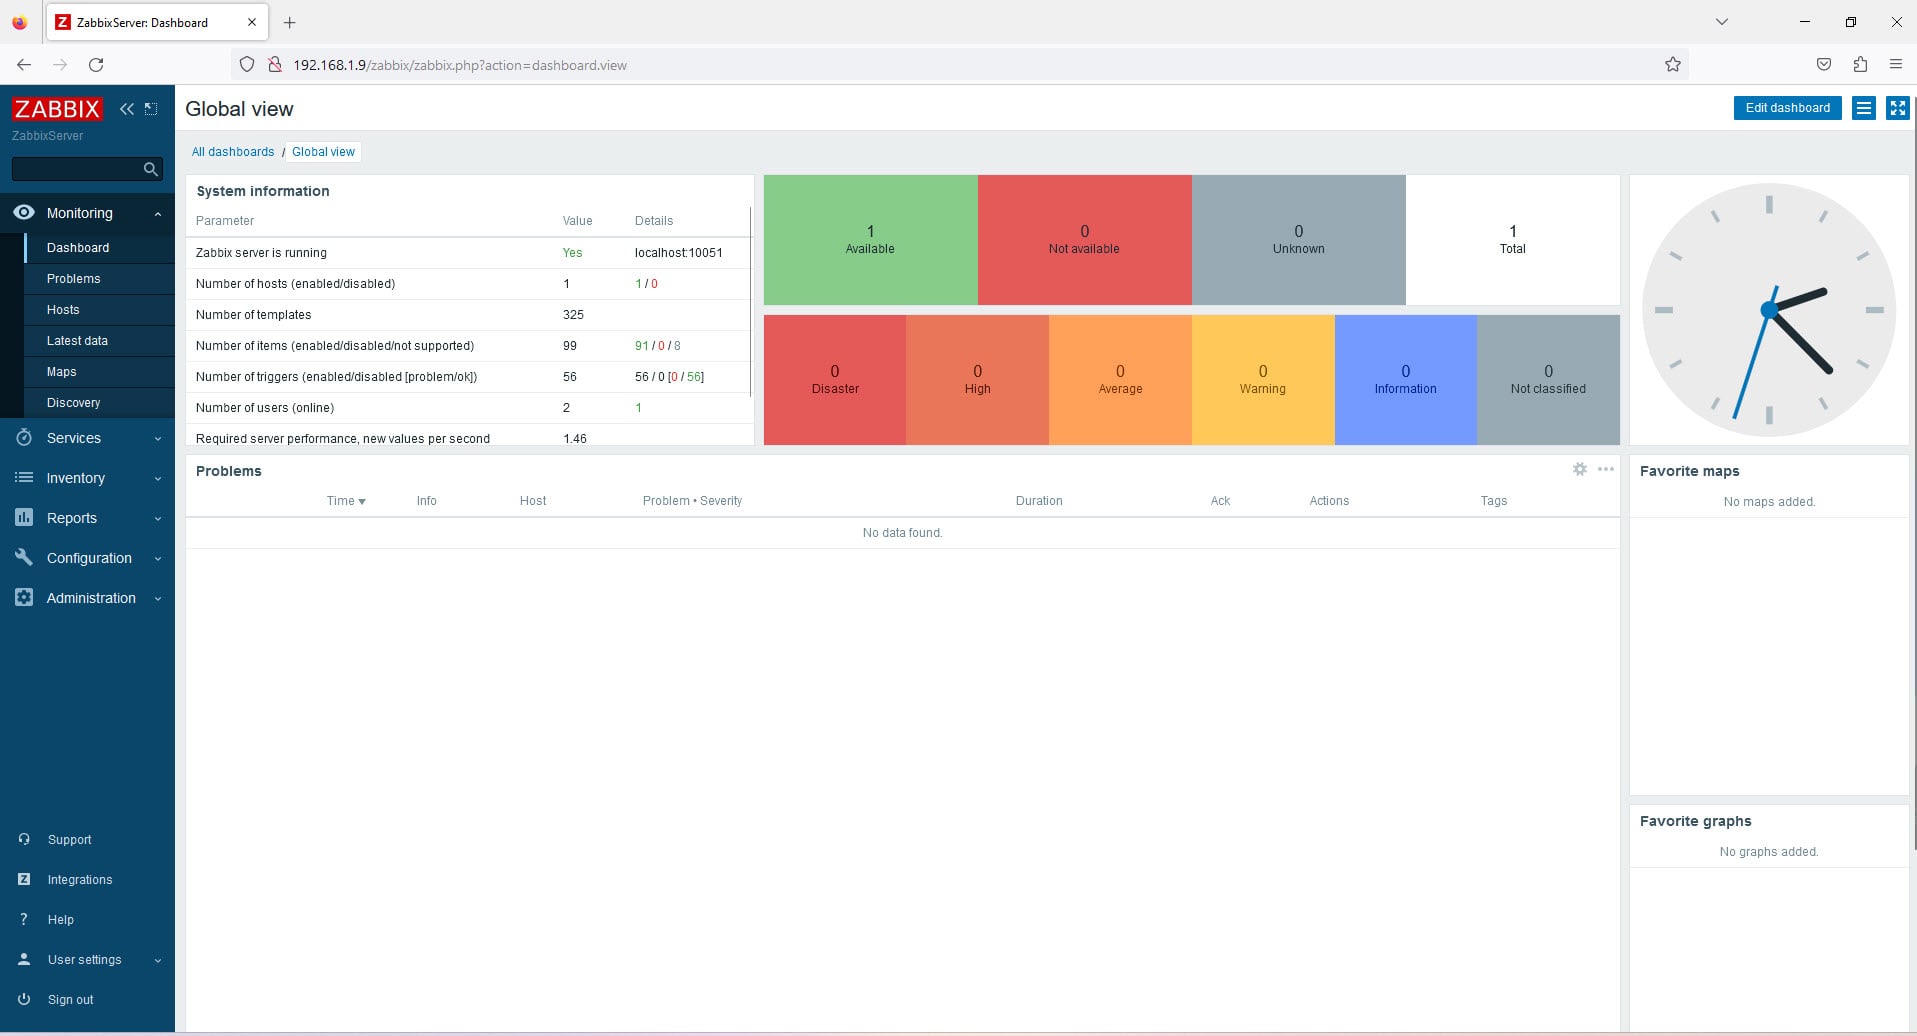
That’s it. You successfully installed the Zabbix-Server on Ubuntu
Thank you for reading !!!