In the previous tutorial, We successfully installed an OCS Inventory Server, you can now add agents for managing clients.
And this tutorial, We will learn How to Install OCS Inventory Agent on Windows.
Prerequisites:
- OCS Inventory Server installed on another server
- Windows client:
- Windows 11/10/8/7
- Windows Server 2022/2019/2016/2012
- For this tutorial:
- OCS Inventory Server:
- IP address: 192.168.1.10
- Windows Client
- Windows 11 64-bit
- Hostname: WIN11-1
- IP address: 192.168.1.25
- OCS Inventory Server:
Read more:
Step 1 – Download OCS Inventory Agent for Windows
Go to the official website of the OCS Inventory to download OCS Inventory Agent: Download OCS Inventory Agent
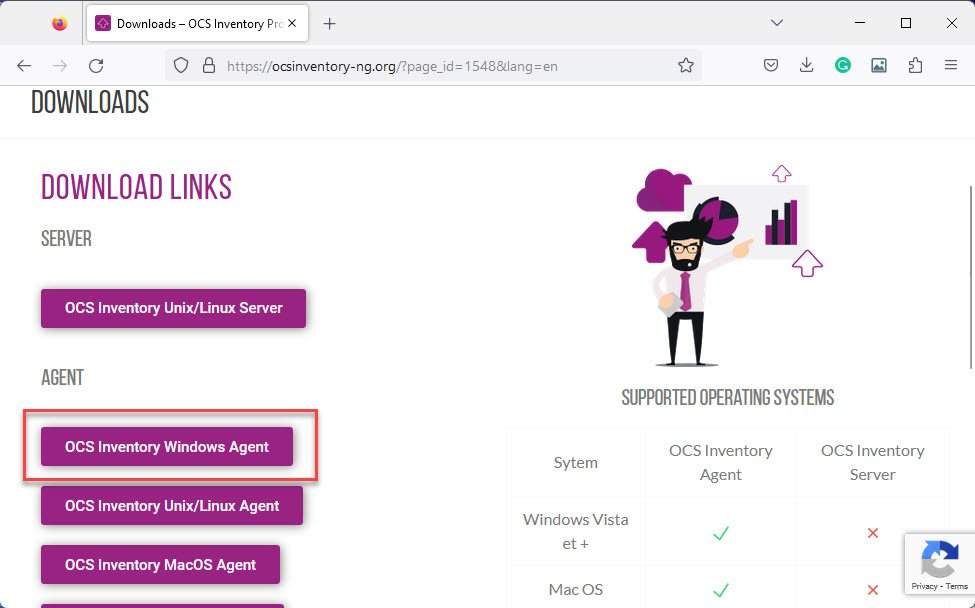
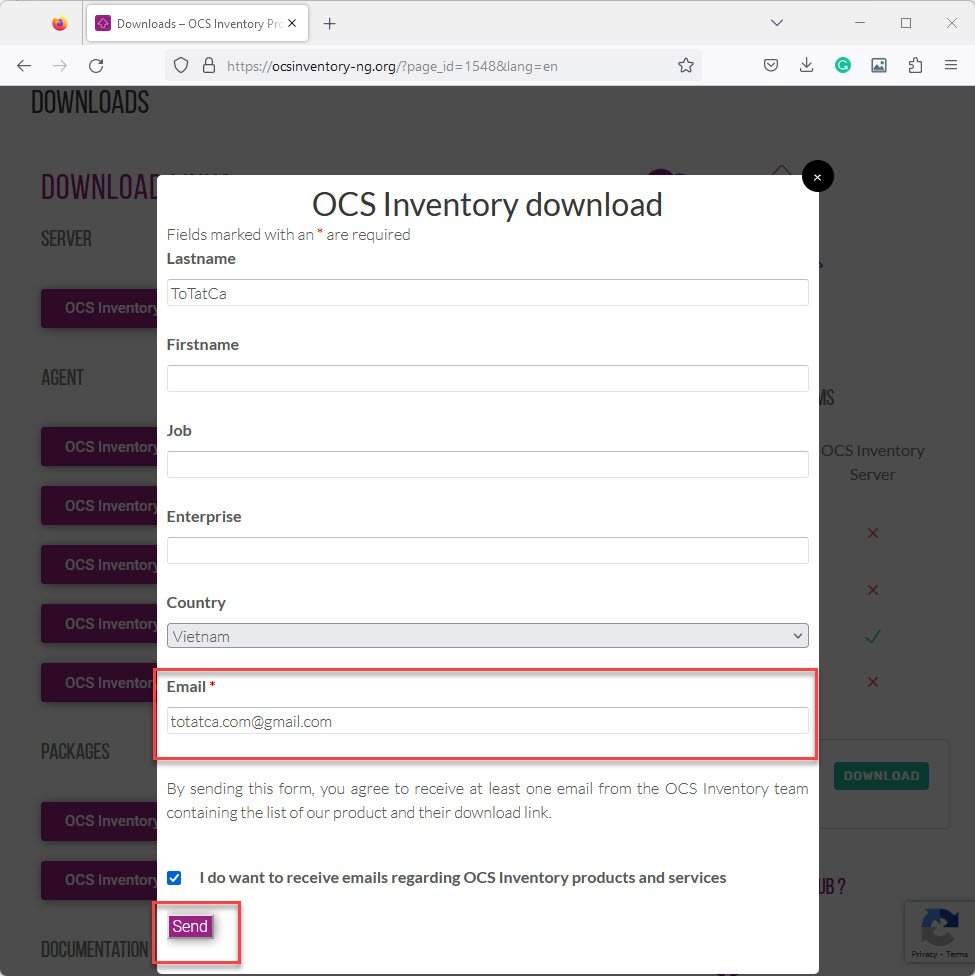
Click on the OCS Inventory Windows Agent button and enter Your-info, Email on the pop-up page, then click Send button
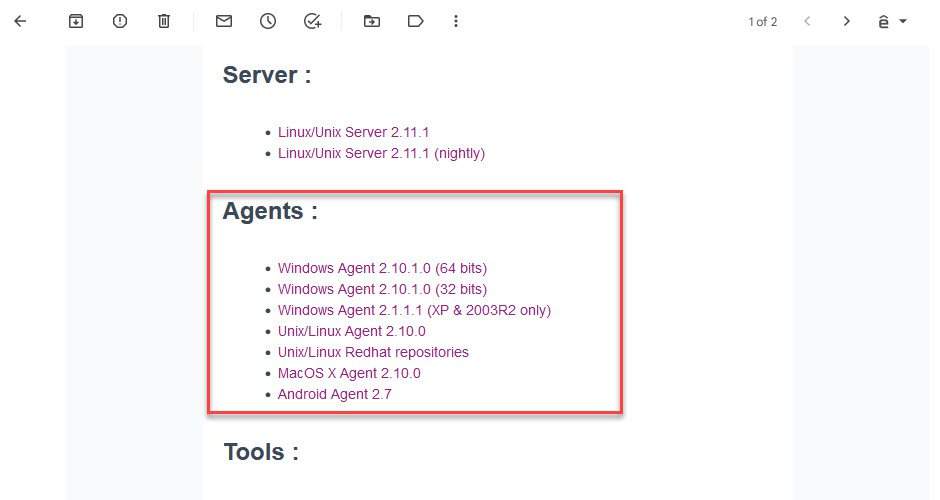
Now, log in to your email and download OCS Agent for your Windows version ( 32-bit or 64-bit)
Step 2 – Install OCS Inventory Agent on Windows
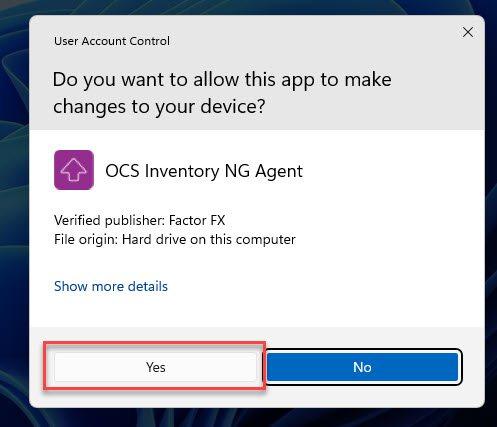
Once you are downloaded, extract the file and right-click on the OCS-Windows-Agent-Setup-x64 icon – select Run as administrator:

Click Yes to allow apps run on your system:
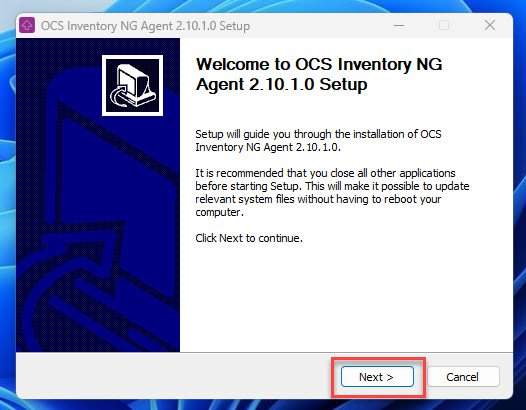
In the window Welcome to OCS Inventory NG Agent Setup click Next
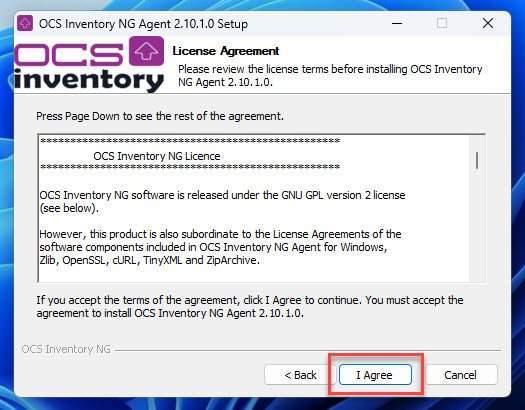
In the window License Agreement click I Agree to accept the terms of the agreement
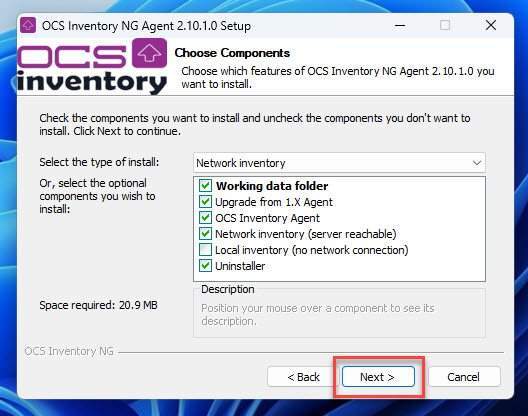
In the window Choose Components keep default and click Next
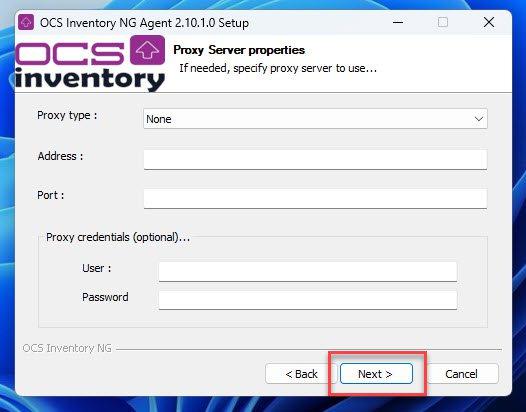
In the window Proxy Server properties click Next
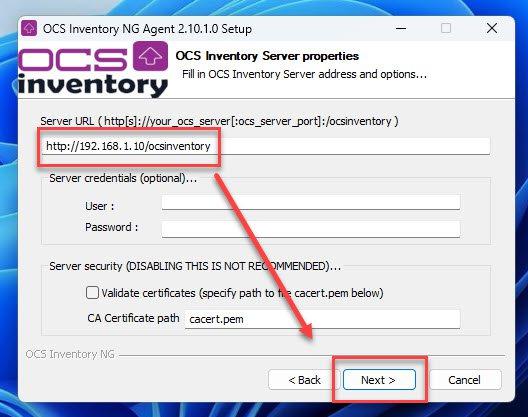
IMPORTANT: In the window OCS Inventory Server properties , You need to input the correct URL of the OCS Inventory Server ( Replace 192.168.1.10 = Your IP Server) and click Next
In the window OCS Inventory Agent for Windows properties choose the following:
- Section General options… check select Enable verbose log
- Section Setup options…select Immdediately launch inventory (=/NOW)
and click Next

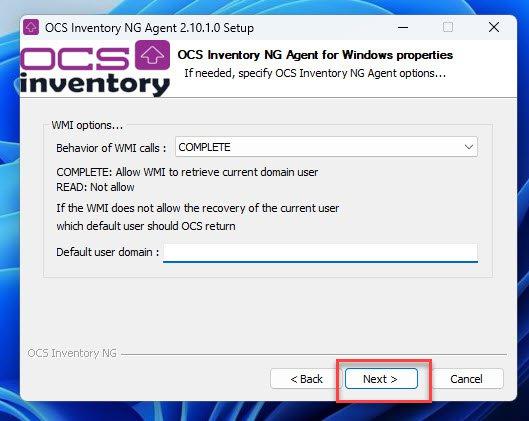
In the window OCS Inventory NG Agent for Windows properties keep default and click Next
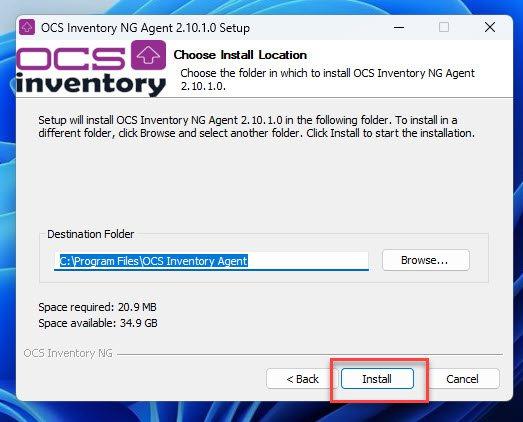
In the window Choose Install Location keep default and click Next
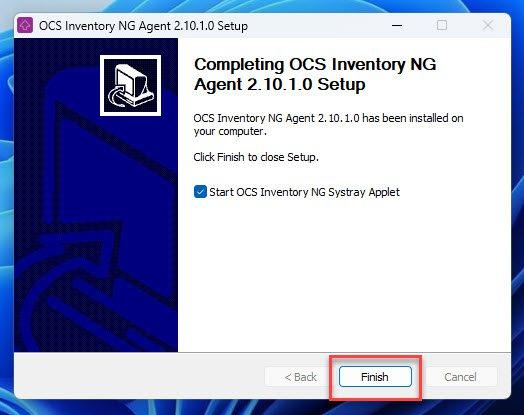
When done with the installation click Finish
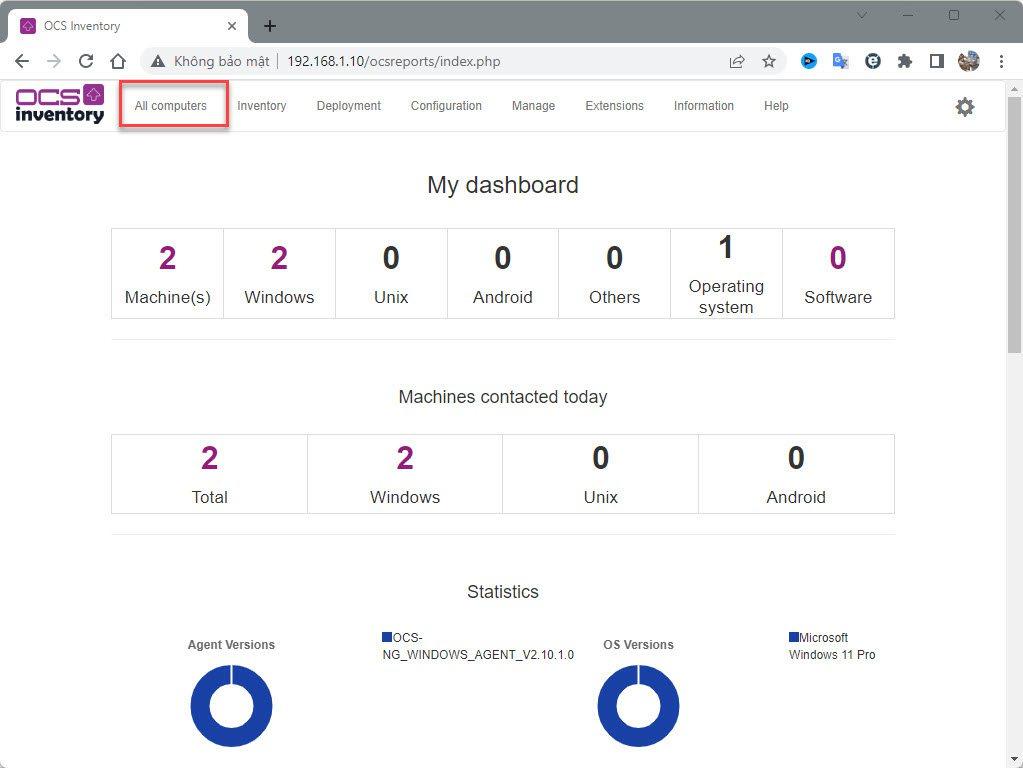
Now, Log in to OCS Inventory Server to verify that the assets have been inventoried.
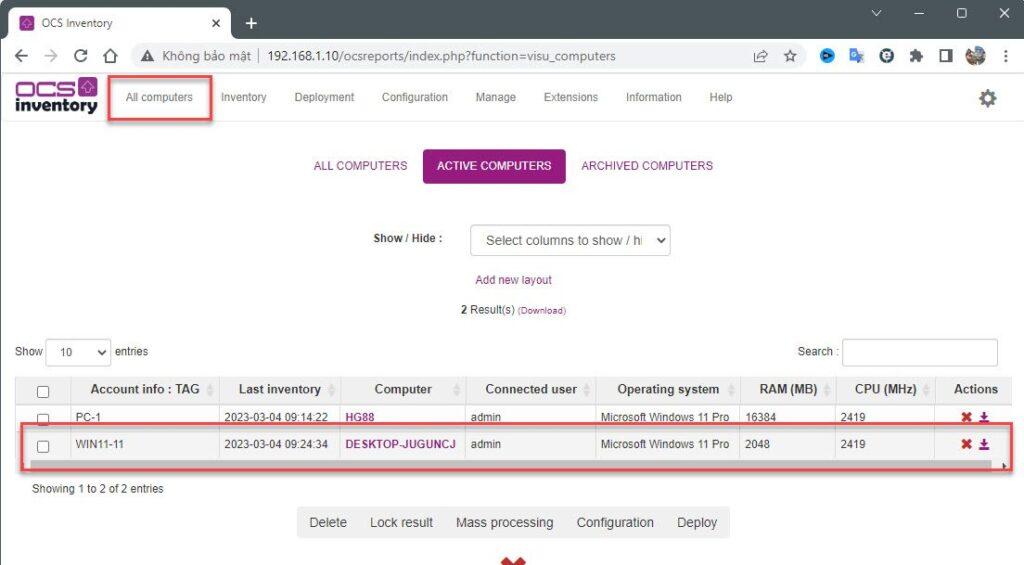
Click on the All Computers tab to see a list of your assets.
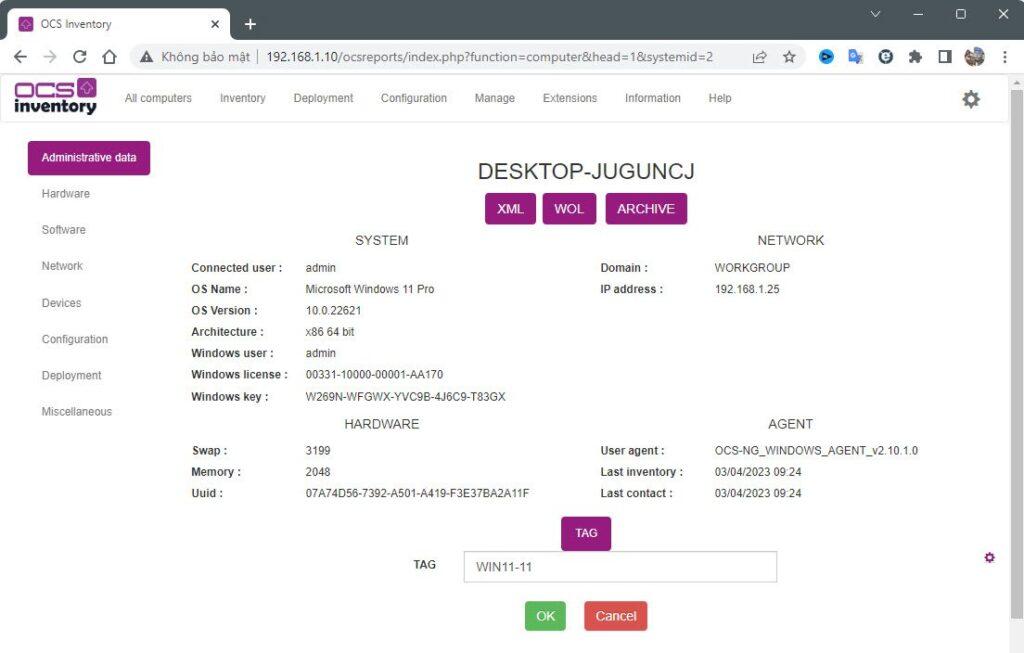
Click on your Computer Name to show full info on the assets
That’s it. You successfully installed OCS Inventory Agent on Windows!
Thank you for reading !!!