In a complex business environment, managing users and IT assets is a crucial task to ensure efficiency and security within the system. With the popularity of Active Directory (AD) as a widely used user management system in Windows environments, integrating it with GLPI – an IT asset and configuration management tool – can bring significant benefits.
In this article, we will explore the process of How to Synchronize Users from Active Directory to GLPI. By doing this, you can automate the synchronization of user information from AD to GLPI, allowing for more efficient user management and reducing manual efforts.
Read more
- How to Install and Configure Active Directory on Windows Server 2022/2019/2016
- How to Install GLPI 10 on Ubuntu 22.04 | 20.04 | 18.04 LTS
- How to Upgrade GLPI to Latest version on Ubuntu/Debian
Prerequisites
- GLPI server has been installed
- IP Address: 192.168.1.9
- Active Directory server has been installed
- Domain : hg.local
- IP Address : 192.168.1.11
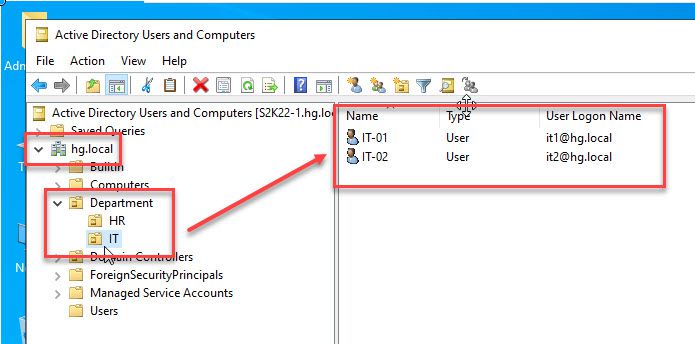
- In this guide, we assume the structure of the Active Directory as follows:
- We have a parent OU called Department that contains sub OUs (HR, IT).
- Within the HR OU, we have user accounts (hr1, hr2, …) and within the IT OU, we have user accounts (it1, it2, …).
On the Active Directory server
Step 1 – Adjust Firewall on the Active Directory
Note: Skip this step, if the Firewall is turned off on your server
By default, Active Directory listens on ports 389 and 636 for secure communication. To allow the GLPI server to connect to the AD server, you need to open these two ports. Please follow the steps below in order to open the ports:
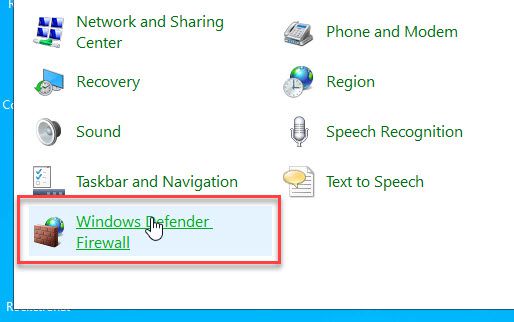
Open the Control Panel on your server – Click on Windows Defender Firewall feature.
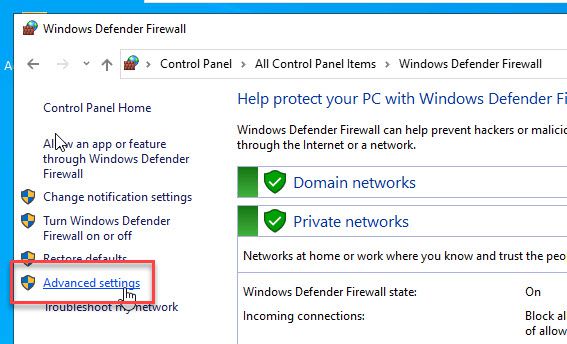
Click on Advanced settings option in the Windows Defender Firewall window.
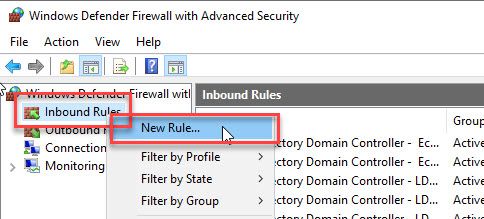
In the Windows Defender Firewall with Advanced Security window, right-click on Inbound Rules – select New Rule…
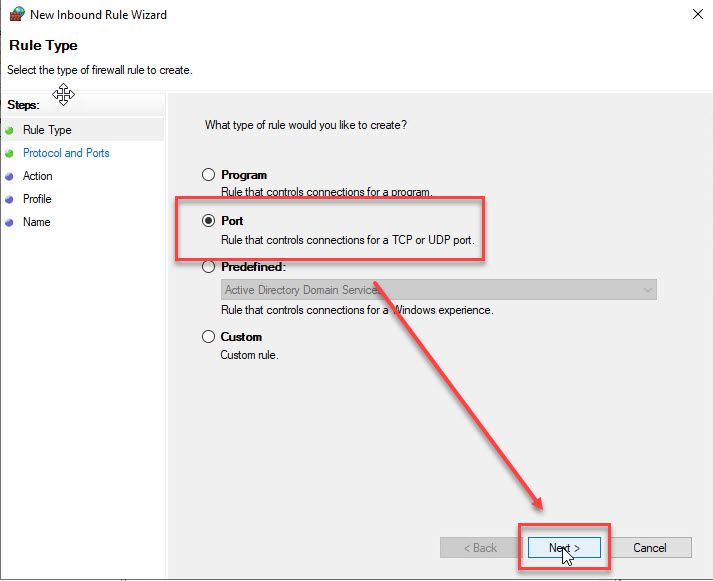
Choose Port and click Next in the Rule Type window.
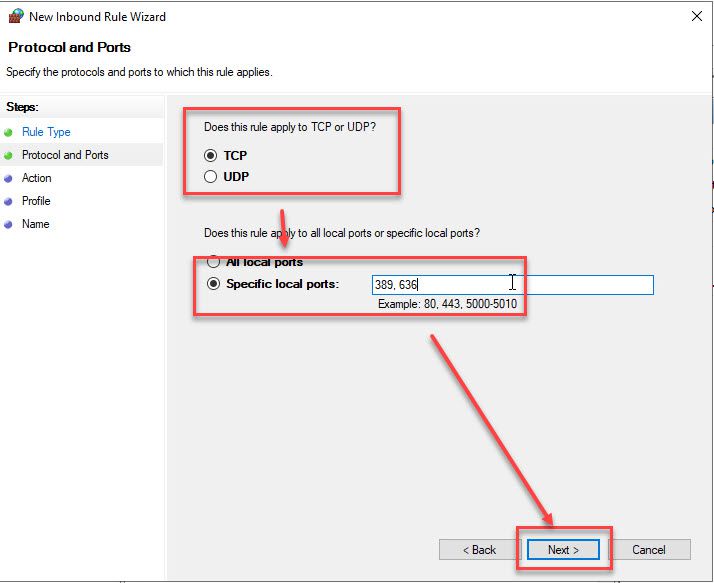
In the Protocol and Ports window, choose as shown below:
- Does this rule apply to TCP or UDP: TCP
- Specific local ports: 389, 636
and then click Next
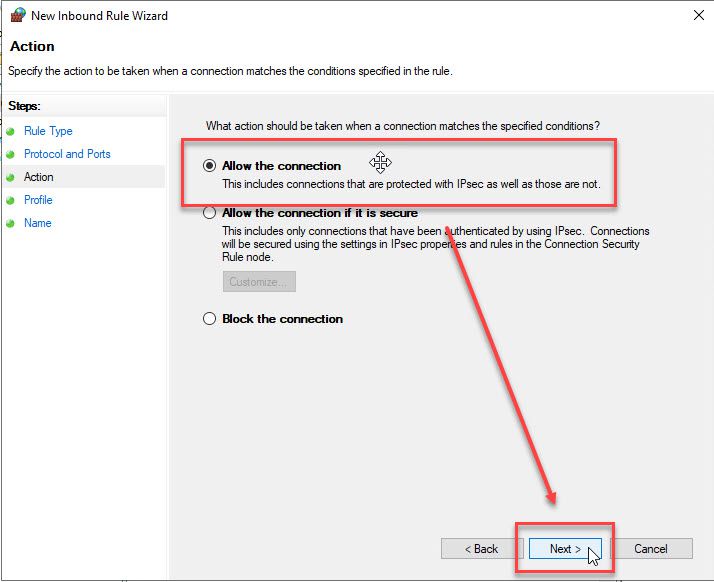
In the Active window, choose Allow the connection and click Next
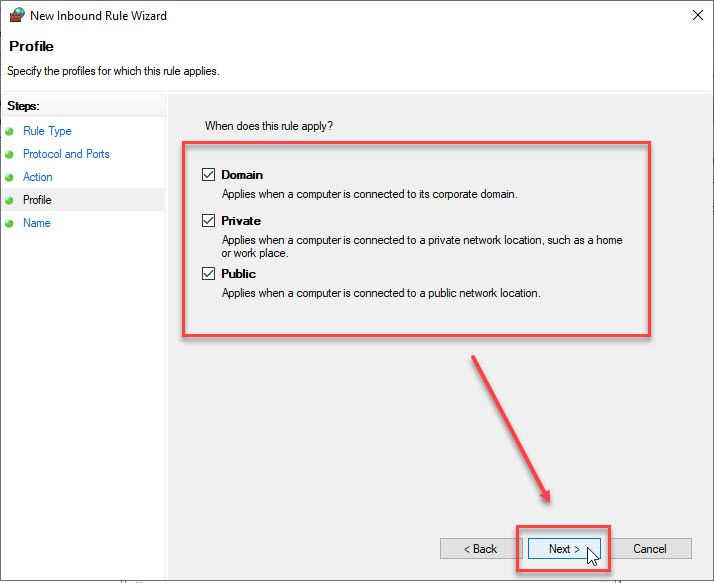
Keep default and click Next in the Profile window.
Set the Name and Descriotion for rule and click Finsh

Step 2 – Create a new user for authentication
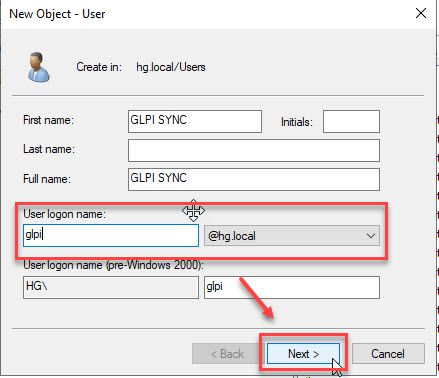
Next, we need to create a user called glpi. This user is used for authentication between Active Directory and GLPI
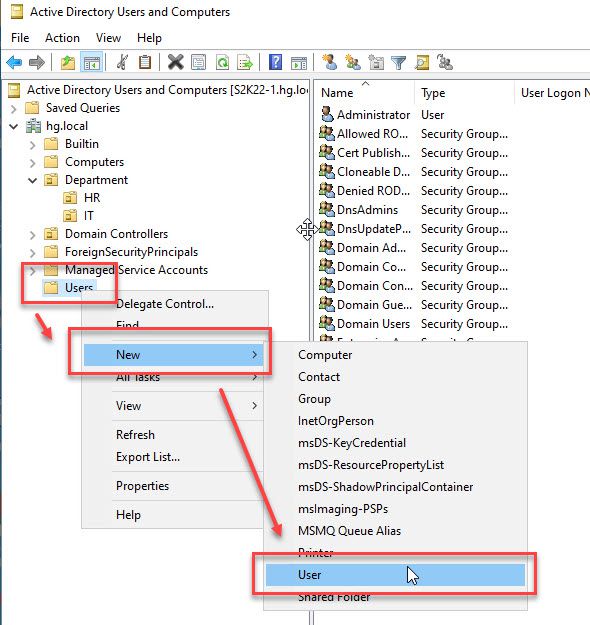
Open the Active Directory Users and Computers tool, right-click on Users – select New – select User option.
In the New Object – User window, enter the glpi user information as follows:
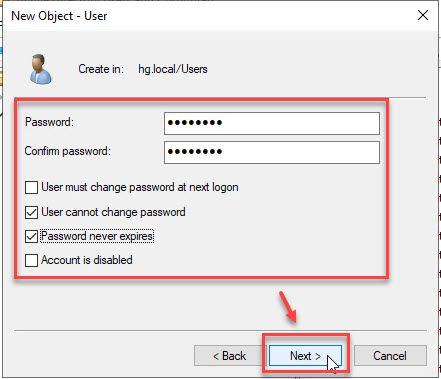
Set a strong password for glpi user
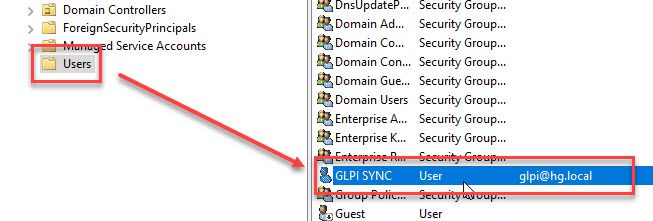
The [email protected] account domain has been created successfully.
On the GLPI server
Step 3 – Authentication between AD and GLPI
Now, log in to the GLPI system with your administrator account – in the left panel select Setup – select Authentication
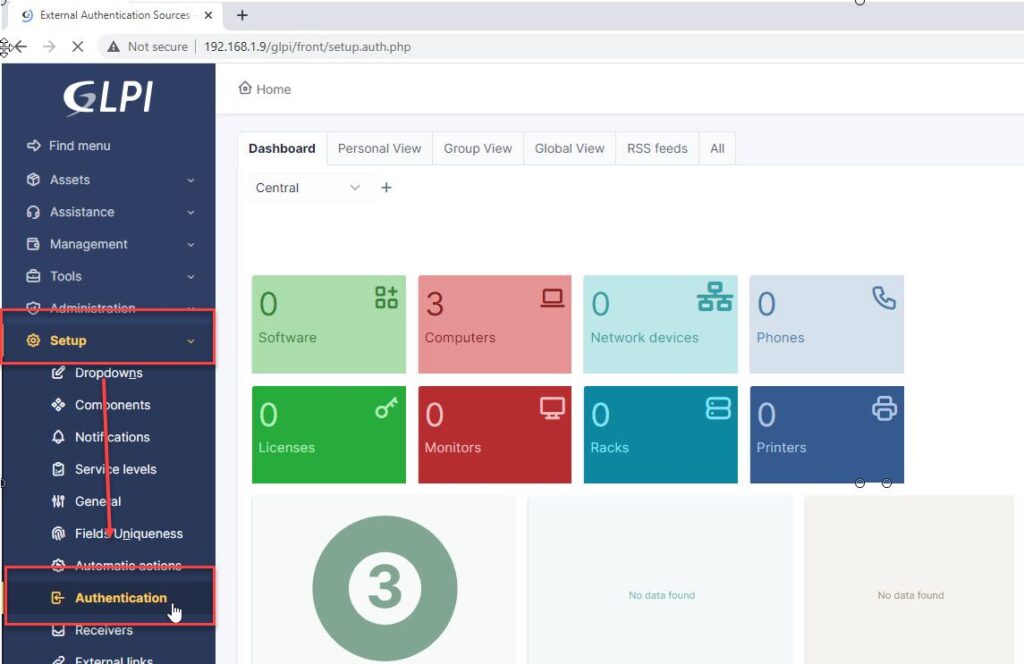
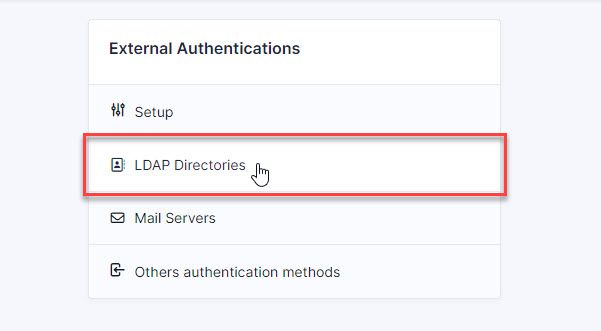
and select LDAP Directories option
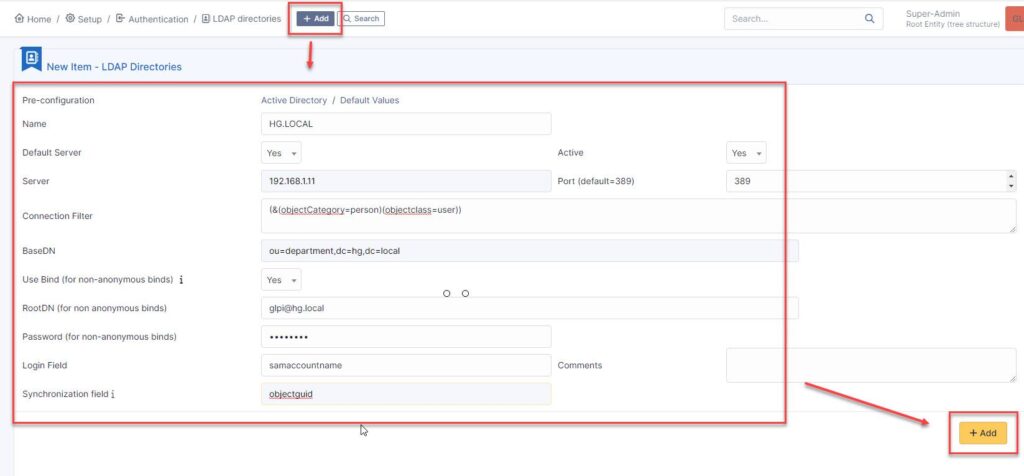
In the New Item – LDAP Directory page, click on Add button and provide the following information:
- Name: Your-Name
- Default Server: Yes
- Active: Yes
- Server: 192.168.1.11 (replace it with your AD IP address)
- Port: 389
- Connection Filter: (&(objectCategory=person)(objectclass=user))
- BaseDN: ou=department,dc=hg,dc=local ( Replace it with your AD structure)
- Use Bind: Yes
- RootDN: [email protected] ( account has been created in step 2)
- Password: [email protected]
- Login Field: samaccountName
- Synchronization Filed: objectguid
and the click Add button
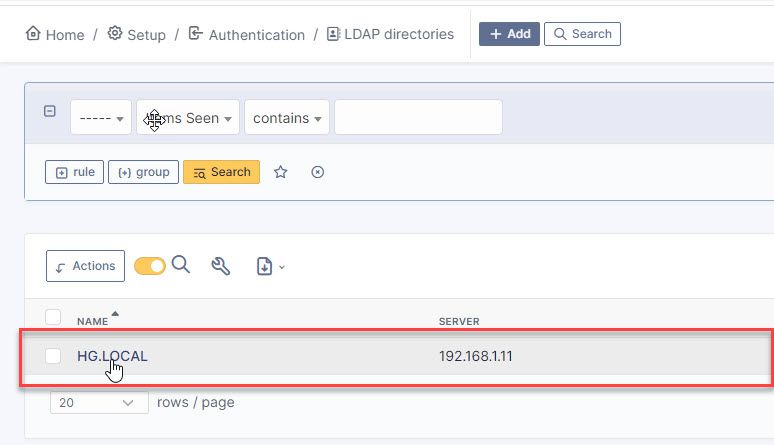
After done, click on it
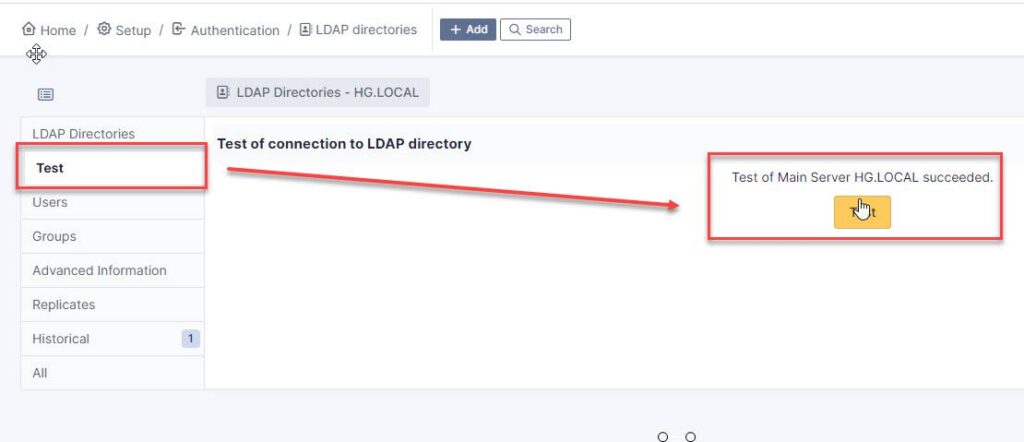
In the left panel, select Test – click Test to check connect between GLPI and Active Directory, If successful, you will see something like the following:
Step 4 – Import Users from Active Directory to GLPI
The preparations are complete. Now, follow the steps below to import users from AD to GLPI.
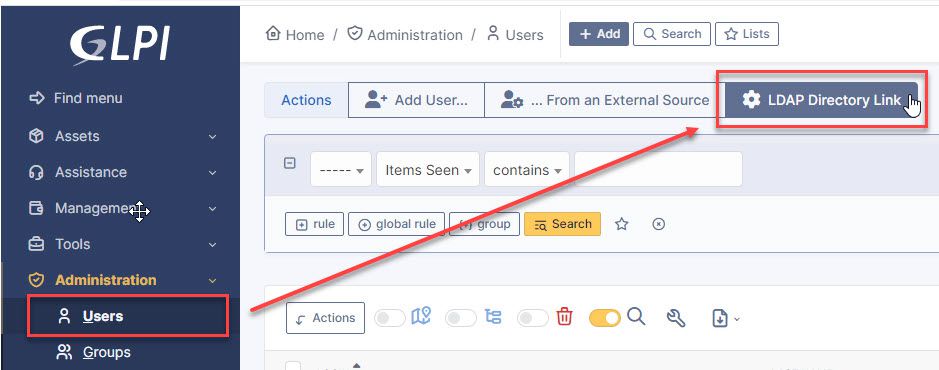
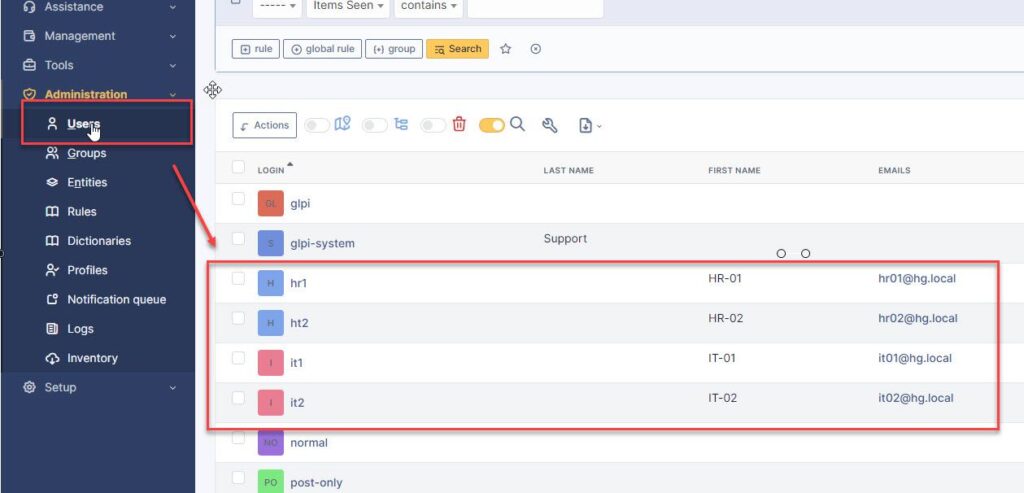
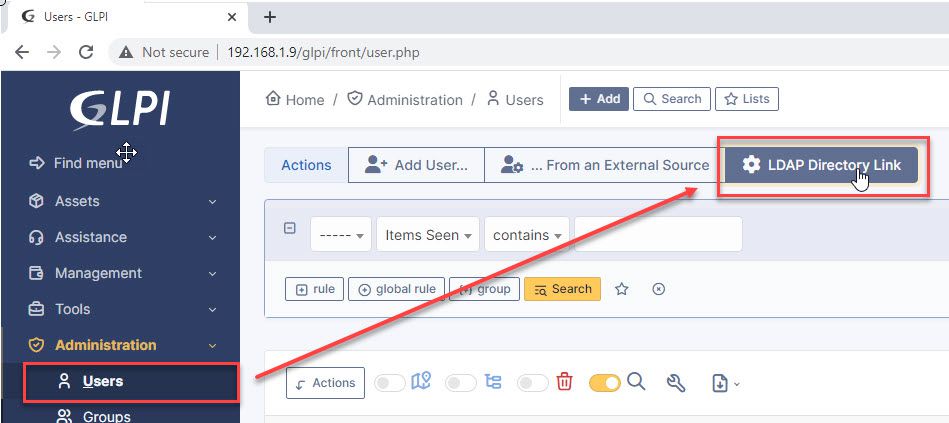
In the left panel, select Administration – select Users – select LDAP Directory Link option
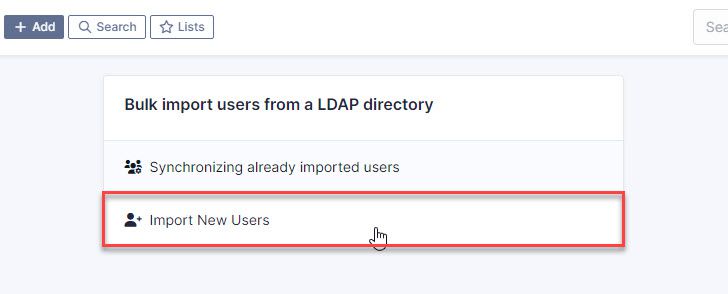
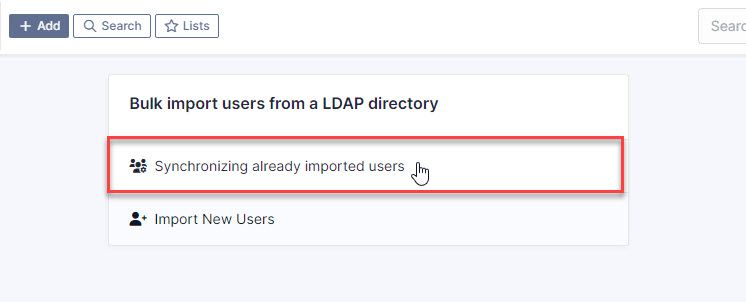
Click Import New User in the Bulk import users from a LDAP directory page.
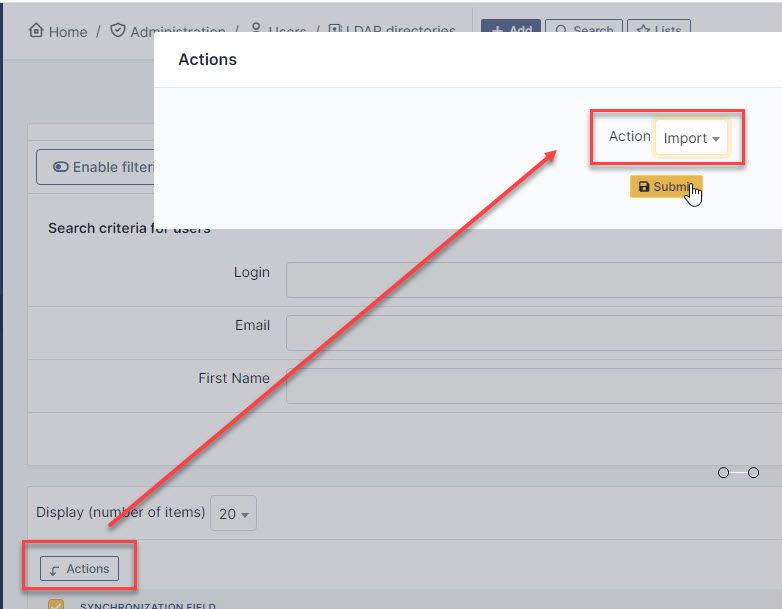
Click on Search button and you will see a list of users found from Active Directory, select the users you want to synchronize (or select all), and then click the Action button.
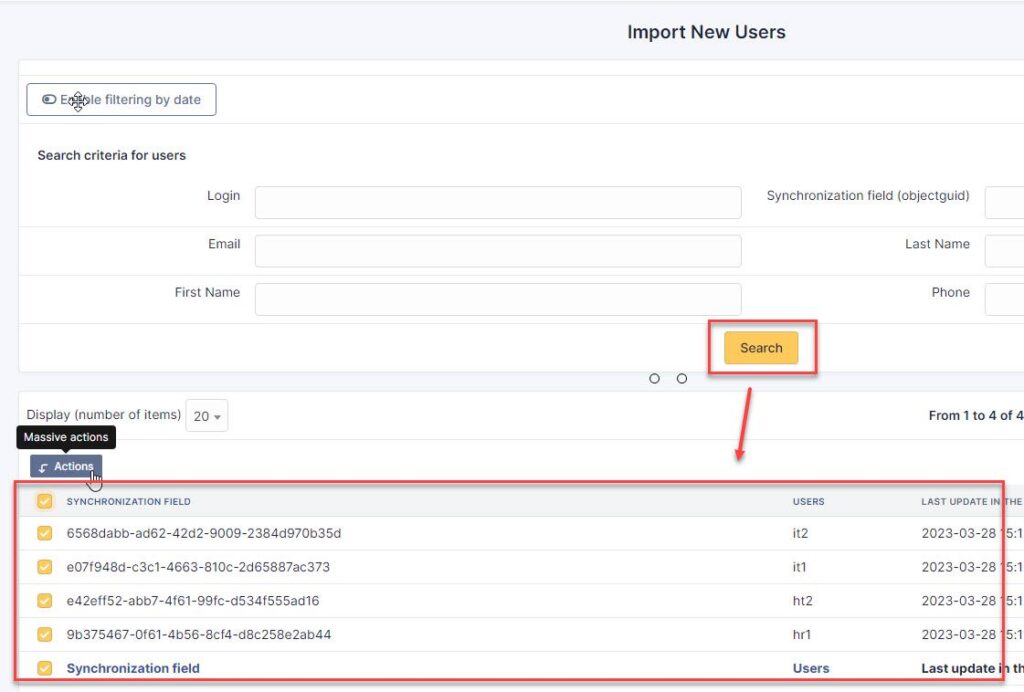
In the Actions page, select Import and then click Submit to import.
To verify, click on Users from the menu, and you will see the successfully synchronized users.
Step 5- Synchronize Users from Active Directory to GLPI
During the usage, there might be instances where user information changes. Follow the steps below to synchronize immediately.
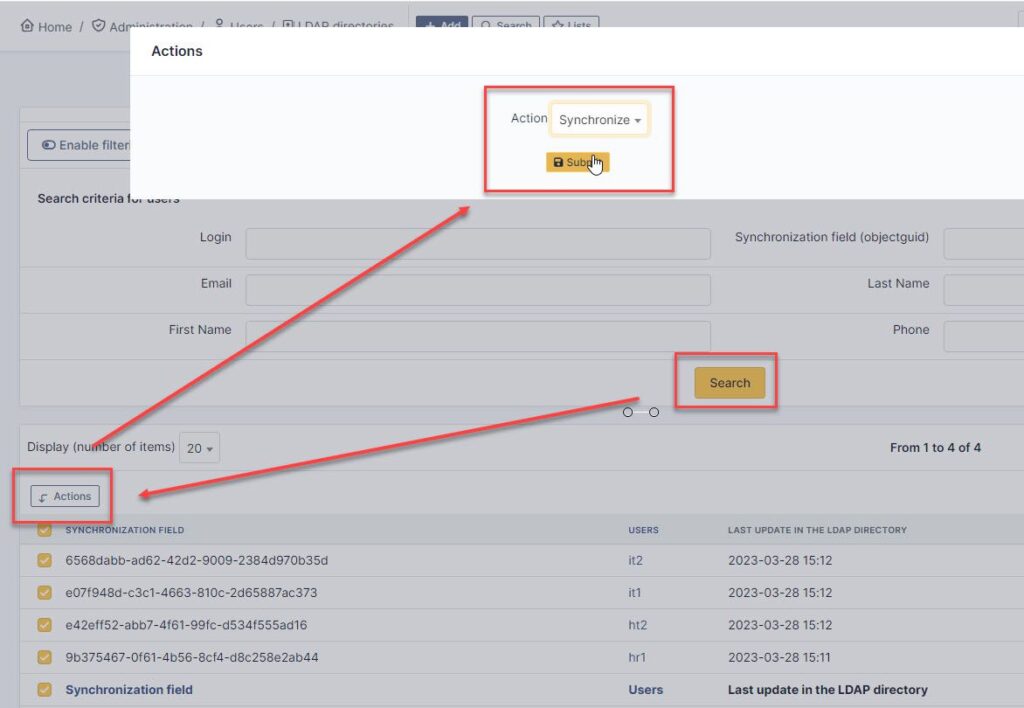
From menu, select Administration – select LDAP Directory Link setting.
Click Synchronizing already imported users option
Select all users – click Actions – select Synchronize and then click Submit button.
That’s it! You now know how to import and synchronize user data from AD to GLPI. If you have any comments or suggestions, please leave a comment below.
Thank you for reading !!!