Welcome to totatca.com. In this article, we will explore together How to Install and Configure GLPI 10 on Debian 12/11/10
GLPI is an open-source IT Asset Management, issue tracking system, and service desk system. This software is written in PHP and distributed as open-source software under the GNU General Public License.
GLPI is a web-based application that helps companies to manage their information system. The solution can build an inventory of all the organization’s assets and manage administrative and financial tasks. The system’s functionalities help IT Administrators to create a database of technical resources, as well as a management and history of maintenance actions. Users can declare incidents or requests thanks to the Helpdesk feature.
Prerequisites:
- Operating system: Debian 12/11/10
- User privileges: root or non-root user with root privileges
- A LAMP stack installed on your system
Read more: How to Install LAMP stack ( Linux – Apache – MySQL/MariaDB – PHP ) on Debian
Read more:
- How to Upgrade GLPI to Latest version on Ubuntu/Debian
- How to Synchronize Users from Active Directory to GLPI
- How to Install and Configure OCS Inventory Server on Ubuntu
- Fix Warning – PHP directive “session.cookie_httponly” should be set to “on” to prevent client-side script to access cookie values
- Fix Warning – Web server root directory configuration is not safe as it permits access to non-public files in GLPI
Step 1 – Install PHP extensions and packages required by GLPI
First of all, run the system update command to ensure all the packages on your system are up to date and in the latest state:
sudo apt update && sudo apt upgrade -y
Next, install the packages and the PHP extensions required by GLPI:
sudo apt install -y vim wget tar php-curl php-zip php-gd php-intl php-intl php-pear php-imagick php-imap php-memcache php-pspell php-tidy php-xmlrpc php-xsl php-mbstring php-ldap php-ldap php-cas php-apcu libapache2-mod-php php-mysql php-bz2
Step 2 – Create the database for GLPI
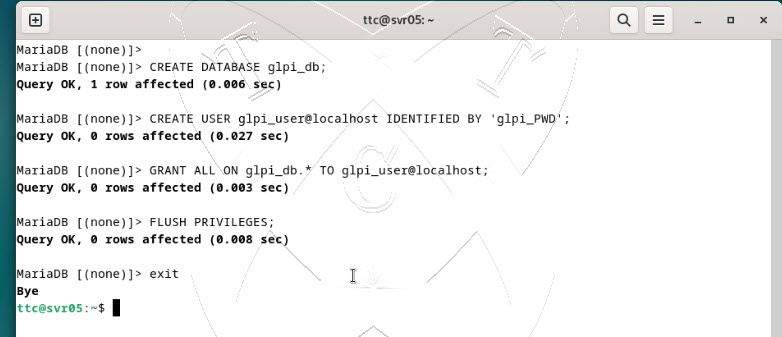
Log in to your database server:
sudo mysql -uroot -p
Create a new database name called glpi_db
CREATE DATABASE glpi_db;
Create a new database user called glpi_user with password glpi_PWD
CREATE USER glpi_user@localhost IDENTIFIED BY
'glpi_PWD';
Grant all privileges on the glpi_db database to the glpi_user user
GRANT ALL ON glpi_db.* TO glpi_user@localhost;
Reload and exit the database server
FLUSH PRIVILEGES;
EXIT;
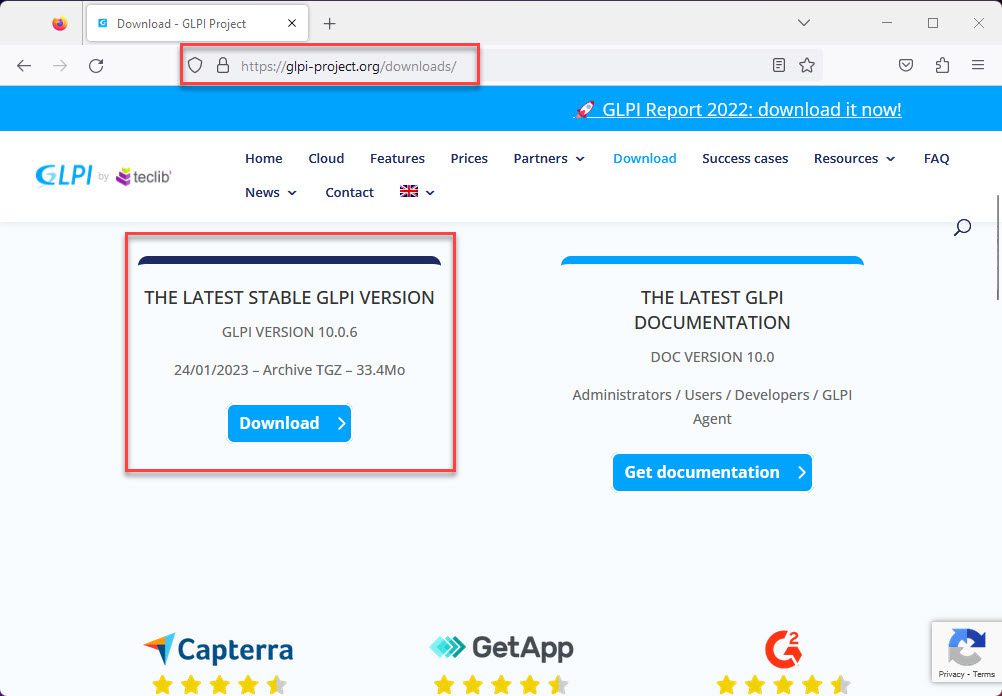
Step 3 – Download GLPI’s latest version
First, go to the official website https://glpi-project.org/downloads/ to download the latest stable GLPI version:
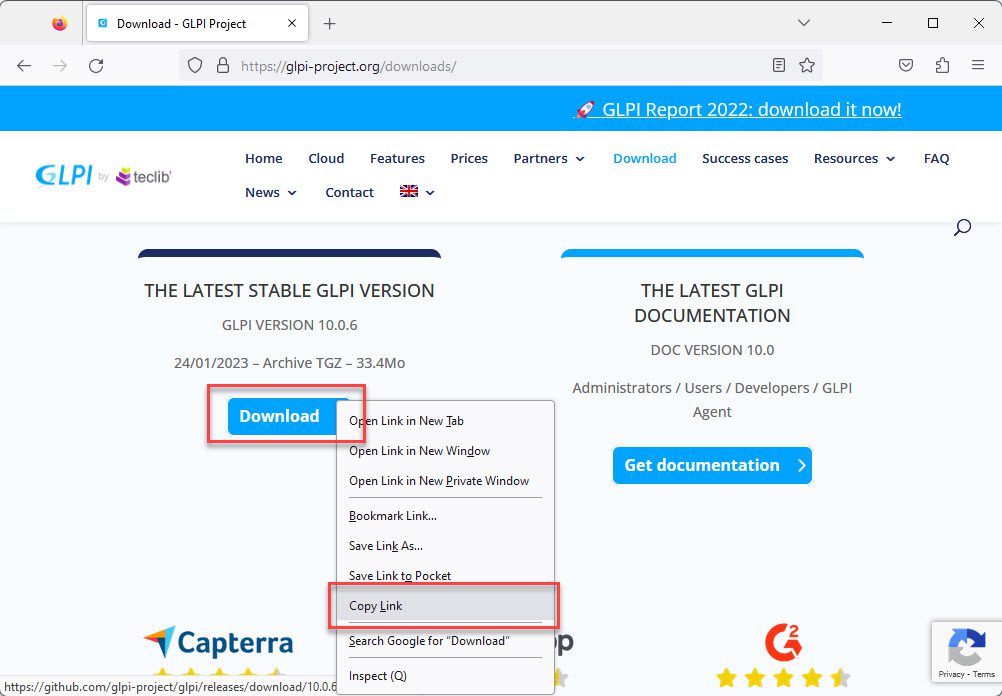
Right-click on the Download button and select Copy Link
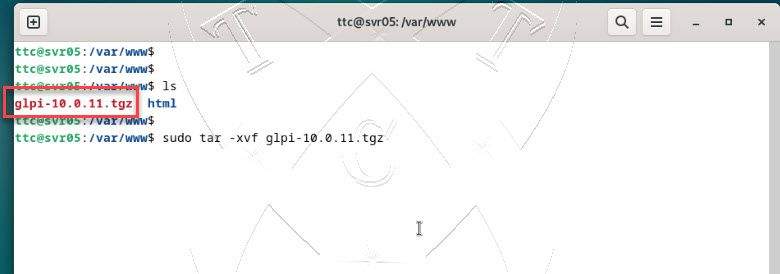
Next, go to the /var/www/ directory
cd /var/www/
And run the command below to download the latest stable GLPI:
sudo wget Paste_Link_in_step_above
### Example for GLPI 10.0.6
sudo wget https://github.com/glpi-project/glpi/releases/download/10.0.11/glpi-10.0.11.tgz%20
Next, the extract has just downloaded the file
sudo tar -xvf glpi-10.0.11.tgz
Step 5 – Configure GLPI
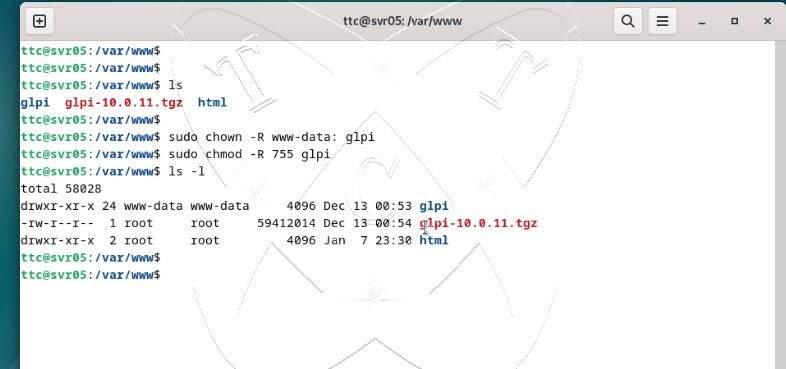
After extracting, you will get a folder named glpi. We need to change ownership and permissions using the following command:
sudo chown -R www-data:www-data glpi
sudo chmod -R 755 glpi
ls -l
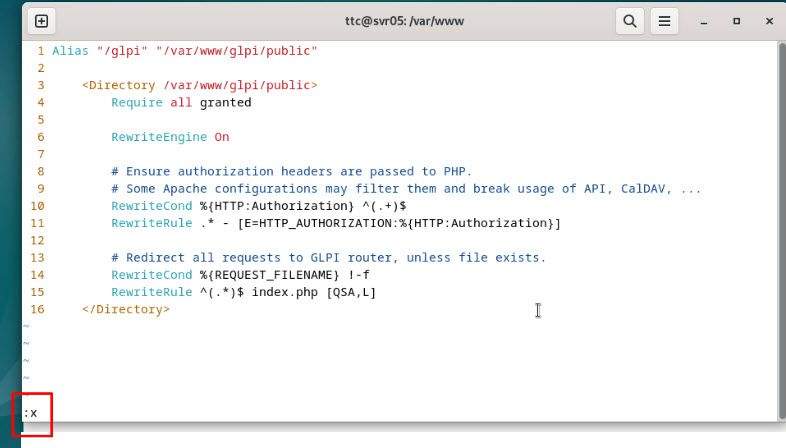
Create an Apache configuration file named glpi.conf in /etc/apache2/sites-available/ using the following command:
sudo vim /etc/apache2/sites-avaiable/glpi.conf
Press the i key to switch to insert mode and add the following content:
Alias "/glpi" "/var/www/glpi/public"

    <Directory /var/www/glpi/public>
        Require all granted

        RewriteEngine On

        # Ensure authorization headers are passed to PHP.
        # Some Apache configurations may filter them and break usage of API, CalDAV, ...
        RewriteCond %{HTTP:Authorization} ^(.+)$
        RewriteRule .* - [E=HTTP_AUTHORIZATION:%{HTTP:Authorization}]

        # Redirect all requests to GLPI router, unless file exists.
        RewriteCond %{REQUEST_FILENAME} !-f
        RewriteRule ^(.*)$ index.php [QSA,L]
    </Directory>
Save the file by pressing Esc, then type the command :x and hit Enter:
Enable the site you just created:
sudo a2ensite glpi.conf
sudo a2enmod rewrite
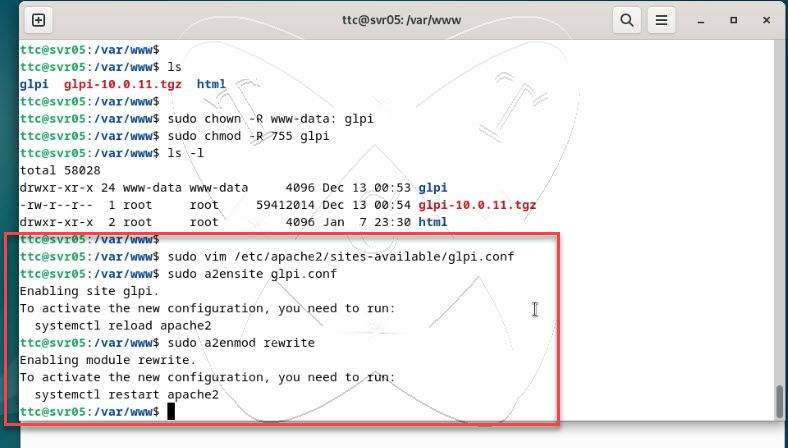
Then restart the Apache service for the change to take effect:
sudo systemctl restart apache2
Step 5 – Setup GLPI
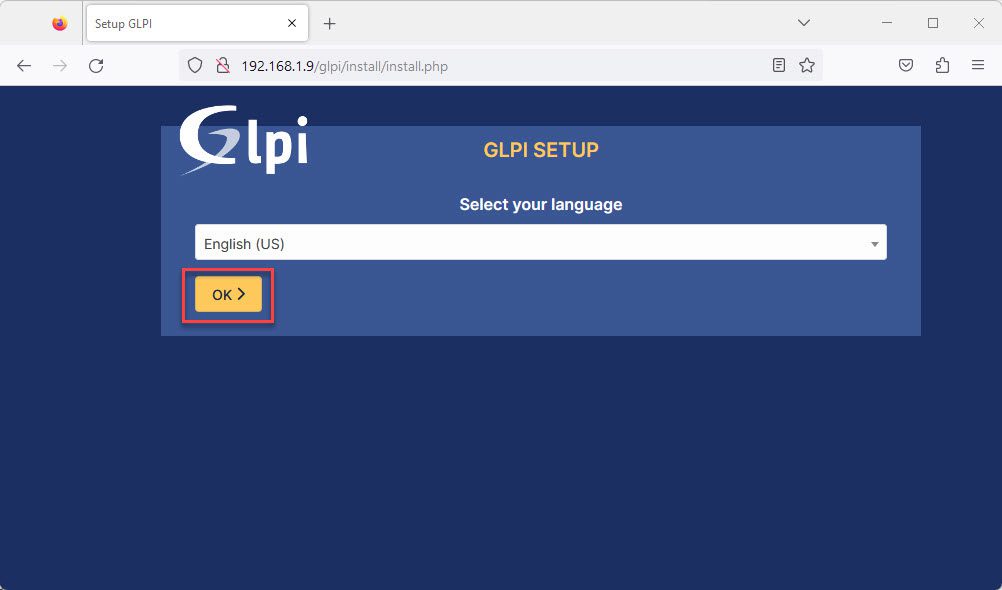
Open your web browser and access the address http://IP-Server/glpi to set up the GLPI through the web interface.
On the first page, select your language and click on the OK button to the next step
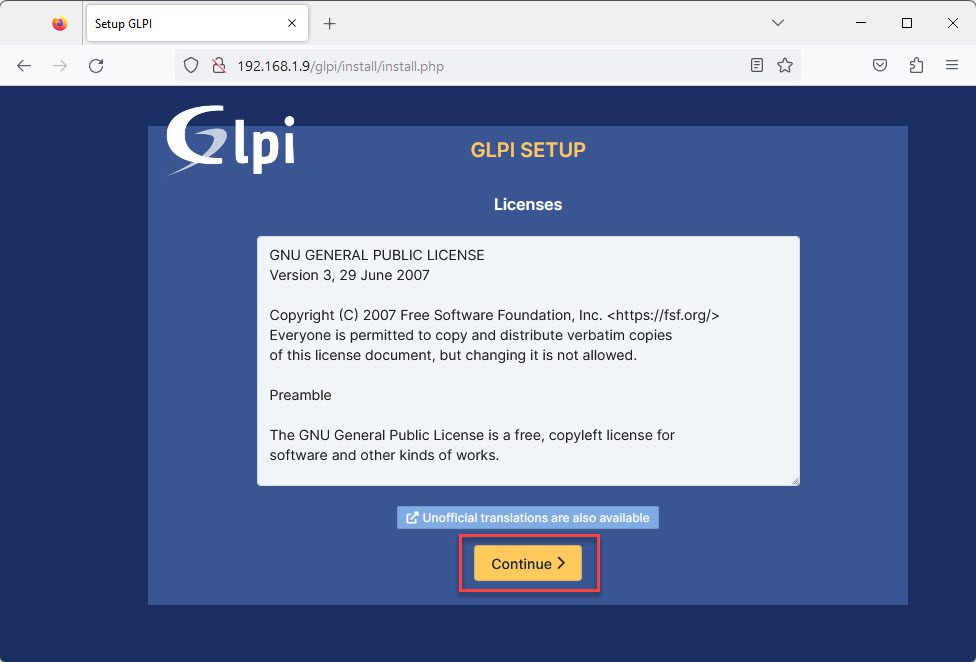
Next, you need to accept the licenses team by clicking on the Continue button to the next step
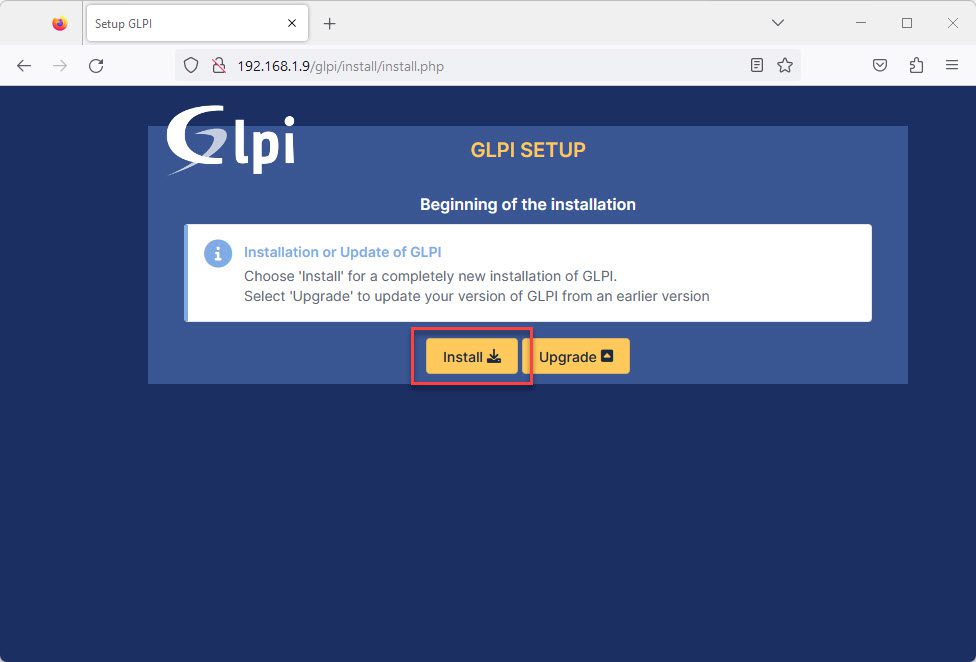
As this is a new installation, click on the Install button to the next step
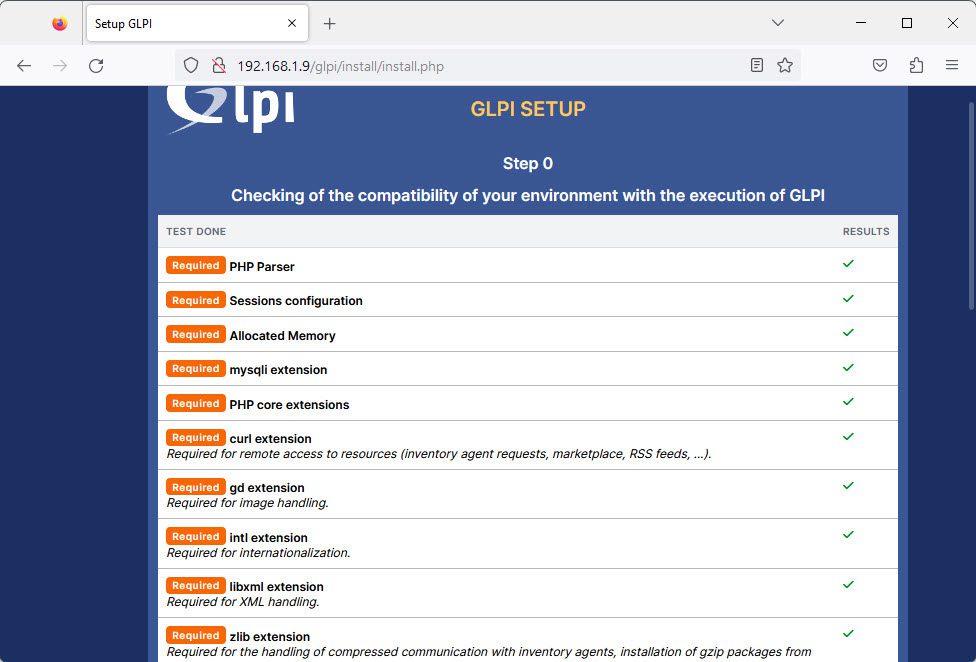
If the requirements are OK, click on the Continue button to the next step
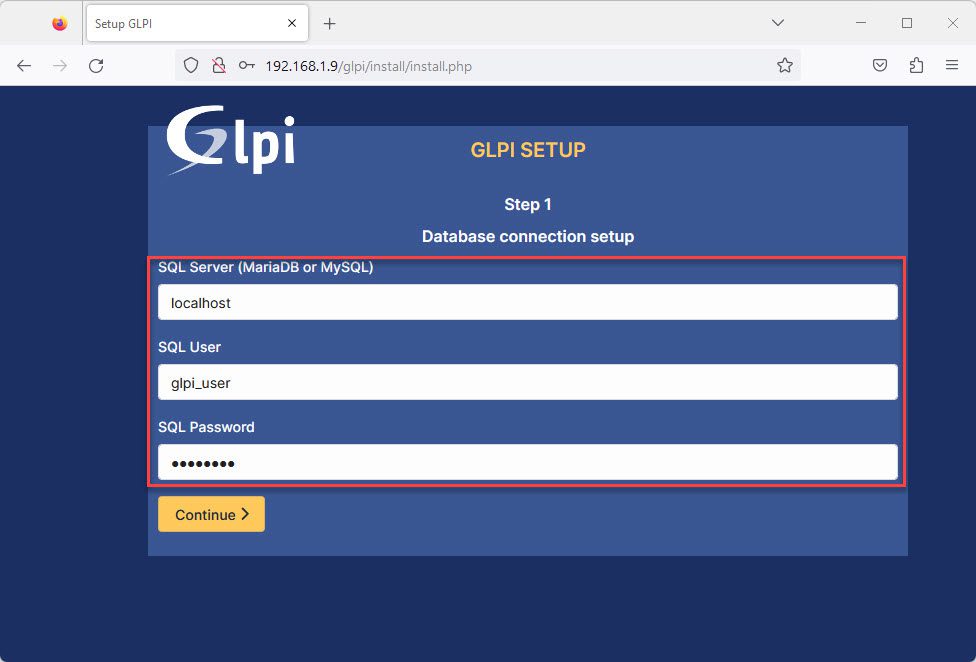
Input in your database created in step 2:
- SQL Server: localhost
- SQL User: glpi_user
- SQL Password: glpi_PWD
and click on the Continue button to the next step
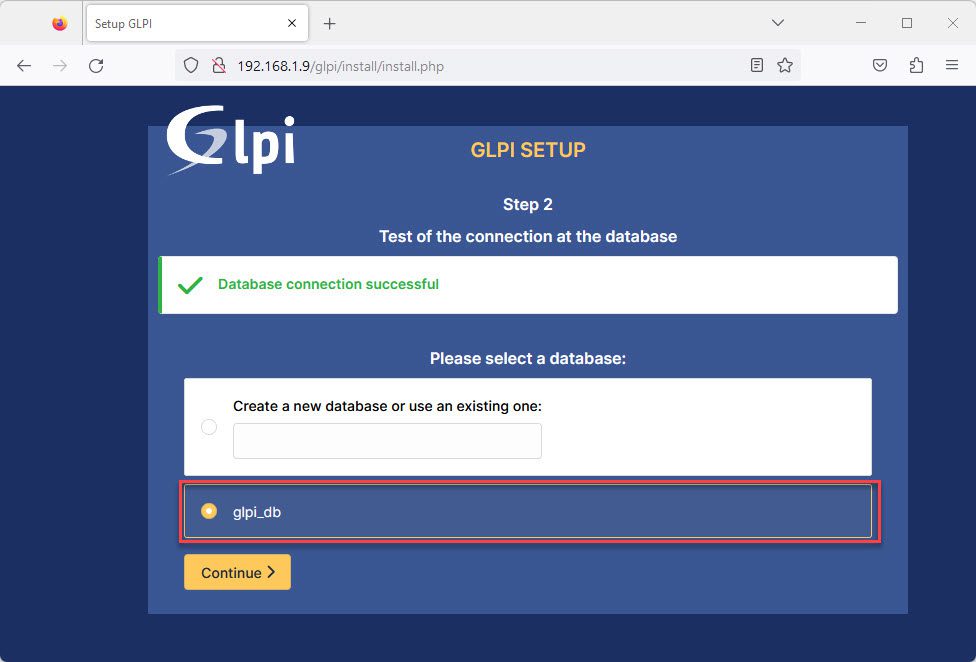
Select the glpi_db created in step 2 and click on the Continue button to the next step
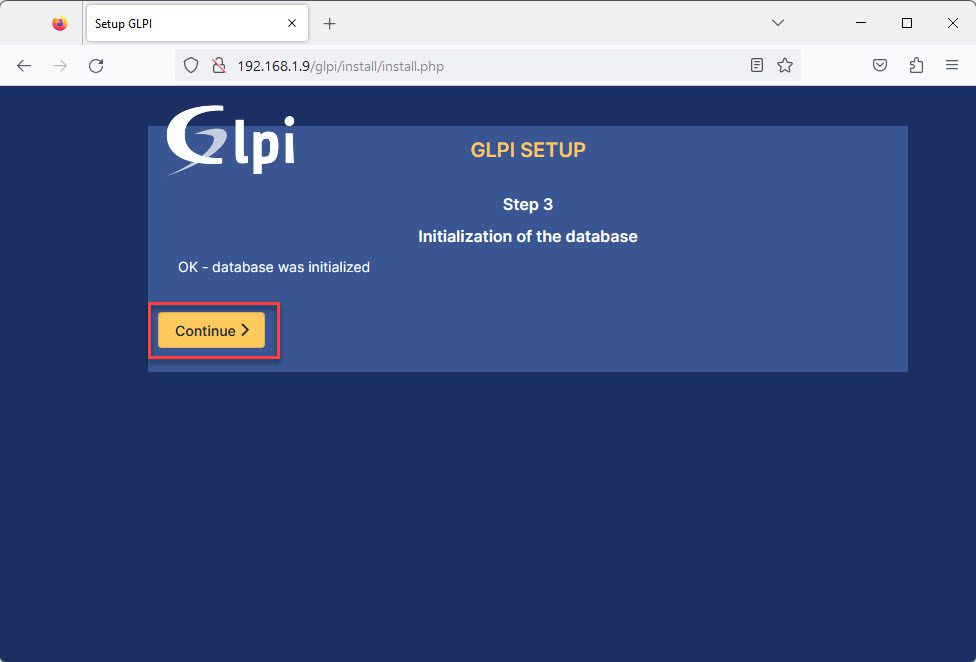
The database was initialized, click on the Continue button to the next step
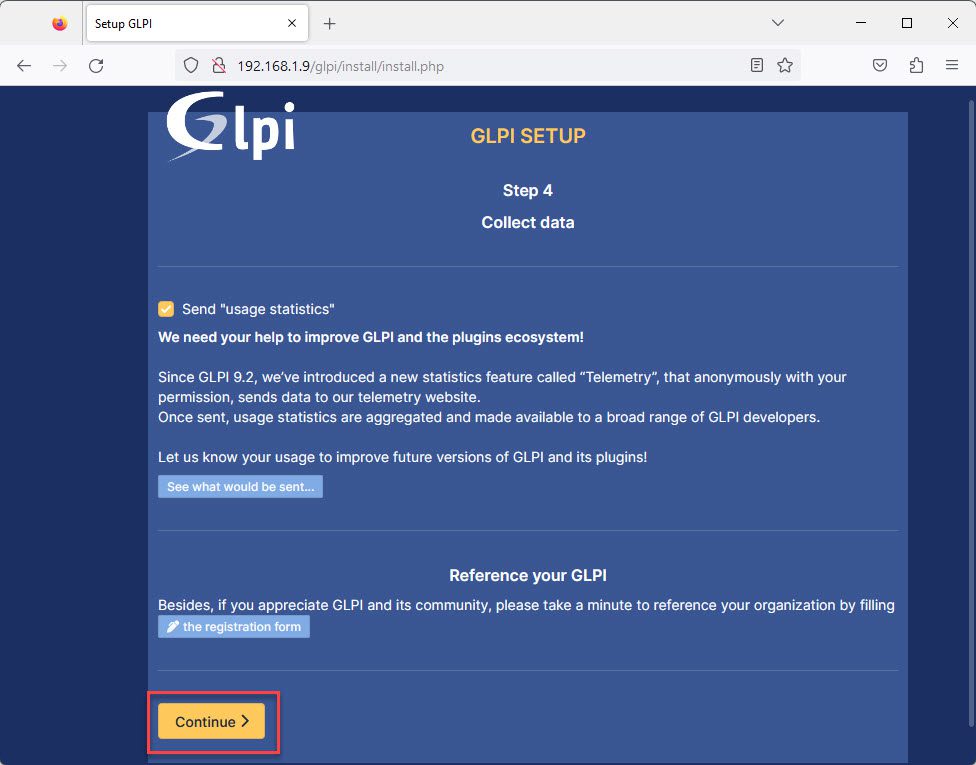
Uncheck Send “usage statistic” and click on the Continue button to the next step
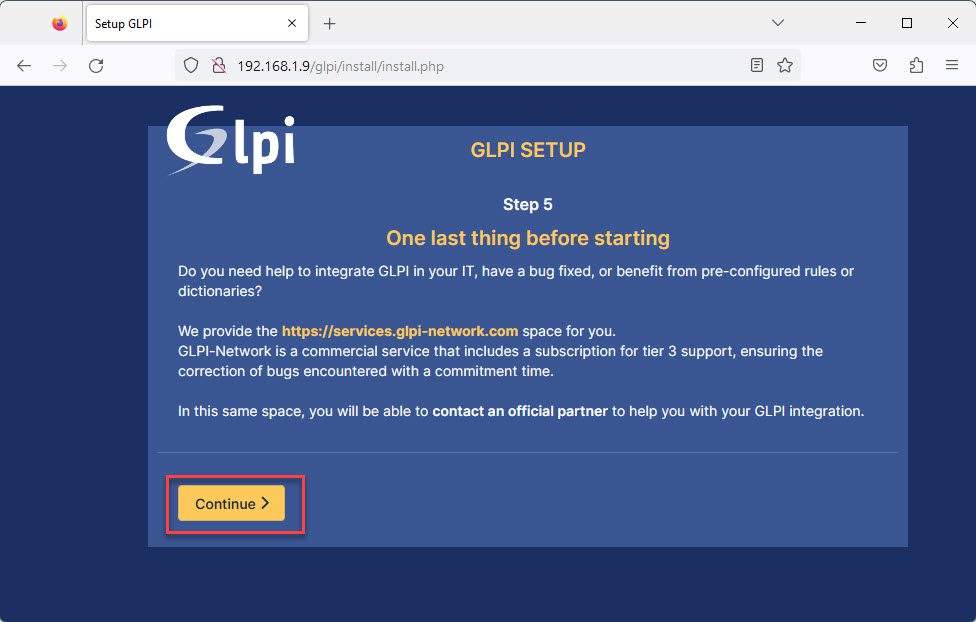
Click on the Continue button to the next step
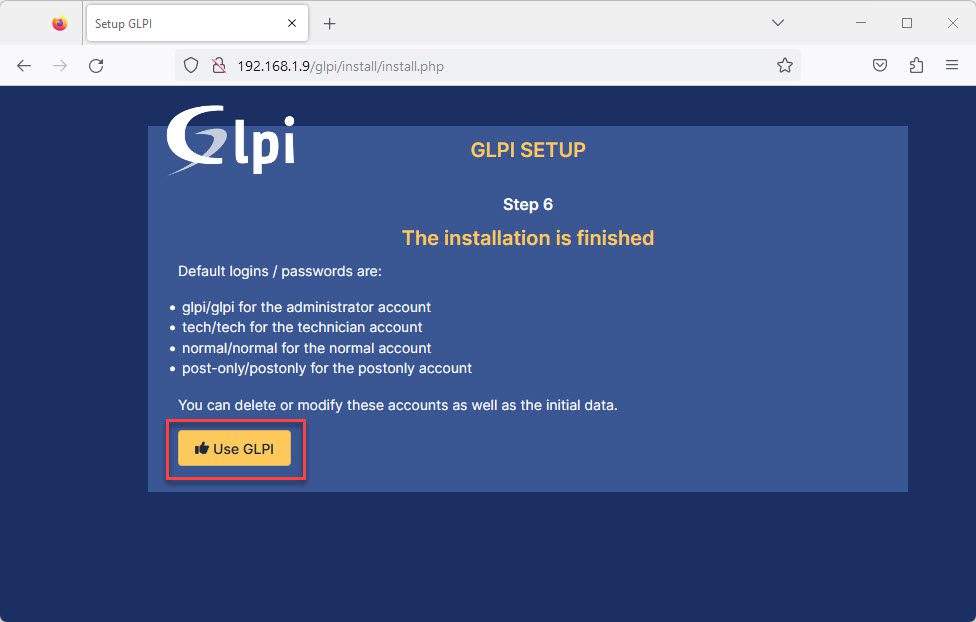
The installation is finished with the default username and password as below:
- Administrator account:
- Username: glpi
- Password: glpi
- Technician account:
- Username: tech
- Password: tech
- Normal account:
- Username: normal
- Password: normal
- Postonly account
- Username: post-only
- Password: post-only
and click on the Use GLPI button to the next step.
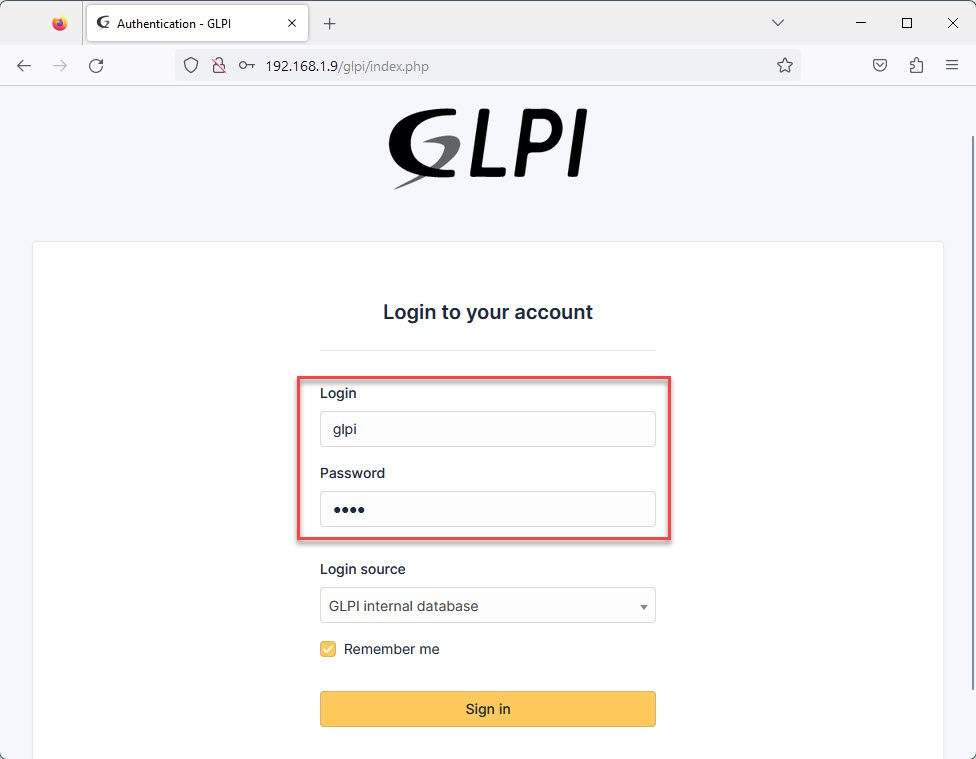
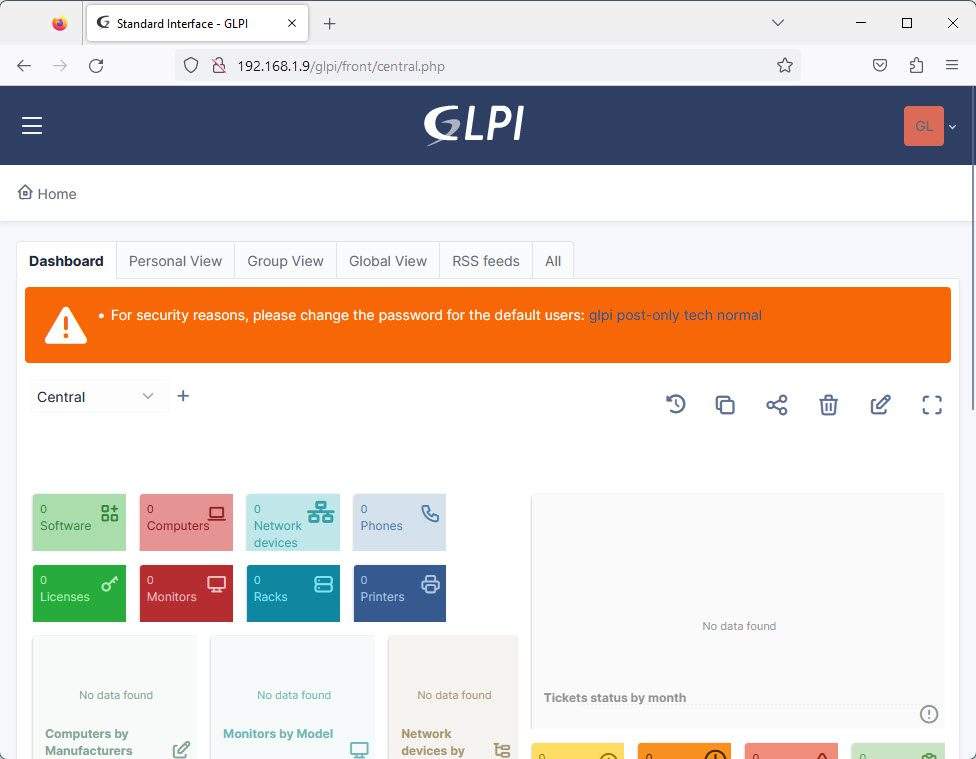
Now, log in to GLPI with the default username and password
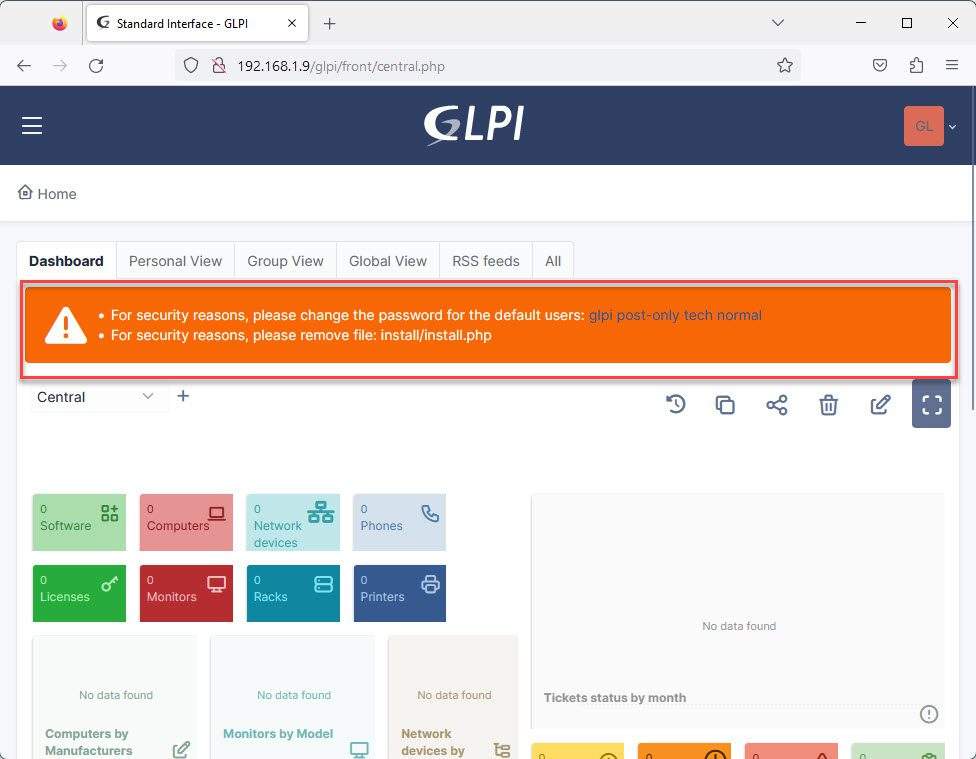
You see the dashboard central of the GLPI system:
Step 6 – Fix warning
For the For security reasons, please change the password for the default users warning, you need to change the default passwords for those accounts.
For the For security reasons, please remove file: install/install.php warning, you need to remove or rename install.php file in the /glpi/install directory:
Go to the glpi/install directory by following the command below:
cd glpi/install
sudo mv install.php install.php.bak
And restart the Apache service to apply the change:
sudo systemctl restart apache2
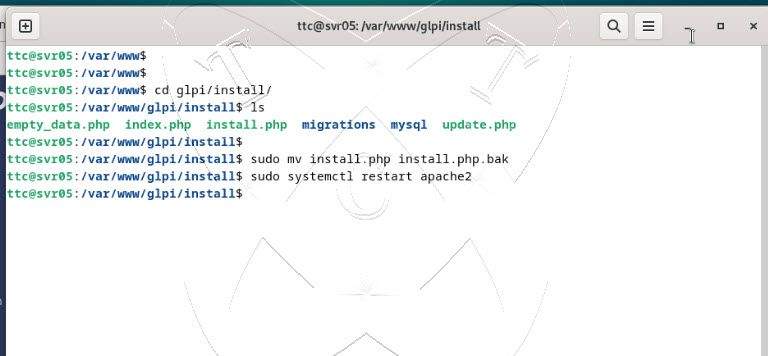
Now, reload the page and you won’t see the warning For security reasons, please remove file: install/install.php
Additionally, if you encounter two other warnings, PHP directive “session.cookie_httponly” should be set to “on” to prevent client-side script to access cookie values and Web server root directory configuration is not safe as it permits access to non-public files in GLPI, you can refer to the article here.
That’s it, Wishing you success!!!