Hello everyone, in this guide How to Install and Configure LAMP Stack on CentOS | RockyLinux | AlmaLinux 8/9, we will learn through the step-by-step process of installing LAMP on your system.
Installing the LAMP stack is an important process to create a fully functional web application development environment. LAMP is an acronym that refers to the essential components of this stack, including Linux, Apache, MySQL/MariaDB, and PHP.
- Linux: The Linux operating system serves as the platform for running web applications.
- Apache: Apache is a web server that handles HTTP requests and provides web resources to users’ browsers.
- MySQL/MariaDB: MySQL/MariaDB serves as a popular database management system utilized for storing and managing data in web applications.
- PHP: PHP is a programming language used for developing dynamic web software and interacting with databases.
Prerequisites
- Operating system
- CentOS 8
- CentOS Stream 8/9
- Rocky Linux 8/9
- Alma Linux 8/9
- Privileges: root or non-root user with sudo privileges.
Read more
- Squid Proxy – Install and Configure Squid Proxy Server on CentOS | RockyLinux | AlmaLinux
- How to Change Hostname and FQDN/Fullname on Linux
- Fix Error Username is not in the sudoers file – This incident will be reported
Step 1 – Update system
Before we install the LAMP stack, run the following command to update the repository and software packages.
sudo dnf update
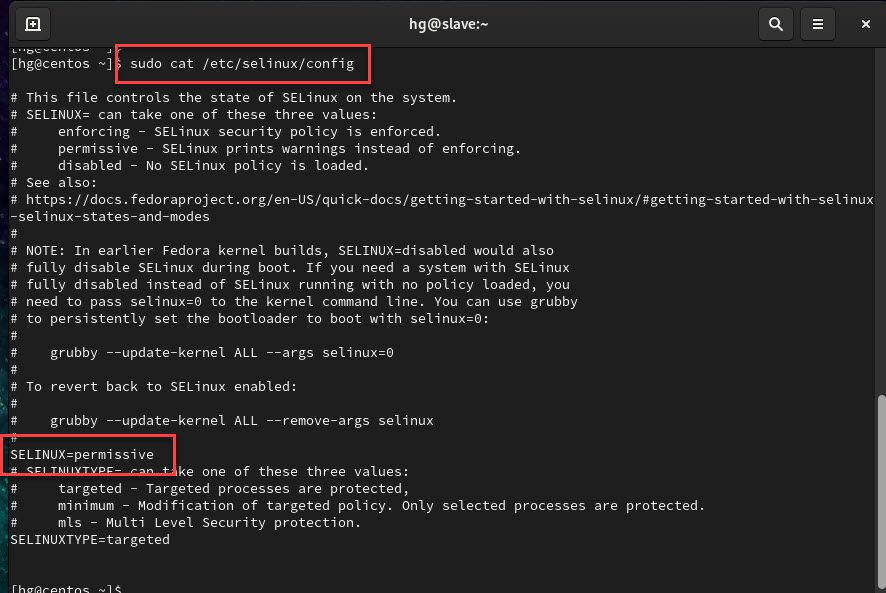
Step 2 – Adjust SELINUX
To install the LAMP stack, we need to temporarily disable SELinux and configure SELinux to permissive mode on the system.
sudo setenforce 0 && sudo sed -i
's/^SELINUX=.*/SELINUX=permissive/g'/etc/selinux/config
Ensure it’s mode permissive
sudo cat /etc/selinux/config
Step 3 – Install Apache Web Server
Install Apache Service
The first step is to install Apache. To install Apache, run the following command:
sudo dnf install httpd httpd-tools -y
After Apache is installed, we need to start the Apache service by using the following command:
sudo systemctl start httpd
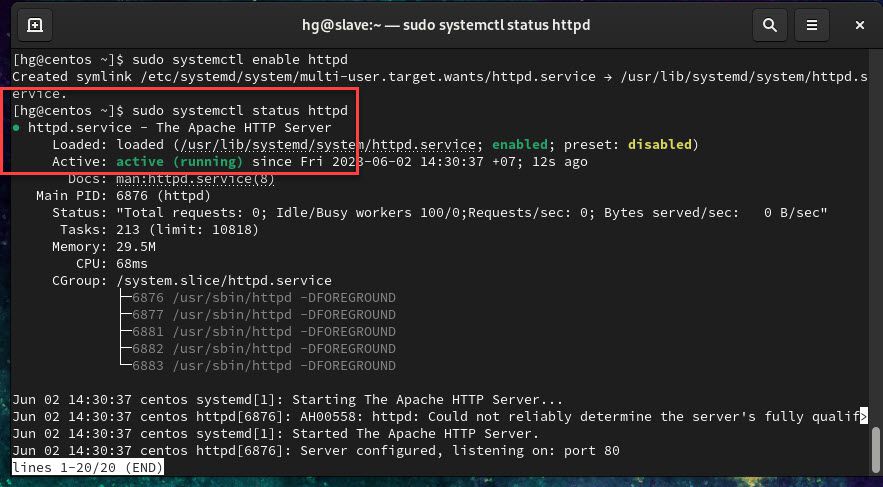
Next, we will enable the Apache service to auto-start at system boot time by running the following command:
sudo systemctl enable httpd
Also, check status of the Apache service, and ensure it’s running on the system by running the following command:
sudo systemctl status httpd
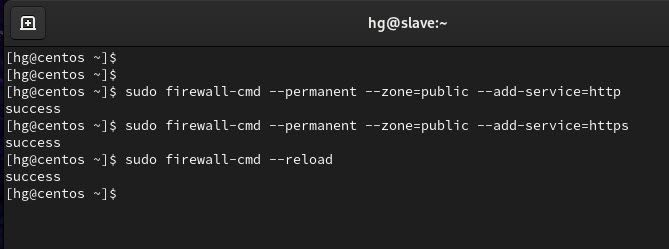
Adjust Firewall
By default, the Apache service listens on ports 80 and 443 (secure). We need to allow incoming traffic on both ports in the firewall, you can run the following command:
Note: Skip if Firewalld not running on your system
sudo firewall-cmd
--permanent--zone=public--add-service=httpsudo firewall-cmd
--permanent--zone=public--add-service=httpssudo firewall-cmd
--reload
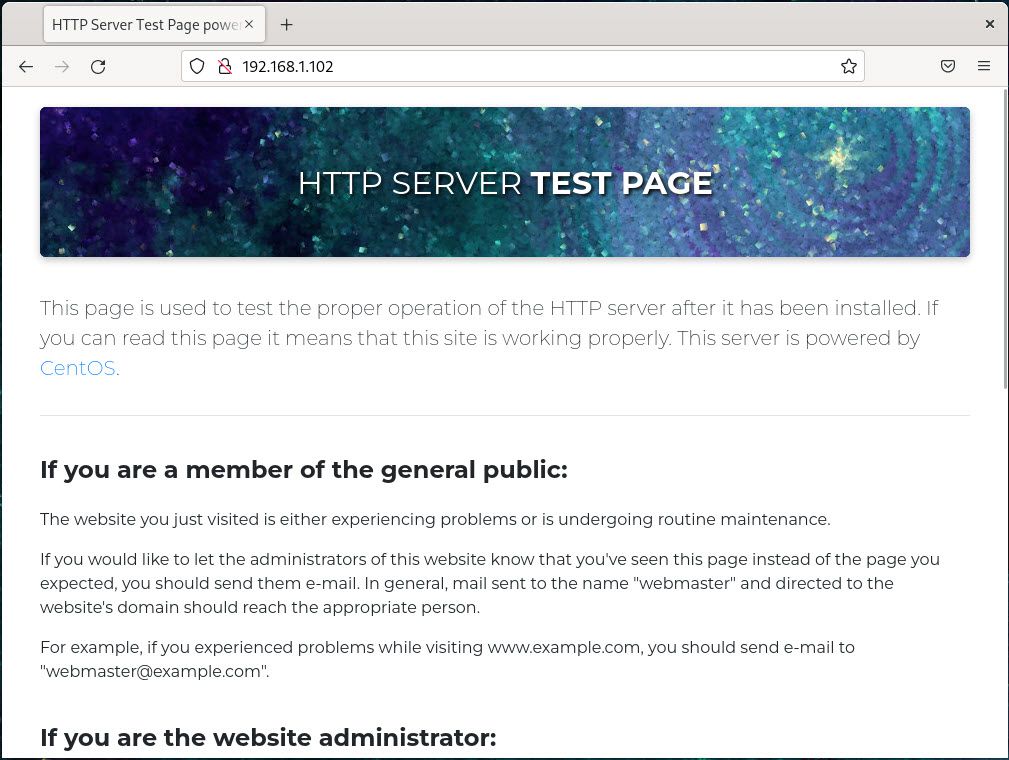
Testing
To check if the Apache service is functioning correctly, open your preferred web browser and navigate to the address HTTP://IP-Server hoặc HTTP://Your-Domain . If everything is set up correctly, you should see a page similar to the one below.
Step 4 – Install MariaDB/MySQL Server
Next, we need to install MySQL/MariaDB service. In this example, I will install the MariaDB server. MariaDB is a drop-in replacement for MySQL.
Install MariaDB Server
Run the following command to install:
sudo dnf install mariadb-server mariadb -y
After the MariaDB server is installed, run the following command to start MariaDB service
sudo systemctl start mariadb
Next, we will enable the MariaDB Service to auto-start at the system boot time:
sudo systemctl enable mariadb
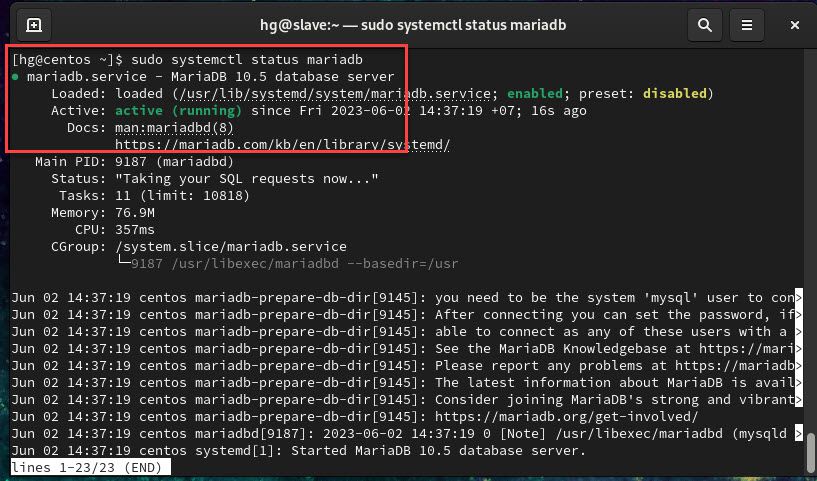
Finally, check status of the MariaDB service, and ensure it’s running on the system.
sudo systemctl status mariadb
Secure MySQL/MariaDB
To improve the security of your database server, it’s recommended that you run a security script that comes pre-installed with MariaDB. This script will remove some insecure default settings and lock down access to your database system. Run the following command to secure MySQL/MariaDB service.
sudo mysql_secure_installation
You will be prompted with a series of questions that you need to answer as shown below:
[hg@centos ~]$ sudo mysql_secure_installation

NOTE: RUNNING ALL PARTS OF THIS SCRIPT IS RECOMMENDED FOR ALL MariaDB
      SERVERS IN PRODUCTION USE!  PLEASE READ EACH STEP CAREFULLY!

In order to log into MariaDB to secure it, we'll need the current
password for the root user. If you've just installed MariaDB, and
haven't set the root password yet, you should just press enter here.

Enter current password for root (enter for none): press Enter
OK, successfully used password, moving on...

Setting the root password or using the unix_socket ensures that nobody
can log into the MariaDB root user without the proper authorisation.

You already have your root account protected, so you can safely answer 'n'.

Switch to unix_socket authentication [Y/n] press Enter
Enabled successfully!
Reloading privilege tables..
 ... Success!


You already have your root account protected, so you can safely answer 'n'.

Change the root password? [Y/n] press Enter
New password: Input-Your-Password-for-root-user
Re-enter new password: Input-Your-Password-for-root-user
Password updated successfully!
Reloading privilege tables..
 ... Success!


By default, a MariaDB installation has an anonymous user, allowing anyone
to log into MariaDB without having to have a user account created for
them.  This is intended only for testing, and to make the installation
go a bit smoother.  You should remove them before moving into a
production environment.

Remove anonymous users? [Y/n]  press Enter
 ... Success!

Normally, root should only be allowed to connect from 'localhost'.  This
ensures that someone cannot guess at the root password from the network.

Disallow root login remotely? [Y/n] press Enter
 ... Success!

By default, MariaDB comes with a database named 'test' that anyone can
access.  This is also intended only for testing, and should be removed
before moving into a production environment.

Remove test database and access to it? [Y/n] press Enter
 - Dropping test database...
 ... Success!
 - Removing privileges on test database...
 ... Success!

Reloading the privilege tables will ensure that all changes made so far
will take effect immediately.

Reload privilege tables now? [Y/n] press Enter
 ... Success!

Cleaning up...

All done!  If you've completed all of the above steps, your MariaDB
installation should now be secure.

Thanks for using MariaDB!
[hg@centos ~]$
Step 5 – Install PHP and PHP extensions
Lastly, we need to install PHP, a powerful programming language that enables the development of dynamic web applications and interaction with databases.
Install PHP and PHP extensions
Run the following command to install PHP and PHP extensions:
sudo dnf install php php-fpm php-mysqlnd php-opcache php-gd php-xml php-mbstring -y
You can check the installed PHP version by using the following command:
php -v
Apache web server on CentOS/CentOS Stream/RockyLinux/AlmaLinux by default uses PHP-FPM instead of mod_php to run PHP code.
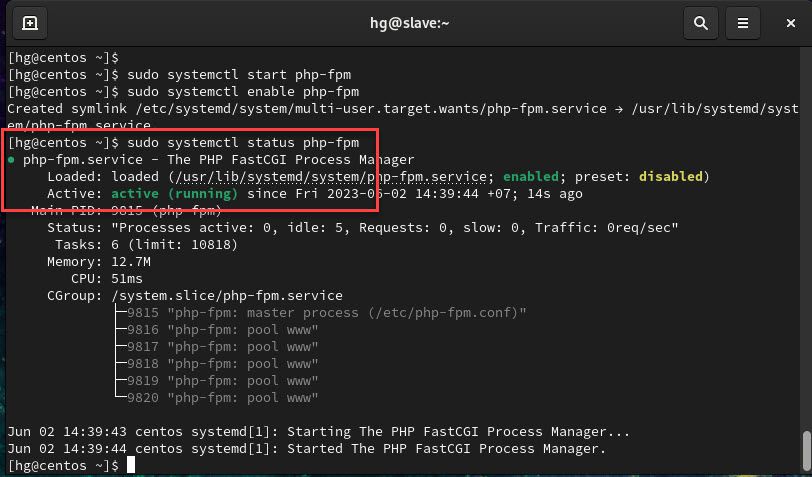
Now, we need to start it:
sudo systemctl start php-fpm
And also enable it to auto-start at system boot time:
sudo systemctl enable php-fpm
And check status of the PHP-FPM service, ensure it’s running:
sudo systemctl status php-fpm
Testing PHP with Apache
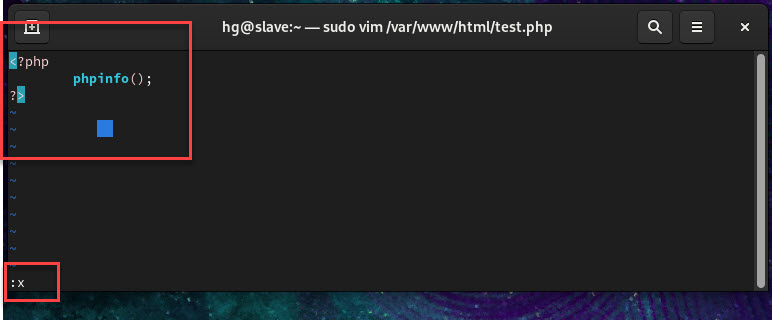
To check if PHP is working correctly with Apache, first, create a file called test.php in the root directory of your web server:
sudo dnf install vim -y
sudo vim /var/www/html/test.php
And add content below:
<?php
	phpinfo();
?>
After done, save and exit the file
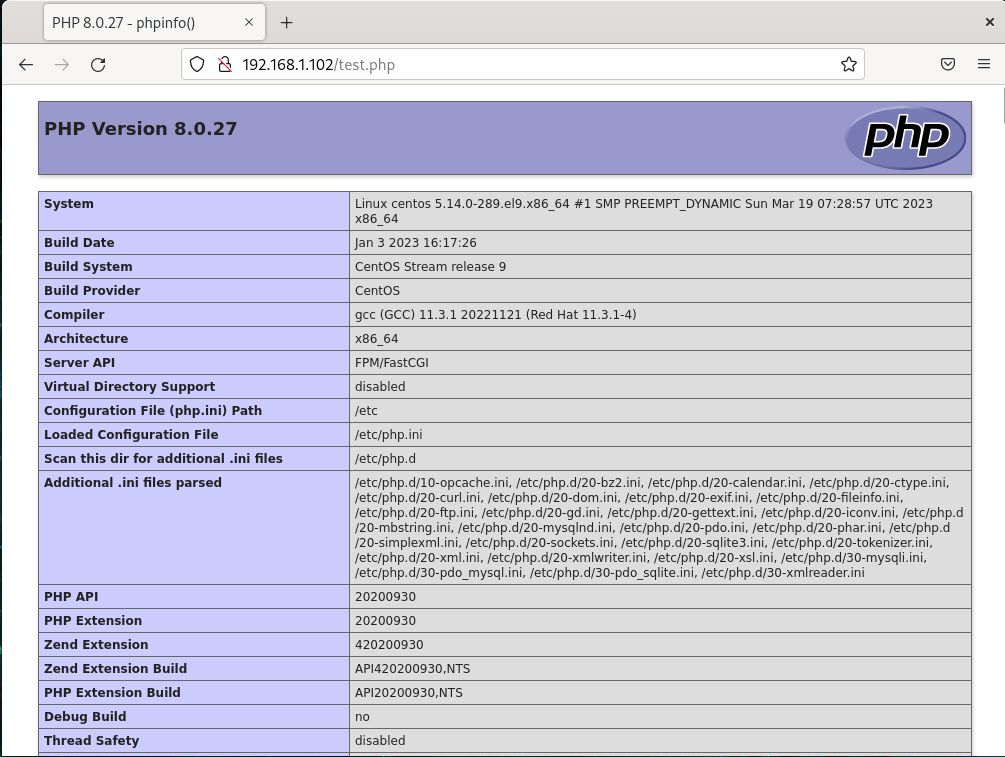
And restart the Apache service to apply the changes:
sudo systemctl restart httpd
Lastly, access the address HTTP://IP-Server/test.php or HTTP://Your-Domain/test.php, and if everything is set up correctly, you should see an image similar to the one below:
That’s it! Through this How to Install and Configure LAMP Stack on CentOS | RockyLinux | AlmaLinux 8/9 guide, you have successfully installed Apache, MySQL/MariaDB, and PHP on your server. If you have any questions or feedback, please leave a comment below.
Thank you for reading !!!