In the previous tutorial, We successfully installed OCS Inventory Server, you can now add agents for managing clients.
In this tutorial, We will learn How to Install and Configure OCS Inventory Agent on Unix/Linux ( Ubuntu | Debian | LinuxMint )
Applies to
- Ubuntu
- Linux Mint
- Debian
Prerequisites
- OCS Inventory Server installed on another server
- For this tutorial:
- OCS Inventory Server
- OCS Server version: 2.10
- IP address: 192.168.1.10
- Clients:
- Hostname: ubt22-2
- IP address: 192.168.1.9
- OCS Agent version: 2.10
- OCS Inventory Server
Read more
- How to Install and Configure OCS Inventory Server on Ubuntu
- How to Install and Configure OCS Inventory Agent on Windows
- How to Install and Configure GLPI on Ubuntu
On the Ubuntu Client
Step 1 – Update system
First of all, run the system update command to ensure all the packages on your system are up to date and also the APT package index cache is in its latest state:
sudo apt update && sudo apt upgrade -y
Step 2 – Install required libraries by OCS Inventory Agent
To install the packages and dependencies required by OCS Inventory Agent, run the command below:
sudo sudo apt install -y make gcc libmodule-install-perl dmidecode libxml-simple-perl libcompress-zlib-perl openssl libnet-ip-perl libwww-perl libdigest-md5-perl libdata-uuid-perl libcrypt-ssleay-perl libnet-snmp-perl libproc-pid-file-perl libproc-daemon-perl net-tools libsys-syslog-perl pciutils smartmontools read-edid nmap libnet-netmask-perl
Step 3 – Download OCS Inventory Agent
Go to the official website of the OCS Inventory to download OCS Inventory Agent for Unix/Linux, click on the OCS Inventory Agent Unix/Linux button:

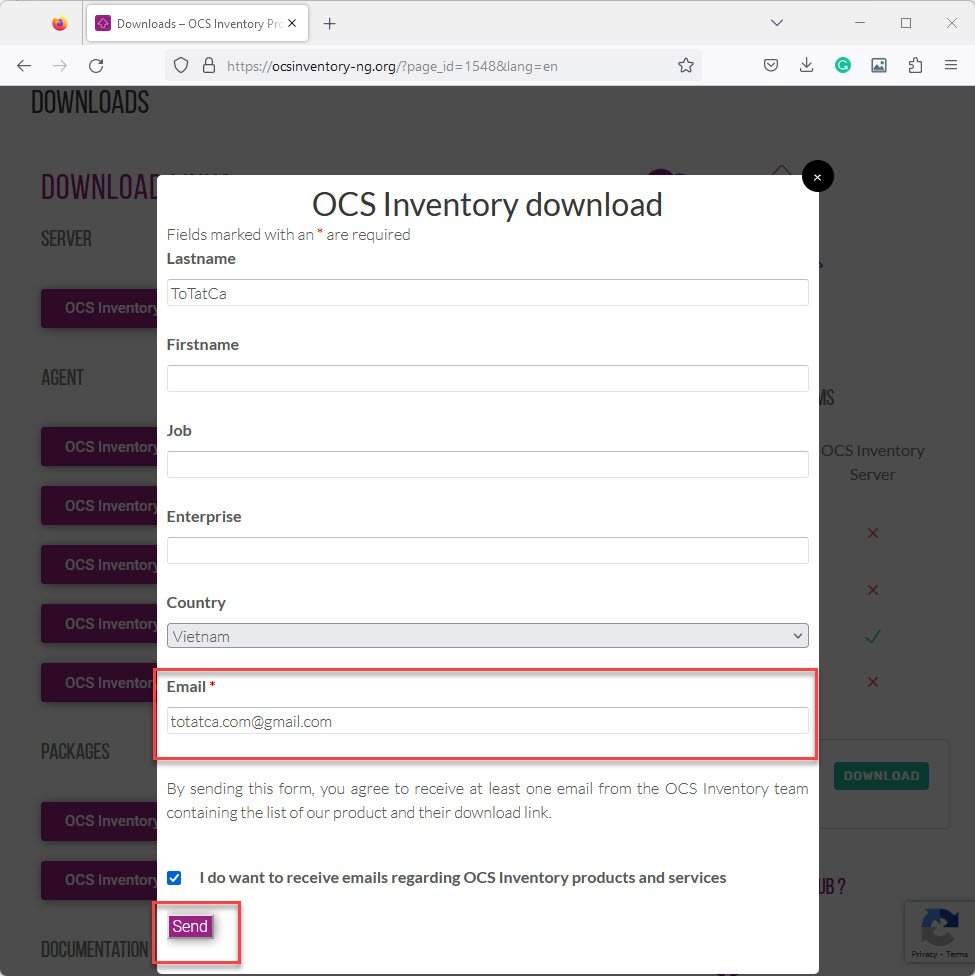
On the pop-up page, enter your info and click Send button:
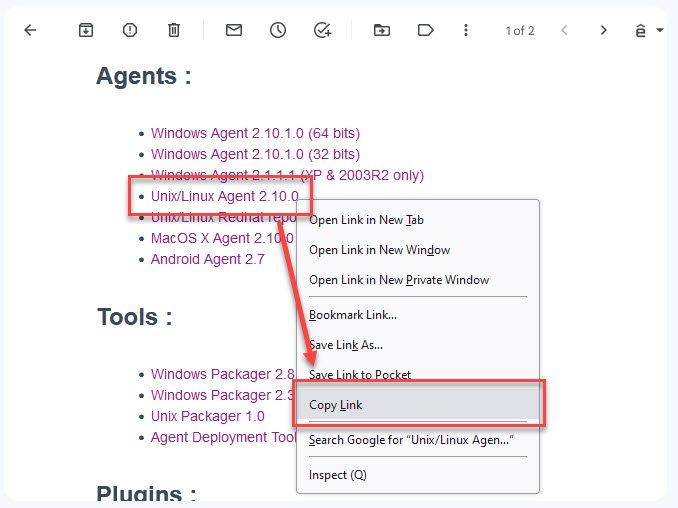
Now, log in to email and get the link OCS Inventory Agent Unix/Linux:
Run the command below to download OCS Inventory Agent Unix/Linux
wget -O OCSinventoryAgentUnix.tar.gz Past_Link_here
### Example for version 2.10
sudo wget -O OCSinventoryAgentUnix.tar.gz https://github.com/OCSInventory-NG/UnixAgent/releases/download/v2.10.0/Ocsinventory-Unix-Agent-2.10.0.tar.gz
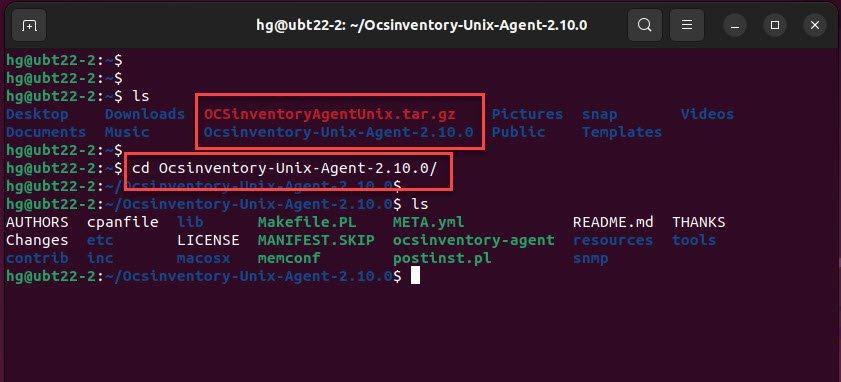
Next, the extract has just downloaded the file
sudo tar -xvf OCSinventoryAgentUnix.tar.gz
Verify extracted file
ls

Step 4 – Install OCS Inventory Agent
Go to the directory “OCS Inventory” unzipped before
cd Ocsinventory-Unix-Agent-2.10.0
ls
Now, run the commands below to install OCS Inventory Agent on your system:
sudo perl Makefile.PL
sudo make
sudo make install
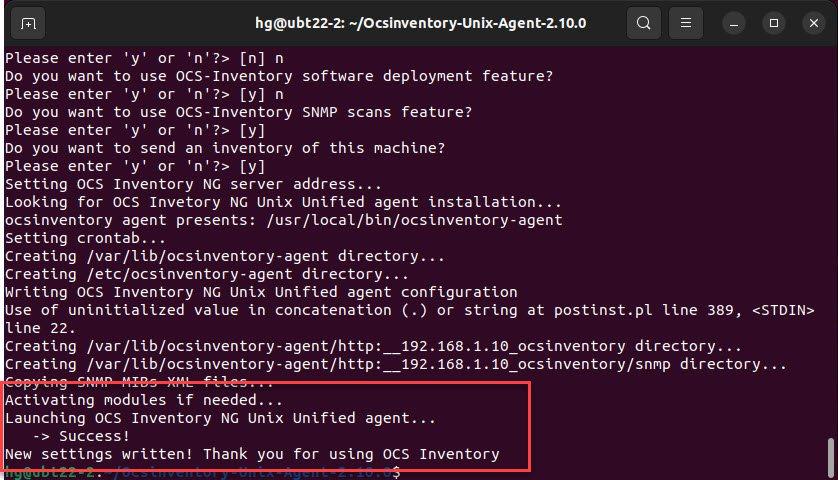
During the installation process, you need to answer some questions below:
hg@ubt22-2:~/Ocsinventory-Unix-Agent-2.10.0$ sudo make install
....
Do you want to configure the agent?
Please enter 'y' or 'n'?> [y] # press Enter
Where do you want to write the configuration file?
 0 -> /etc/ocsinventory
 1 -> /usr/local/etc/ocsinventory
 2 -> /etc/ocsinventory-agent
?>  2    # type 2 and press Enter
Do you want to create the directory /etc/ocsinventory-agent?
Please enter 'y' or 'n'?> [y] # press Enter
Should the old unix_agent settings be imported?
Please enter 'y' or 'n'?> [y] # press Enter
[info] The config file will be written in /etc/ocsinventory-agent/ocsinventory-agent.cfg,
What is the address of your ocs server?>  http://192.168.1.10/ocsinventory # IMPORTANT, enter URL of OCS Inventory http://IP-of-OCS-Server/ocsinventory
Do you need credential for the server? (You probably don't)
Please enter 'y' or 'n'?> [n] # press Enter
Do you want to apply an administrative tag on this machine?
Please enter 'y' or 'n'?> [y] # press Enter
tag?>  UBT22-2   # Enter your tag
Do yo want to install the cron task in /etc/cron.d?
Please enter 'y' or 'n'?> [y] # press Enter
Where do you want the agent to store its files? (You probably don't need to change it)?> [/var/lib/ocsinventory-agent] # press Enter
Do you want to create the /var/lib/ocsinventory-agent directory?

Please enter 'y' or 'n'?> [y] # press Enter
Should I remove the old unix_agent?
Please enter 'y' or 'n'?> [n] # press Enter
Do you want to activate debug configuration option?
Please enter 'y' or 'n'?> [y] n # type n press Enter
Do you want to use OCS Inventory NG UNix Unified agent log file?
Please enter 'y' or 'n'?> [y] # press Enter
Specify log file path you want to use?>  /var/log/ocs-inventory-agent.log # enter your-path and press Enter
Do you want disable SSL CA verification configuration option (not recommended)?
Please enter 'y' or 'n'?> [n] y   # type y press Enter
Do you want to set CA certificates file path?
Please enter 'y' or 'n'?> [y] n  # type y press Enter
Do you want disable software inventory?
Please enter 'y' or 'n'?> [n] n  # press Enter
Do you want to use OCS-Inventory software deployment feature?
Please enter 'y' or 'n'?> [y] n  # press Enter
Do you want to use OCS-Inventory SNMP scans feature?
Please enter 'y' or 'n'?> [y] # press Enter
Do you want to send an inventory of this machine?
Please enter 'y' or 'n'?> [y] # press Enter
If the installation was successful, you should get a message below:
At this point, OCS Inventory Agent is installed, we need to enable the agent to communicate with the OCS Inventory Server immediately by run the command below:
###Syntax
ocsinventory-agent –server http://IP-OCS-Inventory-Server/ocsinventory
### Example
ocsinventory-agent –server http://192.168.1.10/ocsinventory
On the OCS Inventory Server
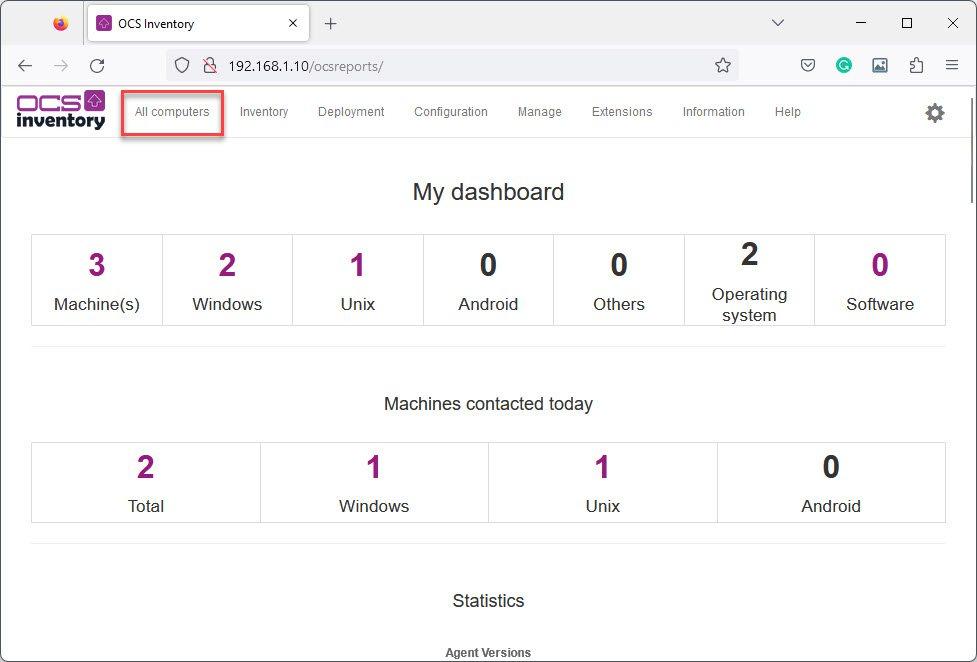
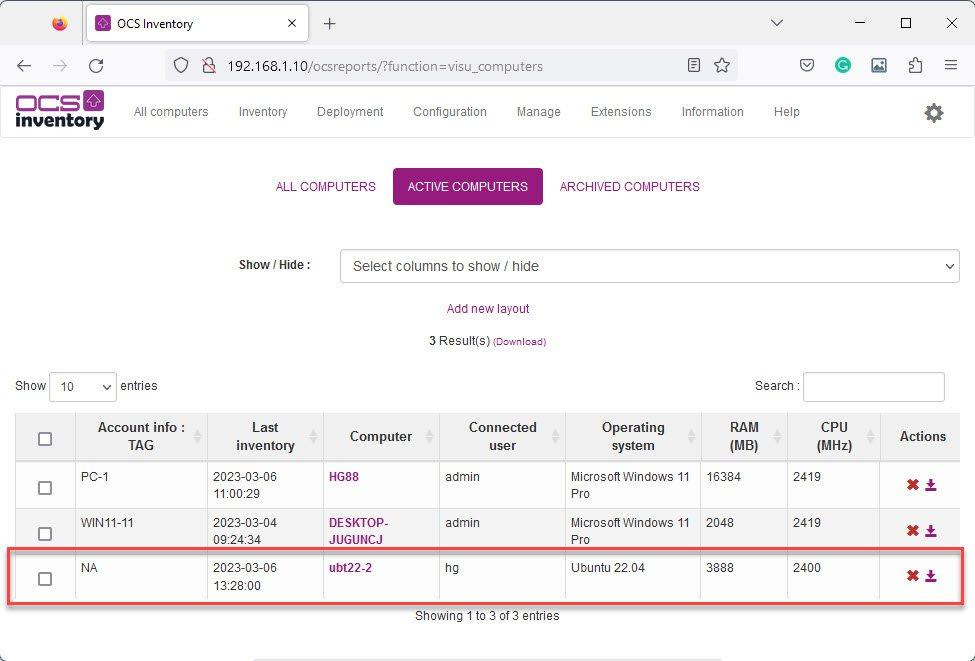
Now, log in to your server, and click on the All computer tab:
You should see that your client has been inventoried
That’s all, You successfully installed OCS Inventory Agent on your system.
Thank you for reading !!!
It’s worked. Thank you.