In the previous tutorial, We successfully installed OpenLDAP Server and LAM on your system.
In this tutorial, We will learn How to Create OUs, Groups, and Users in the OpenLDAP server using LAM
Prerequisites
- OpenLDAP Server & LAM installed.
Read more
- How to Install and Configure OpenLDAP Server and LAM on Ubuntu
- How to Install and Configure OpenLDAP Client on Ubuntu
- How to Configure Static IP Address on Ubuntu Server
- How to Install GLPI on Ubuntu
Structures
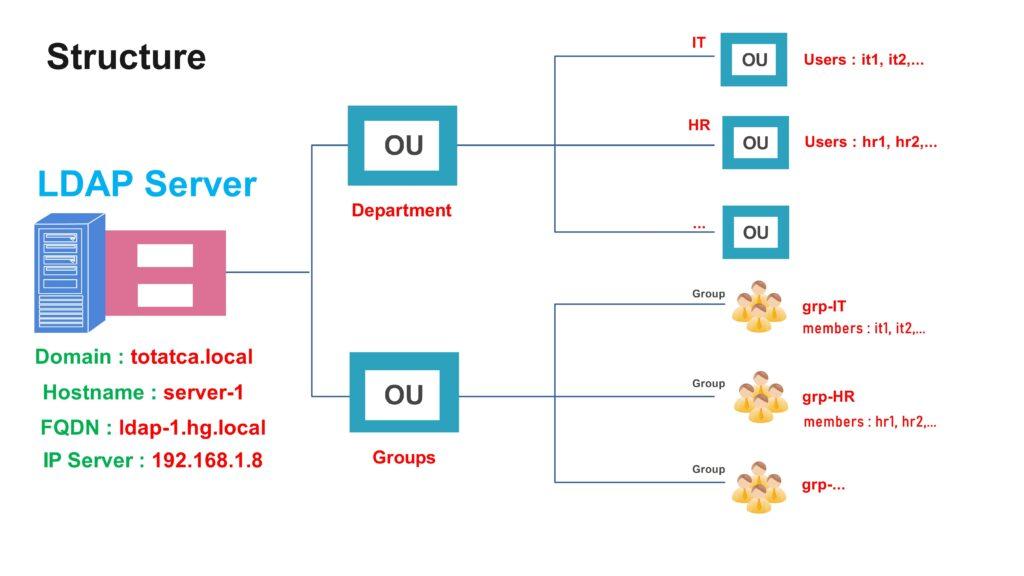
For this tutorial:
- Domain: totatca.local
- Default OU: Department
- Default Group: Groups
- Parent OU=Department contains:
- Child OU called IT contains users below:
- Users: it1, it2, …
- Child OU called HR contains users below:
- Users: hr1, hr2, …
- Child OU called IT contains users below:
- Parent Group contains:
- A group called grp-IT contains members of the IT department ( including it1, it2,…)
- And a group called grp-HR contains members of the HR department (including hr1, hr2,…)
Step 1 – Create the OUs
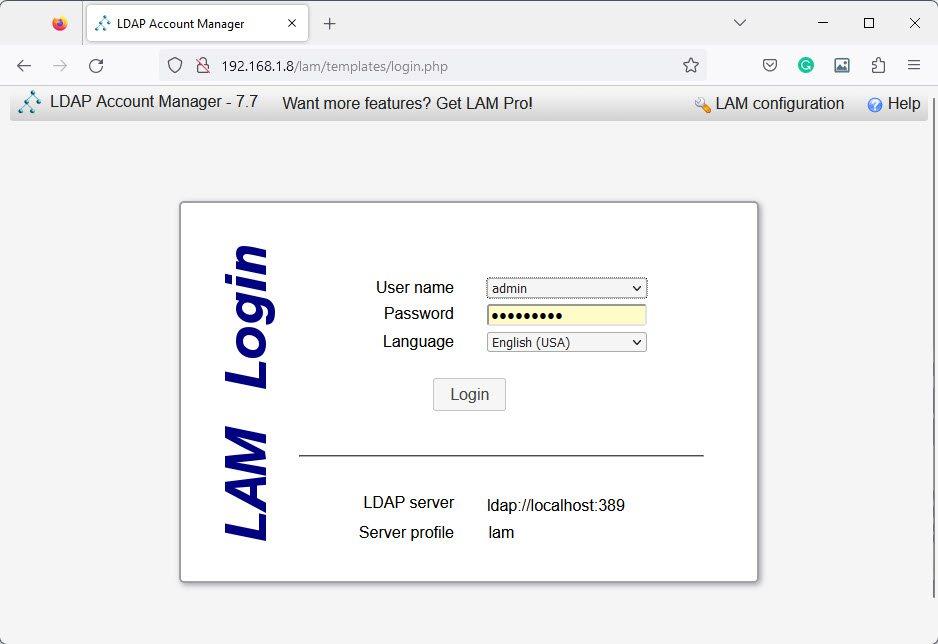
First, log in to LAM with your username and password:
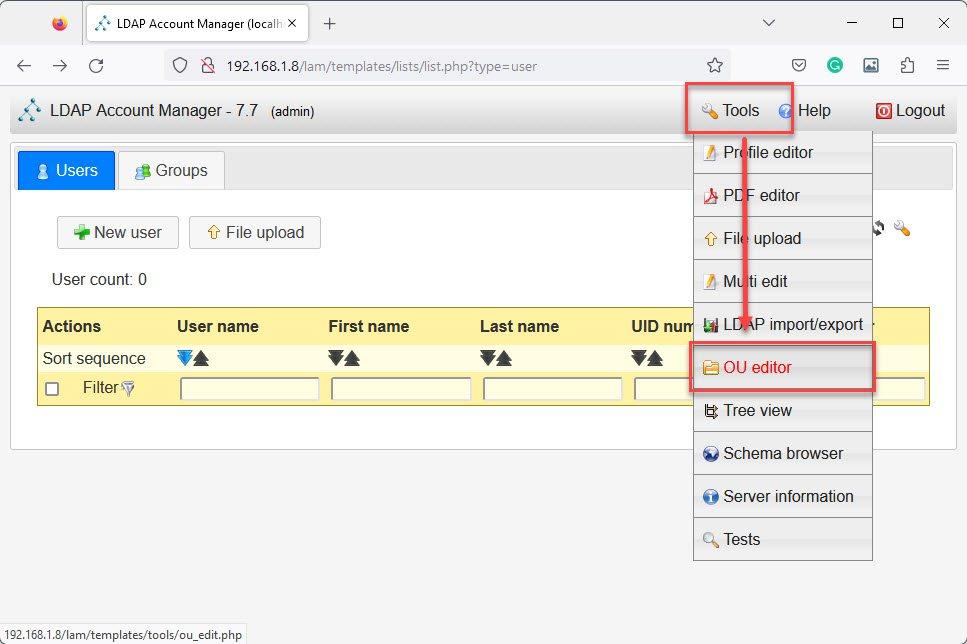
Hover mouse on the Tools button and choose the OU editor button:
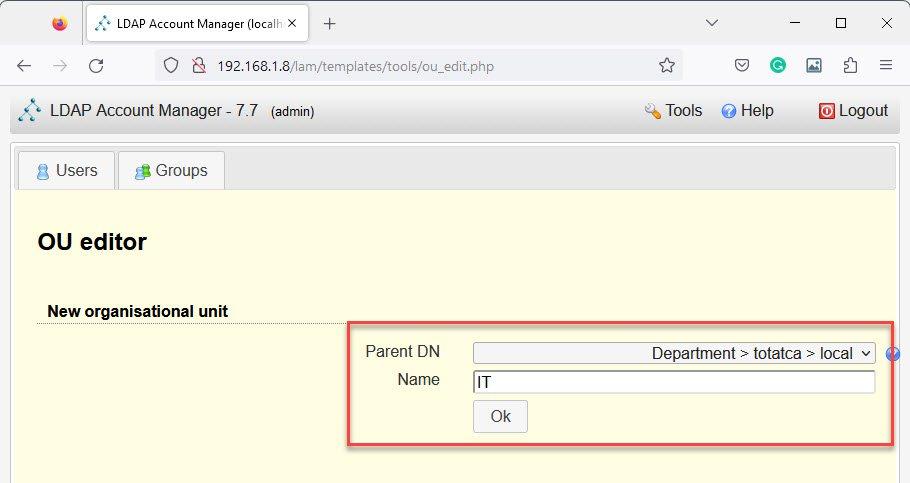
On the OU editor page, in the section New organisational unit choose the similar below:
- Parent DN: Department > totatca > local
- Name: IT
and then click OK to create a child OU as IT
To create other organizational units, do the same as creating IT organizational unit
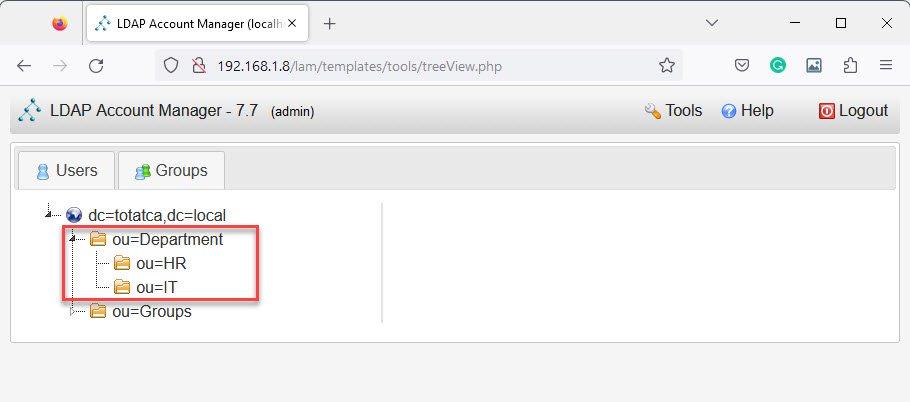
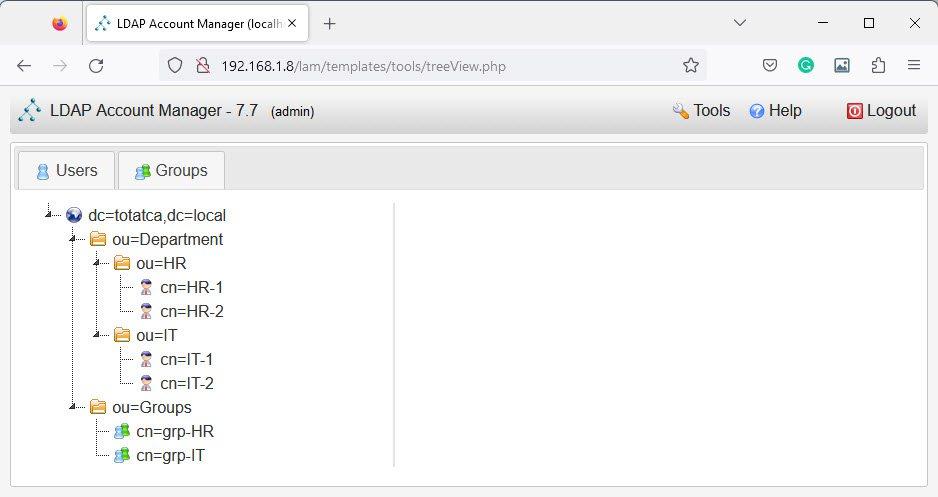
Now, hover mouse on the Tools button and click on the Tree view button to verify the OUs just create. You should see IT and HR OUs created in the Department OU.
Step 2 – Create the Groups
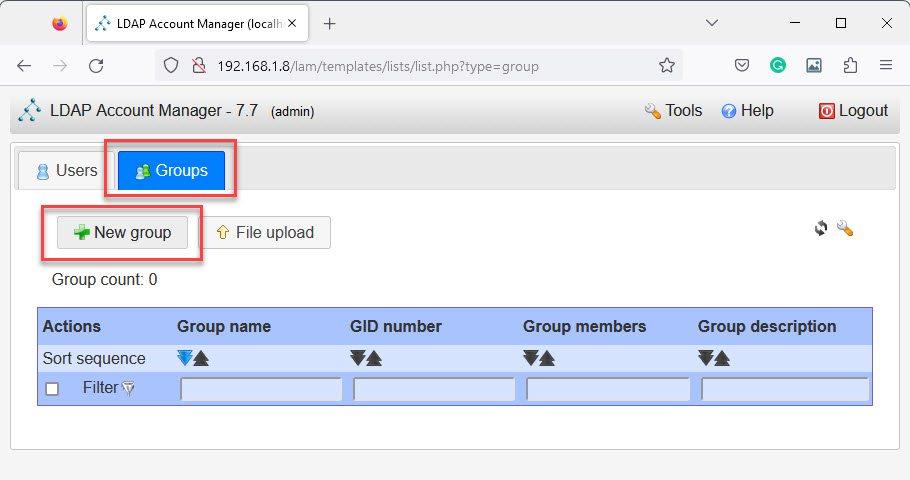
Next, we will create groups for the respective departments. On the LAM page, click on the Groups tab and click on New group button:
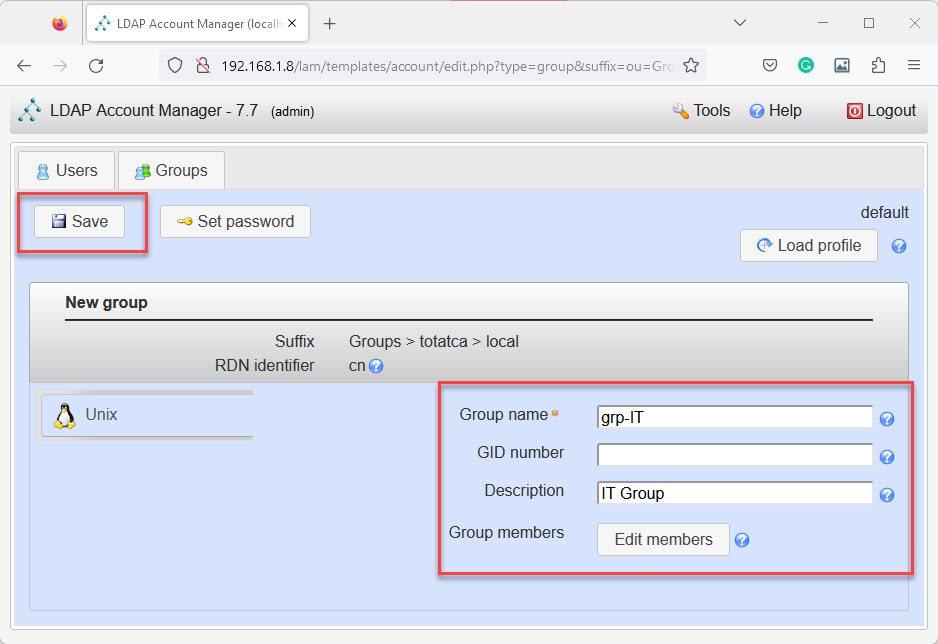
On the New group page, input the Name, ID, and Descriptions of the Group and click Save button
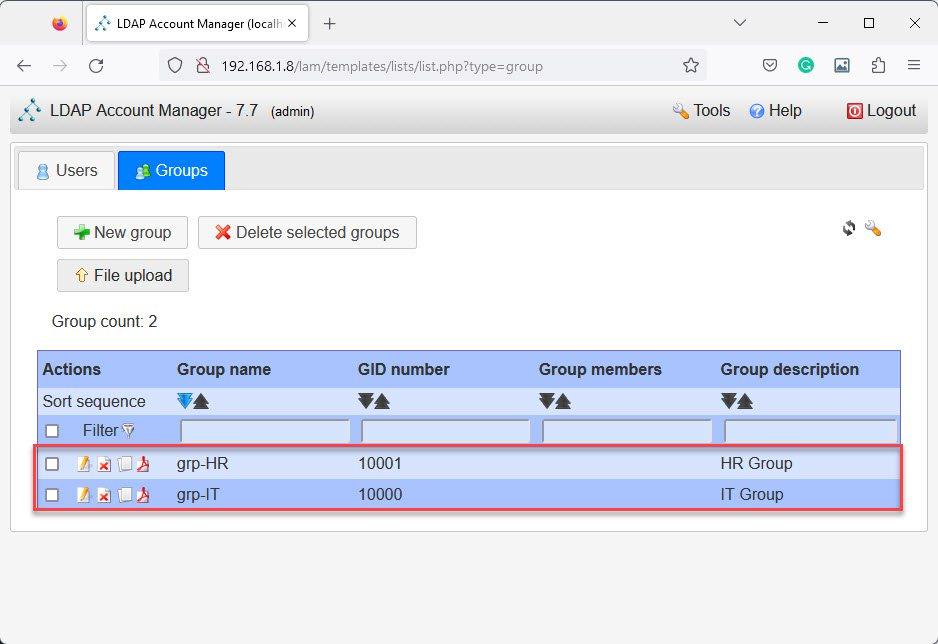
To create other groups, do the same as creating IT group.
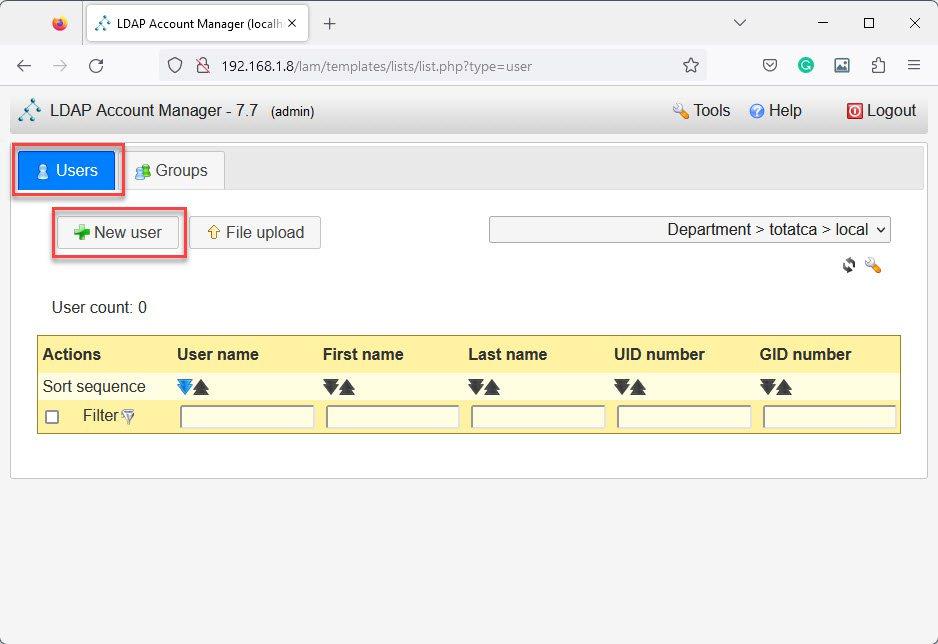
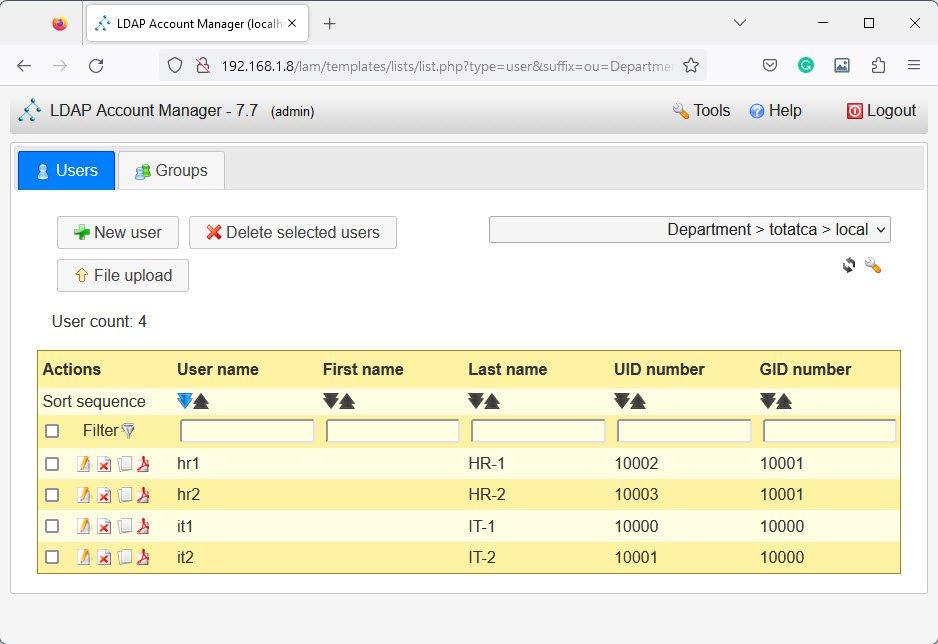
Step 3 – Create the Users
Lastly, we will create users for the respective department, click on the Users tab then click on the New user button:
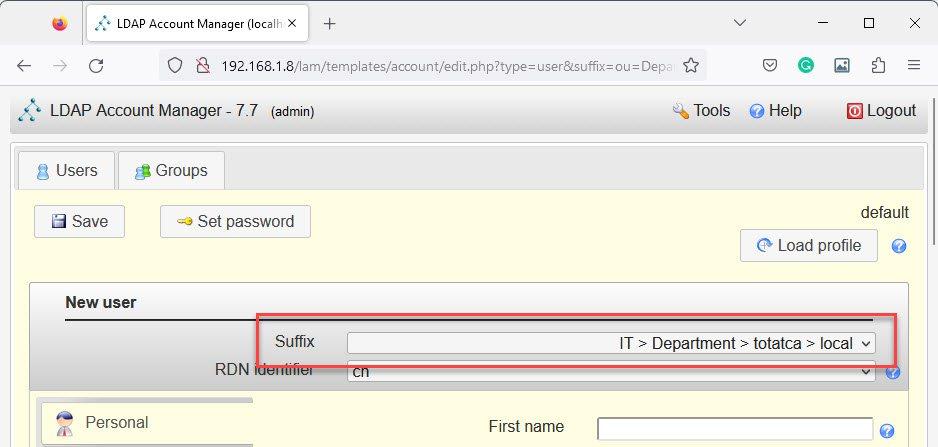
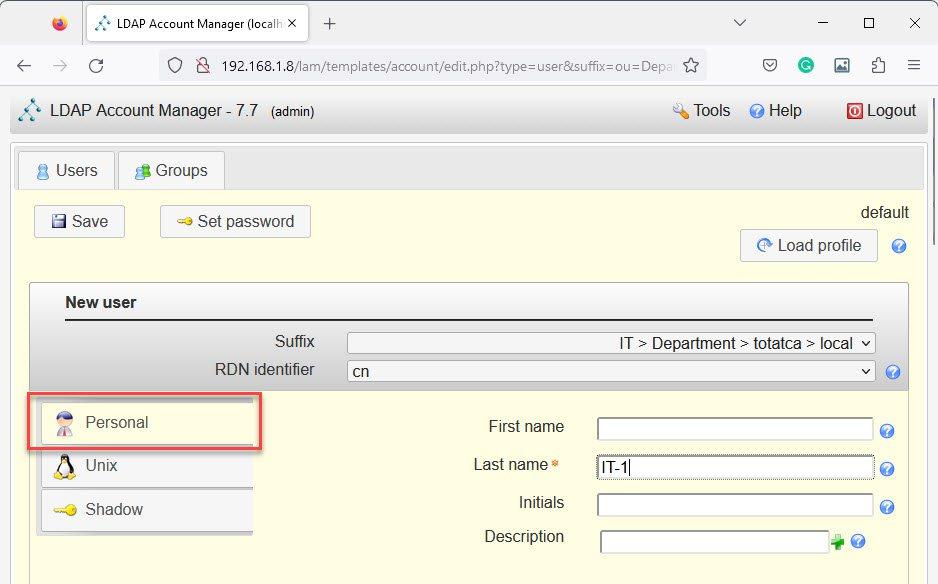
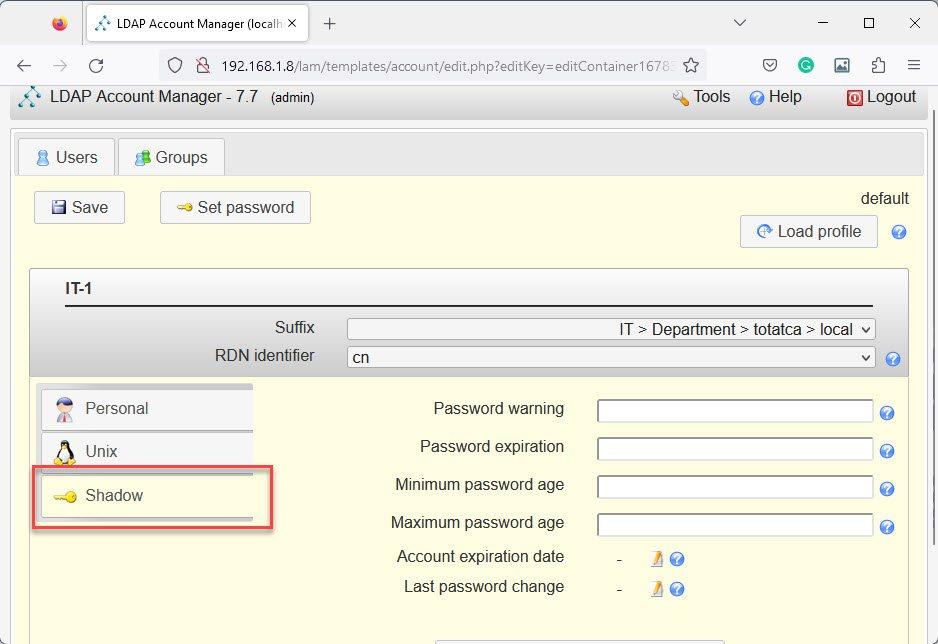
On the New user page, you have four sections for user management:
- In the Suffix section: select the organization unit for the user. For example, I choose IT OU:
- In the Personal tab: Include the user’s personal information ( First name, Last name, Address, Contact,…) and fill out all of the relevant information in the Personal tab. The only information that is required is the Last name:
- In the Unix tab: This section is where you set the Username, Common name, UID number(optional) , User comment, User Primary group, and Secondary groups, Home directory, and the default Login shell when the new user logs into a Linux workstation or server.

- In the Shadow tab: You can add Shadow account extensions for user like Password warning, Password expiration, and Minimum password age,…
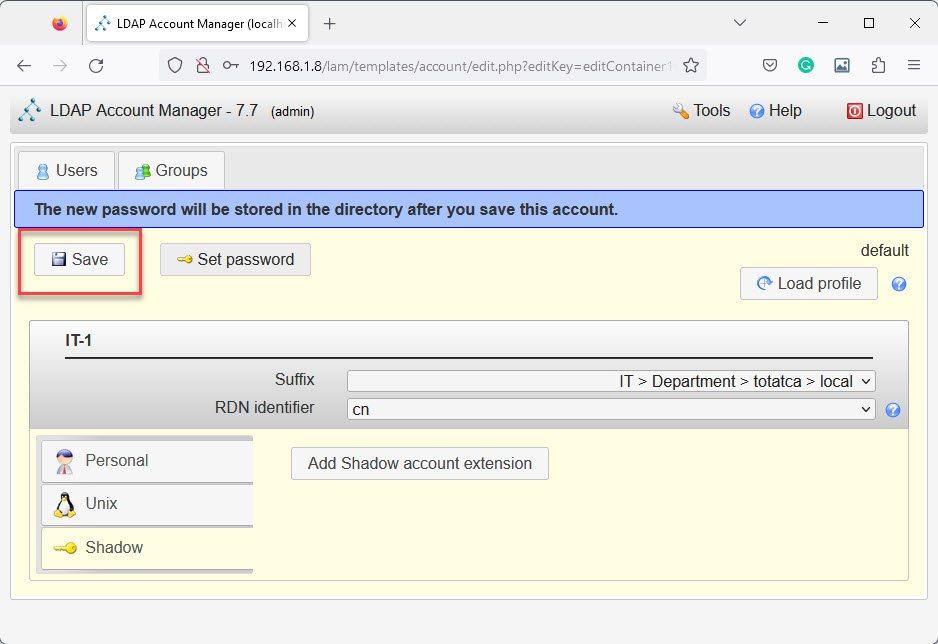
When done with user info, click on the Set password button to set a password for the user
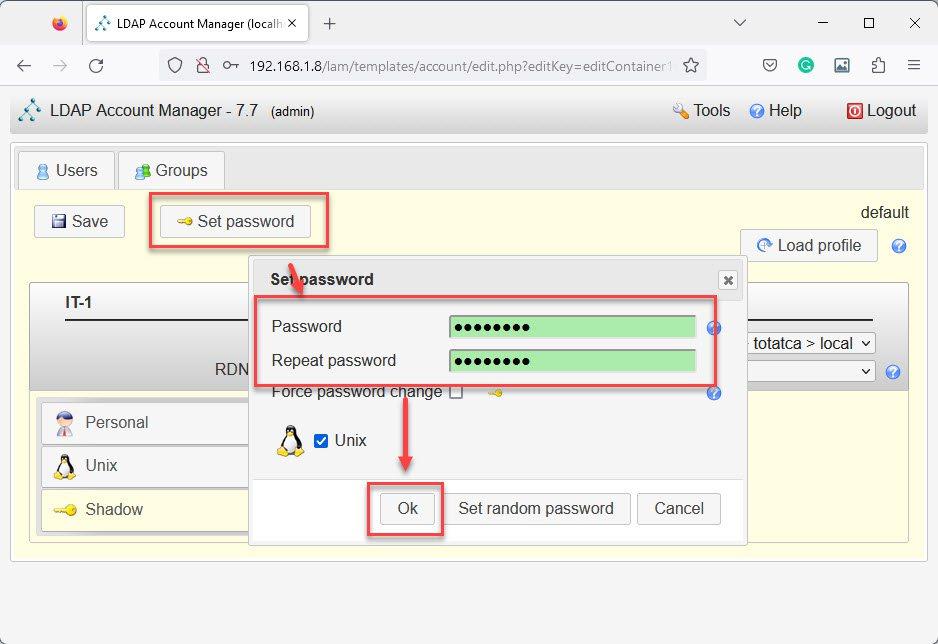
Finally, click on the Save button to create a new user.
To create other groups, do the same as creating it1 user:
To verify, hover again on the Tools button and select Tree View, you should see a result similar to below:
That’s it.
Thank you for reading !!!