In today’s networking landscape, monitoring and managing network devices are key to maintaining system stability and performance. The SNMP (Simple Network Management Protocol) service plays a crucial role, enabling network administrators to remotely control and monitor network devices from a central point.
In this article, we will explore How to Install and Activate SNMP on Windows 11/10 operating systems. By doing so, you’ll gain an additional powerful tool to easily and effectively address network issues.
Let’s dive in to harness the useful features that SNMP brings to the Windows platform
Read more
- FIX ERROR – The referenced account is currently locked and may not be logged on to in Windows 10/11
- How to Flip the Projector Screen on Epson Projector
- How to Install ChromeOS Flex on Any PC
- How to Configure RAID 1 ( Mirroring ) in Windows 11/10/8/7
- How to Install and Configure NTP Server on Windows Server
Step 1 – Install SNMP in Windows 11/10
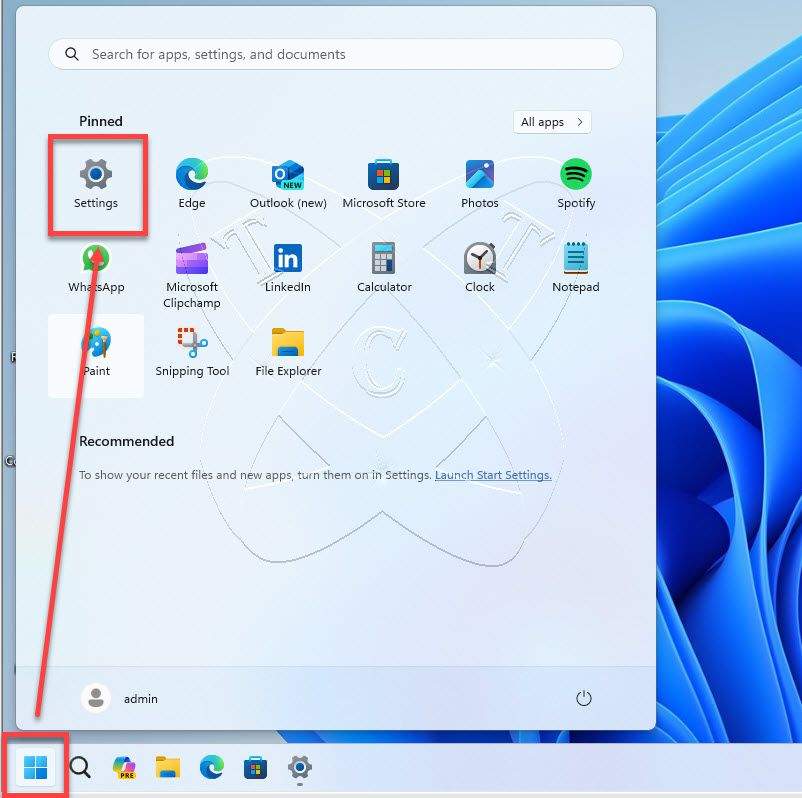
From the Desktop screen, click on the Start button and then select the Settings option;
The Settings window appears, select System from the left-hand menu, then choose Optional features from the menu on the right:

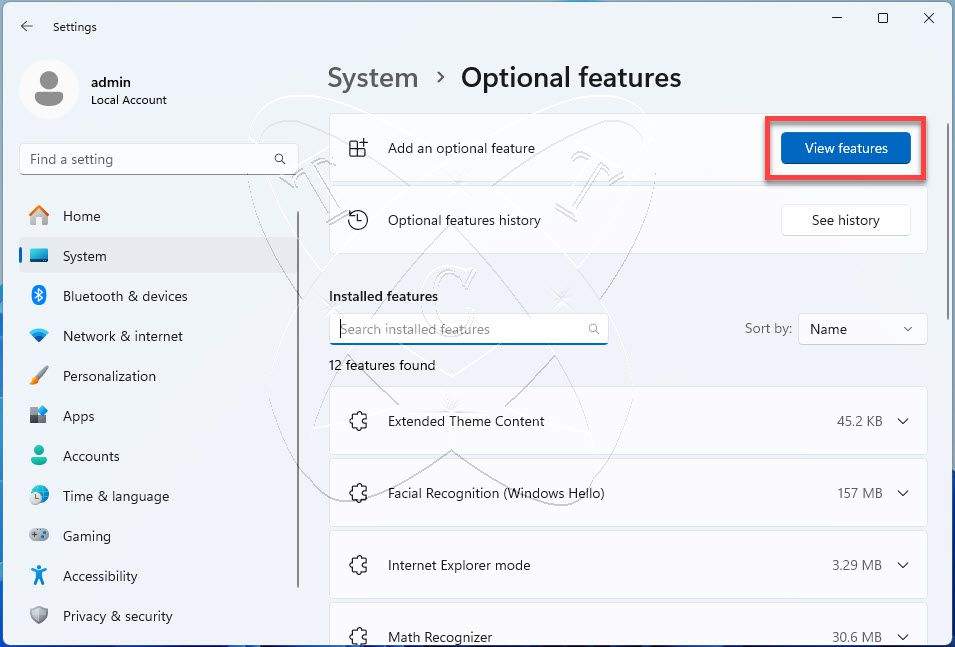
In the Optional features window, click on the View features button:
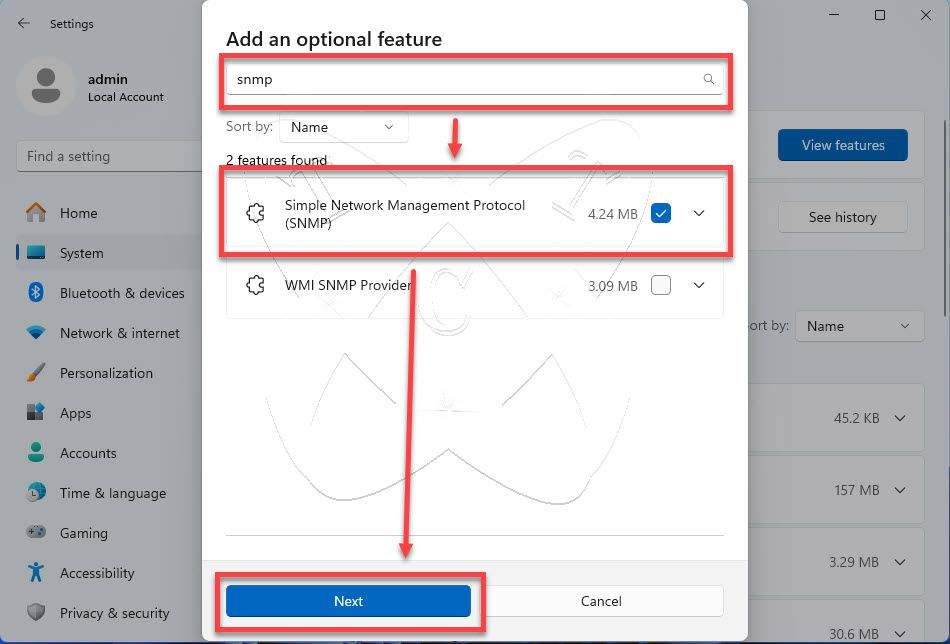
In the Add an optional feature window, enter the keyword snmp to search -> check the “Simple Network Management Protocol (SNMP)” option from the search results, then click Next.
Click Install to begin installing the SNMP service:
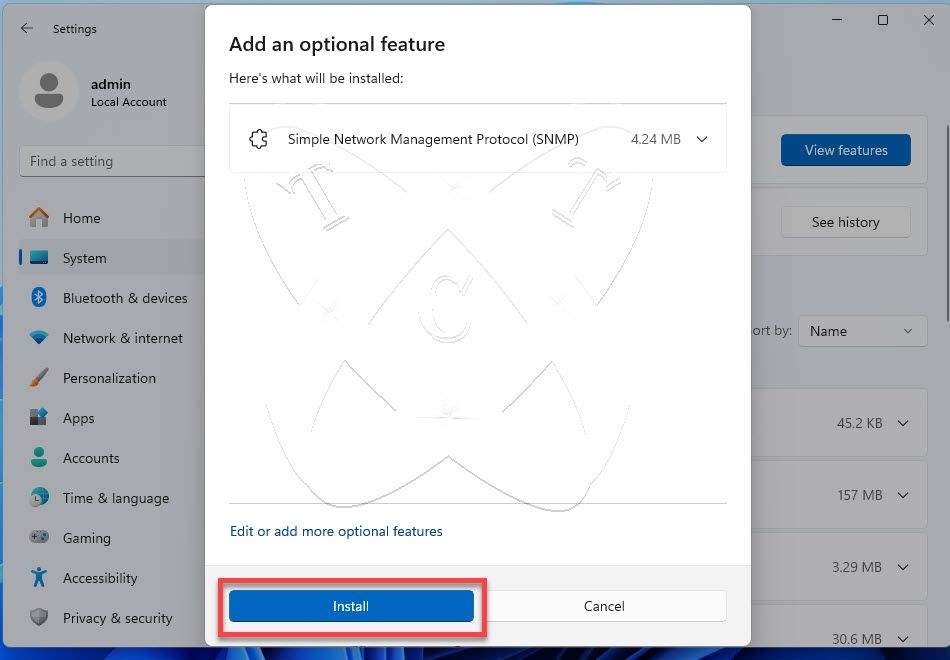
The installation process will take a few minutes. If successful, you will see the message indicating that SNMP has been installed on your system as shown below:

Step 2 – Active SNMP Service
After successful installation, the next step is to activate the SNMP service to allow it to start with Windows.
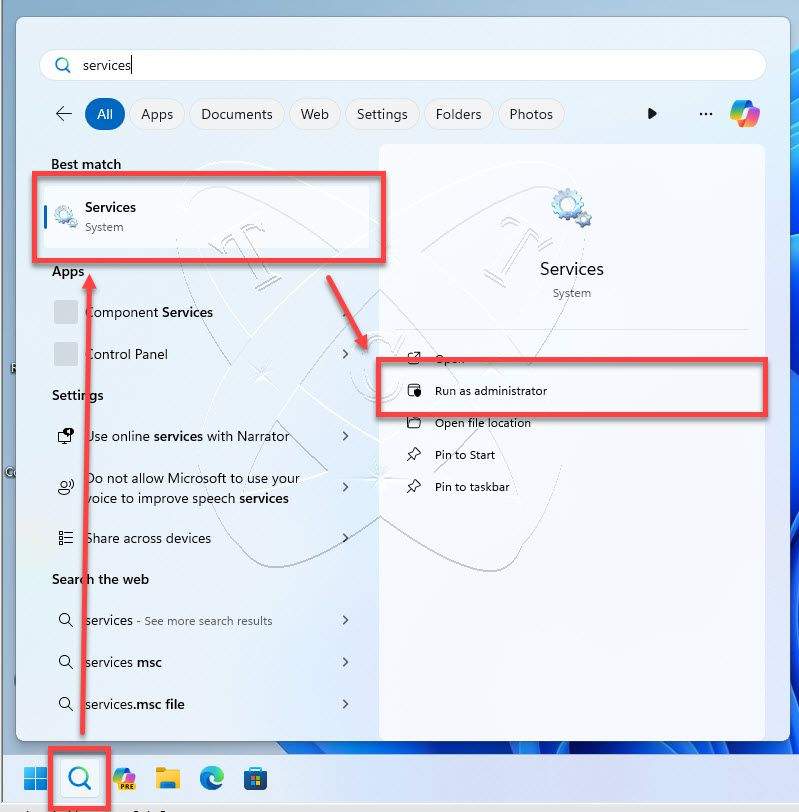
From the desktop, click on the Search icon -> enter the keyword service in the search box -> select Service from the results, and Run it with administrator privileges:
The Services window appears, navigate to the SNMP Trap service, right-click on it, and select Properties:
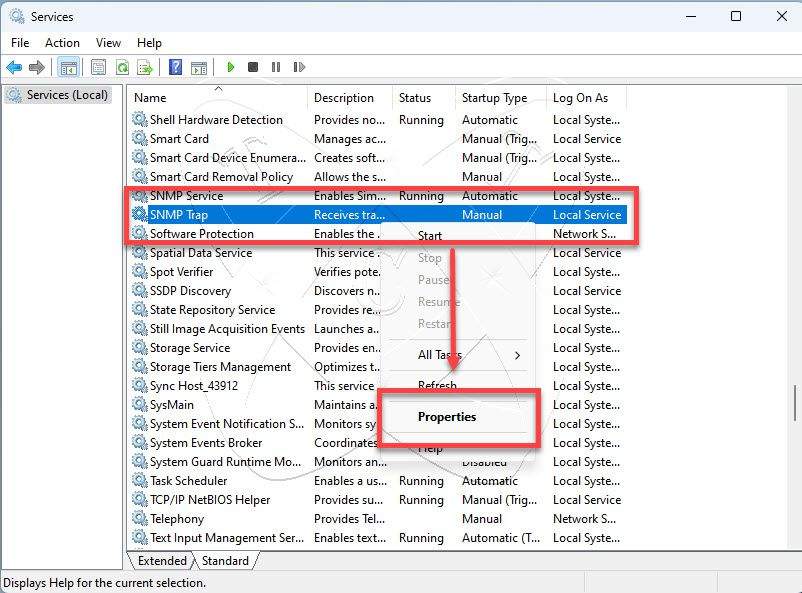
In the SNMP Trap Properties (Local Computer) window:
- Startup type: select the Automatic option
- Service status: click on the Start button
and then click Apply and OK to close the window.

Step 3 – Configure Firewall
By default, SNMP listens on two ports: UDP 161 (SNMP) and UDP 162 (SNMP Trap). If your computer’s firewall is enabled, you need to open these two ports to allow communication and receive SNMP messages from other network devices, as well as to receive SNMP Trap notifications.
Conclusions
By leveraging SNMP, you gain centralized control and monitoring of network devices, empowering you to detect and resolve network issues efficiently. Whether you’re a network administrator or an IT professional, understanding how to utilize SNMP on the Windows platform is a valuable skill that can streamline your operations and ensure the smooth functioning of your network infrastructure. Embrace the power of SNMP to optimize your network management processes and stay ahead in the dynamic world of networking.
Video
Watch more: How to Install SNMP Service on Windows