VMware vSphere (ESXi) is a virtual server operating system developed by VMware, used to create and manage virtual servers on a physical system. ESXi is widely used in data centers and enterprise environments to virtualize servers, improve performance, reduce operating costs, and manage enterprise server infrastructure. ESXi provides many management, security, and reliability features to ensure that the virtualized system operates stably and safely.
In this article, we will learn How to Install VMware vSphere (ESXi) on VMware Workstation for the purpose of experimenting with it in a test environment
Prepare
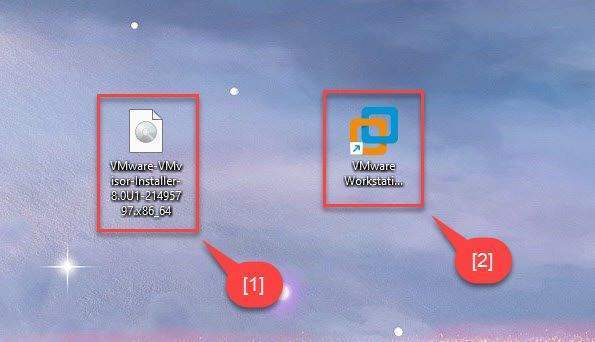
- VMware vSphere Hypervisor (ESXi) 8/7/6 ISO image [1]
Also, read: How to Download VMware vSphere Hypervisor (ESXi) 8/7/6 ISO image from the official website - VMware Workstation has been installed [2]
Step 1 – Create a new virtual machine for ESXi
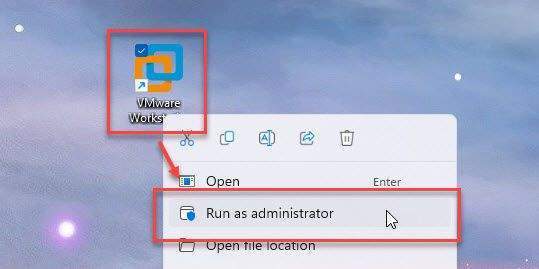
Open VMware Workstation, right-click on the VMware icon and select Run as administrator
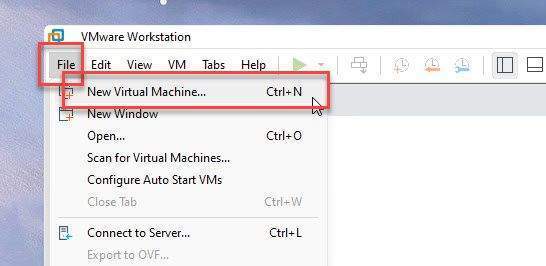
On the Menu – click on File – select New Virtual Machinne…
In the Welcome to the new Virtual Machine Wizard windows, choose Custom (advanced) and click Next

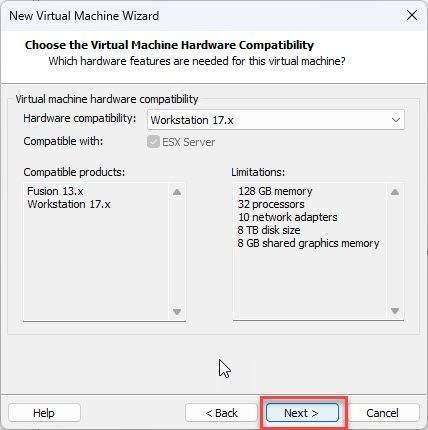
Keep default and click Next in the Choose the Virtual Machine Hardware Compatibility window,
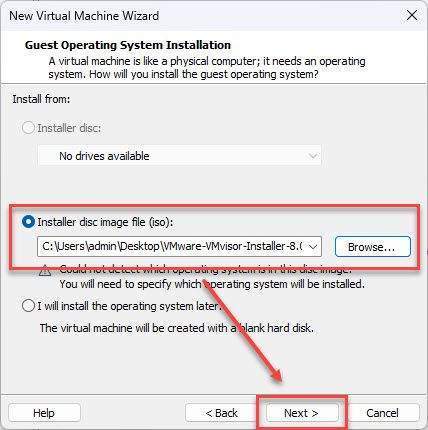
In the Guest Operating System Installation window, select the VMware vSphere (ESXi) ISO image that you have prepared previously and click Next
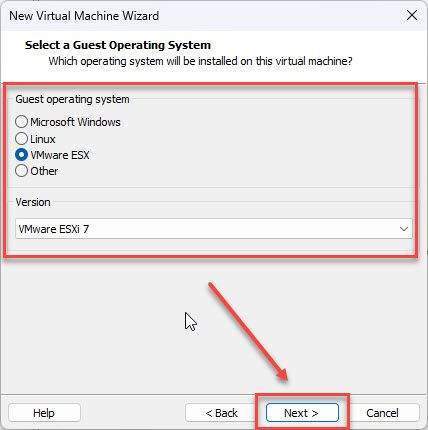
In the Select a Guest Operating System window:
- Guest operating system: VMware ESX
- Version: VMware ESXi 7
and click Next
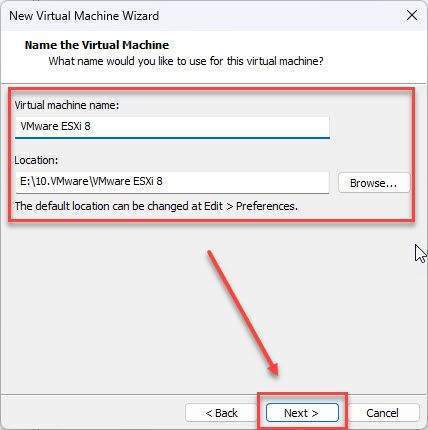
Set the name and location for your VM and click Next in the Name the Virtual Machine window,
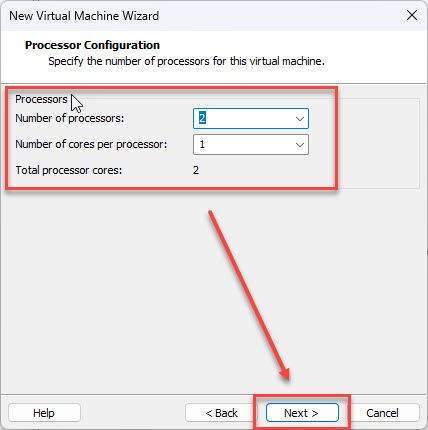
In the Processor Configuration window, keep default and click Next
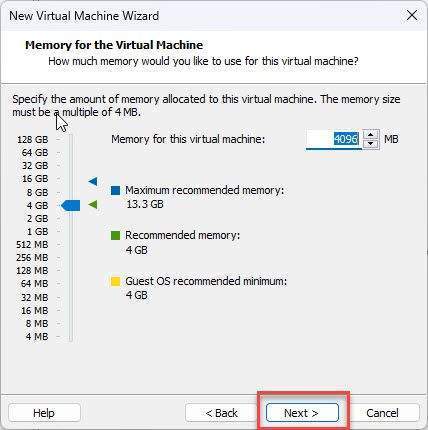
In the Memory for the Virtual Machine window, setup a minimum of 4GB RAM for the VM and click Next
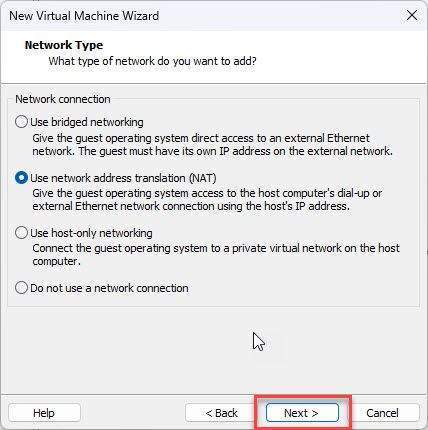
Keep the default (we will setup the network later) and click Next in the Network Type window
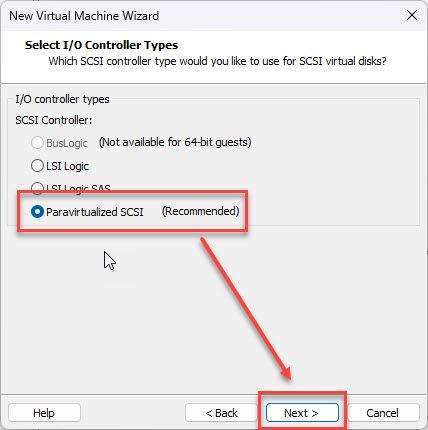
Next, in the Select I/O Controller Types window, keep default and click Next
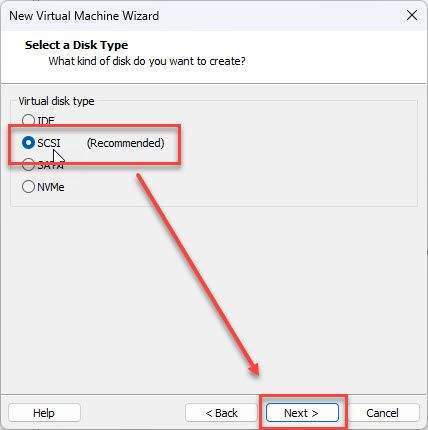
In the Select a Disk Type window, keep default and click Next
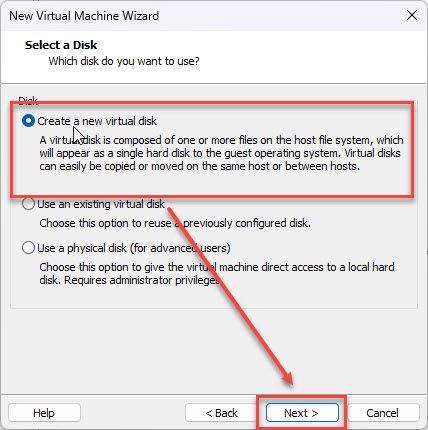
And in the Select a Disk window, keep default and click Next
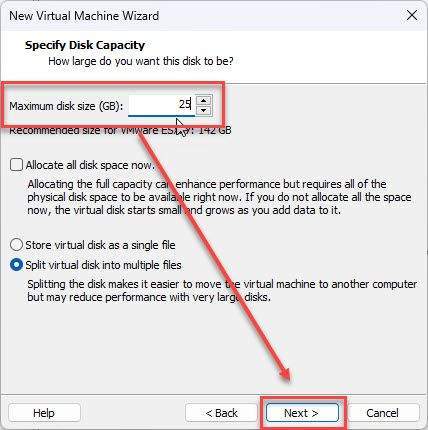
In the Specify Disk Capacity window, recommended hard disk capacity is greater than or equal to 20GB and click Next
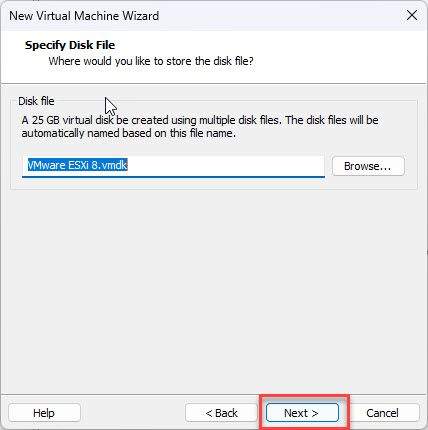
Keep default and click Next in the Specify Disk File window
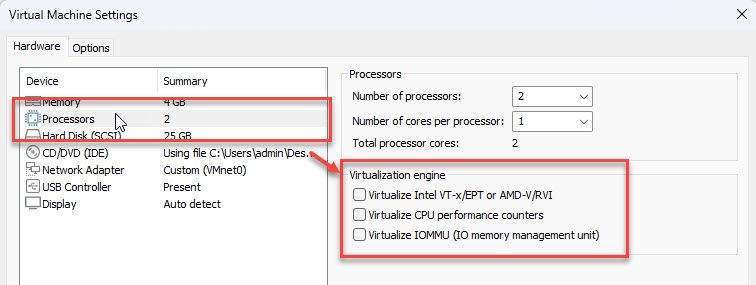
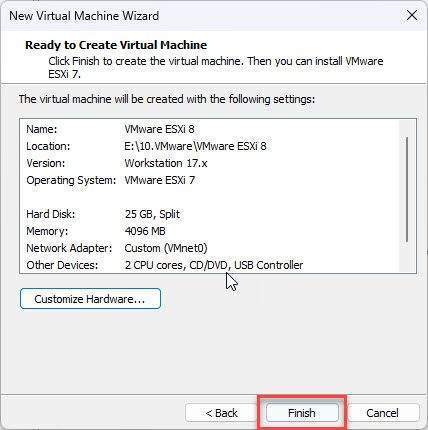
In the Ready to Create Virtual Machine window, click on the Customize Hardware button to set up the CPU and Network for the VM.

In the Hardware window, click choose Processors – Uncheck the options in the section Virtualization Engine as shown below:
Next, click choose Network Adapter, select a virtual network of yours that directly connects to the LAN on the host so that the VM can obtain a dynamic IP from DHCP.
In this case, I select VMnet0 which is directly connected to my LAN.
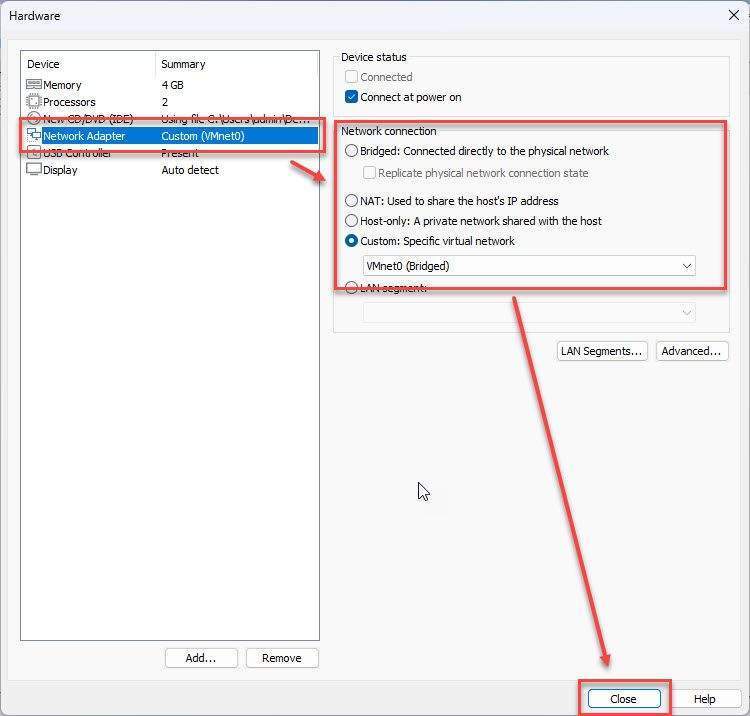
and click Close
Comeback Ready to Create Virtual Machine window, click Finish
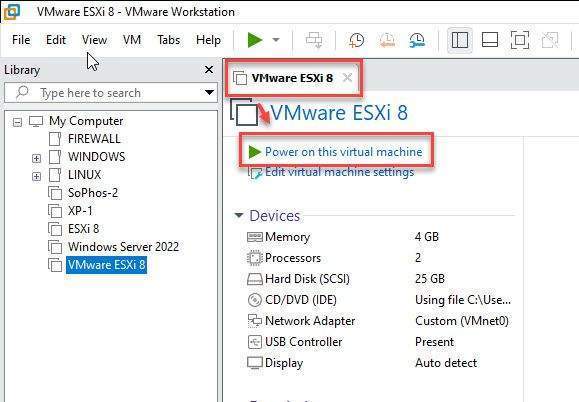
Step 2 – Install VMware vSphere (ESXi) on VMware Workstation
In step 1, we have created a VM for VMware vSphere (ESXi), to install click on Power on this virtual machine button.
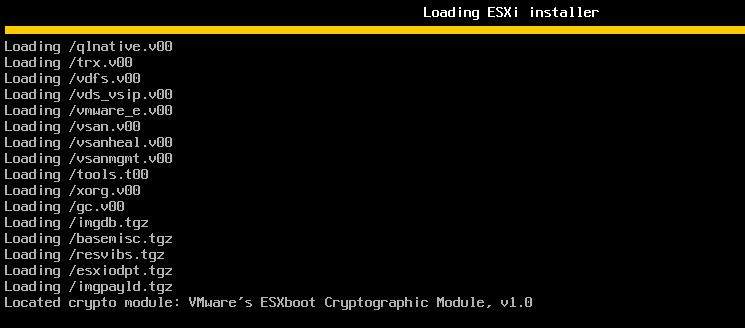
The loading process will take a few minutes…
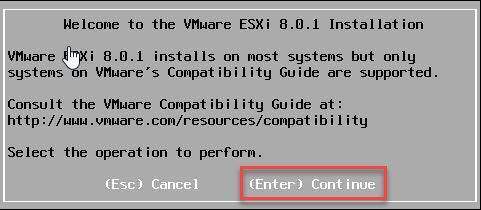
Press Enter to the next step in the Welcome to the VMware ESXi 8 Installation window,
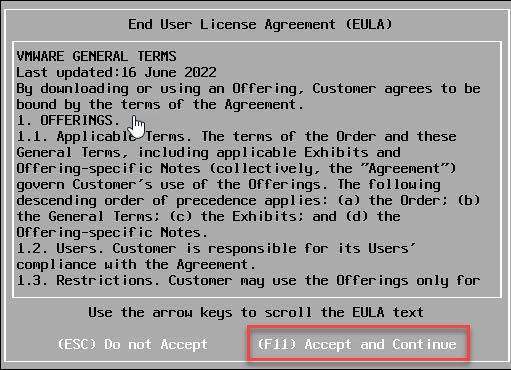
In the End User License Agreement (EULA) window, press F11 to accept the ToS and proceed to the next step.
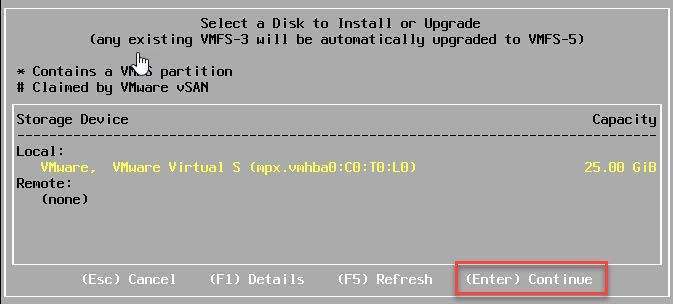
Keep default by pressing Enter to the next step in the Select a Disk to Install or Upgrade window,
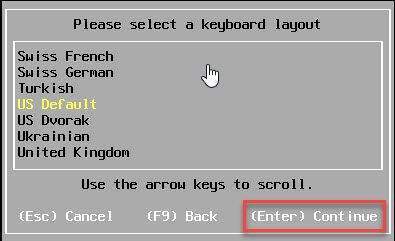
In the Please select a keyboard layout window, keep default by pressing Enter to the next step.
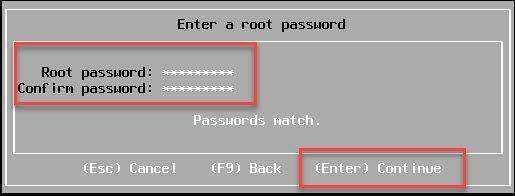
Next, in the Enter a root password window, please set and confirm a password for the root account, then press Enter to proceed to the next step.
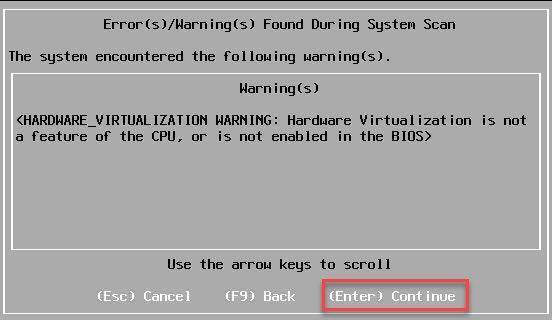
In the Error(s)/Warning(s) Found During System Scan window, press Enter to the next step.
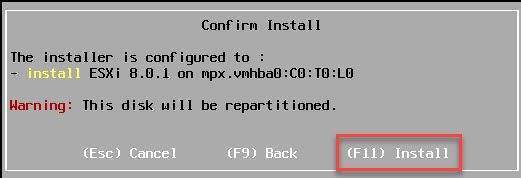
In the Confirm Install window, press F11 to install VMware vSphere (ESXi)
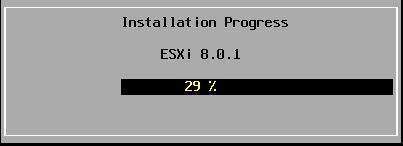
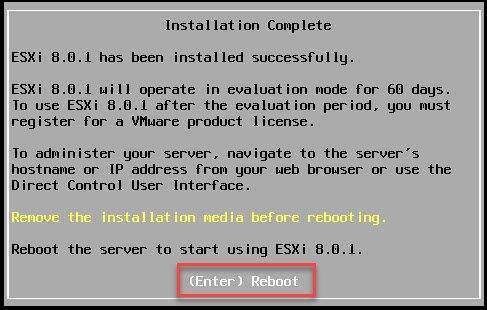
The installation process will take a few minutes to complete…
After the installation is complete, press Enter to restart the system.
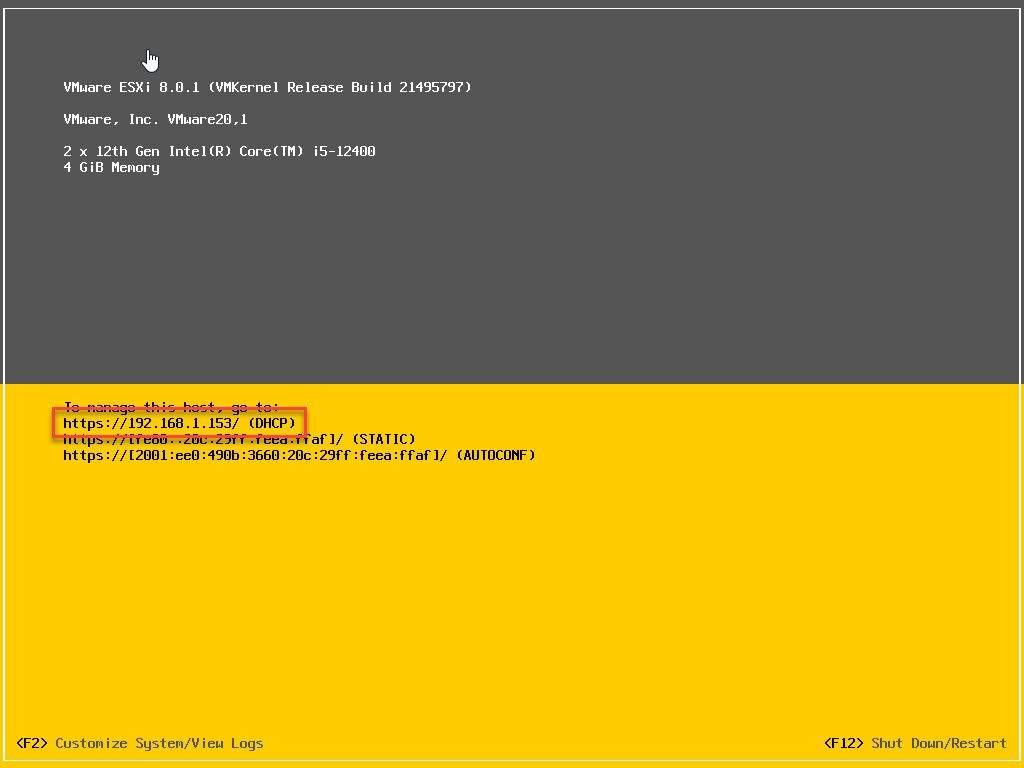
The information screen appears, where you can see basic information about the VMware vSphere (ESXi) server such as CPU, RAM, and login address as shown below.
My address https://192.168.1.153
Step 3 – Access VMware vSphere (ESXi) via the web interface
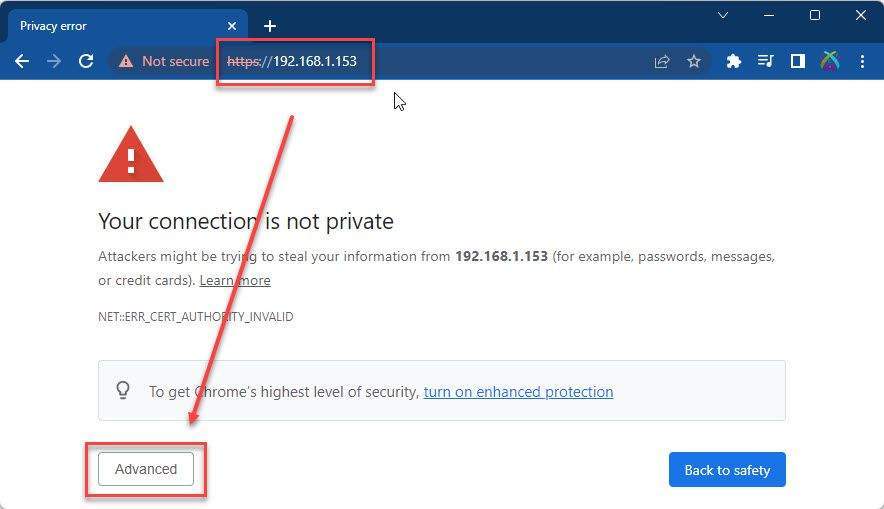
Open your favorite browser and enter the address provided by your server. The security warning screen opens, click on Advanced button:
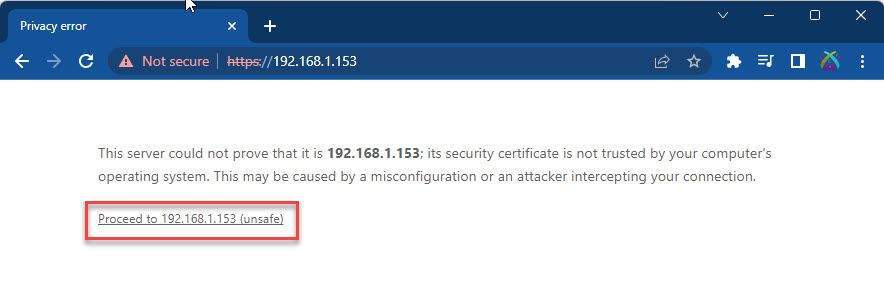
On the next page, click on Proceed to IP-Address…
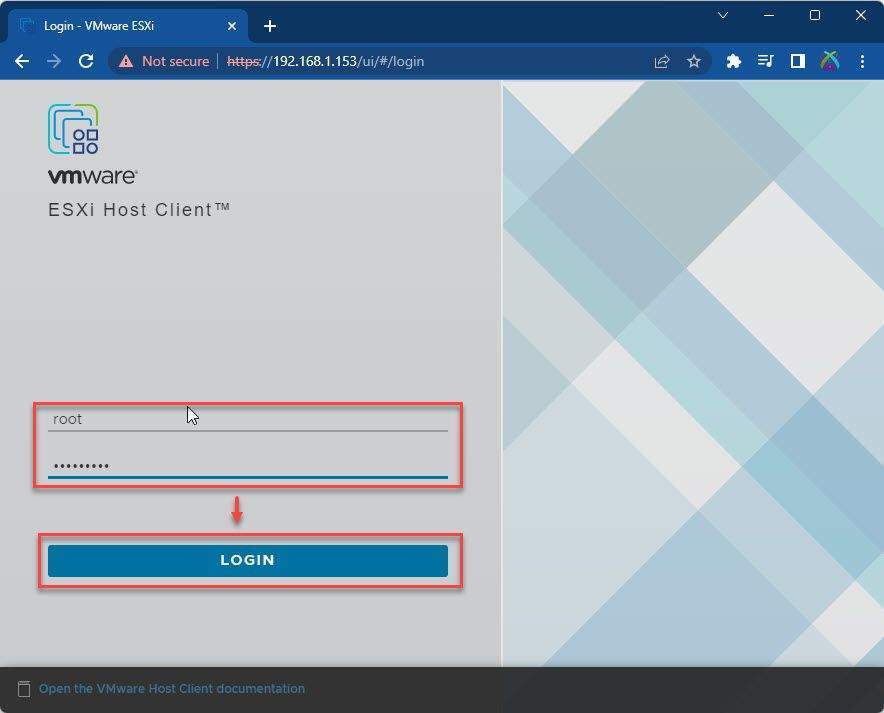
Log in with your information:
- Username: root
- Password: The password was set in Step 2
and then click LOGIN
Successfully…
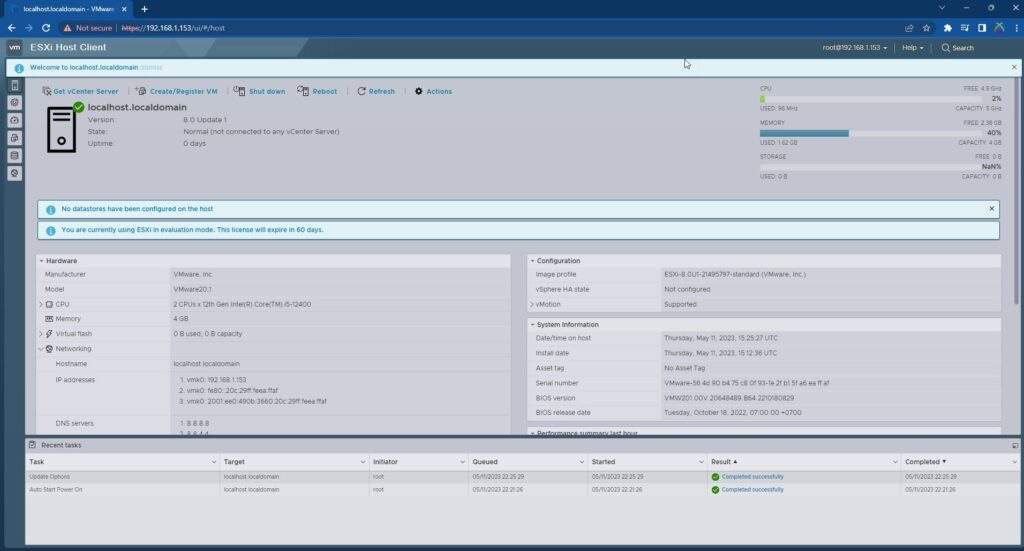
That’s it, through this article, you now know how to successfully install VMware vSphere (ESXi) on VMware Workstation.
Thank you for reading !!!