Hello everyone, in this article, we will explore How to Open/Block ports in the Windows Firewall on the Windows operating system.
Windows Firewall is a built-in feature in the Microsoft Windows operating system, designed to protect your computer from network threats and prevent unauthorized access from applications and network services.
In some cases, it is necessary to open ports on the firewall to allow applications and services to transmit data over the network. For example, opening ports for a web server (port 80 for HTTP, port 443 for HTTPS) enables users to access your website. Similarly, ports for email services (port 25 for SMTP, port 110 for POP3, port 143 for IMAP) need to be open to send and receive emails.
However, opening ports on the firewall is a crucial activity in network security management because it exposes a gateway that could be vulnerable to external attacks. Therefore, system administrators need to carefully consider and only open necessary ports, implementing additional security measures to minimize risks.
In this example, I will open port 80/TCP for the Web server service. Replace port 80 with the port you want to open for your service
Read more
- How to Install ChromeOS Flex on Any PC
- How to Configure RAID 1 ( Mirroring ) in Windows 11/10/8/7
- How to Set Up Basic Records for a Mail Server
- How to Install and Configure NextCloud Server on Ubuntu
- How to Install Android on VirtualBox
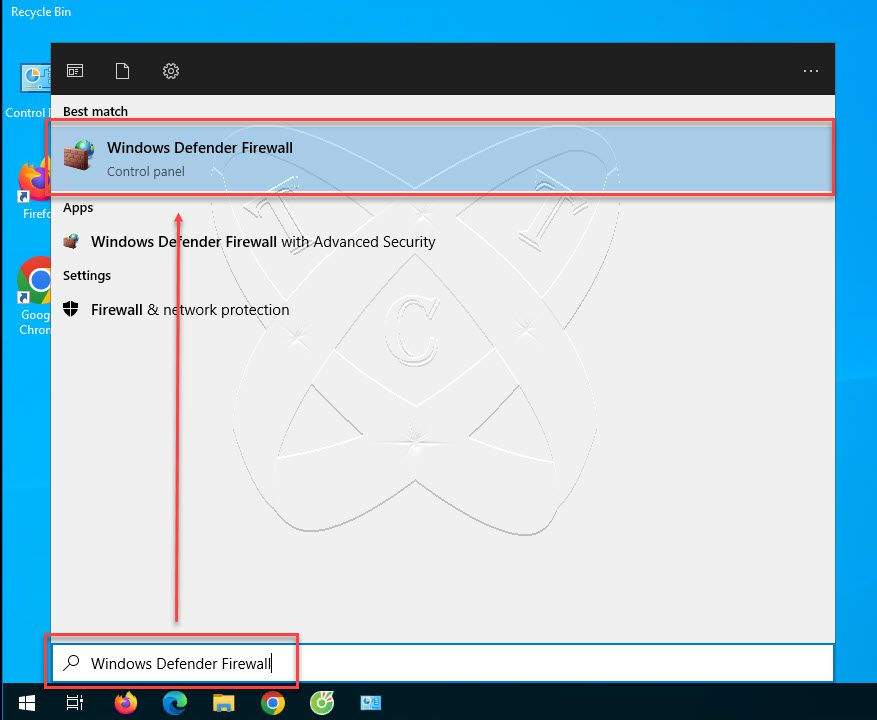
Step 1 – Open the Windows Firewall Settings
On the Desktop screen, press the Win + S key combination to open the search bar and type Windows Defender Firewall – select Windows Defender Firewall from the search results.
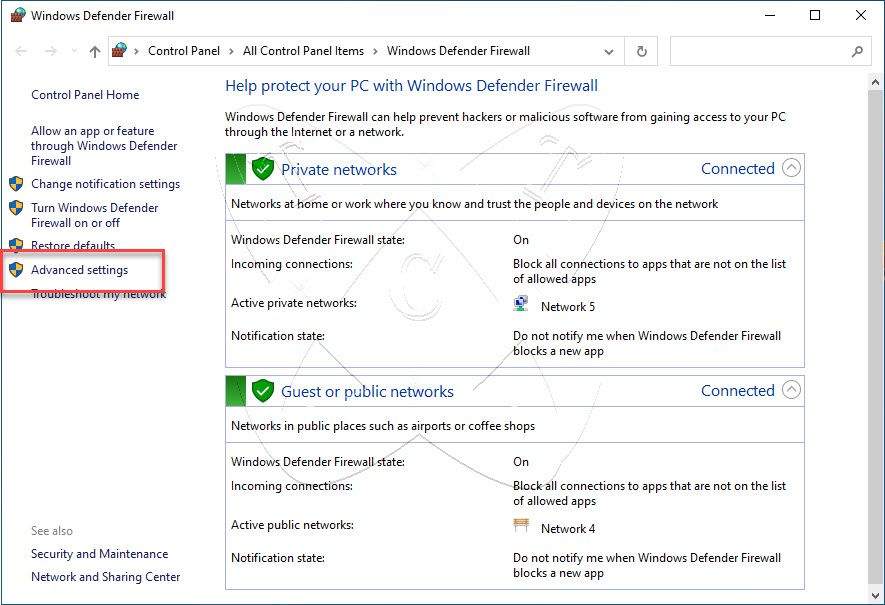
Step 2 – Open a Port/Program on the Windows Firewall
In the Windows Defender Firewall window, select Advanced settings from the left-hand sidebar
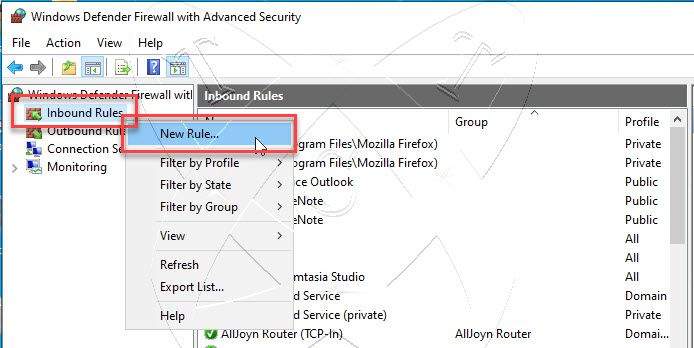
At the Windows Defender Firewall with Advanced Security window, we will work with two types of rules, namely Inbound Rules and Outbound Rules
- Inbound Rules: This rule controls the acceptance or rejection of data coming into the system from external sources. It dictates how the system handles incoming data packets from various sources on the network.
- Outbound Rules: Conversely, this rule controls data leaving the system and going to various destinations on the network. It specifies how the system processes and responds to requests from your system to valid destinations.
Inbound Rules
On the Windows Defender Firewall with Advanced Security windows, right-click on the Inbound Rules – select New Rule
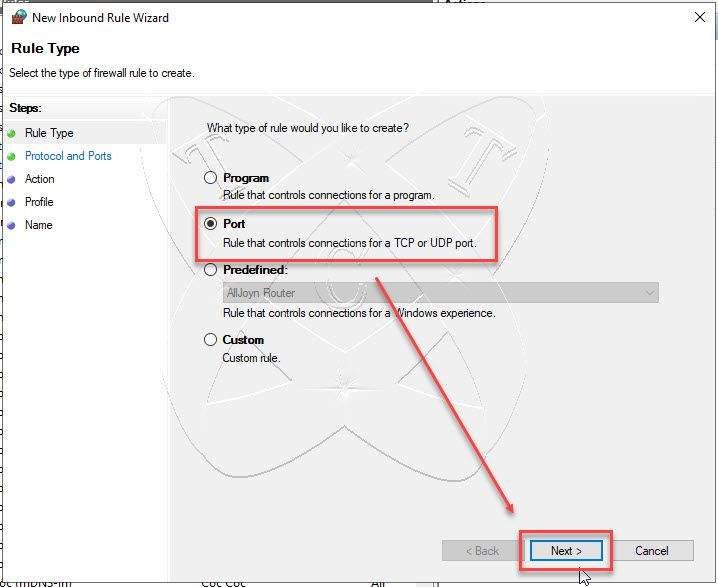
In the Rule Type window, select the Port option and click Next
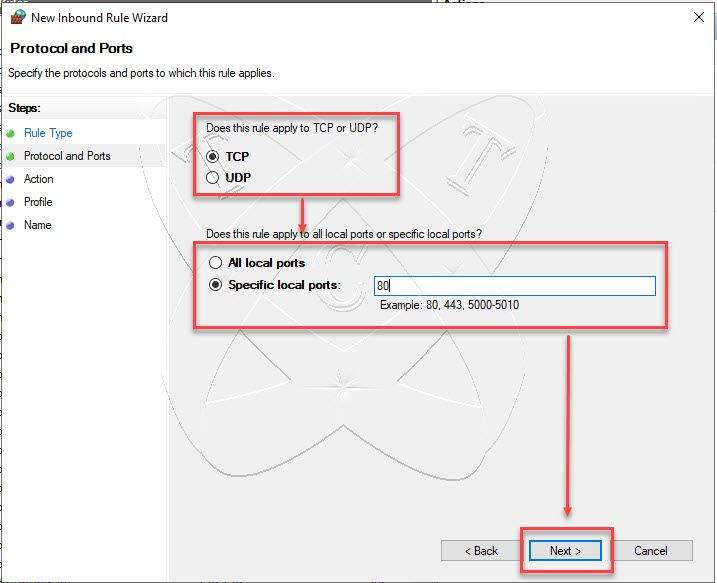
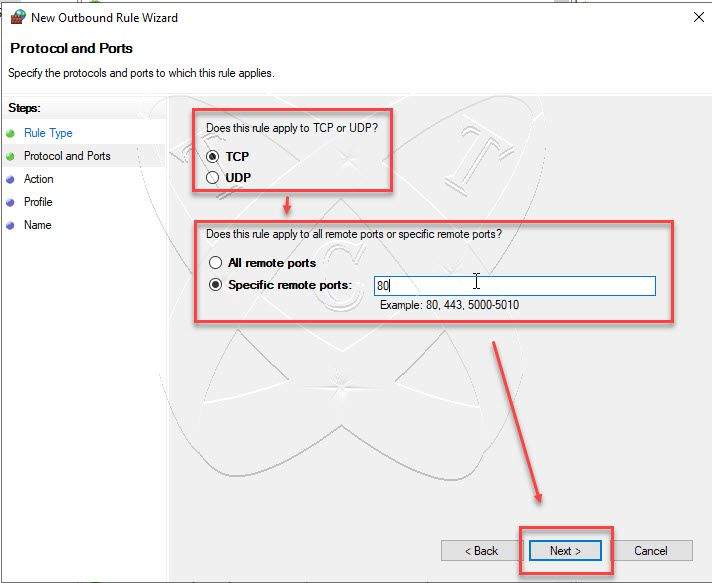
In the Protocol and Ports window:
- Does this rule apply to TCP or UPD?: Select the appropriate protocol type. In this case, I open port 80 using the TCP protocol.
- Does this rule apply to all local ports or specific local ports?: select the Specific local ports option and enter the port you want to open.
and then click Next
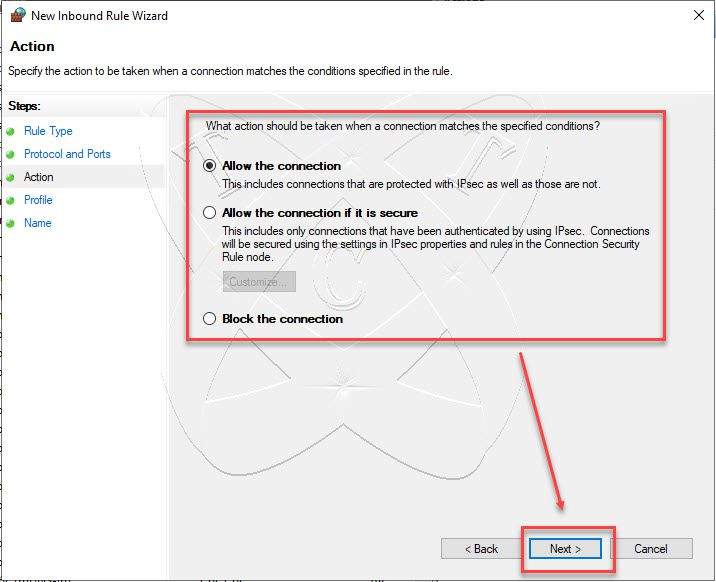
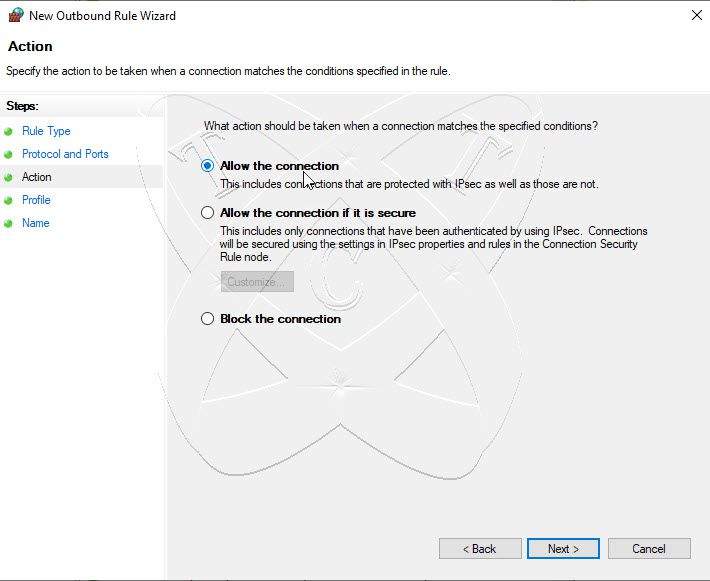
Next, in the Action window, select the Allow the connection option and click Next
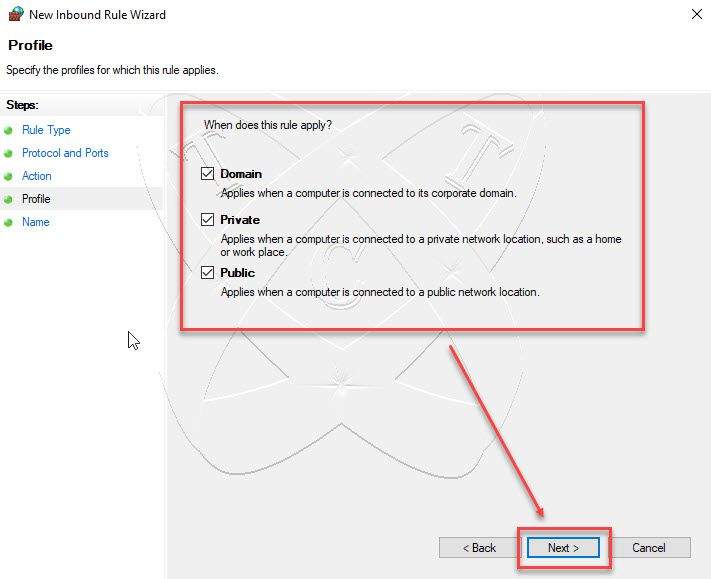
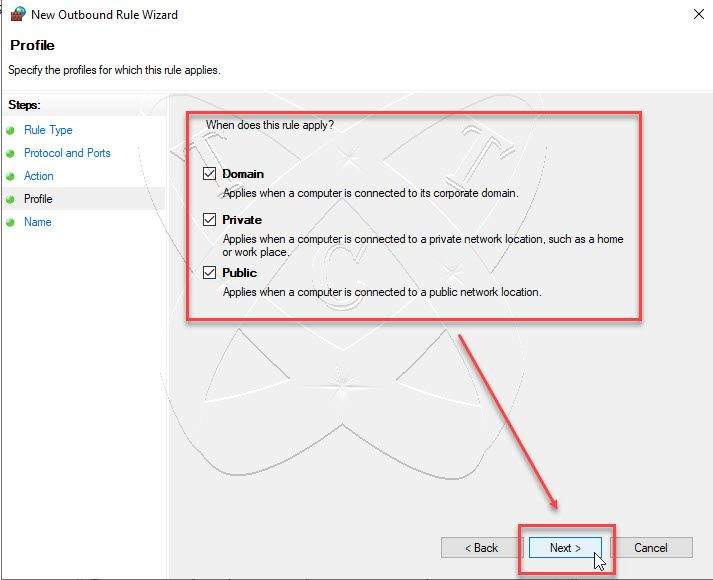
In the Profile window, select all option and click Next
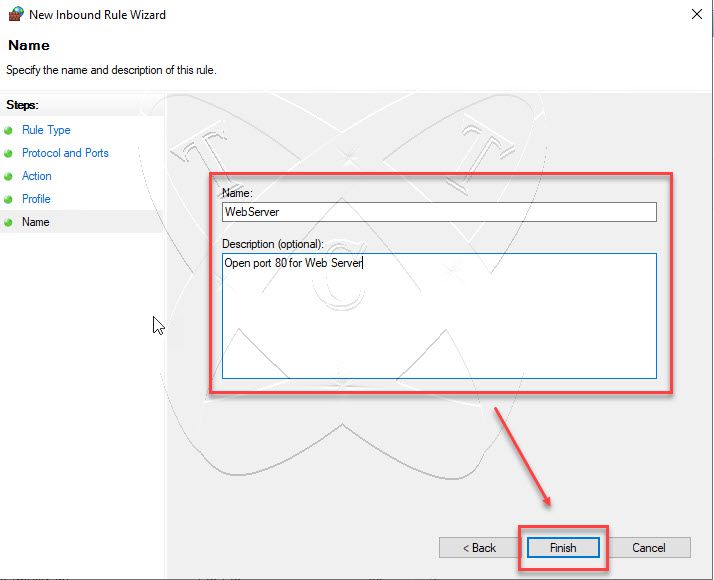
In the Name window, Enter Name and Describe your rule:
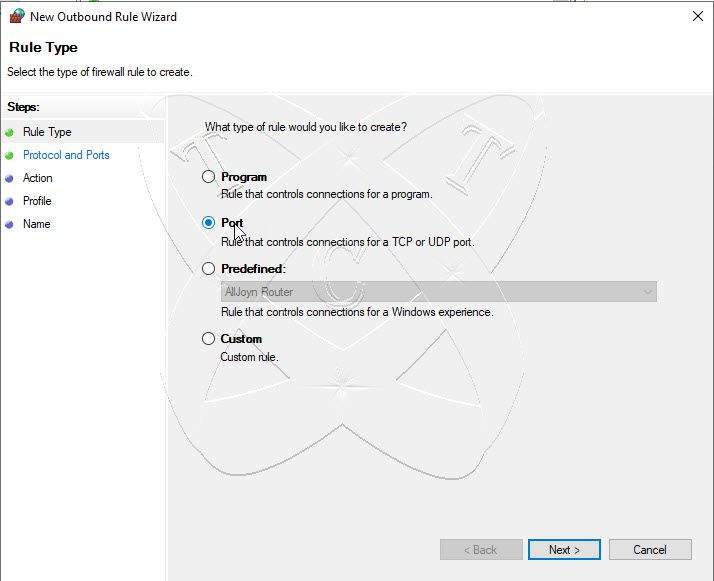
Outbound Rules
Similarly to created an Inbound Rule.
Right-click on the Outbound Rules – select New Rule

Select Port and then click Next
Select Protocol and enter your Port
Next, select the Allow the connection option and click Next
Select all option and click Next
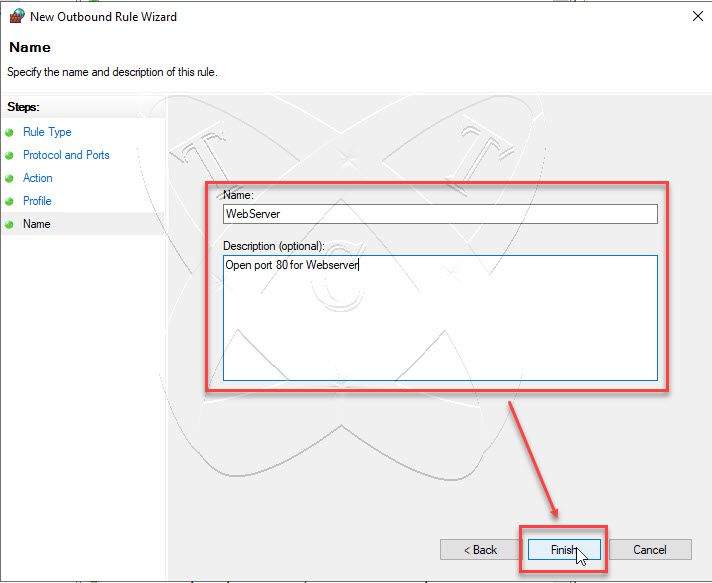
Enter Name and Description your rule:
Conclusions
Understanding how to open ports in Windows Firewall on Windows can greatly enhance your ability to manage network access and optimize your system’s security and performance. By following the steps outlined in this guide, you can confidently configure inbound and outbound rules, ensuring that necessary network services and applications can communicate effectively while maintaining robust protection against unauthorized access. Whether you’re setting up a web server, gaming console, or any other networked device, mastering port management in Windows Firewall is an essential skill that empowers you to tailor your system’s security settings to your specific needs.