Welcome to the next tutorial in our series of GLPI guides. In the previous article, we successfully installed GLPI on Ubuntu with a lower version. Now, in this guide, we will take the next step How to Upgrade GLPI to the Latest version on the Ubuntu/Debian operating system.
Upgrading GLPI is an important process to ensure you have the latest features, security patches, and optimal performance. In this article, we will walk you through each necessary step to upgrade GLPI safely and securely.
Get ready to explore the GLPI upgrade process and enhance your system and data management experience.
Let’s get started!
Prerequisites
- GLPI with a lower version has been installed.
Read: How to Install GLPI 10 on Ubuntu 22.04 | 20.04 | 18.04 LTS - User privileges: root or non-root with sudo privileges.
Read more
- How to Install GLPI 10 on Ubuntu 22.04 | 20.04 | 18.04 LTS
- How to Synchronize Users from Active Directory to GLPI
- How to Install and Configure RocketChat Server on Ubuntu 22.04 | 20.04 LTS
- How to Install VMware vSphere (ESXi) 8/7/6 on VMware Workstation
- How to Add Google Drive to File Explorer | Map Google Drive to PC
Step 1 – Check the current version
To check the current version, you can follow these steps. Log in to the GLPI administration page and scroll down to the bottom left corner. There, you will find the current version of GLPI displayed, as shown below:
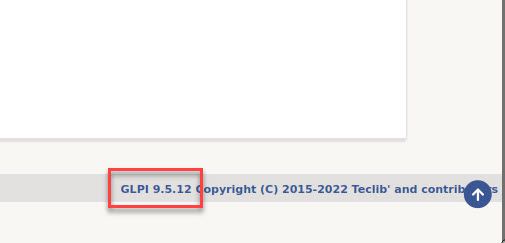
As in this example, my current installed version is 9.5.12.
Step 2 – Backup
Before we begin, ensure you have backup all your essential data, including the GLPI database and relevant files. This will ensure the safety of your data during the upgrade process and provide the ability to restore it in case of any issues.
Throughout this guide, assume the following:
- GLPI’s database name:
glpi_db - GLPI’s database user:
glpi_user - GLPI’s database password:
glpi_PWD - GLPI’s installation directory:
/var/www/html/glpi
Please make sure to replace these values with your actual database name and installation directory when following the instructions.
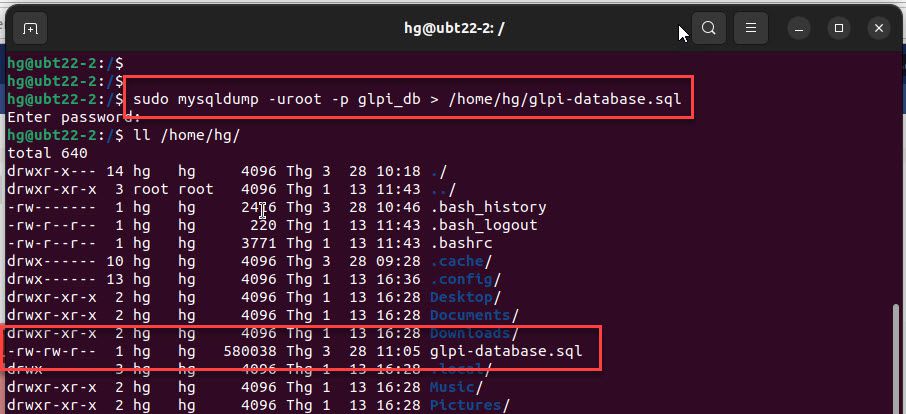
Backup Database
Open the Terminal and execute the following command to back up the GLPI database to the /home/username/ directory with the name glpi-database.sql
sudo mysqldump -uroot -p glpi_db > /home/hg/glpi-database.sql
And run the following command to ensure that you have successfully backed up:
ll /home/hg/
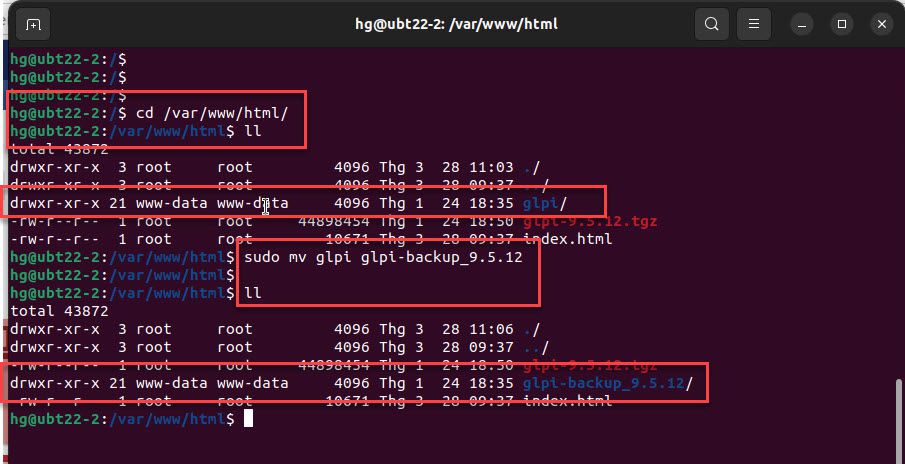
Backup the root directory of GLPI
Go to the /var/www/html directory
cd /var/www/html
ll
Execute the following command to back up the root directory of GLPI:
sudo mv glpi glpi_backup_9.5.12
ll
Step 3 – Download the Latest version of the GLPI
Go to the official website here and obtain the link to download the latest stable version of GLPI as shown below:

Execute the following command to download it:
sudo wget -O glpi.tgz Paste_link_to_here
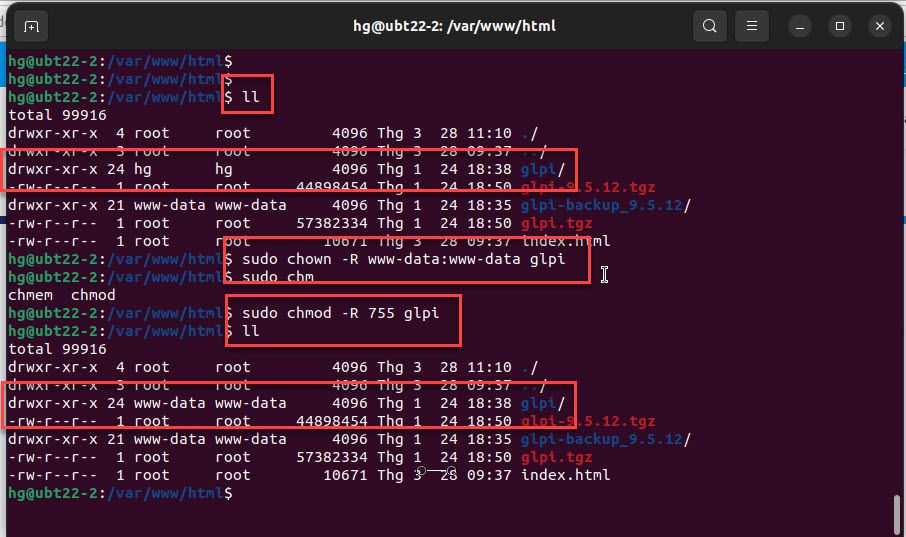
Extract the downloaded file
sudo tar -xvf glpi.tgz
ll
Next, change the permissions and ownership of the extracted GLPI directory. You can use the following commands:
sudo chown -R www-data:www-data glpi
sudo chmod -R 755 glpi
ll
And restart the Apache service to apply the changes:
sudo systemctl restart apache2
Step 4 – Upgrade GLPI to the Latest version
The preparation is complete, now please access the address http://IP-Address/glpi to start upgrading GLPI.
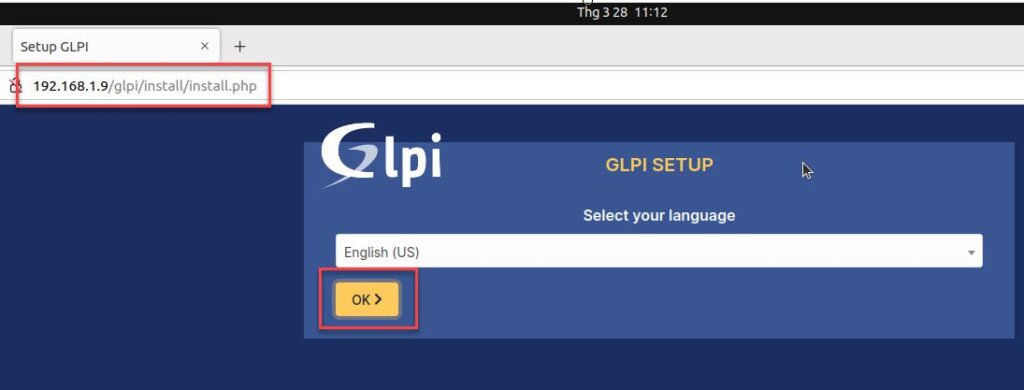
On the first page, select your language you want to install and click OK button:
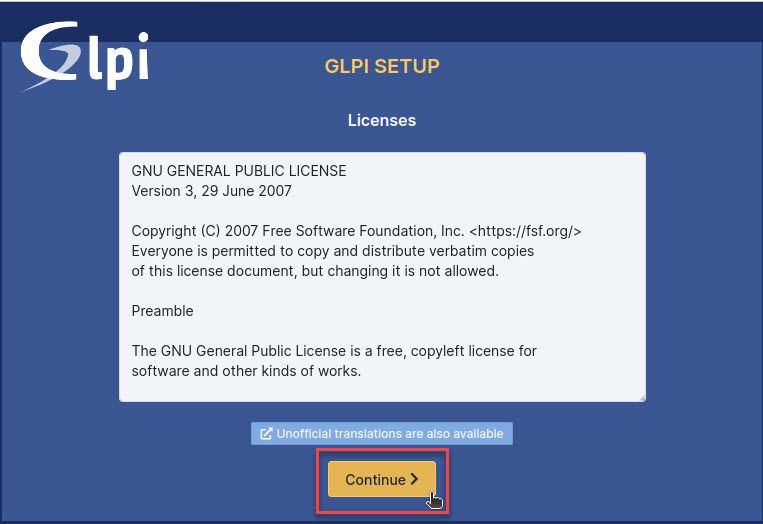
Click the Continue button on the Licenses page
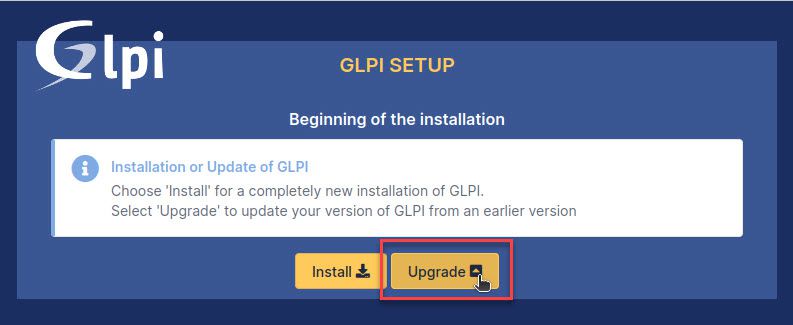
On the Beginning of the installation page, click the Upgrade button to upgrade your version to the latest version
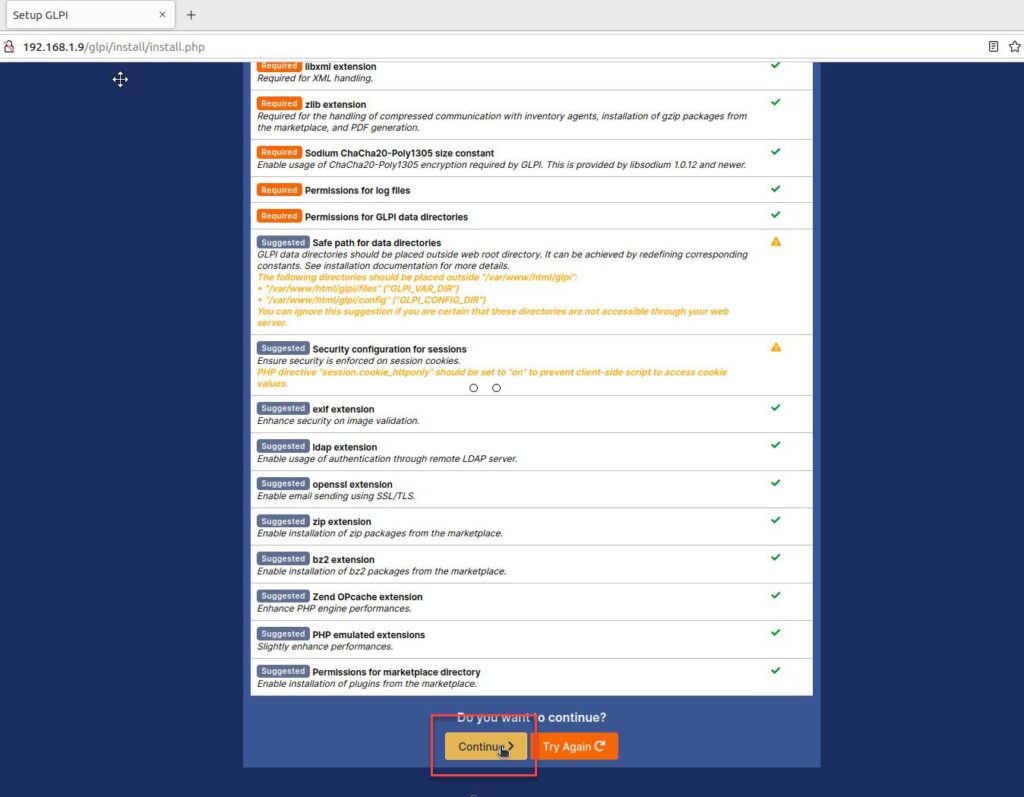
Verify the requirements, ensuring that the mentioned requirements are marked in green, then click Continue to proceed.
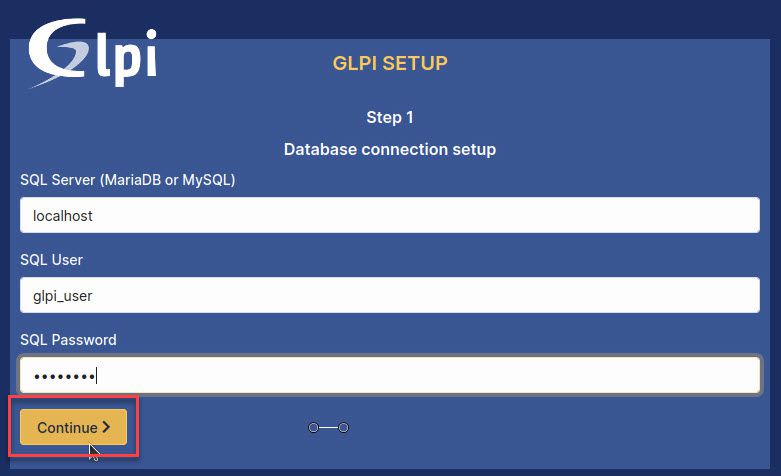
On the Database connection setup page, enter your Database User and Database Password then click Continue to proceed.
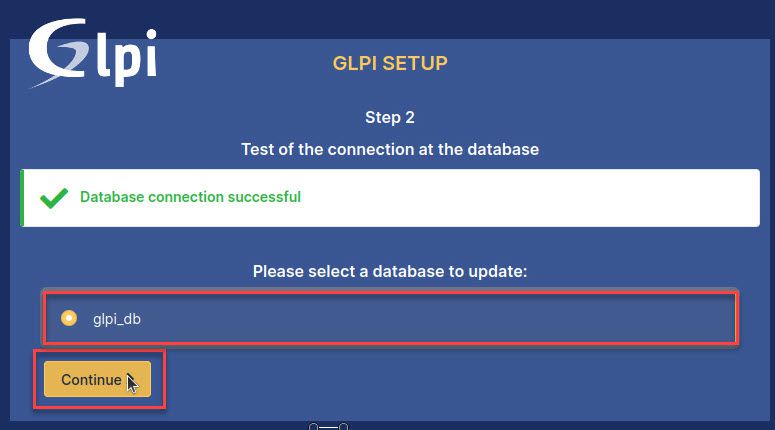
Select your Database Name and click the Continue button
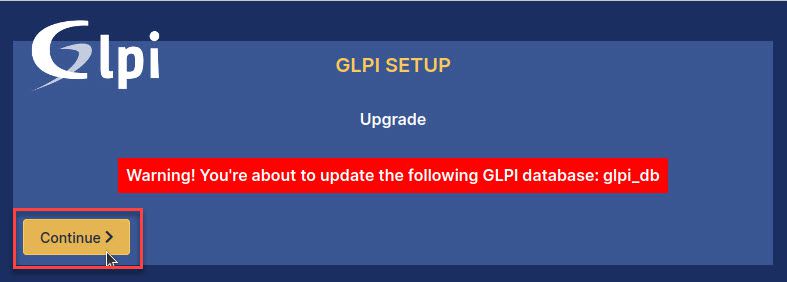
On the warning page, press Continue to proceed.
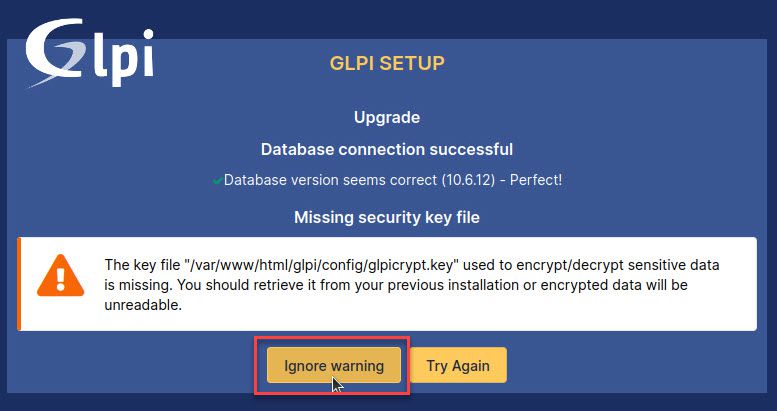
On the next warning page, click Ignore warning to proceed (we will fix this in Step 5)
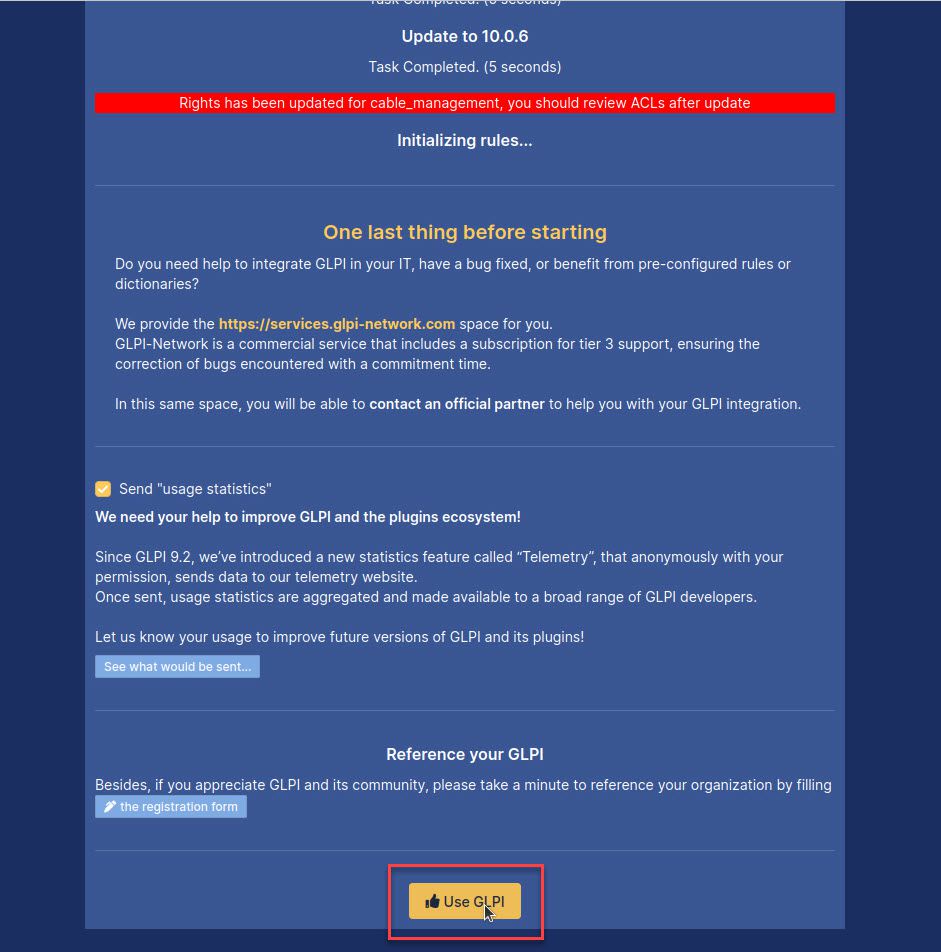
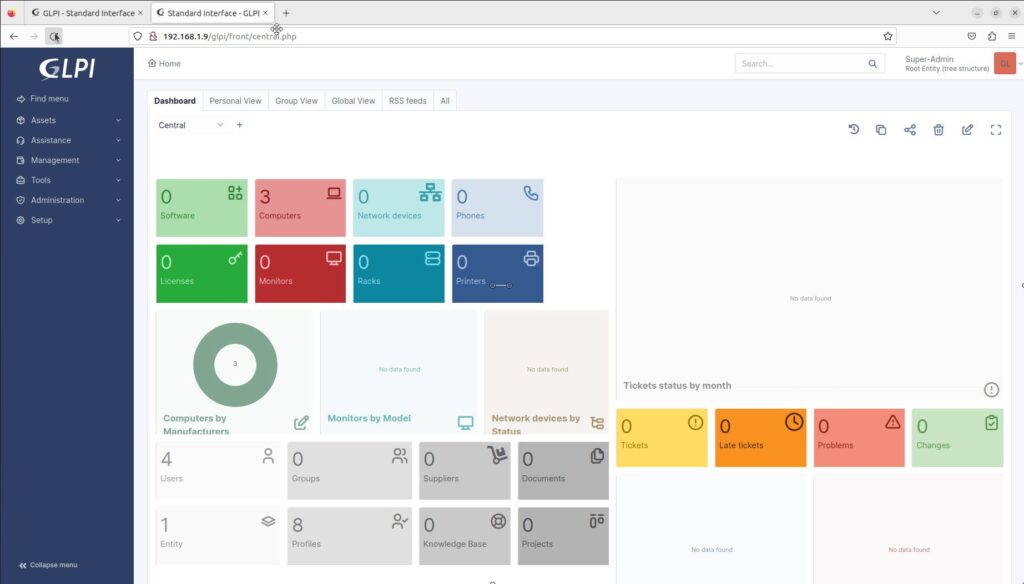
Wait for the upgrade process to complete, then click Use GLPI to be redirected to the GLPI administration page.
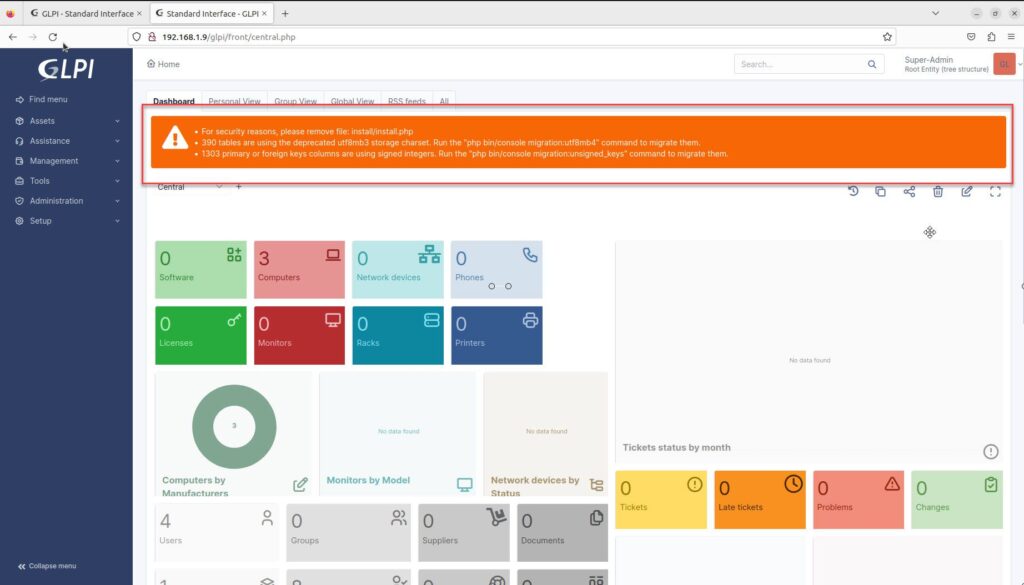
At the administration page, you will see a warning message as shown in the image below, and we will address it in step 5
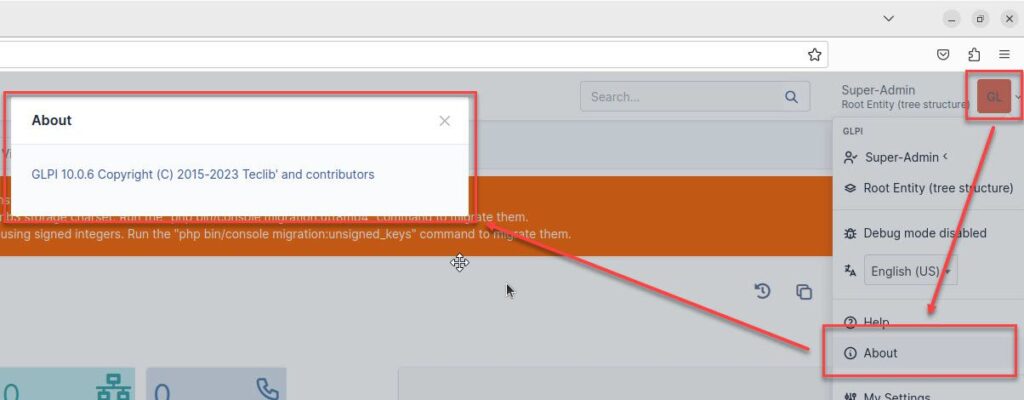
Now, check the newly updated version by clicking on the account icon at the top left corner of the page, then select About. You will find the upgraded version information of GLPI
Step 5 – Fix Warning
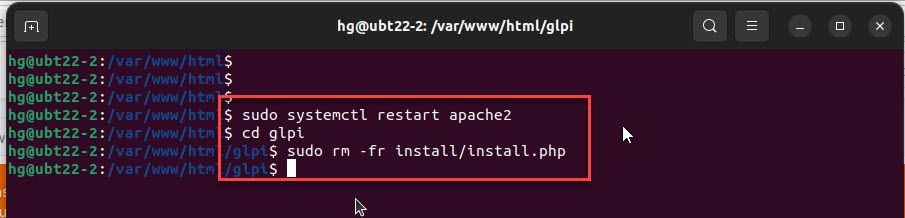
To enhance security, delete the install.php file in the /path/glpi/install directory as instructed by GLPI. You can do this by executing the following commands:
cd glpi
sudo rm -fr install/install.php
Next, execute the following commands one by one to fix the remaining two warnings:
sudo php bin/console migration:utf8mb4
sudo php bin/console migration:unsigned_keys
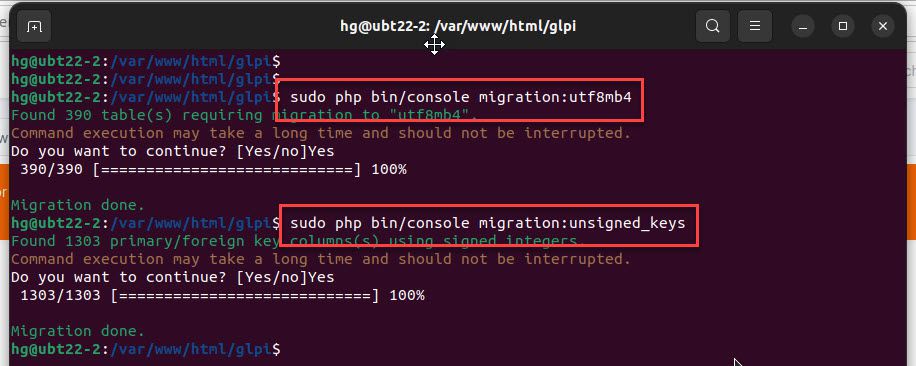
Finally, on the GLPI administration page, press the F5 key or use the refresh button to reload the page. Once refreshed, you will observe that the previously displayed warnings have vanished, indicating that they have been successfully resolved.
That’s it. By following the guide on How to Upgrade GLPI to the Latest Version on Ubuntu/Debian operating system, we have successfully upgraded GLPI to the latest version. If you have any questions or suggestions, please feel free to leave a comment below.
Thank you for reading !!!