In this guide, we will together explore How to Install and Configure an OpenVPN server on Ubuntu.
What is OpenVPN?
OpenVPN is an open-source software used to establish a Virtual Private Network (VPN). It enables users to create secure and encrypted connections over the internet, safeguarding personal information from online threats.
Here are some key features and information about the OpenVPN Server:
- Open Source and Free: OpenVPN is an open-source project, meaning its source code is publicly available and can be modified and developed freely.
- Cross-Platform Support: OpenVPN supports multiple operating systems such as Windows, macOS, Linux, and mobile devices running platforms like Android and iOS.
- High Security: OpenVPN employs robust encryption protocols like SSL/TLS to protect data transmitted over the network. This helps users avoid attacks such as Man-in-the-Middle (MITM) and keeps their data secure.
- Strong Customization Support: OpenVPN allows administrators to configure and fine-tune various parameters such as IP address allocation, certificate management, and firewall rules.
- Remote Access Support: OpenVPN supports remote access, enabling users to access their internal network securely from anywhere in the world via the Internet.
- Powerful Authentication System: OpenVPN supports multiple authentication methods, including username/password and two-factor authentication (2FA), enhancing the security layer.
- Multi-Channel Support and Automatic Reconnection: OpenVPN can run on multiple ports (including both TCP and UDP) and automatically reconnects in case of connection interruptions.
- Easy Configuration and Management: OpenVPN provides graphical management tools and a command-line interface, making it easy for administrators to configure and manage the server.
Read more
- How to Install and Configure OpenVPN Server on Centos distro:✍️ updating
- How to Install and Configure OpenVPN Server on Debian:✍️ updating
- How to Install and Configure OpenVPN Client on Windows:✍️ updating
- How to Install and Configure OpenVPN Client on Ubuntu
- How to Install and Configure Zabbix Server on Ubuntu
Prerequisites
- Server: A physical server or a VPS server with a public static IP address
- OS: Ubuntu 23 | Ubuntu 22.04 LTS | Ubuntu 22.10 | Ubuntu 21.04 | Ubuntu 20.04 LTS | Ubuntu 18.04 LTS
- User privileges: root or non-root user with root privileges.
Step 1 – Update system
Before installing, I will update the system packages to the new version.
sudo apt update
Step 2 – Check the IP of the system
ifconfig
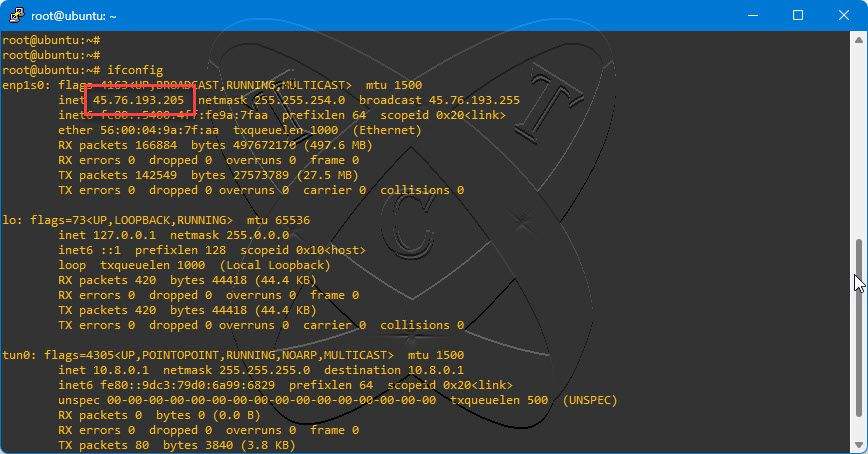
In this example, my server address is 45.76.193.205
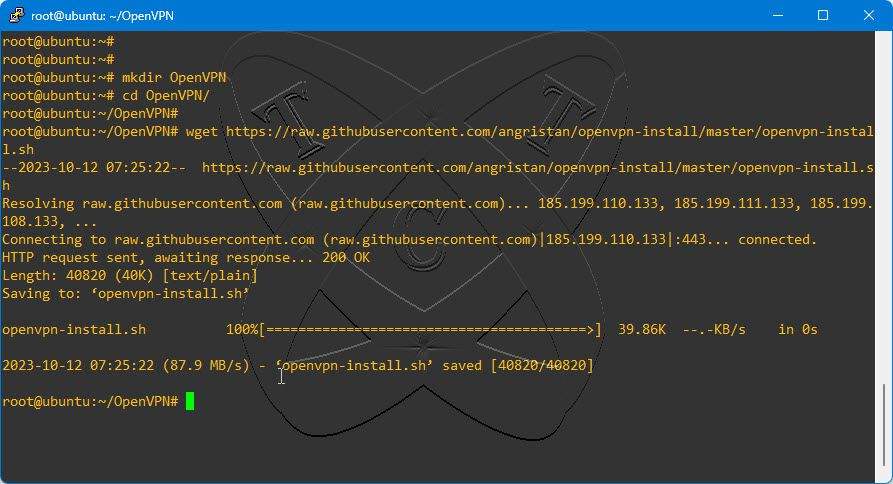
Step 3 – Download the OpenVPN script
First, create a folder named OpenVPN in the /mnt directory using the following command:
sudo mkdir /mnt/OpenVPN
And, move to that folder
cd /mnt/OpenVPN
Next, download the openvpn-install.sh script
sudo wget https://raw.githubusercontent.com/angristan/openvpn-install/master/openvpn-install.sh
Step 4 – Install OpenVPN Server on Ubuntu
First, grant execute permissions to the openvpn-install.sh script
sudo chmod +x openvpn-install.sh
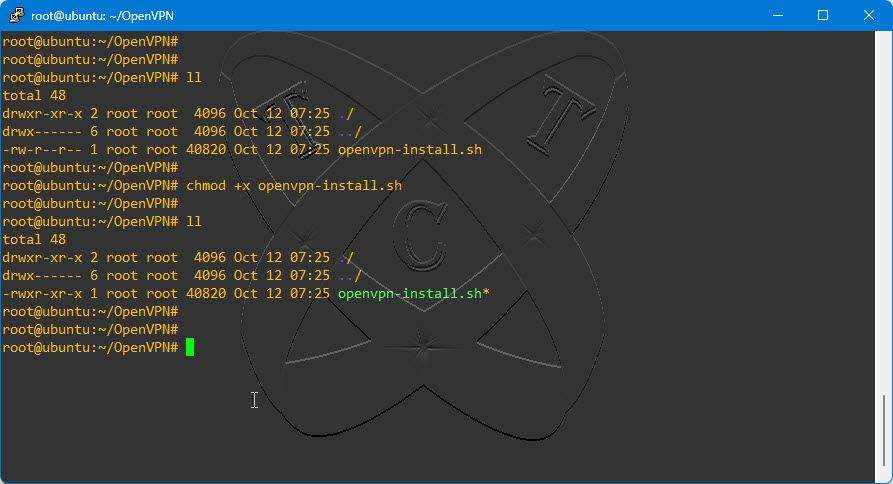
And execute the openvpn-install.sh script to install the OpenVPN server on your system
./openvpn-install.sh
The first time you run it, you’ll need to answer some questions to set up your VPN server, as shown below.
root@ubuntu:~/OpenVPN# ./openvpn-install.sh
Welcome to the OpenVPN installer!
The git repository is available at: https://github.com/angristan/openvpn-instalI need to ask you a few questions before starting the setup.
You can leave the default options and just press enter if you are ok with them.I need to know the IPv4 address of the network interface you want OpenVPN listening to.
Unless your server is behind NAT, it should be your public IPv4 address.
IP address: 45.76.193.205 <= Verify the IP address in step 2, if correct, hit EnterChecking for IPv6 connectivity…
Your host does not appear to have IPv6 connectivity.
Do you want to enable IPv6 support (NAT)? [y/n]: n
What port do you want OpenVPN to listen to?
1) Default: 1194
2) Custom
3) Random [49152-65535]
Port choice [1-3]: 1 <= Keep default and hit EnterWhat protocol do you want OpenVPN to use?
UDP is faster. Unless it is not available, you shouldn’t use TCP.
1) UDP
2) TCP
Protocol [1-2]: 1 <= Keep default and hit EnterWhat DNS resolvers do you want to use with the VPN?
1) Current system resolvers (from /etc/resolv.conf)
2) Self-hosted DNS Resolver (Unbound)
3) Cloudflare (Anycast: worldwide)
4) Quad9 (Anycast: worldwide)
5) Quad9 uncensored (Anycast: worldwide)
6) FDN (France)
7) DNS.WATCH (Germany)
8) OpenDNS (Anycast: worldwide)
9) Google (Anycast: worldwide)
10) Yandex Basic (Russia)
11) AdGuard DNS (Anycast: worldwide)
12) NextDNS (Anycast: worldwide)
13) Custom
DNS [1-12]: 9 <= Choose the DNS Server you want to use (I chose Google – type 9) and hit Enter.Do you want to use compression? It is not recommended since the VORACLE attack makes use of it.
Enable compression? [y/n]: n <= Keep default and hit EnterDo you want to customize encryption settings?
Unless you know what you’re doing, you should stick with the default parameters provided by the script.
Note that whatever you choose, all the choices presented in the script are safe. (Unlike OpenVPN’s defaults)
See https://github.com/angristan/openvpn-install#security-and-encryption to learn more.Customize encryption settings? [y/n]: y <= Type Y and hit Enter
Choose which cipher you want to use for the data channel:
1) AES-128-GCM (recommended)
2) AES-192-GCM
3) AES-256-GCM
4) AES-128-CBC
5) AES-192-CBC
6) AES-256-CBC
Cipher [1-6]: 1 <= Keep default and hit EnterChoose what kind of certificate you want to use:
1) ECDSA (recommended)
2) RSA
Certificate key type [1-2]: 1 <= Keep default and hit EnterChoose which curve you want to use for the certificate’s key:
1) prime256v1 (recommended)
2) secp384r1
3) secp521r1
Curve [1-3]: 1 <= Keep default and hit EnterChoose which cipher you want to use for the control channel:
1) ECDHE-ECDSA-AES-128-GCM-SHA256 (recommended)
2) ECDHE-ECDSA-AES-256-GCM-SHA384
Control channel cipher [1-2]: 1 <= Keep default and hit EnterChoose what kind of Diffie-Hellman key you want to use:
1) ECDH (recommended)
2) DH
DH key type [1-2]: 1 <= Keep default and hit EnterChoose which curve you want to use for the ECDH key:
1) prime256v1 (recommended)
2) secp384r1
3) secp521r1
Curve [1-3]: 1 <= Keep default and hit EnterThe digest algorithm authenticates tls-auth packets from the control channel.
Which digest algorithm do you want to use for HMAC?
1) SHA-256 (recommended)
2) SHA-384
3) SHA-512
Digest algorithm [1-3]: 1 <= Keep default and hit EnterYou can add an additional layer of security to the control channel with tls-auth and tls-crypt
tls-auth authenticates the packets, while tls-crypt authenticate and encrypt them.
1) tls-crypt (recommended)
2) tls-auth
Control channel additional security mechanism [1-2]: 1 <= Keep default and hit Enter… … …
Tell me a name for the client.
The name must consist of alphanumeric character. It may also include an underscore or a dash.
Client name: client-01 <= Create a new client profile (detail in step 5)Do you want to protect the configuration file with a password?
(e.g. encrypt the private key with a password)
1) Add a passwordless client
2) Use a password for the client
Select an option [1-2]: 1 <= Keep default ( Don’t set a password for the configuration file) and hit Enter
- Using SSL: openssl OpenSSL 3.0.8 7 Feb 2023 (Library: OpenSSL 3.0.8 7 Feb 2023)
- Using Easy-RSA configuration: /etc/openvpn/easy-rsa/vars
- The preferred location for ‘vars’ is within the PKI folder.
To silence this message move your ‘vars’ file to your PKIor declare your ‘vars’ file with option: –vars=
Notice
Keypair and certificate request completed. Your files are:
req: /etc/openvpn/easy-rsa/pki/reqs/client-01.req
key: /etc/openvpn/easy-rsa/pki/private/client-01.key
Using configuration from /etc/openvpn/easy-rsa/pki/3a799923/temp.3321711b
Check that the request matches the signature
Signature ok
The Subject’s Distinguished Name is as follows
commonName :ASN.1 12:’client-01′
Certificate is to be certified until Jan 14 07:28:23 2026 GMT (825 days)Write out database with 1 new entries
Data Base UpdatedNotice
Certificate created at:
- /etc/openvpn/easy-rsa/pki/issued/client-01.crt
Notice
Inline file created:
- /etc/openvpn/easy-rsa/pki/inline/client-01.inline
Client client-01 added. <= client-01 has been createdThe configuration file has been written to /root/client-01.ovpn. <= Location to store client profile
Download the .ovpn file and import it in your OpenVPN client.
root@ubuntu:~/OpenVPN#
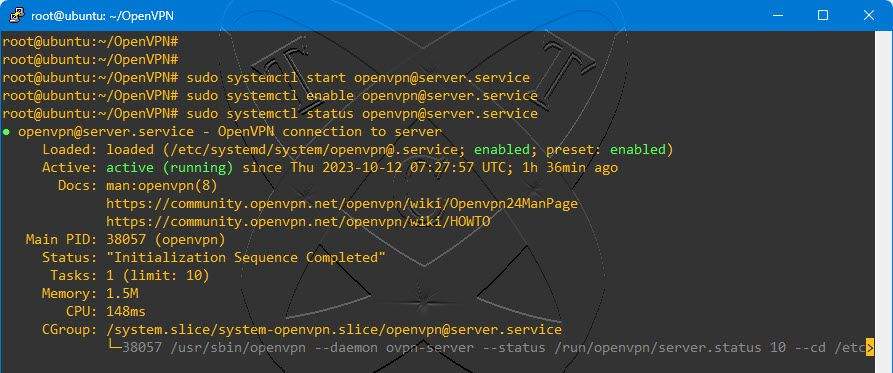
After running the openvpn-install.sh script, you have completed setting up the OpenVPN server on your system. Next, start and configure OpenVPN to launch with the system every time it reboots
sudo systemctl start [email protected]
sudo systemctl enable [email protected]
Check the status of the OpenVPN service to ensure it is running
sudo systemctl status [email protected]
And if you want to stop the OpenVPN service, run the following command:
sudo systemctl stop [email protected]
Step 5 – Add new Client profiles
To create a new account, rerun the command bash openvpn-ubuntu-install.sh and set it up as follows:
root@ubuntu:~/OpenVPN# ./openvpn-install.sh
Welcome to OpenVPN-install!
The git repository is available at: https://github.com/angristan/openvpn-installIt looks like OpenVPN is already installed.
What do you want to do?
1) Add a new user
2) Revoke existing user
3) Remove OpenVPN
4) Exit
Select an option [1-4]: 1 <= Select 1 (Add a new user) and press Enter to create a new clientTell me a name for the client.
The name must consist of alphanumeric character. It may also include an underscore or a dash.
Client name: client-02 <= Enter a name for the client you want to create and press EnterDo you want to protect the configuration file with a password?
(e.g. encrypt the private key with a password)
1) Add a passwordless client
2) Use a password for the client
Select an option [1-2]: 1 <= hit Enter
- Using SSL: openssl OpenSSL 3.0.8 7 Feb 2023 (Library: OpenSSL 3.0.8 7 Feb 2023)
- Using Easy-RSA configuration: /etc/openvpn/easy-rsa/vars
- The preferred location for ‘vars’ is within the PKI folder.
To silence this message move your ‘vars’ file to your PKIor declare your ‘vars’ file with option: –vars=
Notice
Keypair and certificate request completed. Your files are:
req: /etc/openvpn/easy-rsa/pki/reqs/client-02.req
key: /etc/openvpn/easy-rsa/pki/private/client-02.key
Using configuration from /etc/openvpn/easy-rsa/pki/7acceada/temp.e8be78da
Check that the request matches the signature
Signature ok
The Subject’s Distinguished Name is as follows
commonName :ASN.1 12:’client-02′
Certificate is to be certified until Jan 14 09:10:32 2026 GMT (825 days)Write out database with 1 new entries
Data Base UpdatedNotice
Certificate created at:
- /etc/openvpn/easy-rsa/pki/issued/client-02.crt
Notice
Inline file created:
- /etc/openvpn/easy-rsa/pki/inline/client-02.inline
Client client-02 added. <= client-02 has been createdThe configuration file has been written to /root/client-02.ovpn. <= Location to store client profile
Download the .ovpn file and import it in your OpenVPN client.
root@ubuntu:~/OpenVPN#
That’s all. Through this article, we have been able to create an OpenVPN server on Ubuntu by ourselves