WireGuard VPN server is an open-source VPN service built on the WireGuard platform, providing security, privacy, and reliability features for users’ internet connections. WireGuard VPSN server helps users connect and access the internet securely and privately, while allowing them to access online services from anywhere without geographical limitations.
It can meet the VPN connection needs of businesses and individuals, with the ability to operate on multiple operating systems, including Windows, MacOS, Linux, Android, and iOS. It is designed with a simple, user-friendly, and efficient design, making it easy for users to configure and connect to WireGuard servers.
WireGuard VPN server uses advanced security protocols to protect users’ data and personal information, ensuring that connections are encrypted and secure. This helps users feel confident when connecting to unsafe public networks, protecting them from online network threats and keeping their data safe.
In this guide, We will learn How to Install and Configure WireGuard VPN Server on Ubuntu 22.04 | 20.04 LTS
Prerequisites
- OS: Ubuntu with a public static IP address
- User privileges: root or non-root user with sudo privileges.
Step 1 – Prepare
First, we need to update and upgrade all the system packages to the latest version by running the following command below:
sudo apt update && sudo apt upgrade -y
Next, install the iptables, net-tools, and vim packages using the following command:
sudo apt install iptables net-tools vim -y
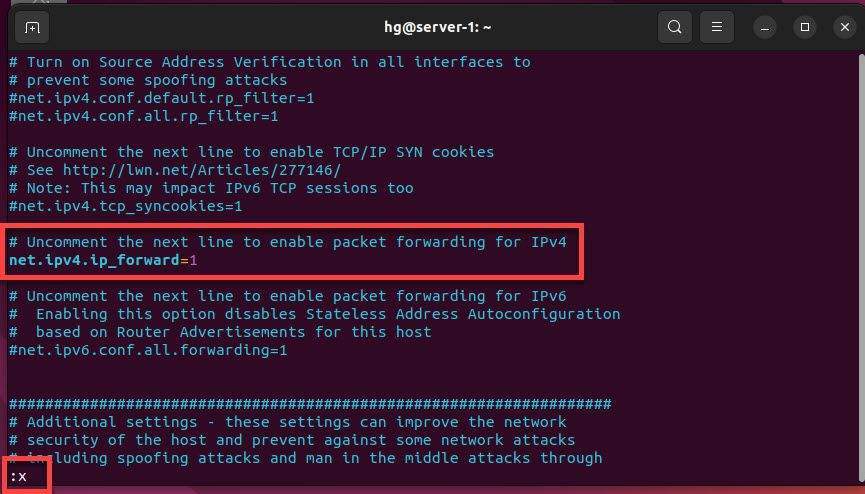
After the iptables package is installed, we need to enable IP forwarding to route packets between the Clients and the Internet by open and editing the /etc/sysctl.conf file:
sudo vim /etc/sysctl.conf
Find and edit (or uncomment) the following line:
#net.ipv4.ip_forward=1
change to
net.ipv4.ip_forward=1
After done, save and exit file.
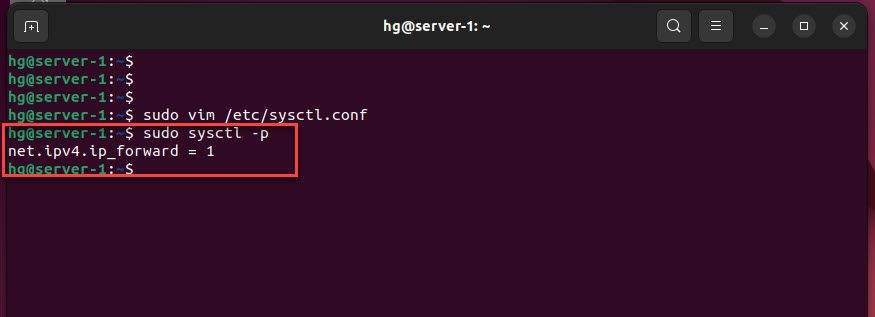
And run the following command to apply the changes:
sudo sysctl -p
You will get the following output:
Check the static IP address and network interface name using the following command:
ifconfig
You will get the following output:
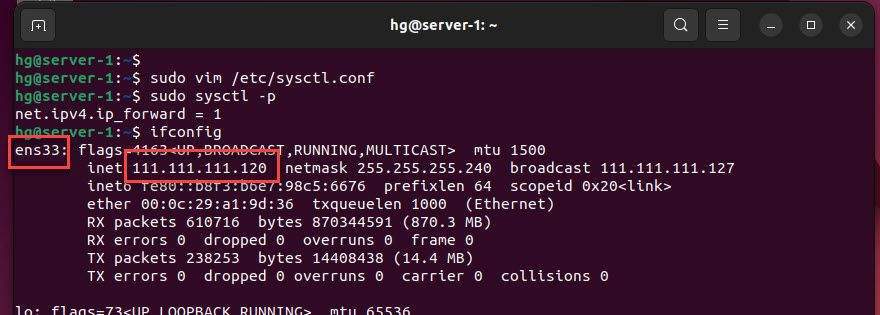
From the output of the command, my server information is as follows:
- Network interface name: ens33
- Static public IP address: 111.111.111.120
Step 2 – Install WireGuard VPN Server
Everything is ready to install the WireGuard VPN server on your system. Run the following command to proceed with the installation:
sudo apt install wireguard -y
Once the WireGuard package has been installed, please proceed to the next step.
Step 3 – Configure WireGuard VPN Server
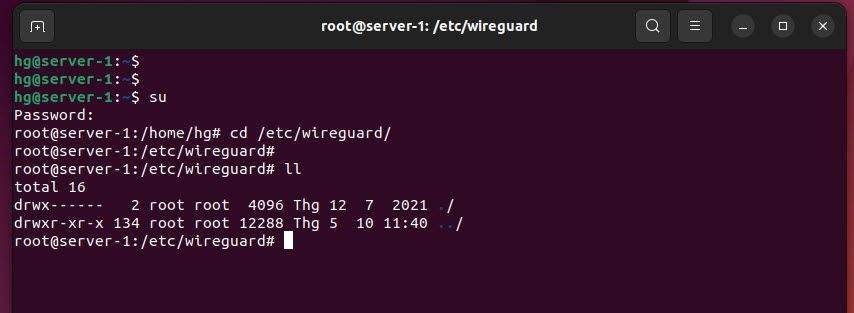
First, switch to root mode and go to the /etc/wireguard directory, use the following command:
su
cd /etc/wireguard
ll
By default, when not configured, the folder is empty.
Create WireGuard Key Pair
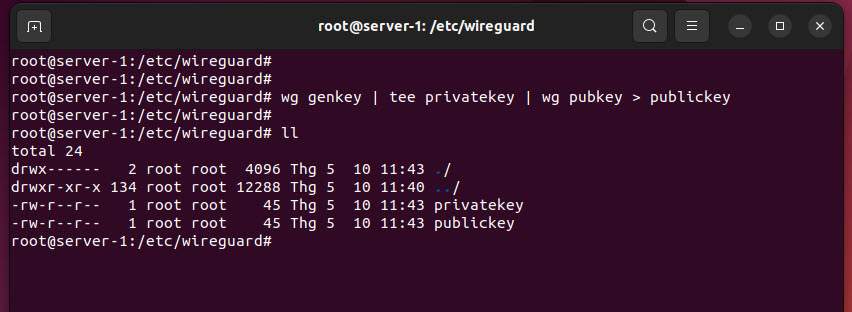
You need to create a WireGuard key pair, one private key for the VPN server called privatekey and one public key for the VPN client called publickey. To create the key pair, run the following command:
wg genkey | tee privatekey | wg pubkey > publickey
Note: You can to replace “privatekey” and “publickey” with your own file names
Now, re-check again using the ll command, and you will see that the privatekey and publickey have been created.
ll
You will get the following output:
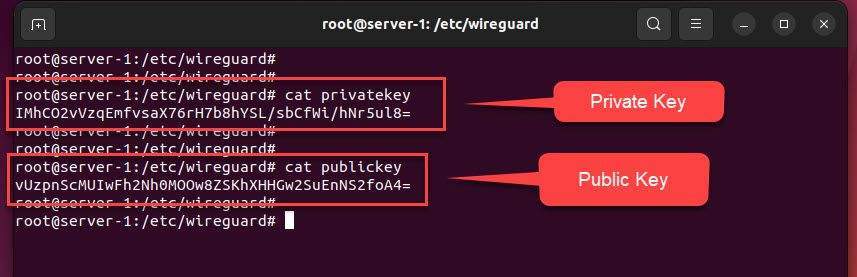
Check the content of private key using the following command:
cat privatekey
Output: IMhCO2vVzqEmfvsaX76rH7b8hYSL/sbCfWi/hNr5ul8=
Note: For Private Key, you should not share it publicly and use it to configure the server in the next step
And check the content of public key using the following command:
cat publickey
Output: vUzpnScMUIwFh2Nh0MOOw8ZSKhXHHGw2SuEnNS2foA4=
Note: We will use the PublicKey to configure on the client machines
Create VPN Configuration
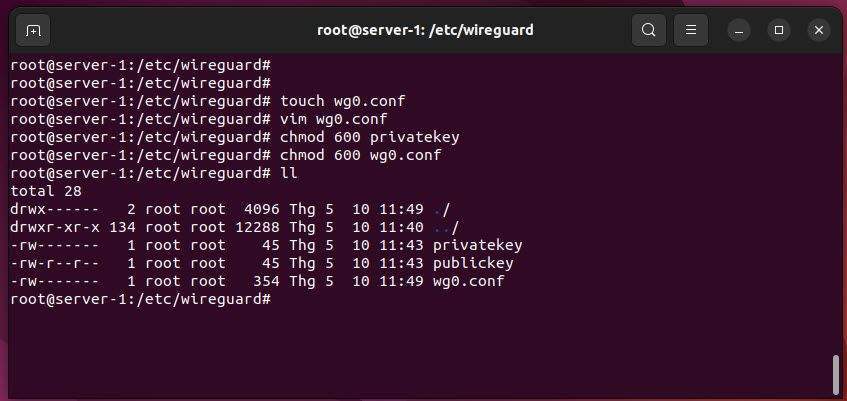
Create a VPN configuration file named wg0.conf using the following command.
touch wg0.conf
Open the wg0.conf file:
vim wg0.conf
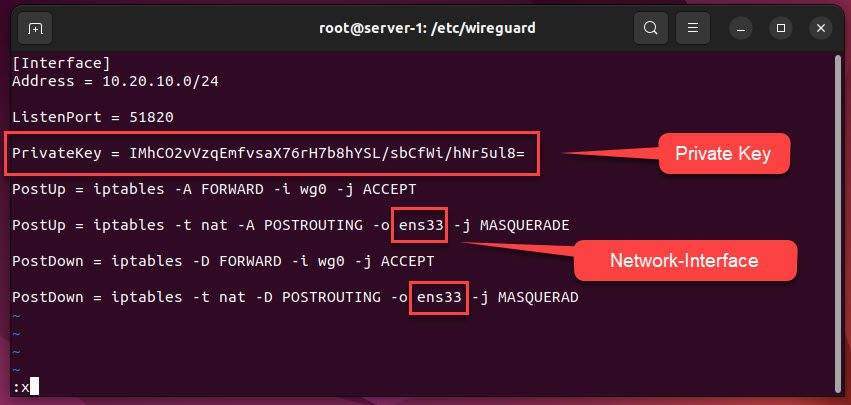
Press i to switch insert mode and add the content below:
Note: You need to replace PrivateKey with your own private key.
[Interface]
Address = 10.20.10.0/24

ListenPort = 51820
# Replace Your-PrivateKey = Your PrivateKey
PrivateKey = Your-PrivateKey

PostUp = iptables -A FORWARD -i wg0 -j ACCEPT

# Replace Your-Network-Interface = Your Network Interface
PostUp = iptables -t nat -A POSTROUTING -o Your_Network_Interface_Name -j MASQUERADE

PostDown = iptables -D FORWARD -i wg0 -j ACCEPT

PostDown = iptables -t nat -D POSTROUTING -o Your_Network_Interface_Name -j MASQUERAD
The meaning of the parameters:
- Address: A private IP address for wg0 interface.
- ListenPort: Default, WireGuard listen on port 51820, If you want, you can also change it to another port.
- PrivateKey: A privatekey of the server ( cat /etc/wireguard/privatekey).
- PostUp: The PostUp will run when the WireGuard Server starts the virtual VPN tunnel.
- PostDown: The PostDown rules run when the WireGuard Server stops the virtual VPN tunnel.
Specify the command that allows traffic to leave the server and give the VPN clients access to the Internet. - Your_Network_Interface_Name: It can be determined by using the “ifconfig” command in step 1
Once you are done, save and exit file by press Esc type command :x and hit Enter
Next, set proper permission on the private key and wg0.conf file using the following command:
chmod 600 privatekey
chmod 600 wg0.conf
ll
Active the WireGuard VPN Server
At this point, the WireWuard VPN Server is installed and configured. To start and enable the WireGuard VPN service to start at system reboot run the following command:
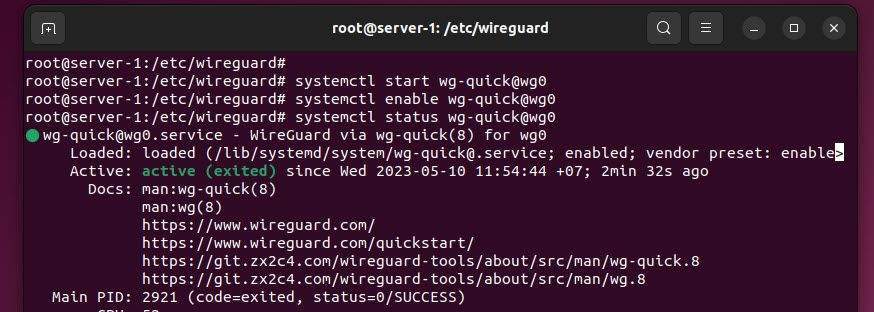
systemctl start wg-quick@wg0
systemctl enable wg-quick@wg0
Verify the status of WireGuard service, make sure it’s running using the following command:
systemctl status wg-quick@wg0
You will see its status is active as shown on the screen below:
Step 4 – Adjust Firewall
Note: Skip this step, If you don’t want to firewall running on the system
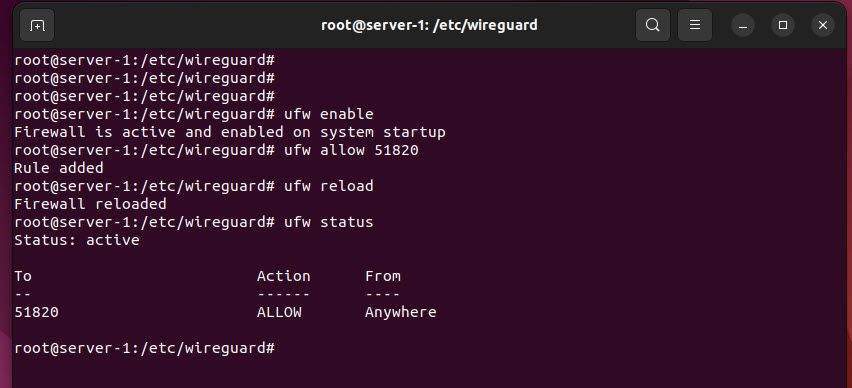
If you are using a firewall on Ubuntu, you need to open port 51820 to allow VPN connection. To do this, you can run the following commands:
ufw enable
ufw allow 51820
ufw reload
ufw status
Step 5 – Setup WireGuard Client
After completing these steps, you have successfully Install and Configure Wireguard VPN Server on Ubuntu. Now, you can connect to the VPN from any client machine that has WireGuard installed and use the public key of the VPN server to connect.
- How to Install and Configure WireGuard Client on Windows (updating)
- How to Install and Configure WireGuard Client on Ubuntu (updating)
- How to Install and Configure WireGuard Client on Debian (updating)
- How to Install and Configure WireGuard Client on CentOS | RockyLinux (updating)
Thank for reading !!!