Welcome to totatca.com! In this How to Use the Robocopy Command in Windows to Speed Up File Copying article, we will provide comprehensive instructions on utilizing the Robocopy command in Windows.
Robocopy is a powerful command-line tool available in Windows operating systems that enables efficient and speedy file copying and synchronization.
One feature that makes Robocopy special (and often overlooked) is its multi-threaded capability, allowing you to copy multiple files simultaneously. Instead of copying each file individually, utilize the built-in copy feature within File Explorer
In this guide, we will walk you through the process of using Robocopy to enhance the speed of your file-copying operations.
Read more
- How to Add Exclusions in Windows Defender on Windows 11/10
- How to Create a New Local User in Windows 10/11
- How to Upgrade Windows 10 Home to Pro or Any Windows 10 Edition
- How to Install and Configure Active Directory on Windows Server 2022/2019/2016
- How to Enable Group Policy Editor on Windows 11/10 Home
Step 1 – Open the Command Prompt
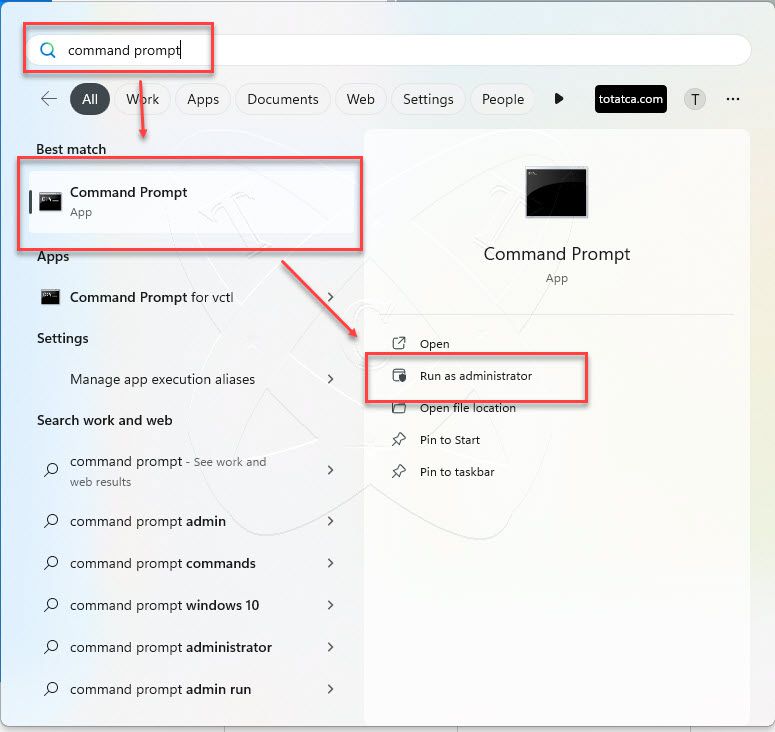
To begin, open the Command Prompt on your Windows computer. You can do this by pressing the Windows key, typing Command Prompt into the search bar, and selecting Run as administrator.
Step 2 – The Robocopy Syntax
Robocopy follows a specific syntax that consists of the command followed by various parameters and options. The basic syntax is as follows:
robocopy <source> <destination> [<files>] [<options>]
Robocopy Command Parameters:
- <source>: Specifies the source directory or file(s) you want to copy.
- <destination>: Specifies the destination directory where the files will be copied.
- <files>: (Optional) Specifies specific files or file patterns you want to copy. You can use wildcards (*) to denote multiple files or file types.
- <options>: (Optional) Specifies additional parameters to modify the behavior of the copy operation.
Step 3 – Select the Appropriate Options for Faster Copying
Robocopy provides several options that can help increase the speed of file copying. Here are some commonly used options:
- /MT[:n]: Specifies the number of threads to be used for the copy process. This option allows for parallel copying, which can significantly speed up the operation. The value of n can range from 1 to 128. For example, /MT:8 will use eight threads for copying.
- /R:<N>: Sets the number of retries on failed copies. By default, Robocopy retries failed copies one million times. You can adjust this value according to your needs. For example, /R:3 will limit retries to three times.
- /W:<N>: Sets the wait time between retries, in seconds. You can modify this value to reduce the waiting time between retries. For example, /W:1 will set the wait time to one second.
- /Z: Enables Robocopy to use restartable mode, allowing the copying process to be resumed from where it left off in case of an interruption. This is useful for copying large files over unstable connections
Step 4 – Execute the Robocopy Command
Once you have selected the appropriate options, construct the Robocopy command with the desired parameters. For example:
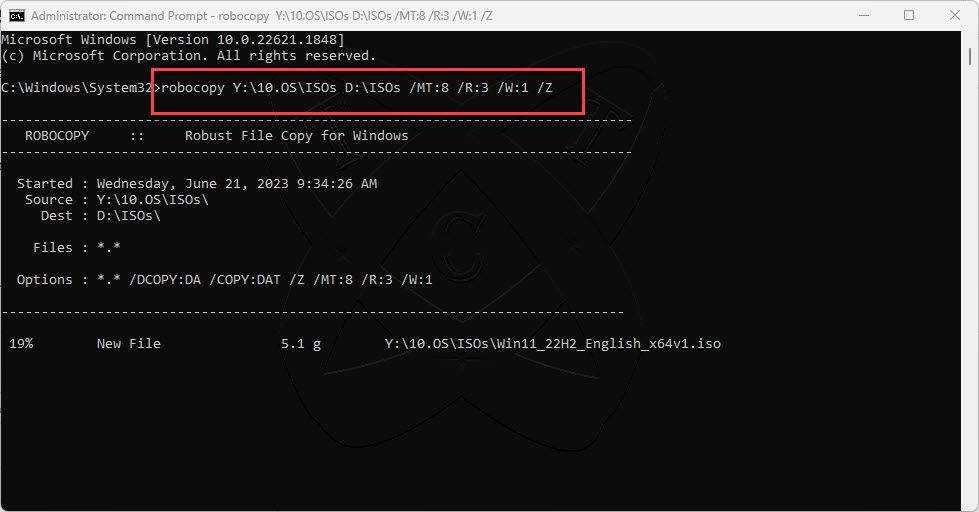
robocopy Y:\10.OS\ISOs D:\ISOs /MT:8 /R:3 /W:1 /Z
This command will copy the files from the source folder (Y:\10.OS\ISOs) to the destination folder (D:\ISOs) using eight threads (/MT:8), limiting retries to three times (/R:3) with a one-second wait time (/W:1), and enabling restartable mode (/Z).
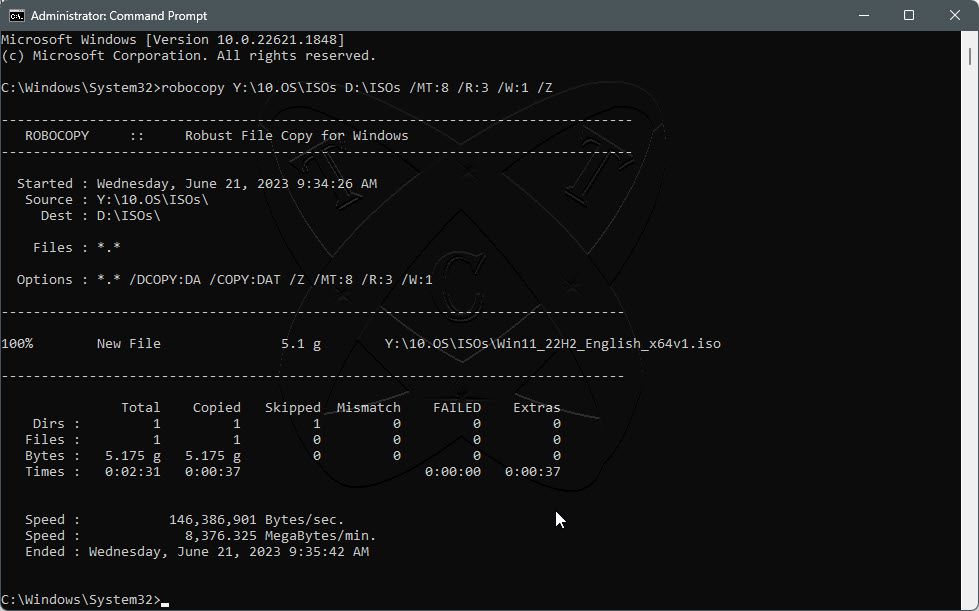
After executing the Robocopy command, you can monitor the progress of the copying process in the Command Prompt window. Robocopy will display detailed information about the files being copied, the number of retries, and the overall progress
Conclusion
By following these steps and using the appropriate options, you can leverage the power of Robocopy to significantly speed up file copying operations on your Windows computer. Experiment with different options to find the configuration that works best for your specific requirements.