Introduction to WireGuard VPN Server on Linux VPS
WireGuard is a lightweight, fast, and straightforward VPN solution ideal for personal VPN setups or remote access. In this guide, we will walk you through building a WireGuard VPN Server on a Linux VPS, covering installation, configuration, and client setup.
System Overview and Prerequisites
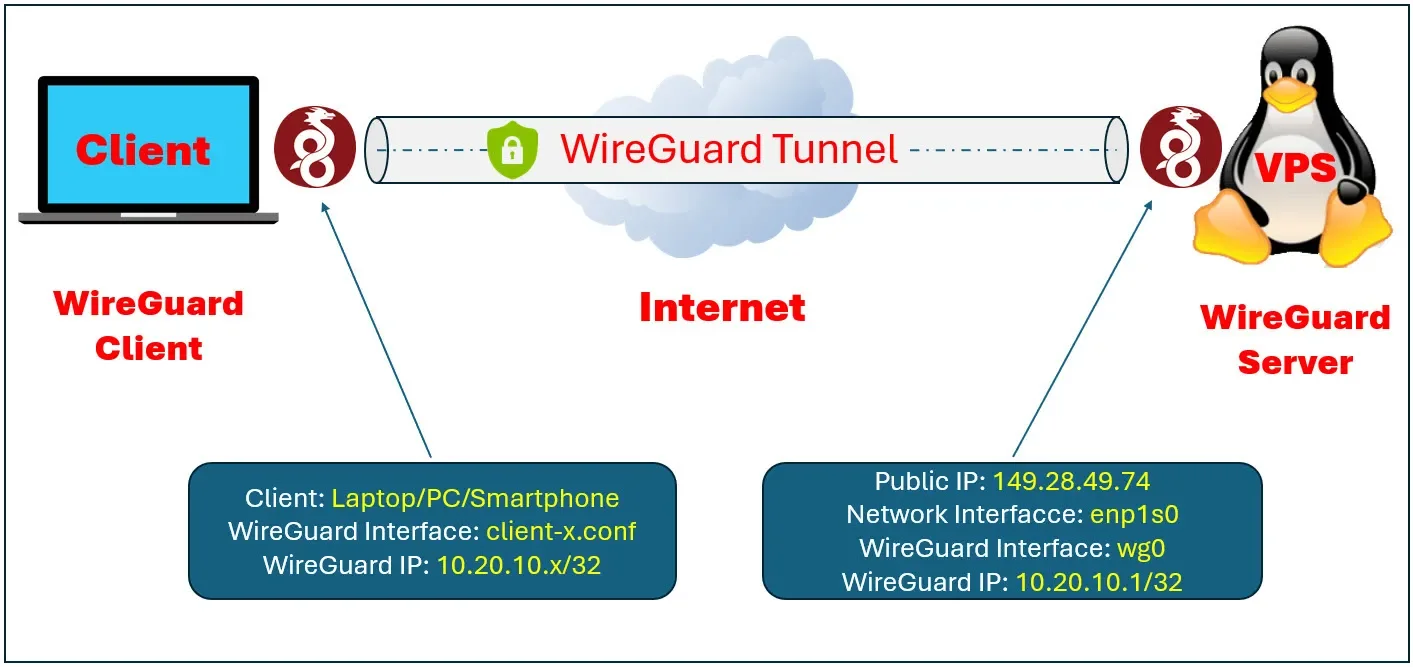
The deployment consists of two main components: the Linux VPS acting as the WireGuard VPN Server and a Client device, such as a laptop or smartphone. The server has a public IP address and a network interface, while the WireGuard interface and VPN IP addresses are configured within the VPN setup. Replace all example IP addresses and interface names with those specific to your environment.
In this article, I assume that the environment and configuration details are as follows:
- Public IP address of the server:
149.28.49.74 - Network interface name:
enp1s0 - WireGuard listening port:
33333 - VPN IP subnet used for WireGuard:
10.20.10.0/24 - VPN IP address assigned to the WireGuard server:
10.20.10.1/24 - VPN IP addresses assigned to WireGuard clients:
10.20.10.x/24
Please replace the placeholder values with those that match your actual environment before following this guide.
Connecting to Your Linux VPS
Start by connecting to your Linux VPS either via SSH or through the VPS provider’s control panel console.
Update the package list to ensure you can download the latest software versions from the repositories.
sudo apt updateInstalling WireGuard and Required Tools
Install WireGuard along with necessary components for network management.
sudo apt install vim curl net-tools qrencode iptables wireguard -yVerify the installation by checking the WireGuard version.
wg --versionGathering Server Network Information
Check and note your server’s public IP address and the network interface name.
curl ifconfig.co
ifconfig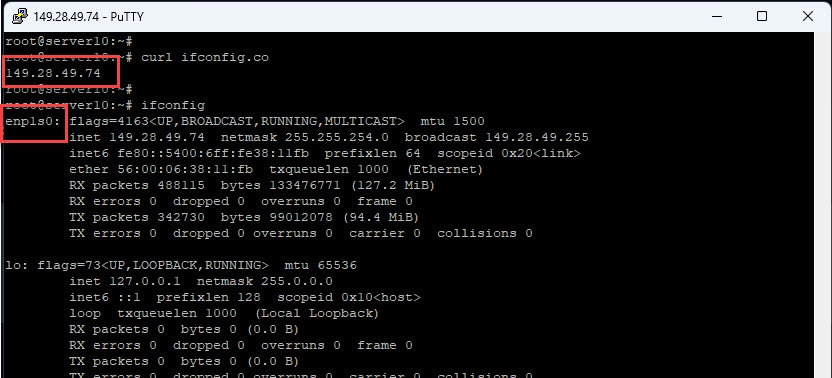
My info:
- Public IP Address: 149.28.49.74
- Interface Name: enp1s0
Enabling IP Forwarding
Edit the sysctl configuration file to enable IPv4 forwarding.
sudo vim /etc/sysctl.confUncomment or add the following line to allow packet forwarding:
net.ipv4.ip_forward=1Apply the changes immediately.
sudo sysctl -p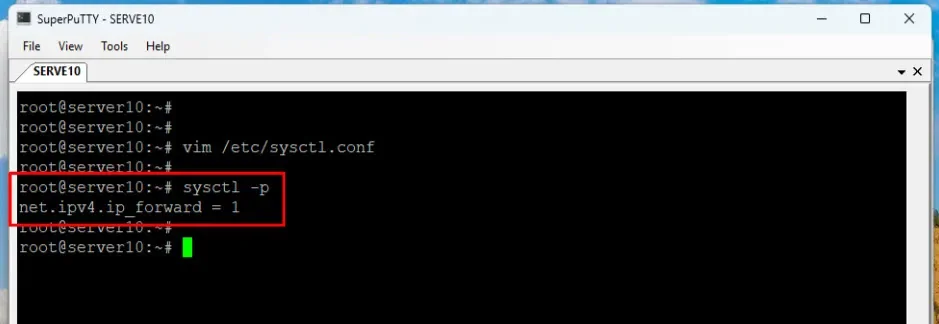
Generating WireGuard Key Pairs
Navigate to the WireGuard configuration directory.
cd /etc/wireguardGenerate the server’s private and public keys.
wg genkey | tee server_private.key | wg pubkey > server_public.keyGenerate a key pair for the first client.
wg genkey | tee client1_private.key | wg pubkey > client1_public.keySecure the private key files by setting appropriate permissions.
sudo chmod 600 server_private.key client1_private.key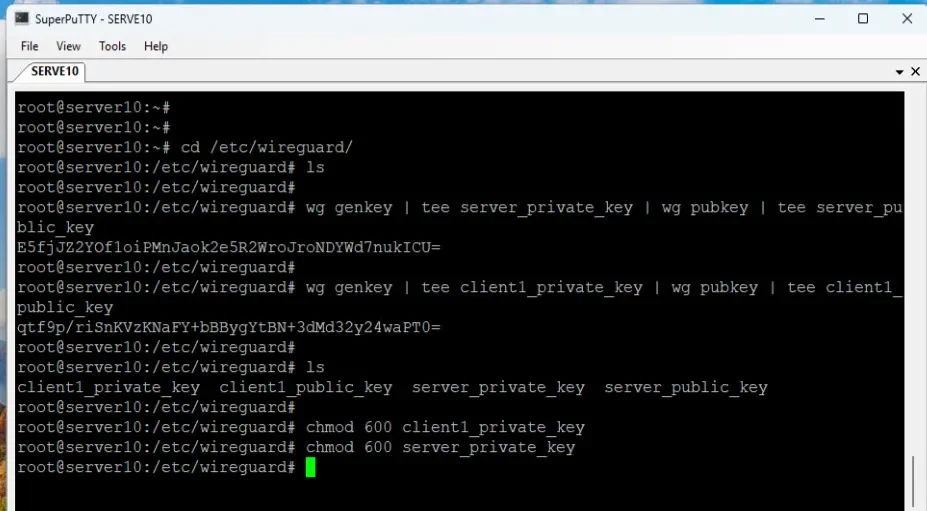
Preparing WireGuard Configuration Keys
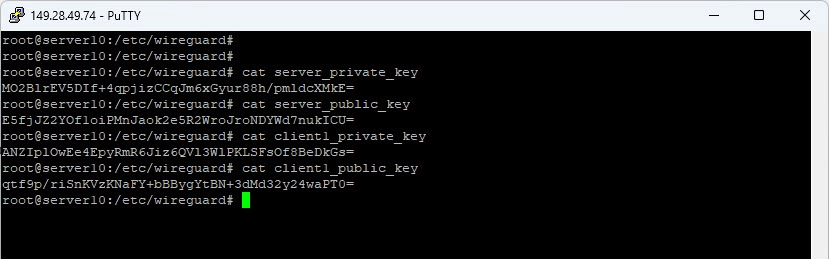
Display the contents of the generated keys and save them for configuration.
cat server_private.key
cat server_public.key
cat client1_private.key
cat client1_public.key
My keys:
Configuring the WireGuard Server
Create and open the WireGuard server configuration file.
sudo vim /etc/wireguard/wg0.confAdd the following configuration, replacing placeholders with your actual data:
[Interface]
Address = 10.20.10.1/32

ListenPort = 33333

PrivateKey = server_private.key

PostUp = iptables -A FORWARD -i wg0 -j ACCEPT; iptables -A FORWARD -o wg0 -j ACCEPT

PostUp = iptables -t nat -A POSTROUTING -o INTERFACE_NAME -j MASQUERADE

PostDown = iptables -D FORWARD -i wg0 -j ACCEPT; iptables -D FORWARD -o wg0 -j ACCEPT

PostDown = iptables -t nat -D POSTROUTING -o INTERFACE_NAME -j MASQUERADE


#### CLIENT 1 / PEER 1 ###

[Peer]
PublicKey = client1_public.key

AllowedIPs = 10.20.10.11/32

### CLIENT 2 / PEER 2 ###

#[Peer]
#PublicKey = client2_public.key

#AllowedIPs = 10.20.10.12/32
Save and close the file.
Restrict access to the server configuration file for security.
sudo chmod 600 /etc/wireguard/wg0.confStarting and Enabling WireGuard Service
Start the WireGuard interface.
sudo systemctl start wg-quick@wg0Enable WireGuard to start automatically on boot.
sudo systemctl enable wg-quick@wg0Check the status of the WireGuard service.
sudo systemctl status wg-quick@wg0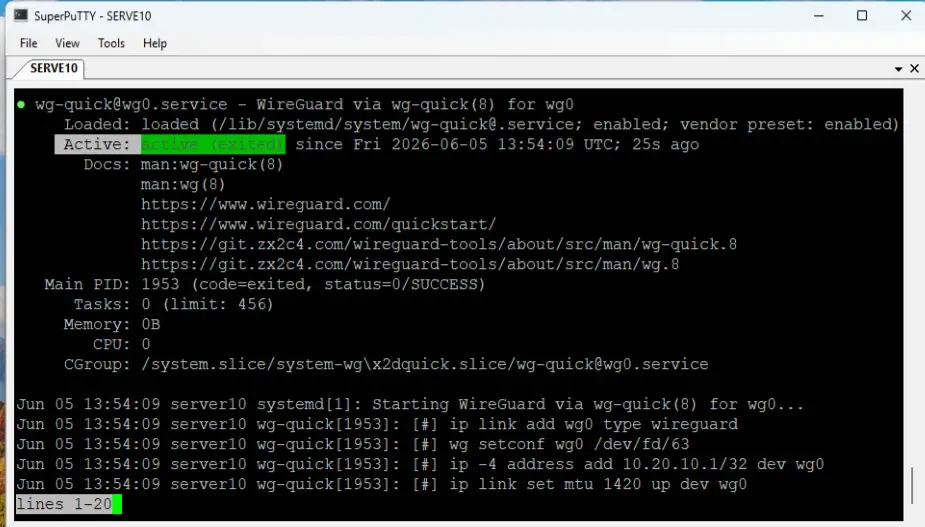
Configuring Firewall to Allow WireGuard Traffic
Check if the firewall is active.
sudo ufw statusAllow the WireGuard port through the firewall using UDP protocol.
sudo ufw allow 33333/udp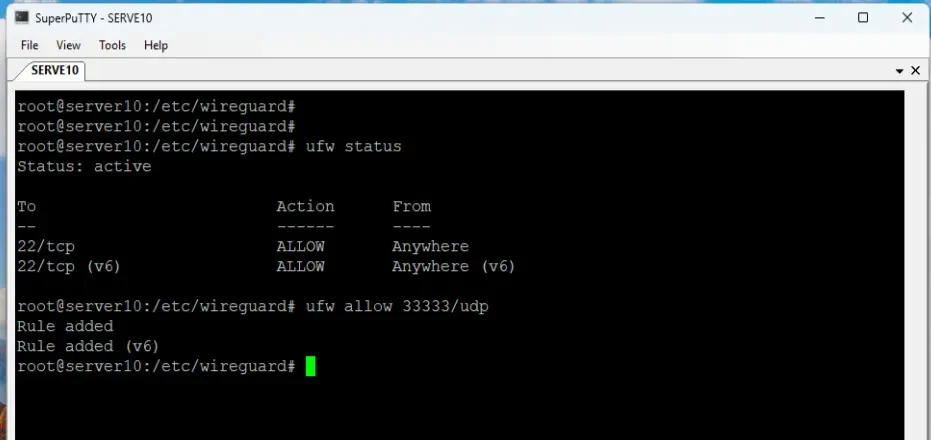
Creating the Client Configuration File
Create a new client configuration file.
sudo vim client-1.confAdd the following client configuration, replacing placeholders accordingly:
[Interface]
PrivateKey = client1_private.key

Address = 10.20.10.2/32

DNS = 1.1.1.1, 8.8.8.8

[Peer]
PublicKey = server_public.key

Endpoint = SERVER_PUBLIC_IP:33333

AllowedIPs = 0.0.0.0/0

PersistentKeepalive = 25
Save and close the client configuration file.
Deploying the Client Configuration
- WireGuard – Set Up a WireGuard VPN Server on a Linux VPS
- How to Set Up WireGuard VPN Client on Windows
- How to Set Up WireGuard VPN Client on Linux Ubuntu/LinuxMint/Debian-based
- How to Set Up WireGuard VPN Client on Linux CentOS/RockyLinux/AlmaLinux/RHEL-based
- How to Set Up WireGuard VPN Client on Android
Conclusion
You have successfully installed and configured a WireGuard VPN Server on your Linux VPS. The server is running, and the first client profile is ready to use. In the next tutorial, we will cover configuring WireGuard clients on Windows, Linux, and mobile devices to connect to this server.
If you found this guide helpful, consider subscribing to support future content. Thank you for reading, and stay tuned for more.