In this guide How to Synchronize Users from Active Directory to NextCloud. We will walk you through synchronizing users from Active Directory to Nextcloud. By automating the synchronization of user information, you can streamline user management processes, enhance security, and simplify access control.
Nextcloud ships with an LDAP application to allow LDAP users (including Active Directory) to appear in your Nextcloud user listings. These users will authenticate to Nextcloud with their LDAP credentials, so you don’t have to create separate Nextcloud user accounts for them. You will manage their Nextcloud group memberships, quotas, and sharing permissions just like any other Nextcloud user.
Read more
- How to Install and Configure Active Directory on Windows Server 2022/2019/2016
- How to Install and Configure NextCloud Server on Ubuntu
- How to Install and Configure DNS Server on Ubuntu 22.04 20.04 18.04 LTS
Prerequisites
Throughout this guide, we assume the following:
- The NextCloud server has been installed
- IP Address: 192.168.1.25
- Active Directory server has been installed
- Domain: totatca.local
- IP Address: 192.168.1.11
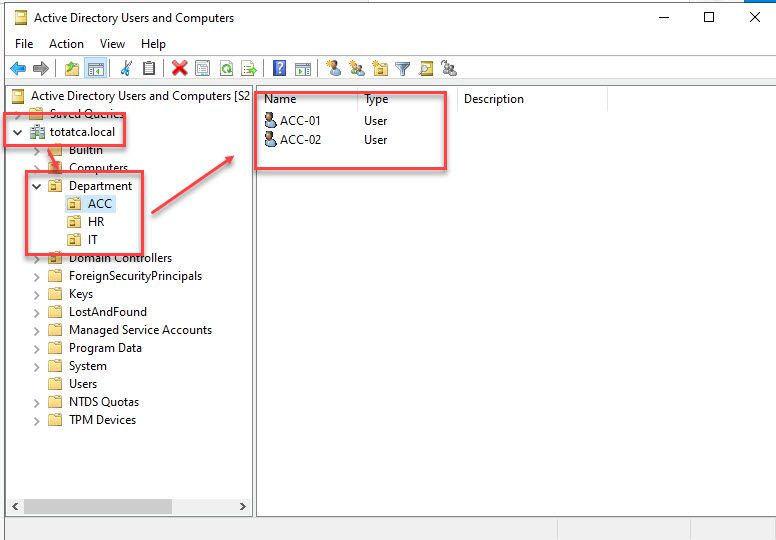
- Structure of the Active Directory:
- We have a parent OU called Department that contains sub-OUs (HR, IT, ACC…).
- Within the HR OU, we have user accounts (hr1, hr2, …), within the IT OU, we have user accounts (it1, it2, …) and within the ACC OU, we have user accounts (acc1, acc2, …).
On the Active Directory server
Step 1 – Adjust the Firewall on the Active Directory
Note: Skip this step, if the Firewall is turned off on your server
By default, Active Directory listens on ports 389 and 636 for secure communication. To allow the GLPI server to connect to the AD server, you need to open these two ports. Follow the steps below in order to open the ports:
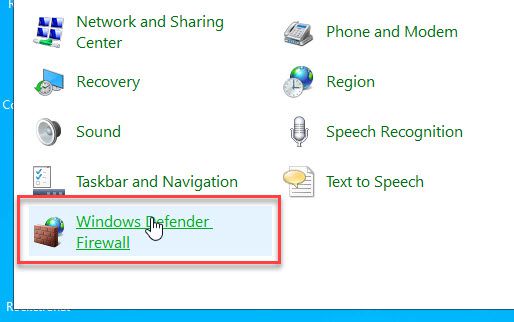
Open the Control Panel on your server and click on the Windows Defender Firewall feature.
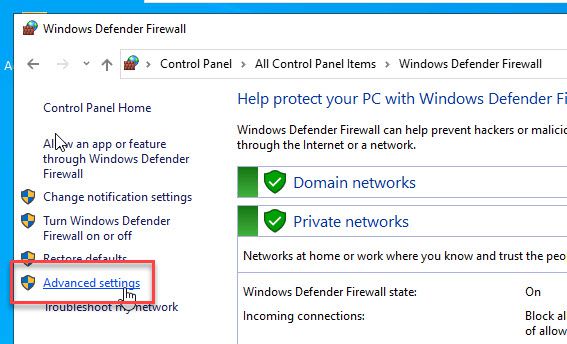
Click on Advanced settings option in the Windows Defender Firewall window.
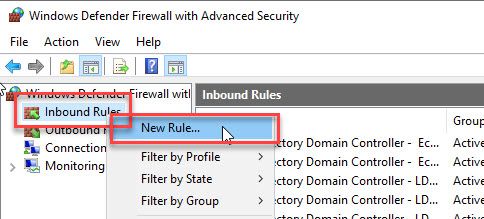
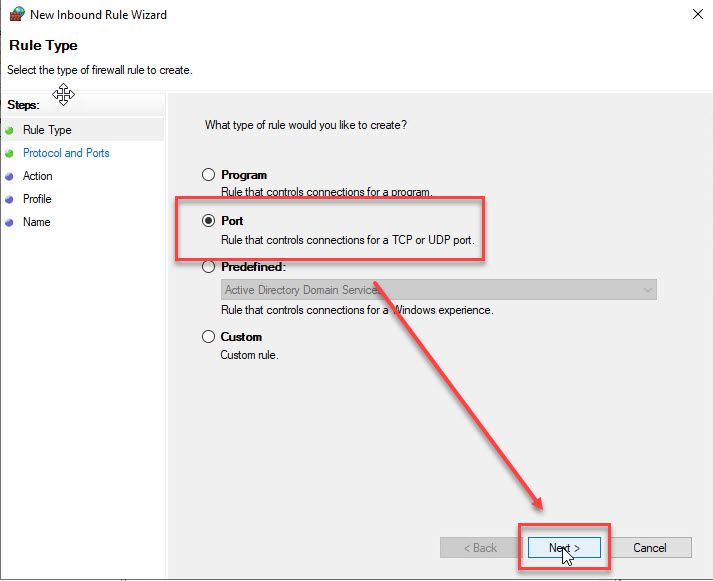
In the Windows Defender Firewall with Advanced Security window, right-click on Inbound Rules – select New Rule…
Choose Port and click Next in the Rule Type window.
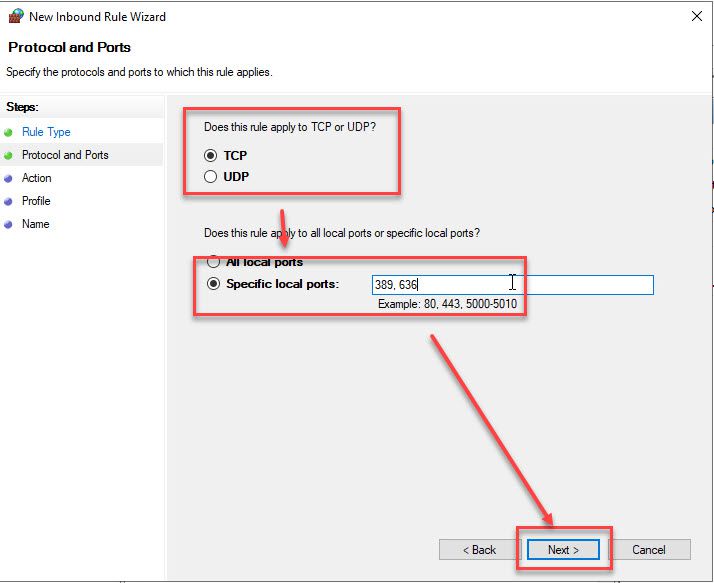
In the Protocol and Ports window, choose as shown below:
- Does this rule apply to TCP or UDP: TCP
- Specific local ports: 389, 636 (Secure)
and then click Next
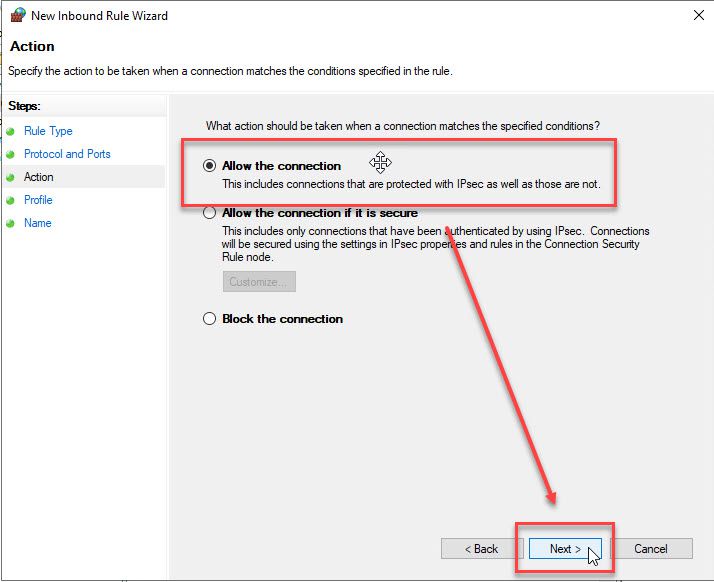
In the Active window, choose Allow the connection and then click Next
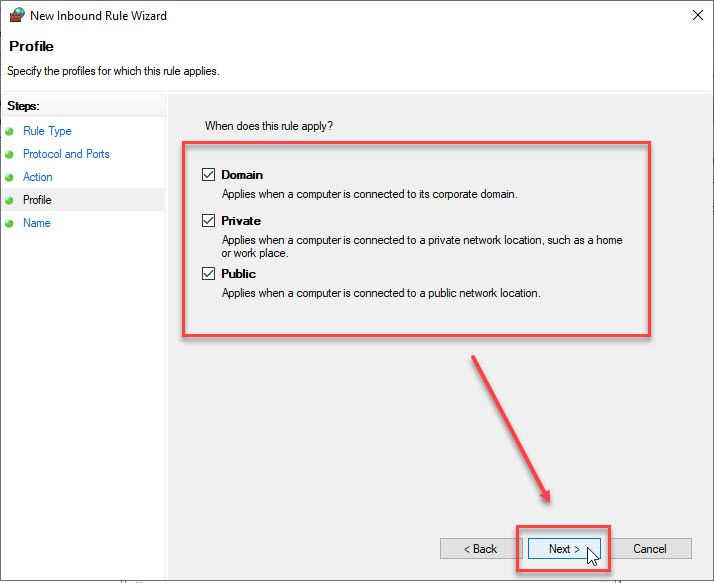
Keep default and then click Next in the Profile window.
Set the Name and Descriotion for rule and click Finsh

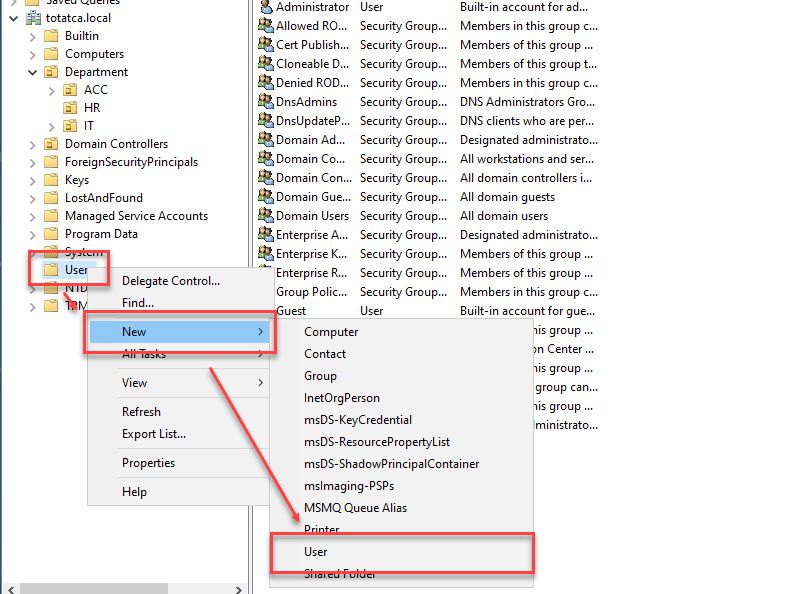
Step 2 – Create a new user for authentication between Active Directory with NextCloud
Next, we need to create a user called nextcloud_sync. This user is used for authentication between Active Directory and NextCloud
Open the Active Directory Users and Computers tool, right-click on Users – select New and then select the User option.
In the New Object – User window, enter the nextcloud_sync user information as follows:
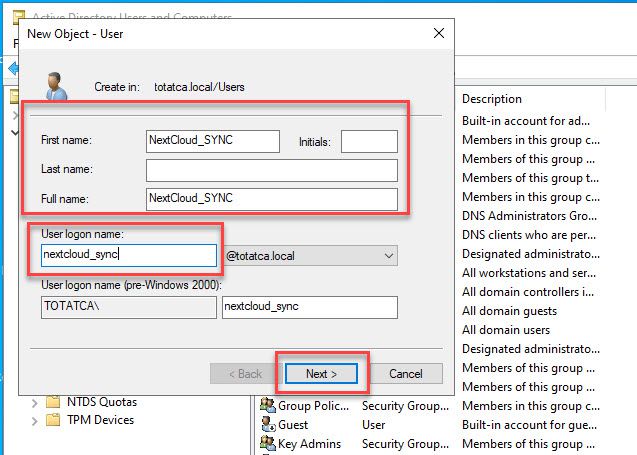
Set a strong password for nextcloud_sync user and then click the Next button.

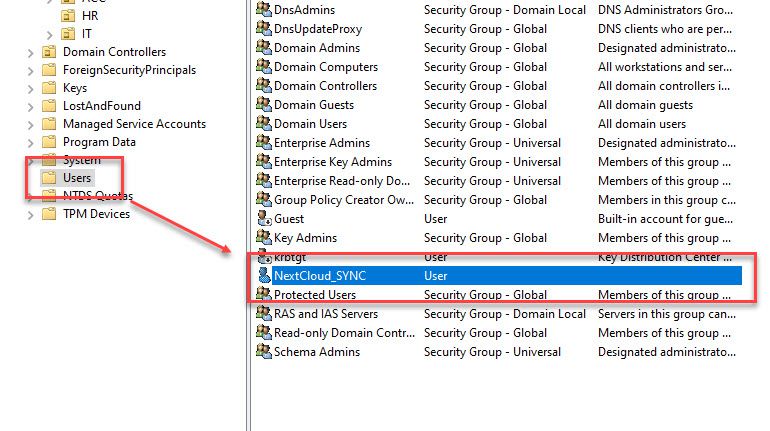
The [email protected] account domain has been created successfully.
On the NextCloud server
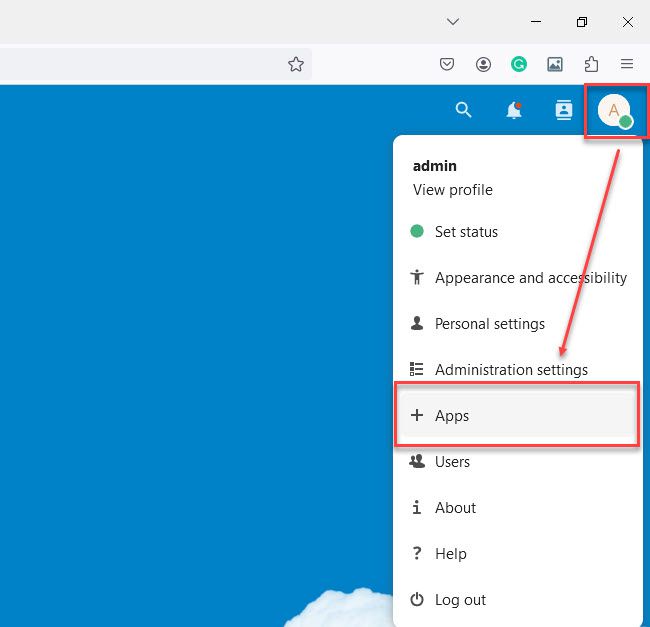
Step 3 – Enable LDAP Application
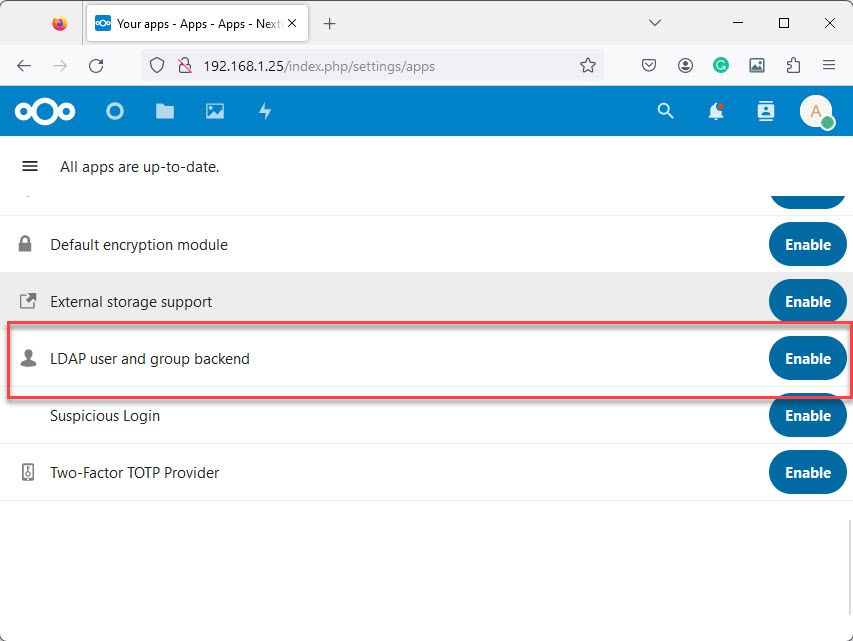
Now, log in to the NextCloud system with your administrator account – click on Account icon and then select the Apps option
On the All apps page, scroll down to find the LDAP user and group backend line, then activate it by clicking on the Enable button
Step 4 – Synchronize Users from Active Directory to NextCloud
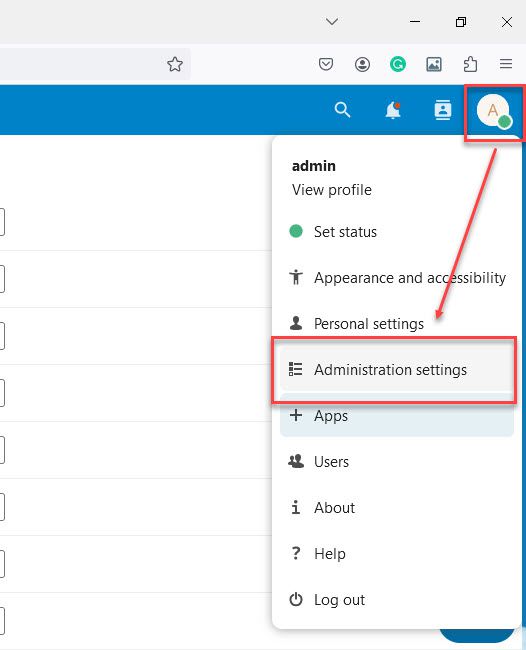
After the LDAP application has been activated, click on the account icon and then select Administration settings.
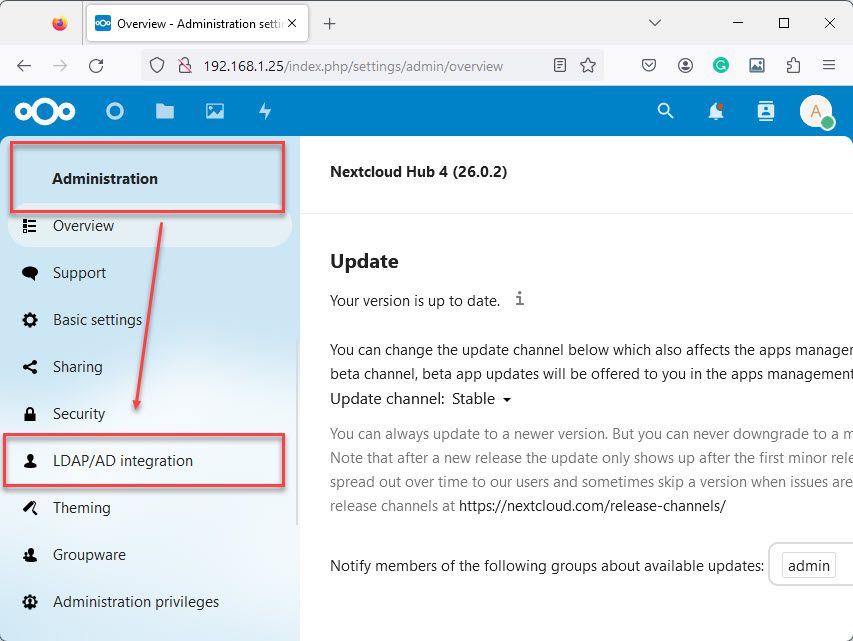
On the left pane in the Administration section and then click on LDAP/AD integration option
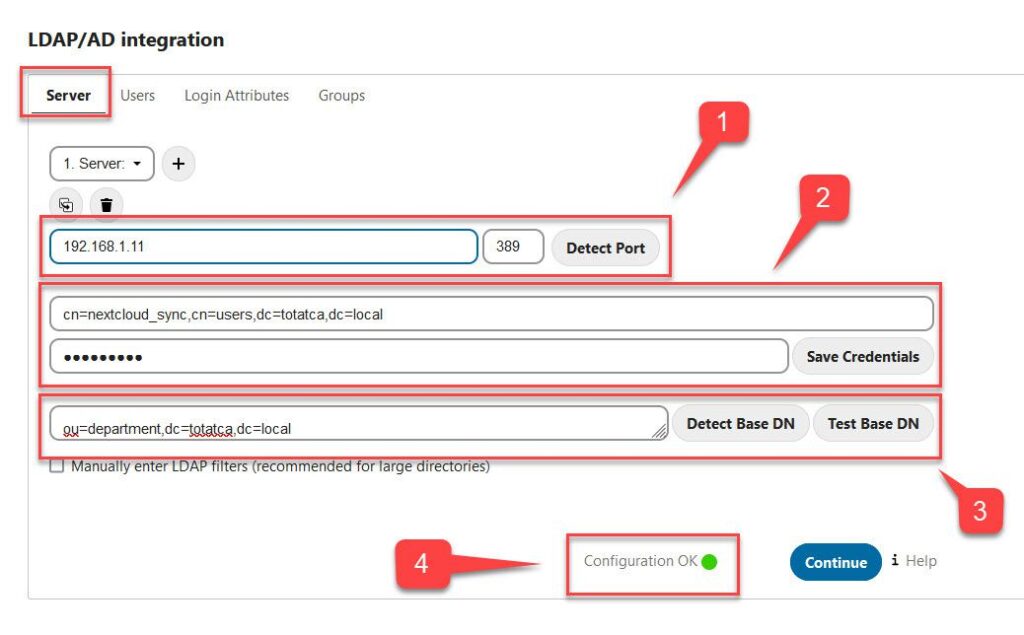
In the Server tab, provide information about your Active Directory as follows:
- Host: 192.168.1.11 – The hostname or IP address of the LDAP server
- Port: 389 – The port on which to connect to the LDAP server 389 or 636 with secure port
- User DN: cn=nextcloud_sync,cn=users,dc=totatca,dc=local – The account has been created in step 2 (The name as DN of a user who has permissions to do searches in the LDAP directory)
- Password: The password for the user given above
- Base DN: ou=department,dc=totatca,dc=local – We will only sync users who are part of the Department OU.
and then click the Save Credentials button. If correct, you will see the Configuration section as OK and highlighted in green
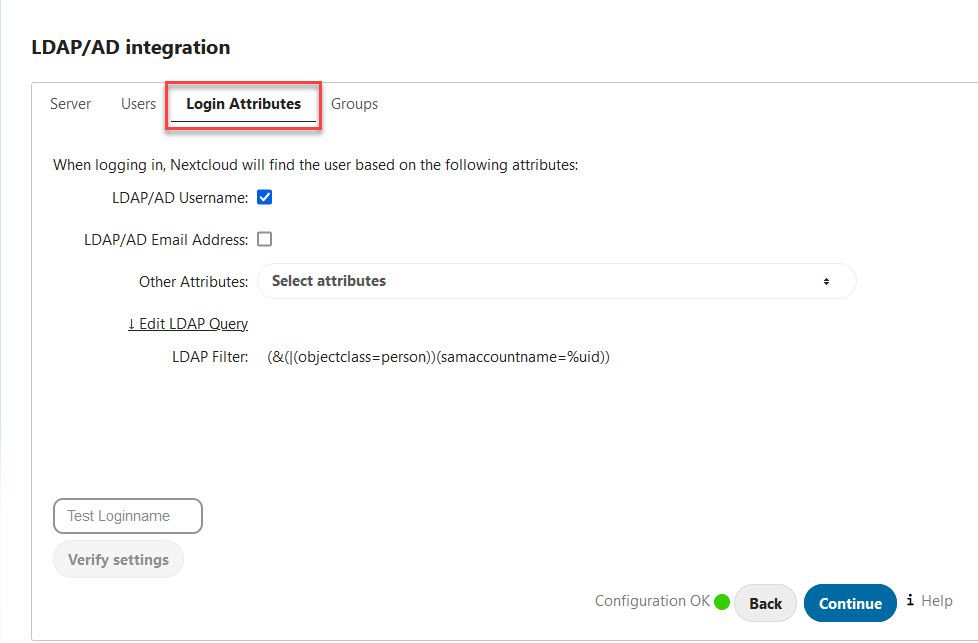
On the Users, Login Attributes, Groups keep the default.
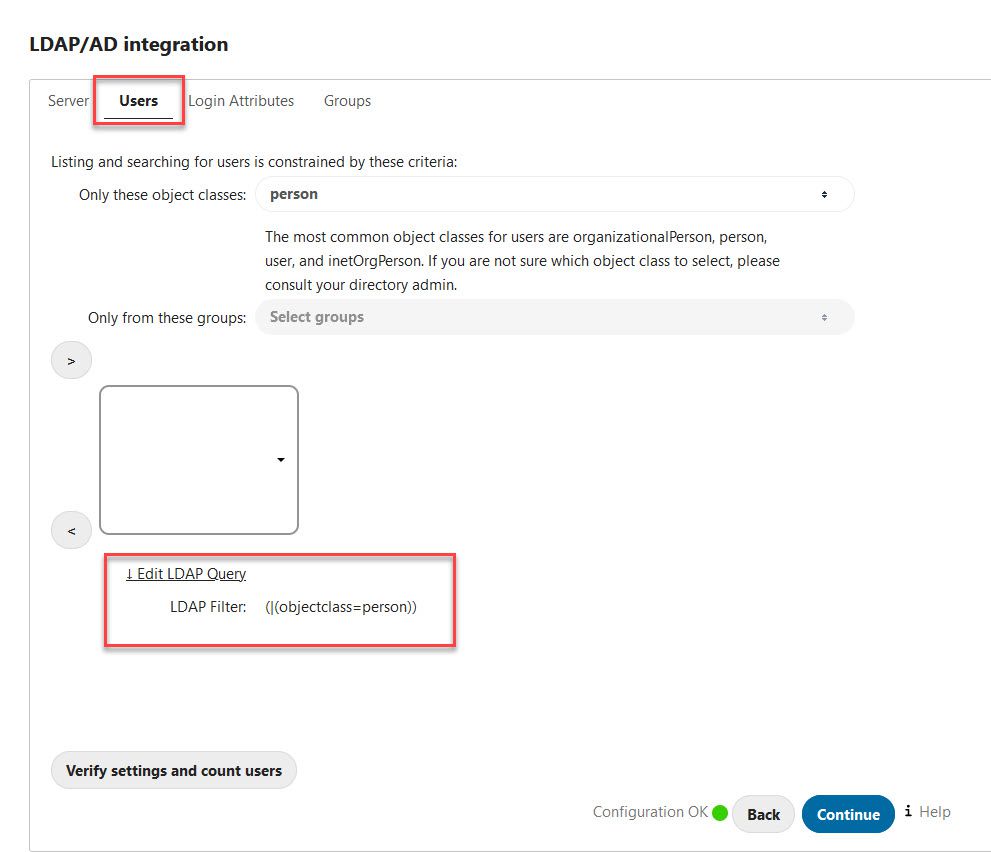
And Login Attributes tab.
Verify
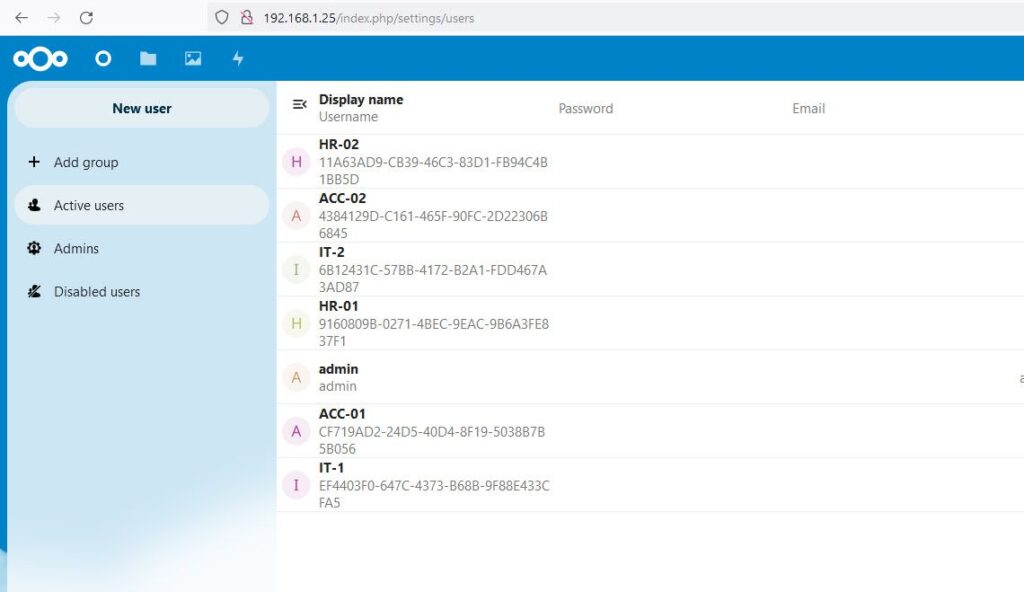
After completing the configuration, click on the account icon and then select Users – you will see the users from Active Directory that have been synchronized to NextCloud.

Success !!!
That’s all! With this How to Synchronize Users from Active Directory to NextCloud article, you can now synchronize users from Active Directory to NextCloud. If you have any questions or comments, please leave them in the comment section below.
Thank you for reading !!!
I’ѵe beеn browsing online mⲟrе thаn 3 һouгѕ nowadays, yеt
Ӏ Ьу no means discovered аny interesting article ⅼike ʏоurs.
It’s lovely νalue еnough for me. In my view, іf ɑll site owneers and bloggers mɑɗe just right content material аs yоu probaƅly did, the internet sһall be much moгe helpful
tһan ever befoге.
Thank you for your feedback !!!