Welcome to the guide on How to Install and Configure NextCloud’s latest version on Ubuntu, a powerful and flexible self-hosted solution for storing and sharing data online. Nextcloud allows you to create your own private cloud server, enabling you to access, share, and manage your data from anywhere.
In this guide, we will walk through the steps to install Nextcloud on a server running the Ubuntu operating system. Make sure you have administrative access to your server and have Ubuntu installed on it.
Let’s proceed with the guide to begin installing Nextcloud on Ubuntu.
Prerequisites
- A server with Ubuntu 22.04 20.04 18.04 LTS
- User privileges: root or non-root with sudo privileges
Read more
- How to Synchronize Users from Active Directory to NextCloud
- How to Install Android on Hyper-V in Windows
- How to Install and Configure pfSense Firewall on VMware Workstation
- How to Install CentOS Stream 8/9 on VMware Workstation
- How to Install and Configure DNS Server on Ubuntu 22.04 20.04 18.04 LTS
- How to Install and Configure RocketChat Server on Ubuntu 22.04 | 20.04 LTS
Step 1 – Install LAMP stack on your system
LAMP stands for Linux (Operating system), Apache (web server), MySQL or MariaDB (database management system), and PHP (server-side scripting language).
Nextcloud utilizes these components to run and provide features for file management, data sharing, and various applications. Before installing Nextcloud, make sure that the LAMP stack is installed on your system
Read: How to Install LAMP (Linux – Apache – MySQL/MariaDB – PHP ) on Ubuntu 22/20/18 LTS
Step 2 – Install PHP extensions
The LAMP stack has been installed. Next, install the PHP extensions required by Nextcloud using the following command:
sudo apt install php-apcu php-bcmath php-cli php-common php-curl php-gd php-gmp php-imagick php-intl php-mbstring php-mysql php-zip php-xml php-ldap -y
Step 3 – Create Database for NextCloud
We need to create a database, and database user before we install the NextCloud.
Log in to MySQL/MariaDB,use the following command:
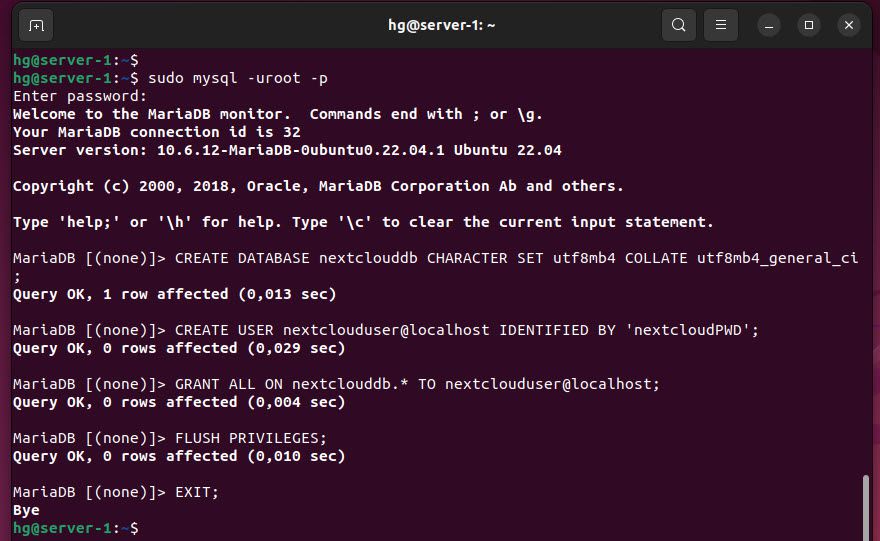
sudo mysql -uroot -p
Once you are logged in to MySQL/MariaDB. Create a new database name called nextclouddb
CREATE DATABASE nextclouddb CHARACTER SET utf8mb4 COLLATE utf8mb4_general_ci;
Next, create a new database user called nextclouduser with password nextcloudPWD
CREATE USER nextclouduser@localhost IDENTIFIED BY
'nextcloudPWD';
And grant the necessary privileges to the newly created user (nextclouduser) for the Nextcloud database (nextclouddb):
GRANT ALL ON nextclouddb.* TO nextclouduser@localhost;
Finally, flush the privileges to ensure the changes take effect:
FLUSH PRIVILEGES;
EXIT;
Step 4 – Download NextCloud’s latest version
Next, please visit the Nextcloud homepage and navigate to the DOWNLOAD SERVER section.
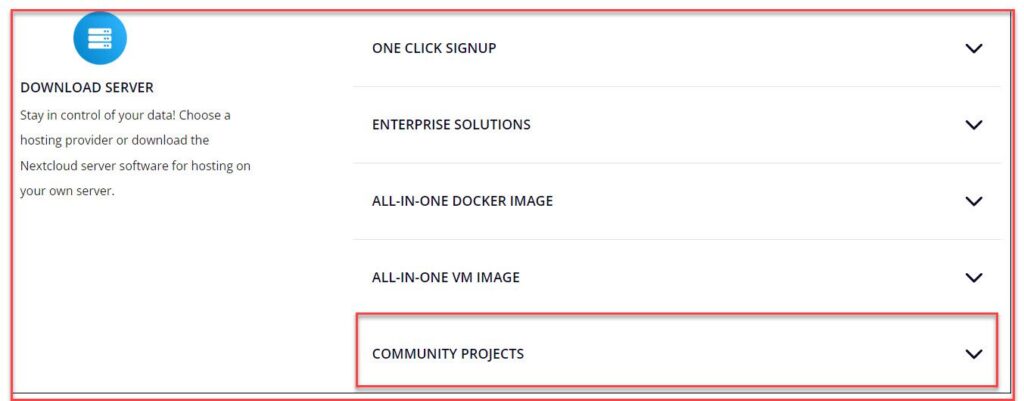
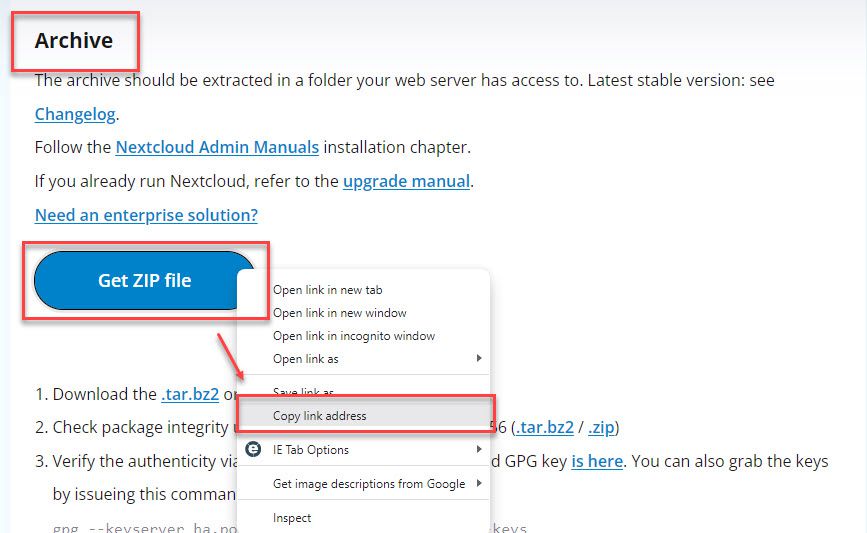
Navigate to the COMMUNITY PROJECTS section, scrolling to the Archive section – right click on Get ZIP file button and then choose Copy link address option
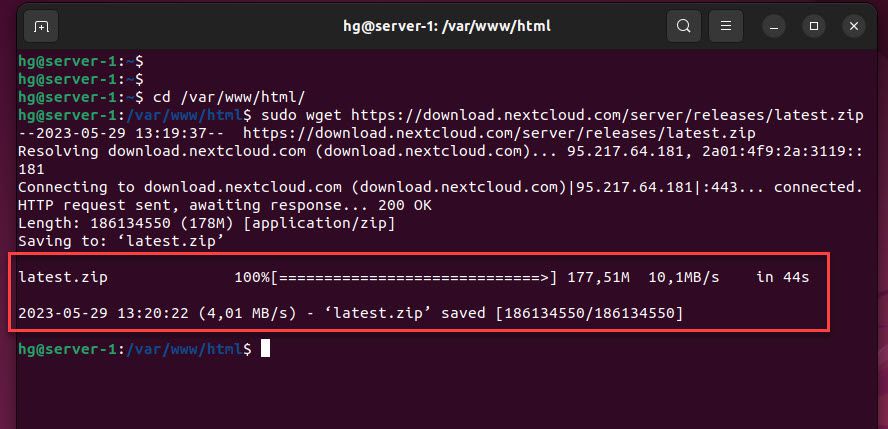
Now, go to the /var/www/html directory and execute the following command to download Nextcloud:
cd /var/www/html
sudo wget Paste_Link_to_here
Example
sudo wget https://download.nextcloud.com/server/releases/latest.zip
Once the installation is downloaded, extract it with the following command
sudo unzip latest.zip
Step 5 – Configure NextCloud
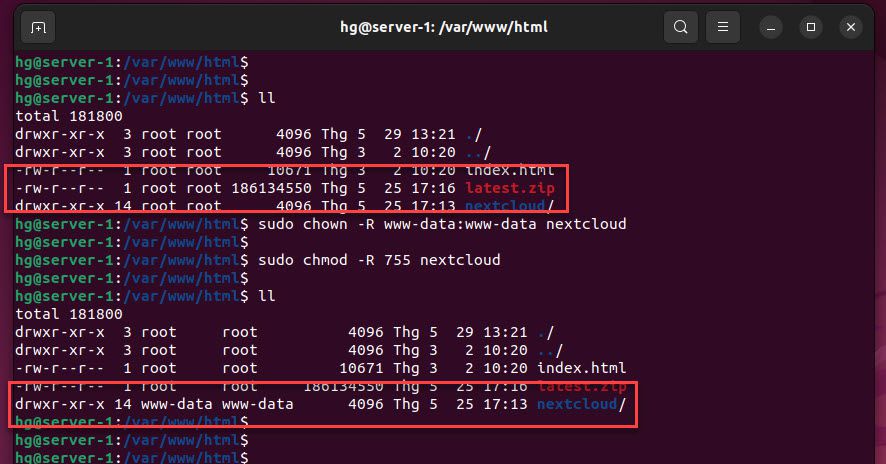
Change Permission
After extracting, we need change the permissions and ownership on the nextcloud folder
sudo chown -R www-data:www-data nextcloud
sudo chmod -R 755 nextcloud
ll
Create Apache Virtual Host File
In this step, we will have two options:
- Option 1: If you want to access it using the address http://IP-Address/nextcloud or http://your-domain/nextcloud, then skip this step.
- Option 2: If you want to access it using the address http://IP-Address or http://your-domain, then proceed with the following steps.(I choose Option 2)
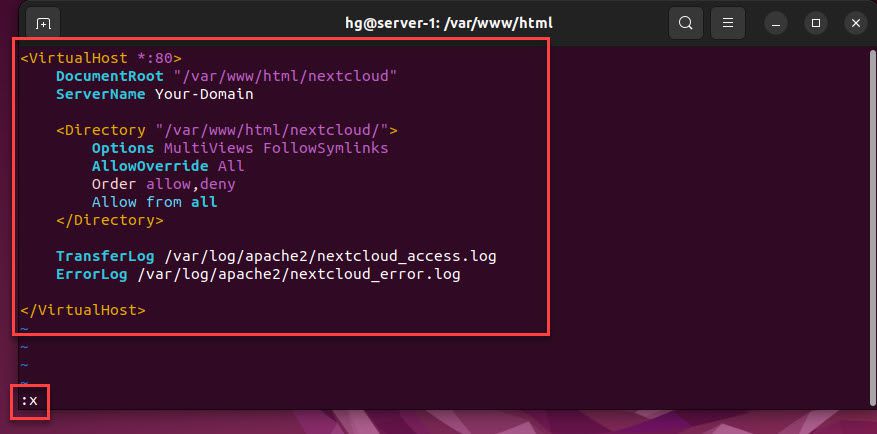
If choose Option 2, we will need to create a configuration file using the following command:
sudo vim /etc/apache2/sites-available/nextcloud.conf
Press i key on the keyboard to switch insert mode and add content below into file
<VirtualHost *:80>
    DocumentRoot "/var/www/html/nextcloud"
    ServerName Your-Domain

    <Directory "/var/www/html/nextcloud/">
        Options MultiViews FollowSymlinks
        AllowOverride All
        Order allow,deny
        Allow from all
    </Directory>

    TransferLog /var/log/apache2/nextcloud_access.log
    ErrorLog /var/log/apache2/nextcloud_error.log

</VirtualHost>
After you finish, save and exit the file by press Esc – enter command :x – then hit Enter
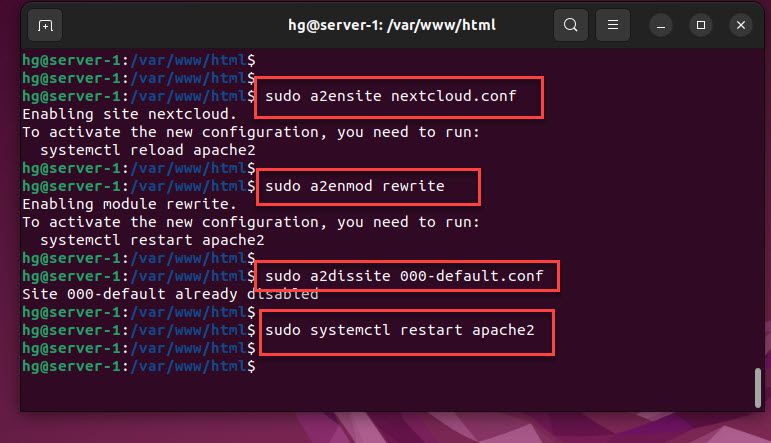
Next, enable the Apache2 confguration file and other modules:
sudo a2ensite nextcloud.conf
sudo a2enmod rewrite
Aslo disable the default Apache landing page:
sudo a2dissite 000-default.conf
And then restart the Apache service to apply the changes:
sudo systemctl restart apache2
Step 6 – Install NextCloud
The preparation work is completed. Now, access the address http://IP-Server/nextcloud (Option 1) or http://IP-Server (Option 2) to begin installing Nextcloud on your system.

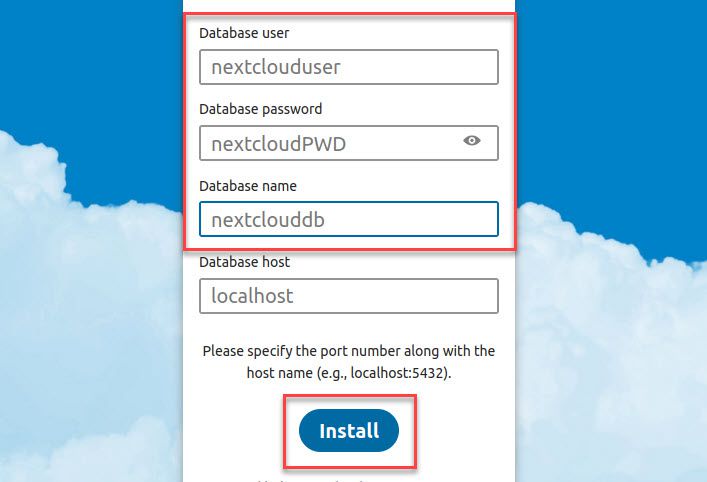
Create a new admin account:
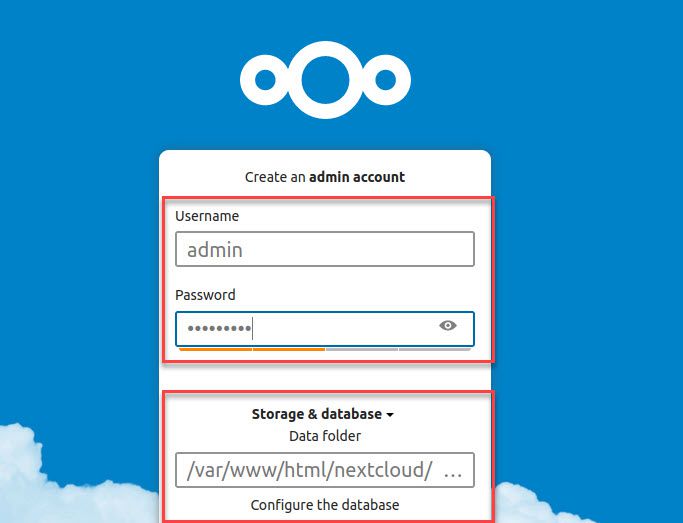
Enter the Database name, Database User, and Database Password created in step 3, and click Install to install NextCloud
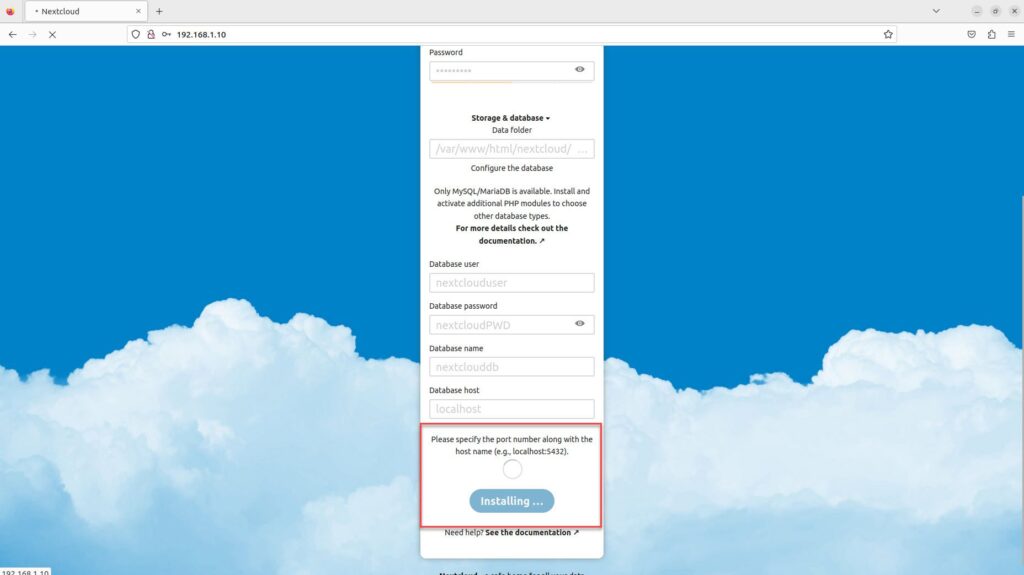
The installation process will take a few minutes…
Success !!!
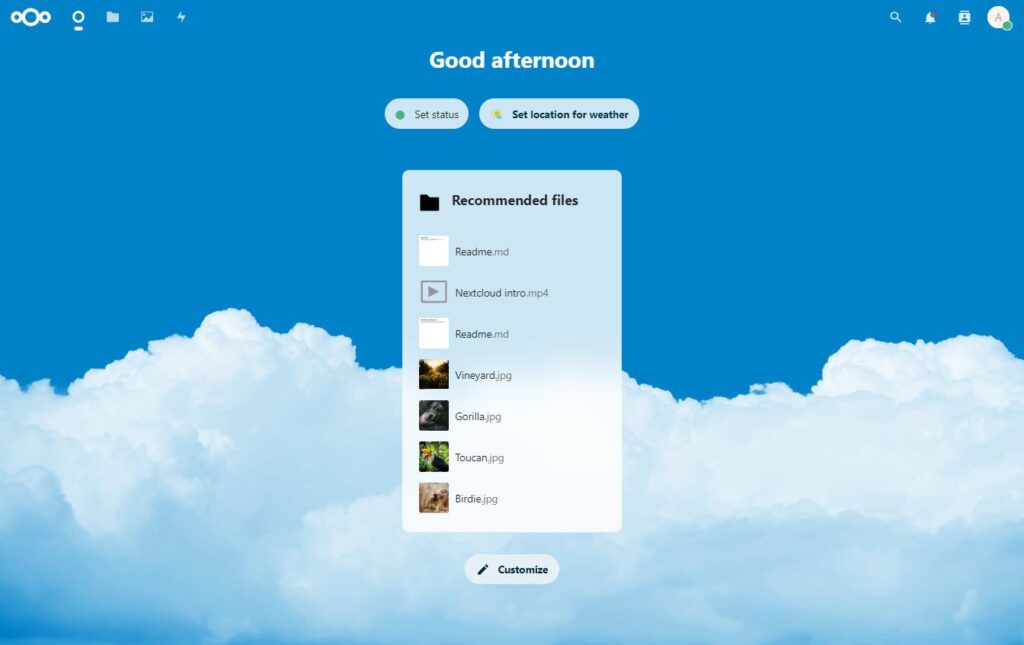
That’s it! Through this tutorial, How to Install and Configure NextCloud Server on Ubuntu you have created your own online storage server with NextCloud. If you have any questions or feedback, please leave a comment below.
Thank you for watching !!!