In the previous article, we learned how to set up an OpenVPN server on the Linux operating system. In this article, we will explore together how to install and connect an OpenVPN Client on Windows to OpenVPN server.
Read more
- How to Install and Configure OpenVPN Server on Centos | CentOS Stream | RHEL | RockyLinux | AlmaLinux:✍️ updating
- How to Install and Configure OpenVPN Server on Ubuntu
- How to Install and Configure OpenVPN Client on Windows
- How to Install and Configure OpenVPN Client on Ubuntu
- How to Install and Configure Zabbix Server on Ubuntu
Prerequisites
- An OpenVPN Server
- An OpenVPN server on Linux has been installed.
- Client profiles named client-01.ovpn, client-02.ovpn, etc., have been created on the server.
- OpenVPN Client
- Windows 7/8/10/11
- Windows Server 2012/2016/2019/2022
On Windows Client
Step 1 – Download Client profiles from Server
In the OpenVPN server setup, we have created client profiles (for example: client-01.ovpn, client-02.ovpn, etc.). We need these client profiles to connect to the OpenVPN server. Therefore, we require a tool called WinSCP. You can download and install WinSCP from its official website here.
After successfully downloading and installing it, open the application, create a new connection, and configure it as shown in the image below:
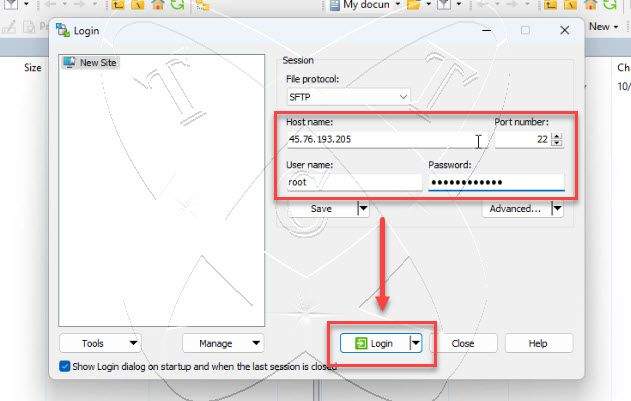
In which
- Hostname: IP of the Server
- Port number: keep the default
- Username: Account login on the Server
- Password: Password login on the Server
Once configured, click the Login button. You will be prompted and choose Yes as shown below:

Upon successful login, right-click on the client profile you want to download and select Download

Choose the location where you want to save the client profile
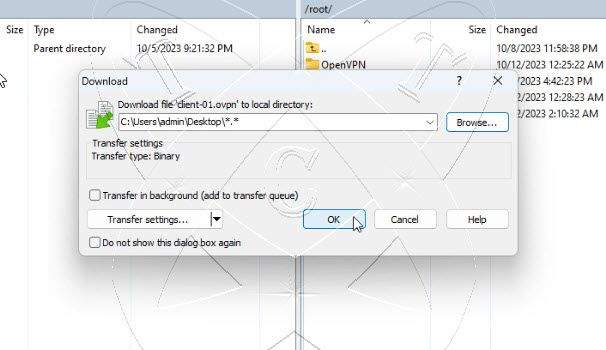
In this example, I saved the client profile named client-01.ovpn on the Desktop.

Step 2 – Install and Configure OpenVPN Client on Windows
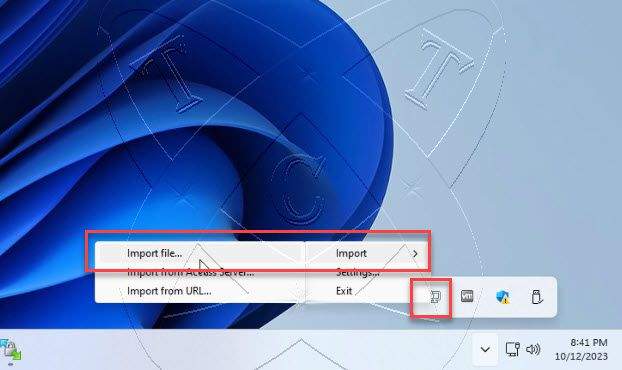
Next, you need to download and install the OpenVPN Client from here. After installation, open the application, and move to the bottom left corner of the screen, you will see the OpenVPN icon, right-click – select Import – choose Import file…
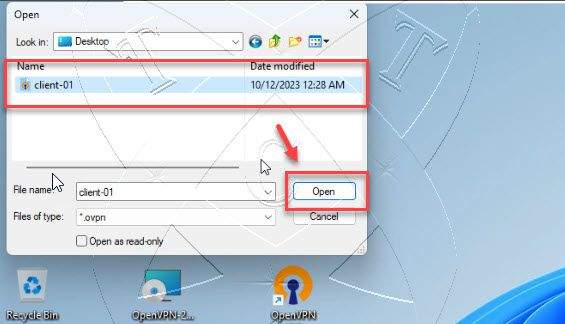
Select the client profile you downloaded in step 1
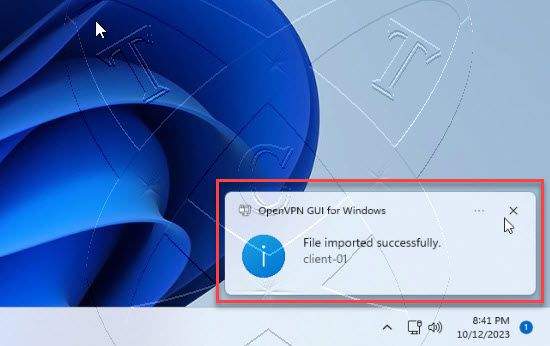
If correct, you will see a success message like the one below.
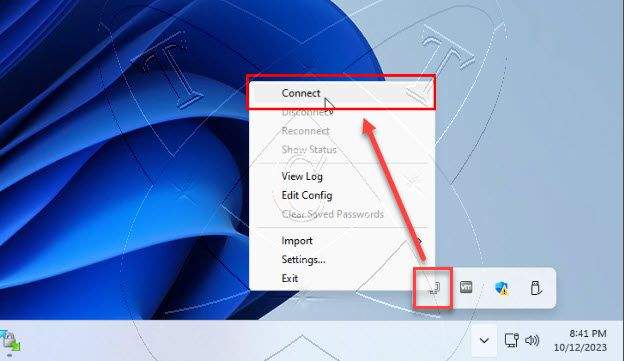
You have successfully imported the client profile. To connect to the server, right-click on the OpenVPN icon again, and select Connect
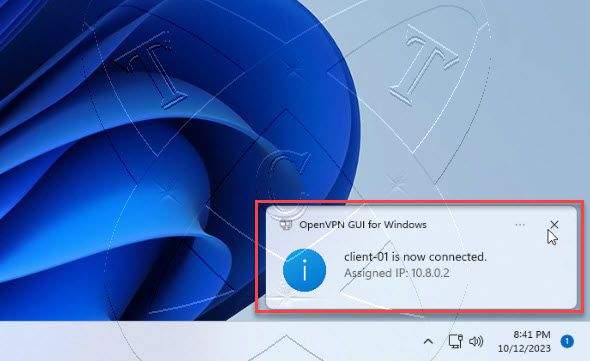
If you see a message like the one below, congratulations, you have successfully connected.
Step 3 – Verify the connection
To check if your connection is successful, visit the https://www.whatismyip.com/ page. If the returned IP address matches the server’s address, it means you have successfully established the connection.

That’s all. Thank you for reading.