Squid Proxy is a widely-used open-source caching proxy server for the web. It is designed to improve web performance and speed up the delivery of content to clients by caching frequently-requested web pages and other Internet content, such as images and videos.
Squid Proxy works by intercepting client requests for content and then either serving the content from its cache or forwarding the request to the origin server. This helps to reduce the amount of bandwidth used by clients and improve the overall speed of the web browsing experience.
Squid Proxy is highly configurable and supports a wide range of authentication and access control methods, making it suitable for use in a variety of environments, including enterprise networks, educational institutions, and public internet access points. It also includes a number of advanced features, such as content filtering, load balancing, and SSL decryption, which make it a versatile and powerful tool for managing web traffic.
In this guide, we will learn How to Install and Configure Squid Proxy Server on Ubuntu 22.04 LTS | 20.04 LTS | 18.04 LTS
Prerequisites
- OS: An Ubuntu server has been installed with a static IP address
- User privileges: root or non-root user with root privileges.
- In this guide:
- My Network: 192.168.1.0/24
- My Server: Ubuntu 22.04 LTS
- IP Server: 192.168.1.7/24
- Hostname: squid-1
Read more
- How to Setup Static IP Address on Ubuntu Server
- How to Setup Hostname/FQDN on Linux
- How to Install and Configure LAMP stack on Ubuntu
Step 1 – Update system
Before we start to install the OCS Inventory server on your system, we need to update the system packages to the latest versions available:
sudo apt update && sudo apt upgrade -y
Step 2 – Install Squid Proxy Server on your system
Run the following command to install Squid Proxy Server:
sudo apt install squid -y
After Squid has been installed, we need to start and enable Squid service to automatically start on system startup or reboot:
sudo systemctl start squid
sudo systemctl enable squid
Check the status of the Squid service to ensure it is running by using the following command:
sudo systemctl status squid
If Squid Proxy is running, you will see its status as Active as shown in the image below:

Step 3 – Configure Squid Proxy Server
Go to the /etc/squid directory
cd /etc/squid
List the default installed files by using the following command:
ls
You will see the pre-created files as shown below:

The main configuration file named squid.conf, before configuring, we need to create a copy of it to prevent any loss of default configuration that might need to be restored:
sudo cp squid.conf squid.conf.bak
Use your favorite text editor to open the squid.conf file, in this guide, I’m using VIM editor
sudo vim squid.conf
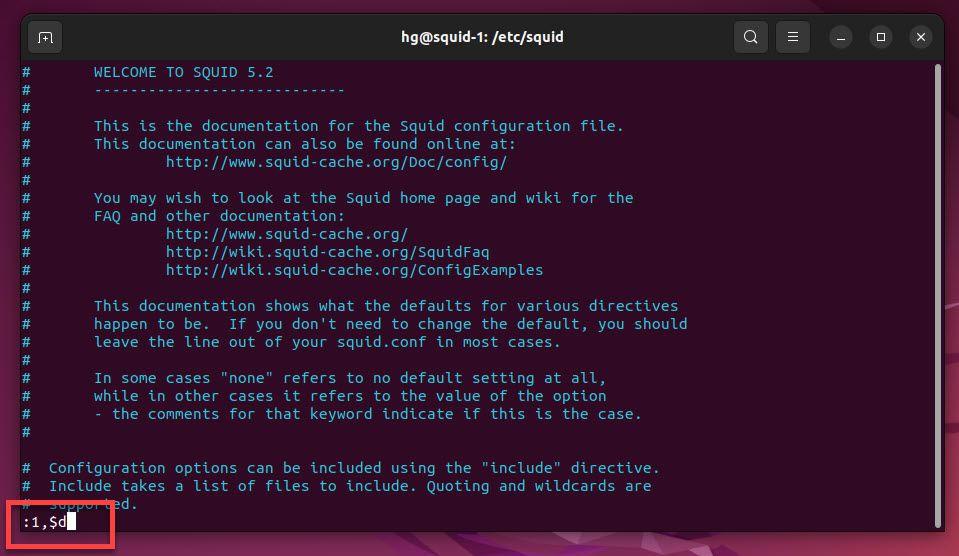
Clear all lines in the file by running the following command:
:1,$d
Then, copy and paste the content below into the file:
#
### Configure Hostname
#
# Replace squid-1 = Your-Hostname
visible_hostname squid-1
#
### My Local Network
### Create an ACL called mynet
# Replace 192.168.1.0/24 = Your-Network
acl mynet src 192.168.1.0/24
#
###
#
acl SSL_ports port 443
acl Safe_ports port 80		# http
acl Safe_ports port 21		# ftp
acl Safe_ports port 443		# https
acl Safe_ports port 70		# gopher
acl Safe_ports port 210		# wais
acl Safe_ports port 1025-65535	# unregistered ports
acl Safe_ports port 280		# http-mgmt
acl Safe_ports port 488		# gss-http
acl Safe_ports port 591		# filemaker
acl Safe_ports port 777		# multiling http
#
###
#
http_access deny !Safe_ports
http_access deny CONNECT !SSL_ports
#
### Allow Local Network
http_access allow mynet
http_access allow localhost manager
http_access deny manager
include /etc/squid/conf.d/*.conf
http_access allow localhost
http_access deny all
#
### Default port 3128, you can change if you want.
http_port 3128
#
### Cache MEM =1/3 Physical RAM
cache_mem 256 MB
#
### Cache DIR
### Syntax : cache_dir ufs PATH L0 L1 L2
### L0 = 'Mbytes' is the amount of disk space (MB) to use under this directory.
### The default is 100 MB.  Change this to suit your configuration.
### L1 is the number of first-level subdirectories which will be created under the 'Directory'.
### The default is 16.
### 'L2' is the number of second-level subdirectories which will be created under each first-level directory.
### The default is 256.
cache_dir ufs /var/spool/squid 2048 16 256
#
### coredump_dir
### By default Squid leaves core files in the directory from where it was started.
### If you set 'coredump_dir' to a directory that exists, Squid will chdir() to that directory at startup and coredump files will be left there.
coredump_dir /var/spool/squid
#
### Default
refresh_pattern ^ftp:		1440	20%	10080
refresh_pattern ^gopher:	1440	0%	1440
refresh_pattern -i (/cgi-bin/|\?) 0	0%	0
refresh_pattern \/(Packages|Sources)(|\.bz2|\.gz|\.xz)$ 0 0% 0 refresh-ims
refresh_pattern \/Release(|\.gpg)$ 0 0% 0 refresh-ims
refresh_pattern \/InRelease$ 0 0% 0 refresh-ims
refresh_pattern \/(Translation-.*)(|\.bz2|\.gz|\.xz)$ 0 0% 0 refresh-ims
refresh_pattern .		0	20%	4320
Once done, save and exit the file using the command below:
:x

Now, restart the Squid service for the changes to take effect and check the status of the Squid service again to ensure it is still running
sudo systemctl restart squid
sudo systemctl status squid
Step 4 – Adjust Firewall
Skip this step if you do not want the UFW firewall running on your system.
By default, Squid Proxy listens on port 3128, we need to configure to allow port 3128 through the firewall using the following command:
sudo ufw enable
sudo ufw allow 3128
sudo ufw reload
sudo ufw status

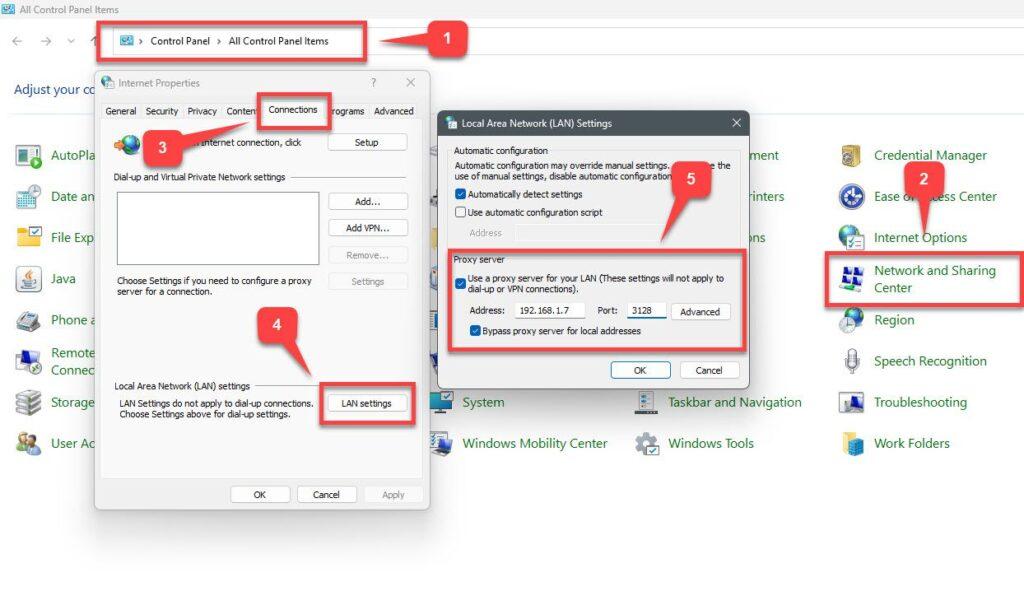
Step 5 – Configure Proxy on Windows Client
To configure a Windows client to use the proxy, access the Control Panel – Internet Options – tab Connections – button LAN Settings :
- Check to User a proxy server for your LAN ( These settings will not apply to dial-up or VPN connections)
- Address: IP=of-the-Squid-Proxy-Server
- Port : 3128
That’s it, through this guide, we have been able to set up a Squid Proxy on Ubuntu.
Thank for reading !!!