In the previous tutorial, We successfully installed OpenLDAP Server and LAM on Ubuntu.
In this tutorial, We will learn How to Install and Configure OpenLDAP Client on Ubuntu
Prerequisites
- OpenLDAP Server installed on another server.
- User privileges: root or non-root user with root privileges.
Read more
- How to Install and Configure OpenLDAP Server & LAM on Ubuntu
- How to Create OUs Groups Users on OpenLDAP Server with LAM
- How to Configure Hostname and FQDN/Fullname on Linux
For this tutorial
- Domain: totatca.local
- OpenLDAP Server
- Full name: ldap-1.totatca.local
- IP address: 192.168.1.8
- Users: it1, it2,…was created
- OpenLDAP Client
- Fullname: ubt22-2.totatca.local
- IP address: 192.168.1.9
Let’s go…
On the OpenLDAP Server
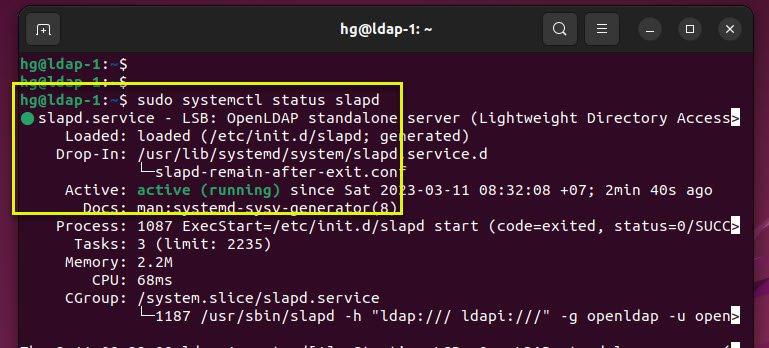
Check the status of the OpenLDAP server, and ensure it’s running:
sudo systemctl status slapd
Sample output:
On the OpenLDAP Client
Step 1 – Prepare
First of all, we need to update the system packages to the latest versions available on your system following the command below:
sudo apt update && sudo apt upgrade -y
Next, you need to add an LDAP server address to the /etc/hosts file if you do not have an active DNS server on your system network following the command below:
sudo vim /etc/hosts
Add new content below:
192.168.1.8 ldap-1.totatca.local
Sample output:
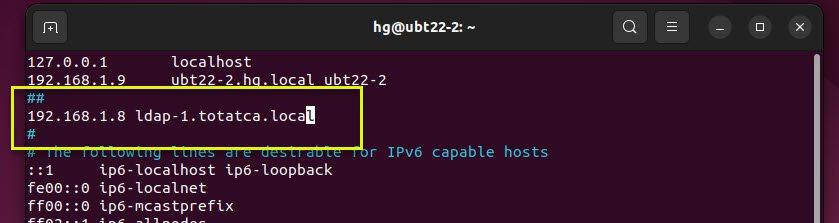
Save and exit the file by pressing Esc :x and hit Enter
Step 2 – Install OpenLDAP Client
Everything is done, run the command below to install OpenLDAP Client on your system:
sudo apt install libnss-ldap libpam-ldap ldap-utils nscd -y
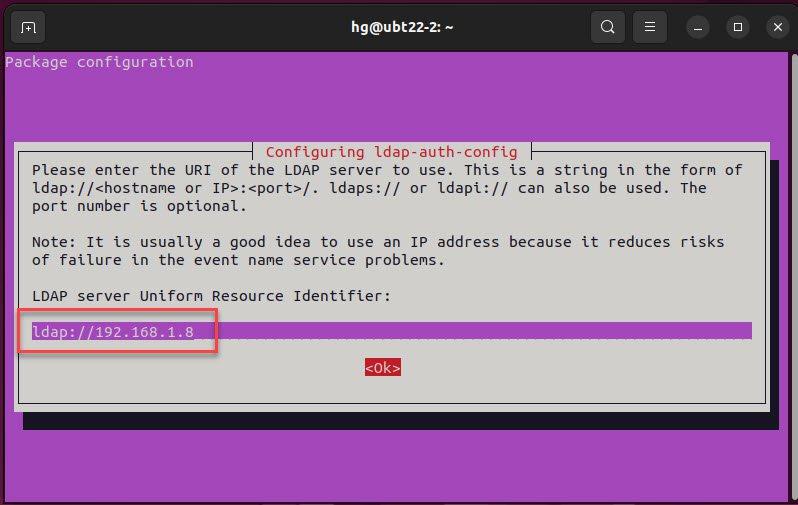
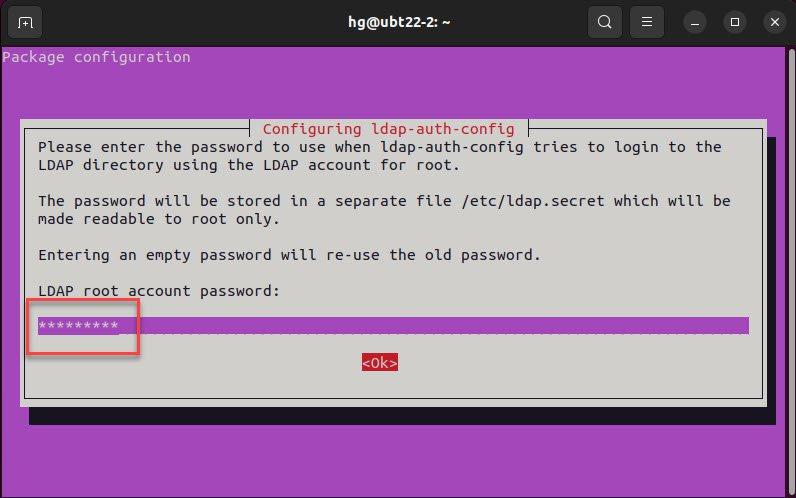
During the installation, you need to answer some questions about LDAP Server information
- LDAP server Uniform Resource Identifier:
ldap://192.168.1.8(replace ldap://192.168.1.8 = Your URL OpenLDAP Server)
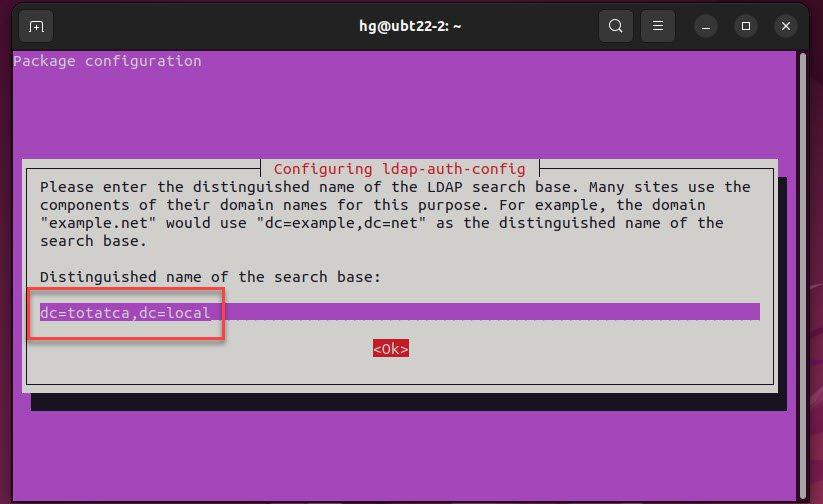
- Distinguished name of the search base:
dc=totatca,dc=local( replace totatca.local = Your domain)
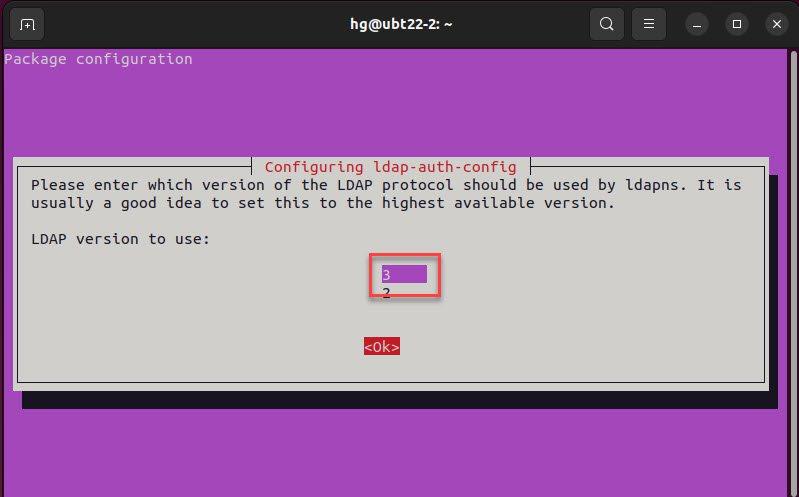
- LDAP version to use: select the version
3
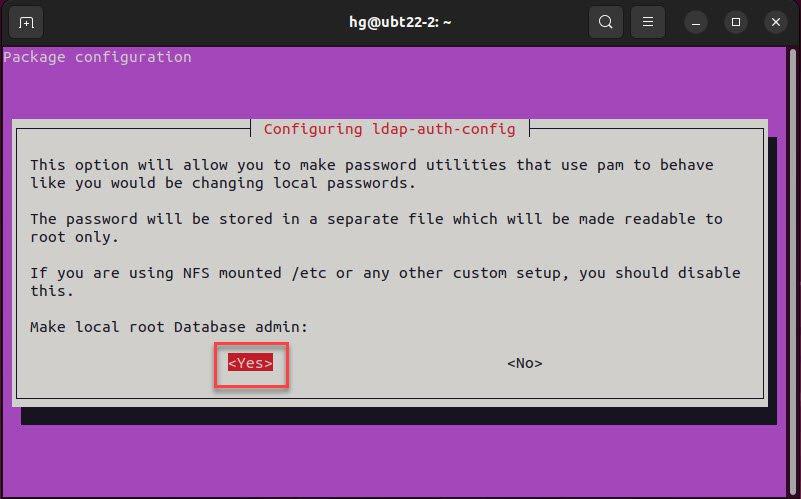
- Make local root Database admin: select
<Yes>To make password utilities that use Pam to behave like you would be changed local passwords.
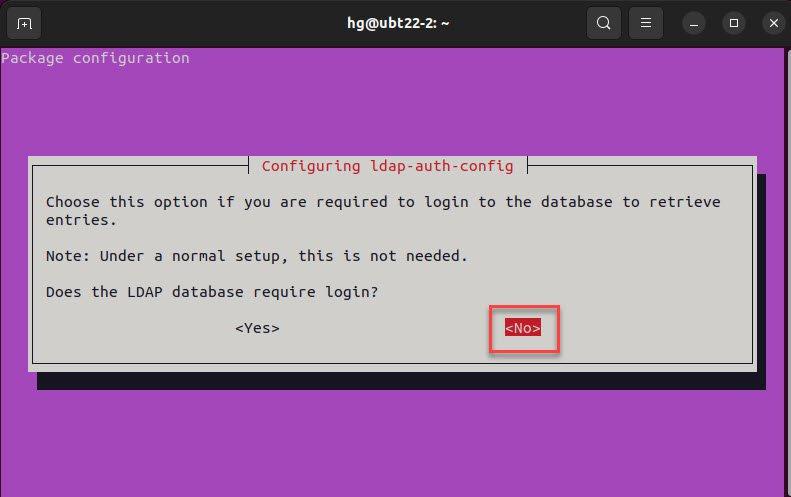
- Dose the LDAP database require login?: select
<No>to disable login requirements to the LDAP database.
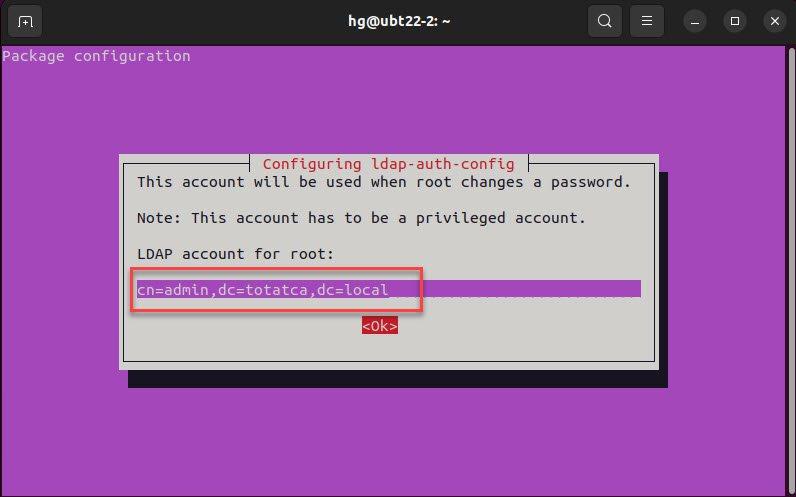
- LDAP account for root:
cn=admin,dc=totatca,dc=local( Account LDAP Server create in the previous tutorial )
- LDAP root account password: input password of LDAP admin
Step 3 – Configure LDAP Client
After successfully installing the OpenLDAP client, now we will go to configure authentication between the client and the server.
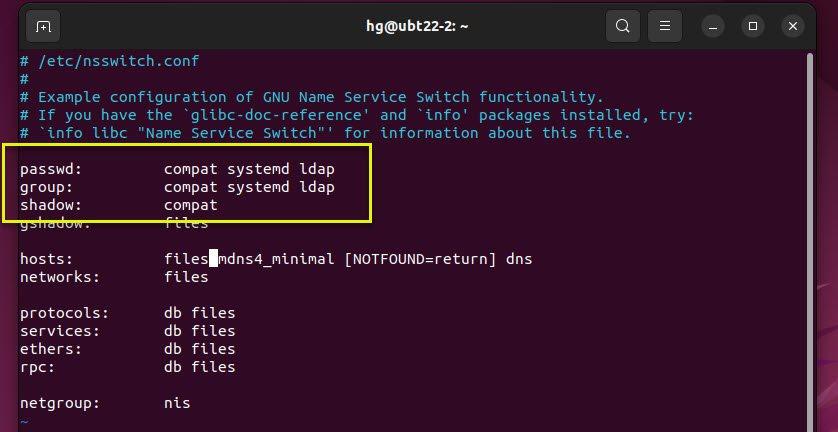
First, open the /etc/nsswitch.conf file to authenticate user between LDAP Client and LDAP Server.
sudo vim
/etc/nsswitch.conf
and edit lines below:
passwd: 		compat systemd ldap
group: 			compat systemd ldap
shadow: 		compat
Save and exit the file by pressing Esc :x and hit Enter
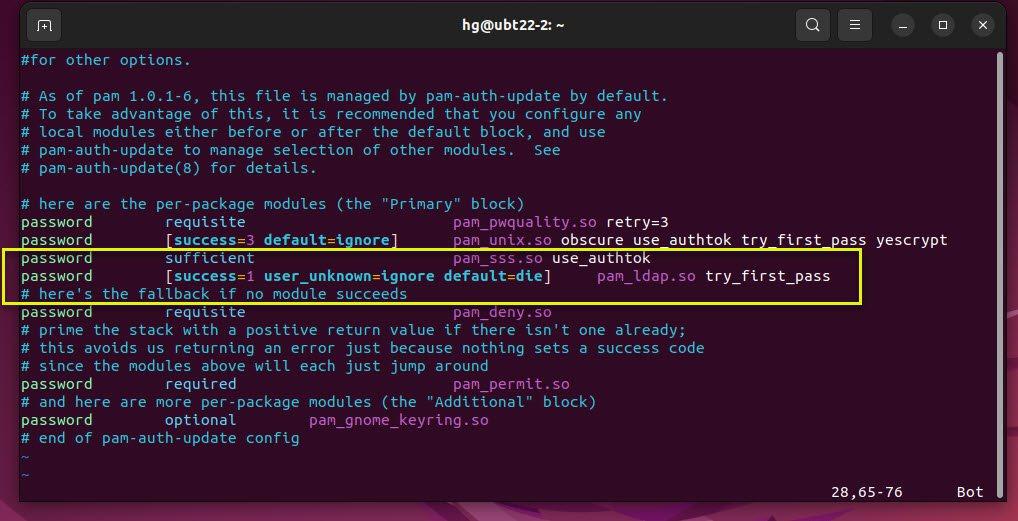
Next, open the /etc/pam.d/common-password file to disable the use_authtok module.
sudo vim /etc/pam.d/common-password
Remove the use_authtok modules on lines below:
###Before
password        [success=1 user_unknown=ignore default=die]     pam_ldap.so use_authtok try_first_pass
###After
password [success=1 user_unknown=ignore default=die] pam_ldap.so try_first_pass
Save and exit the file by pressing Esc :x and hit Enter
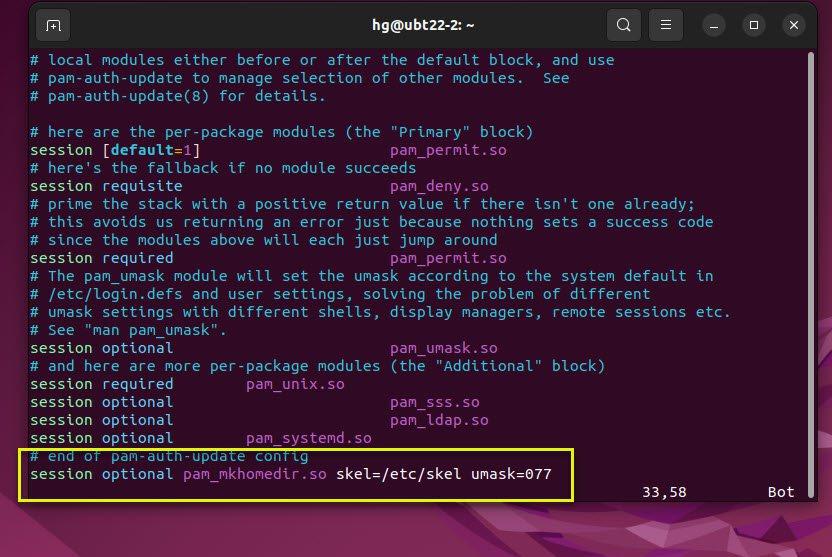
Lastly, open the /etc/pam.d/common-session file to automatically create a home directory when LDAP users log in system.
sudo vim /etc/pam.d/common-session
Add new content below to the end of the file:
session optional pam_mkhomedir.so skel=/etc/skel umask=077
Save and exit the file by pressing Esc :x and hit Enter
Everything is done, now reboot the system to apply the changes.
Step 4 – Testing
The previous tutorial created users (it1, it2, hr1, hr2,…) on the LDAP server.
Once reboot the system, is on the screen login click Not listed? button

Input an account on the OpenLDAP server (example: hr1) and input the password of the hr1
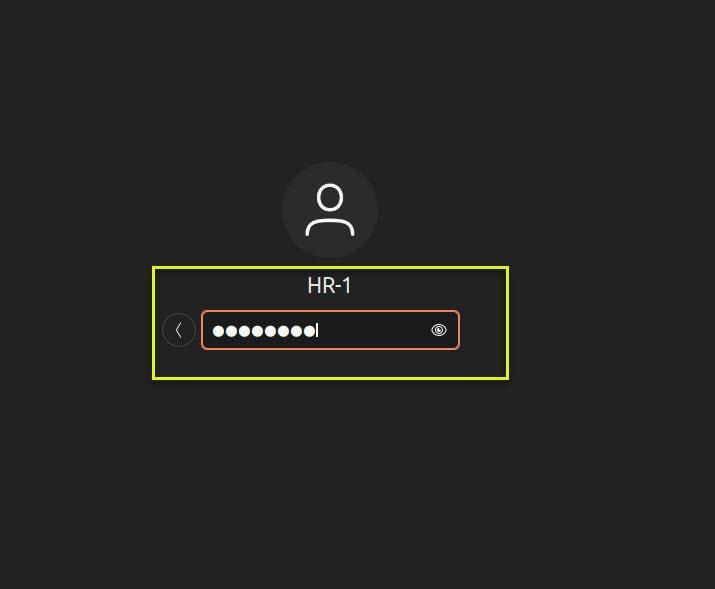
Success !!!

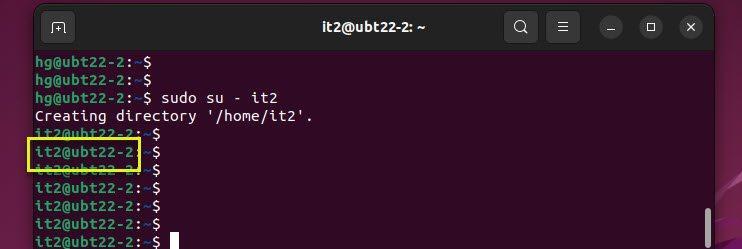
You can also check with the command line by switching to an account on the LDAP server
sudo su – it1
You should see it auto-create the home directory and switch to the mode account on the OpenLDAP server
That’s it. You successfully installed OpenLDAP Client on Ubuntu
Thank you for reading !!!