Hello everyone, in this series of posts, we will explore the Install and Configuration of a Mail Server using PostfixAdmin on Ubuntu.
This is Part 1-Create a Database for Mail Server, focusing on checking the requirements and creating a database for the Mail server before proceeding with the installation and configuration.
What is PostfixAdmin?
About PostfixAdmin
PostfixAdmin is a web interface designed for managing email systems based on Postfix. It simplifies the administration of email accounts, domains, and related configurations, allowing system administrators to perform important tasks easily through its user-friendly web interface.
Features of PostfixAdmin:
- Email Account Management:
- Create, edit, and delete email accounts for individual users and user groups.
- Set passwords, manage storage quotas, and configure various security settings for each email account.
- Domain Management:
- Add and remove email domains.
- Configure MX records and SPF settings for domains.
- Manage domain-related settings and email configurations.
- Granular User Permissions:
- Define user and administrator permissions through a flexible role-based access control system.
- Manage multiple domains and mailboxes from a straightforward interface.
- Integrated Security Measures:
- Secure login credentials and email data.
- Support encryption techniques to protect sensitive data.
- User-Friendly and Customizable:
- User-friendly interface, making it easy for users to perform tasks without deep technical knowledge.
- Customizable and expandable based on specific system requirements.
With PostfixAdmin, email system administrators can save time and effort managing hundreds or even thousands of email accounts and domains through an intuitive and user-friendly interface.
Prerequisites
- Server: A VPS or Physical server
- OS: Ubuntu (Recommended to use LTS versions)
- IP Address: A public static IP address
- Domain: A domain that is accessible on the Internet
- User privileges: root or non-root user with sudo privileges.
In this series
To illustrate easily throughout the article, I assume the following:
- My Server: A VPS on Vultr (Click on the banner on the right to try Vultr with $100 free credit.)
- My OS: Ubuntu 22.04 LTS
- Static IP Address: 43.224.33.183
- Domain: totatca.xyz
- Hostname: mail
Read more: How to Change Hostname and FQDN/Fullname on Linux - FQDN/Fullname: mail.totatca.xyz
Important: Please replace that information with your server details
Step 1 – Check the Prerequisites
Check the Hostname and FQDN/Fullname
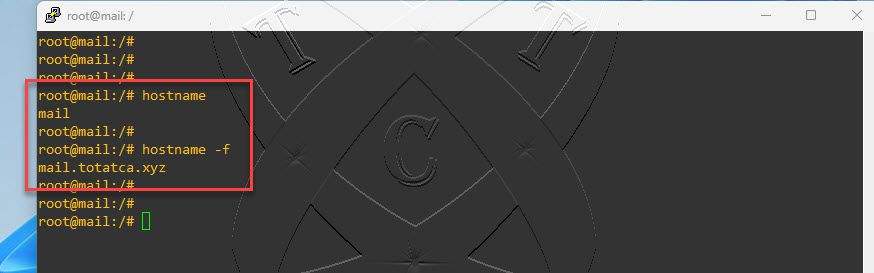
First, you check whether the Hostname and FQDN information are correctly set up using the commands:
hostname
hostname -f
If it’s correct, the result will be similar to the following:
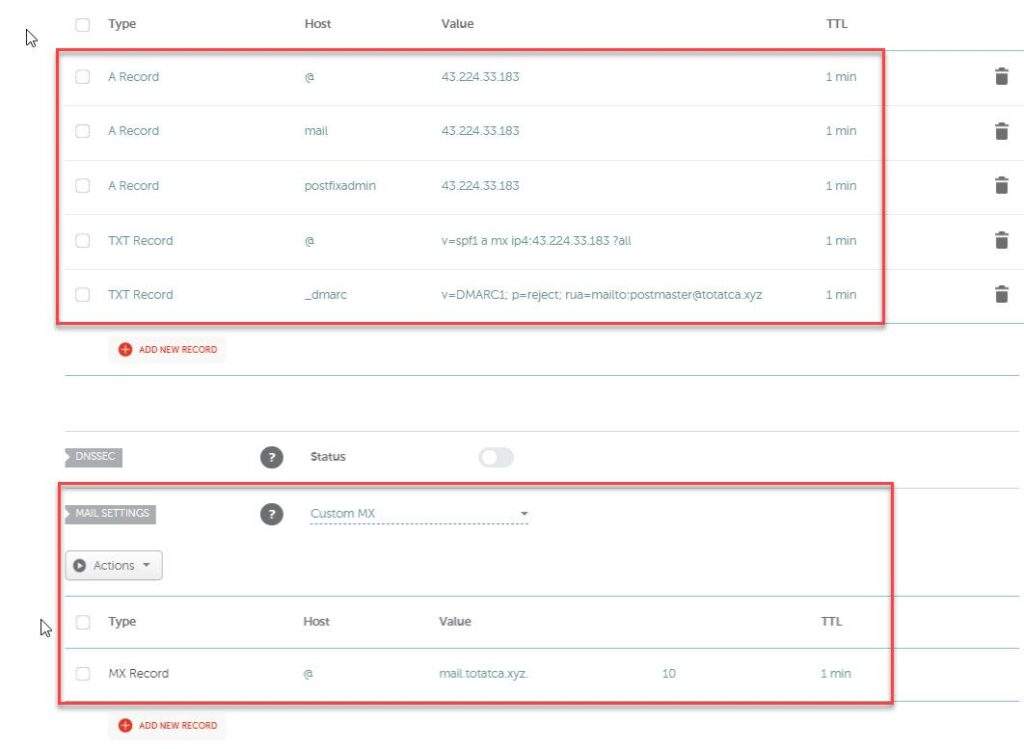
Check the Record for Mail Server
A Mail server won’t function properly if the record configurations are incorrect. To create records for the Mail Server, refer to this article. Below is the information for the records on my server in the DNS Manager including the records:
- A record ( @, mail and postfixadmin )
- TXT record ( SPF, DMARC)
- MX record
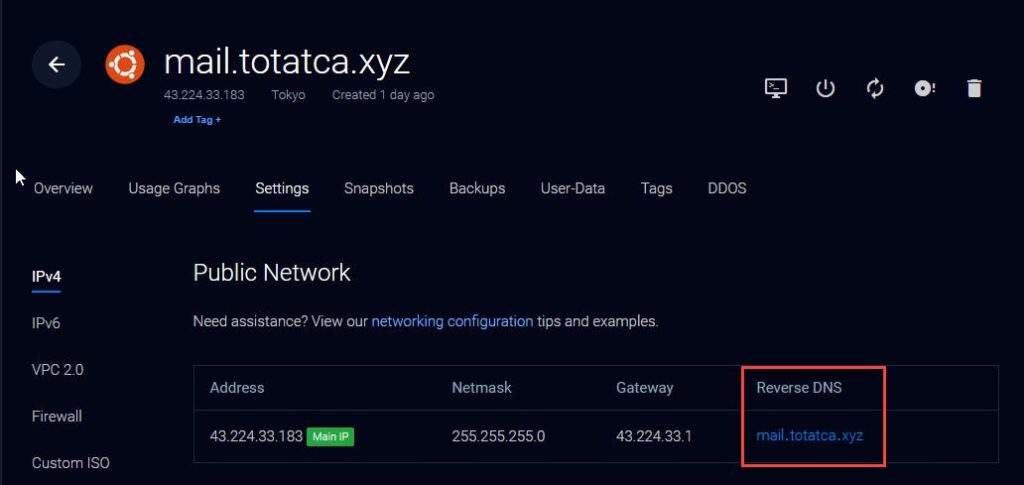
And here is the information for the PTR record on my server.
Other requirements
Make sure the LAMP stack is installed on your server. To install the LAMP stack, refer to the article here.
Step 2 – Install PHP extensions
The LAMP stack has been successfully installed and is ready to operate. To proceed with the PostfixAdmin installation, we need to install the necessary PHP extensions. First, open the terminal and execute the following commands to install the required PHP extensions:
sudo apt update
sudo apt install libapache2-mod-php mariadb-server php-fpm php-imap php-mbstring php-mysql php-json php-curl php-zip php-xml php-bz2 php-intl php-gmp -y
Step 3 – Install Postfix and Dovecot services
Next, we will install the Postfix and Dovecot services along with the necessary extensions by executing the following command:
apt install postfix postfix-mysql dovecot-core dovecot-mysql dovecot-lmtpd dovecot-imapd dovecot-pop3d -y
During the installation process, confirmation windows may appear for you to accept and proceed with the installation process
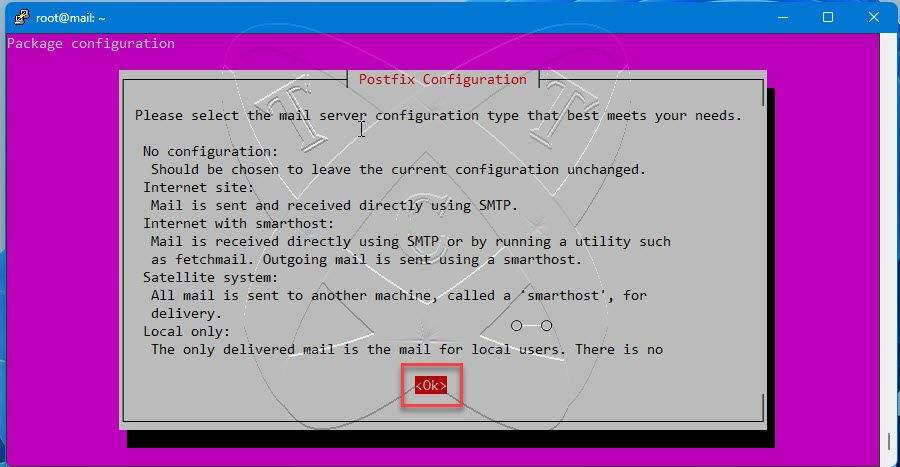
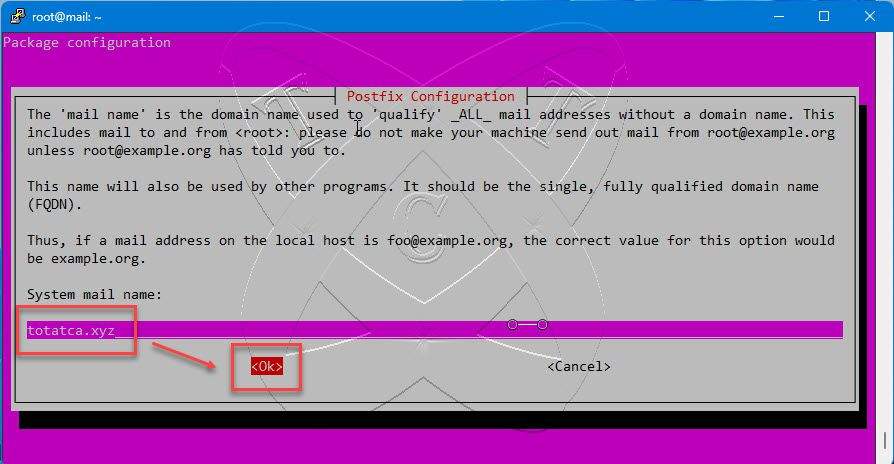
At the Postfix Configuration screen, select Internet Site and press Enter.

Enter Your-domain name and then hit Enter.
Once the installation is complete, we need to start the Postfix – Dovecot services and allow them to automatically start with the system every time it restarts.
sudo systemctl start postfix
sudo systemctl start dovecot
sudo systemctl enable postfix
sudo systemctl enable dovecot
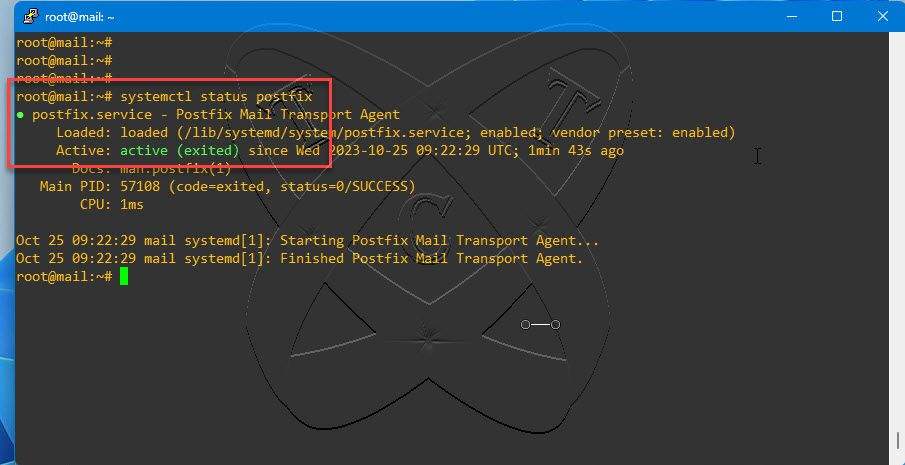
Check the status of the Postfix service to ensure that it’s running on the system:
sudo systemctl status postfix
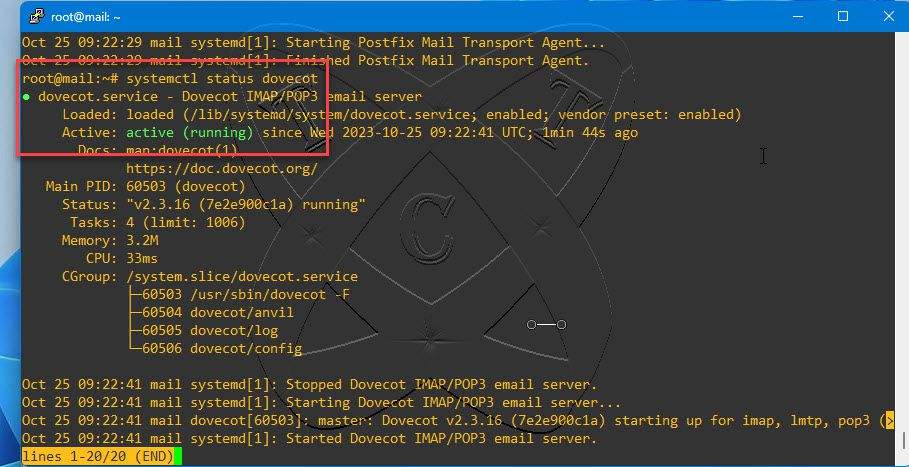
And check the status of the Dovecot service to ensure that it’s running on the system:
sudo systemctl status dovecot
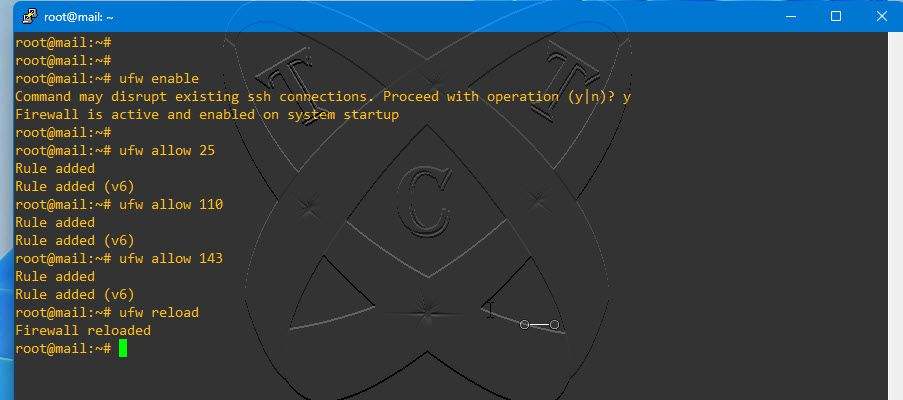
If your server has UFW firewall enabled, you need to allow ports 25 (SMTP), 110 (POP3), and 143 (IMAP) through the firewall. Skip if you do not wish to use a firewall (not recommended).
sudo ufw enable
sudo ufw allow 25
sudo ufw allow 110
sudo ufw allow 143
sudo ufw reload
Step 4 – Create a System User Account to store the mail
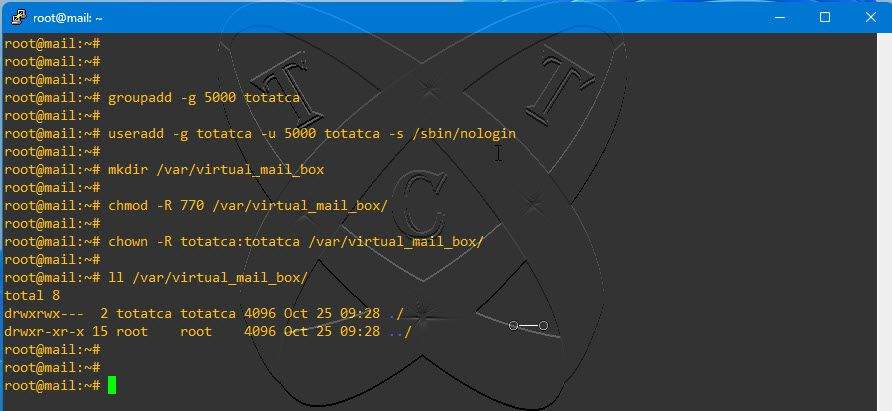
At this point, we will create an account and a system group called totatca with an ID of 5000. This account will represent virtual accounts for accessing emails.
groupadd -g 5000 totatca
useradd -g totatca -u 5000 totatca -s /sbin/nologin
Next, create a folder named virtual_mail_box inside the /var directory. This folder will be used to store emails
mkdir /var/virtual_mail_box
And modify and assign access permissions to the user totatca on the virtual_mail_box directory
chmod -R 770 /var/virtual_mail_box
chown -R totatca:totatca /var/virtual_mail_box
Step 5 – Create a database for PostfixAdmin
To create a database, first log in to your MySQL/MariaDB server using the following command:
sudo mysql -uroot -p
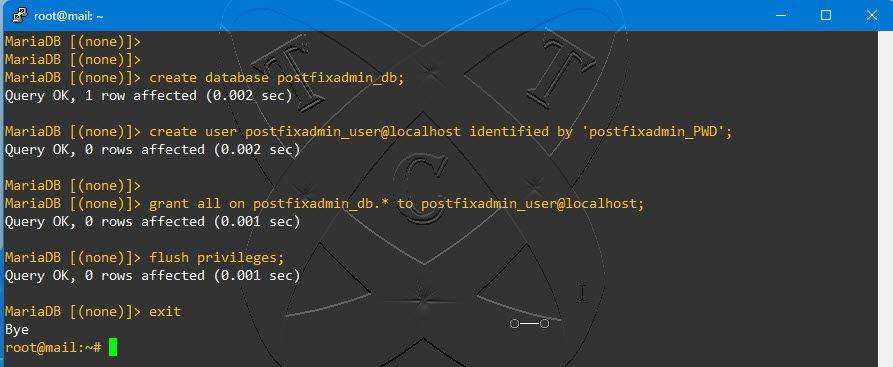
Create a database for PostfixAdmin called postfixadmin_db
create database postfixadmin_db;
Create a new user called postfixadmin_user with password postfixadmin_PWD
create user postfixadmin_user@localhost identified by ‘postfixadmin_PWD’;
Grant all permissions on the postfixadmin_db database to the postfixadmin_user user
grant all on postfixadmin_db.* to postfixadmin_user@localhost;
And reload database
flush privileges;
exit;
Conclusion
At this point, we have successfully completed the preparations for setting up an Email server using PostfixAdmin. We have installed necessary packages, configured services, created databases, and ensured proper permissions. Here are the specifics:
- Domain: totatca.xyz
- Hostname: mail
- FQDN: mail.totatca.xyz
- User and Group: totatca with ID 5000
- Email storage: /var/virtual_mail_box
- Database name: postfixadmin_db
- Database user: postfixadmin_user
- Database password: postfixadmin_PWD
Important: If you change any information, you need to make sure to update the corresponding details in the following steps.
Thank you for following along. Stay tuned for the next part of this series. If you have any further questions or need additional assistance, feel free to ask. See you in the next installment!