In Part 1, we configured the basic settings and created a database for the email server. In Part 2- Configuring Postfix with MySQL/MariaDB, we will configure Postfix together to use MySQL/MariaDB as the database for the Mail server in the Set Up a Mail Server with PostfixAdmin on Ubuntu/Debian series.
Recap some information from Part 1 that we created:
- User and Group: totatca with ID 5000
- Email storage: /var/virtual_mail_box
- Database name: postfixadmin_db
- Database user: postfixadmin_user
- Database password: postfixadmin_PWD
Important: Ensure that you replace the above information with your own details; these details will be used consistently throughout this series of posts.
Step 6 – Create files to connect Postfix and the Database
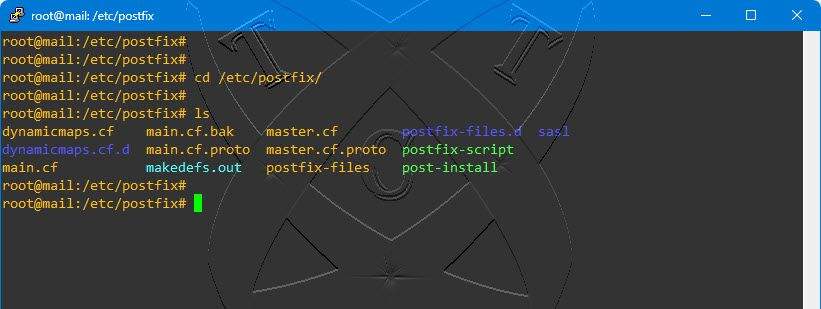
At this point, Postfix has been installed, and the configuration files will be stored in the /etc/postfix directory. Navigate to the /etc/postfix directory using the following command:
cd /etc/postfix
ls
You will see the configuration files looking similar to the ones below:
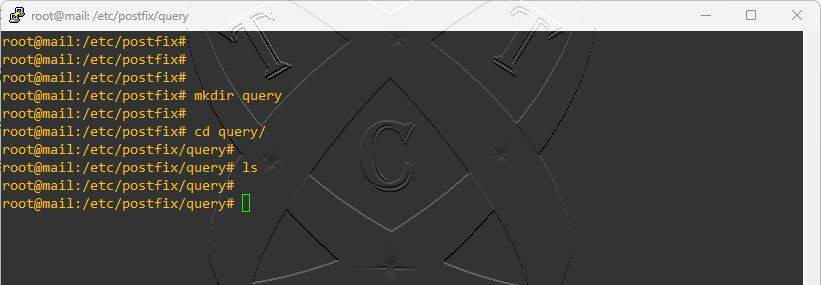
Now, create a folder named query and navigate into it. Postfix will use this directory to store configuration files for the connection between Postfix and MySQL/MariaDB.
mkdir query
cd query
Creating Configuration Files
✳️ Create a new file named mysql_virtual_alias_domain_catchall_maps.cf using the following command:
vim mysql_virtual_alias_domain_catchall_maps.cf
Add the content below to the file:
user = postfixadmin_user
password = postfixadmin_PWD
hosts = localhost
dbname = postfixadmin_db
query = SELECT goto FROM alias,alias_domain WHERE alias_domain.alias_domain = '%d' and alias.address = CONCAT('@', alias_domain.target_domain) AND alias.active = 1 AND alias_domain.active='1'
Once finished, save and exit the file
This file is used to check records in the alias and alias_domain tables. If an Email address matches the specified domain ('%d') and is active (active = 1), it will be selected to map Email addresses and Domains in Postfix to the data in the MySQL/MariaDB database.
✳️ Create a new file named mysql_virtual_alias_domain_mailbox_maps.cf using the following command:
vim mysql_virtual_alias_domain_mailbox_maps.cf
Add the content below to the file:
user = postfixadmin_user
password = postfixadmin_PWD
hosts = localhost
dbname = postfixadmin_db
query = SELECT maildir FROM mailbox,alias_domain WHERE alias_domain.alias_domain = '%d' and mailbox.username = CONCAT('%u', '@', alias_domain.target_domain) AND mailbox.active = 1 AND alias_domain.active='1'
Once finished, save and exit the file
This file is used to determine the mail storage location (maildir) for corresponding mailboxes when records in the mailbox and alias_domain tables match. If an Email address matches the specified domain and is active (mailbox.active = 1 and alias_domain.active='1'), it will retrieve the value of the maildir column from the mailbox table.
✳️ Create a new file named mysql_virtual_alias_domain_maps.cf using the following command:
vim mysql_virtual_alias_domain_maps.cf
Add the content below to the file:
user = postfixadmin_user
password = postfixadmin_PWD
hosts = localhost
dbname = postfixadmin_db
query = SELECT goto FROM alias,alias_domain WHERE alias_domain.alias_domain = '%d' and alias.address = CONCAT('%u', '@', alias_domain.target_domain) AND alias.active = 1 AND alias_domain.active='1'
Once finished, save and exit the file
This file is used to check records in the alias and alias_domain tables. If an Email address matches the specified domain (%d) and is active (alias.active = 1 and alias_domain.active='1'), it retrieves the value from the alias table. This determines where the Email address needs to be forwarded to, based on the configured aliases and domains in the database
✳️ Create a new file named mysql_virtual_alias_maps.cf using the following command:
vim mysql_virtual_alias_maps.cf
Add the content below to the file:
user = postfixadmin_user
password = postfixadmin_PWD
hosts = localhost
dbname = postfixadmin_db
query = SELECT goto FROM alias WHERE address='%s' AND active = '1'
Once finished, save and exit the file
This file is used to check the alias table for a record where the email address matches the provided value (%s) and is active (active = '1'). If a match is found, it will return the destination Email address to which the Email should be forwarded, based on the configuration in the alias table.
✳️ Create a new file named mysql_virtual_domains_maps.cf using the following command:
vim mysql_virtual_domains_maps.cf
Add the content below to the file:
user = postfixadmin_user
password = postfixadmin_PWD
hosts = localhost
dbname = postfixadmin_db
query = SELECT domain FROM domain WHERE domain='%s' AND active = '1'
Once finished, save and exit the file
This file is used to check the domain table to find a record where the domain matches the provided value (%s) and is active (active = '1'). If a match is found, it will return that domain. This configuration specifies that Postfix will accept incoming emails only from active domains identified in the domain table.
✳️ Create a new file named mysql_virtual_mailbox_limit_maps.cf using the following command:
vim mysql_virtual_mailbox_limit_maps.cf
Add the content below to the file:
user = postfixadmin_user
password = postfixadmin_PWD
hosts = localhost
dbname = postfixadmin_db
query = SELECT quota FROM mailbox WHERE username='%s' AND active = '1'
Once finished, save and exit the file
This file is used to check the mailbox table to find a record where the username matches the provided value (%s) and is active (active = '1'). If a match is found, it will return the value of the quota column, indicating the storage limit of the corresponding mailbox. This configuration specifies that Postfix will check the storage limit of the user in the database to determine if they can receive additional emails.
✳️ Create a new file named mysql_virtual_mailbox_maps.cf using the following command:
vim mysql_virtual_mailbox_maps.cf
Add the content below to the file:
user = postfixadmin_user
password = postfixadmin_PWD
hosts = localhost
dbname = postfixadmin_db
query = SELECT maildir FROM mailbox WHERE username='%s' AND active = '1'
Once finished, save and exit the file
This file is used to check the mailbox table to find a record where the username matches the provided value (%s) and is active (active = '1'). If a match is found, it will return the value from the maildir column, indicating the storage path (maildir) of the corresponding mailbox. This configuration specifies where Postfix will store incoming emails for users with the specified corresponding username.
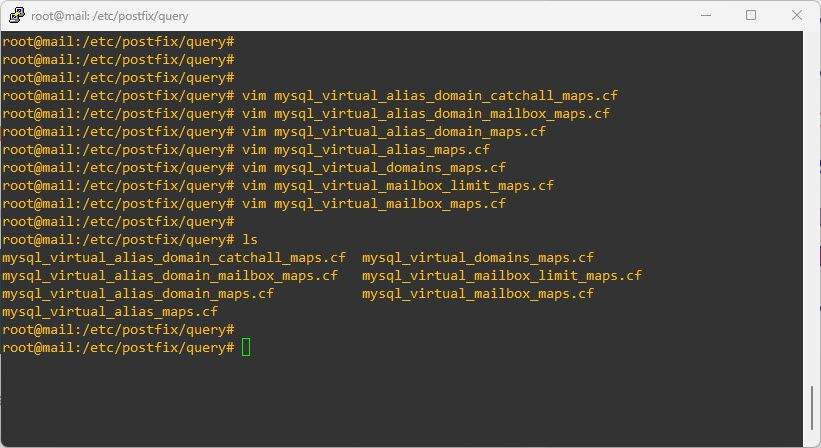
After completion, check again using the ls command, you will see it like the image below:
Step 7 – Configure Postfix with MySQL/MariaDB
The files used for querying from the database are ready. Next, we need to specify the location of these configuration files to Postfix by editing the file main.cf in the /etc/postfix directory.
cd ..
vim main.cf
In the main.cf file, we need to add and modify some content as shown below:
# See /usr/share/postfix/main.cf.dist for a commented, more complete version


# Debian specific:  Specifying a file name will cause the first
# line of that file to be used as the name.  The Debian default
# is /etc/mailname.
#myorigin = /etc/mailname

smtpd_banner = $myhostname ESMTP $mail_name (Ubuntu)
biff = no

# appending .domain is the MUA's job.
append_dot_mydomain = no

# Uncomment the next line to generate "delayed mail" warnings
#delay_warning_time = 4h

readme_directory = no

# See http://www.postfix.org/COMPATIBILITY_README.html -- default to 3.6 on
# fresh installs.
compatibility_level = 3.6


### Comment out all lines in the TLS section
# TLS parameters
#smtpd_tls_cert_file=/etc/ssl/certs/ssl-cert-snakeoil.pem
#smtpd_tls_key_file=/etc/ssl/private/ssl-cert-snakeoil.key
#smtpd_tls_security_level=may

#smtp_tls_CApath=/etc/ssl/certs
#smtp_tls_security_level=may
#smtp_tls_session_cache_database = btree:${data_directory}/smtp_scache


smtpd_relay_restrictions = permit_mynetworks permit_sasl_authenticated defer_unauth_destination
### Add new line mydomain = Your-Domain
mydomain = totatca.xyz
myhostname = mail.totatca.xyz
alias_maps = hash:/etc/aliases
alias_database = hash:/etc/aliases
myorigin = /etc/mailname
### Comment line mydestination
#mydestination = $myhostname, totatca.xyz, mail.totatca.xyz, localhost.totatca.xyz, localhost
relayhost =
mynetworks = 127.0.0.0/8 [::ffff:127.0.0.0]/104 [::1]/128
mailbox_size_limit = 0
recipient_delimiter = +
inet_interfaces = all
### Edit line inet_protocols
inet_protocols = ipv4

### Add at the end of the file.
### Configure Postfix to use MariaDB/MySQL Database

virtual_mailbox_domains = proxy:mysql:/etc/postfix/query/mysql_virtual_domains_maps.cf
virtual_alias_maps =
        proxy:mysql:/etc/postfix/query/mysql_virtual_alias_maps.cf,
        proxy:mysql:/etc/postfix/query/mysql_virtual_alias_domain_maps.cf,
        proxy:mysql:/etc/postfix/query/mysql_virtual_alias_domain_catchall_maps.cf
virtual_mailbox_maps =
        proxy:mysql:/etc/postfix/query/mysql_virtual_mailbox_maps.cf,
        proxy:mysql:/etc/postfix/query/mysql_virtual_alias_domain_mailbox_maps.cf

### Enable auth

smtpd_sasl_type = dovecot
smtpd_sasl_path = private/auth
smtpd_sasl_auth_enable = yes

smtpd_recipient_restrictions = permit_sasl_authenticated, permit_mynetworks, reject_unauth_destination

virtual_transport = lmtp:unix:private/dovecot-lmtp

virtual_mailbox_base = /var/virtual_mail_box
virtual_minimum_uid = 5000
virtual_uid_maps = static:5000
virtual_gid_maps = static:5000
Once finished, save and exit the file
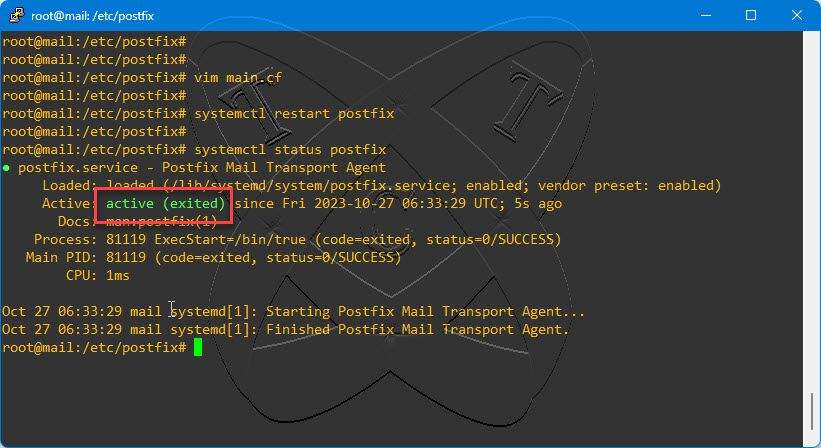
Now, restart the Postfix service to apply the changes:
systemctl restart postfix
Check the status of the Postfix service, ensuring it is Active on the system
systemctl status postfix
Conclusions
In this post, we’ve learned How to configure Postfix to use MySQL/MariaDB as the database for Mail Server in the Set Up a Mail Server with PostfixAdmin on Ubuntu/Debian series.
See you in Part 3 of this series. If you encounter any issues or have additional questions, feel free to leave a comment below