Hello everyone, in our previous posts, we completed configuring Postfix and Dovecot to work with MySQL/MariaDB. In this article, we will explore together Part 4 – How to Install and Configure PostfixAdmin for the Mail server.
Recap some information from Part 1 that we created:
- User and Group: totatca with ID 5000
- Email storage: /var/virtual_mail_box
- Database name: postfixadmin_db
- Database user: postfixadmin_user
- Database password: postfixadmin_PWD
Important: Ensure that you replace the above information with your own details; these details will be used consistently throughout this series of posts.
Step 9 – Download PostfixAdmin
Before starting this step, make sure you have installed the LAMP stack. If not, refer to the article here.
Now, move to the /var/www/html directory with the following command:
cd /var/www/html
At the time of writing, the latest version of PostfixAdmin is 3.3.13. You can refer to it here. Run the following command to download PostfixAdmin:
wget -O postfixadmin.tar.gz https://github.com/postfixadmin/postfixadmin/archive/refs/tags/postfixadmin-3.3.13.tar.gz
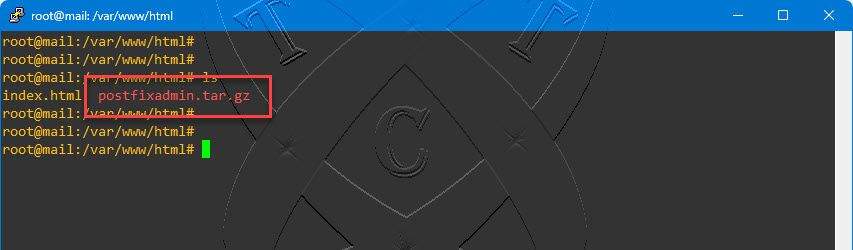
ls
Extract the downloaded file:
tar -xvf postfixadmin.tar.gz
Verify the extracted file:
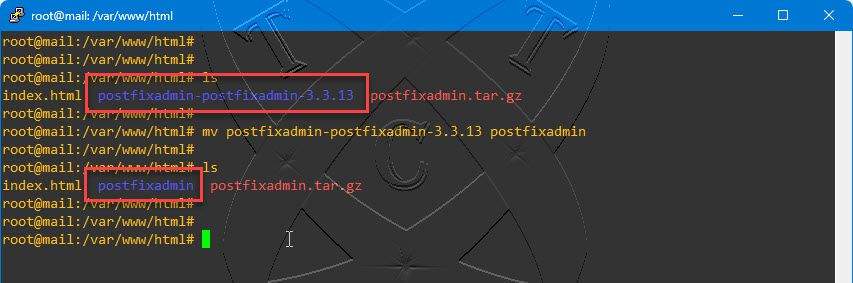
ls
Rename the extracted folder to postfixadmin, or you can choose a different name if you prefer. However, please ensure consistency in the subsequent steps:
mv postfixadmin-postfixadmin-3.3.13 postfixadmin
ls
Step 10 – Configure PostfixAdmin
Navigate to the renamed folder (mine is postfixadmin)
cd postfixadmin
(10.*) Create a new configuration file named config.local.php
vim config.local.php
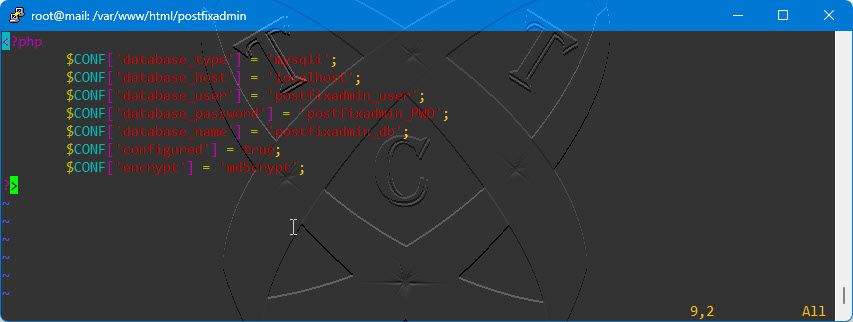
Add the following content to the file:
Note: The database information was created in Part 1. Please replace that information with your own.
<?php
	$CONF['database_type'] = 'mysqli';
	$CONF['database_host'] = 'localhost';
	$CONF['database_user'] = 'postfixadmin_user';
	$CONF['database_password'] = 'postfixadmin_PWD';
	$CONF['database_name'] = 'postfixadmin_db';
	$CONF['configured'] = true;
	$CONF['encrypt'] = 'md5crypt';
?>
Once finished. Save and exit the file.
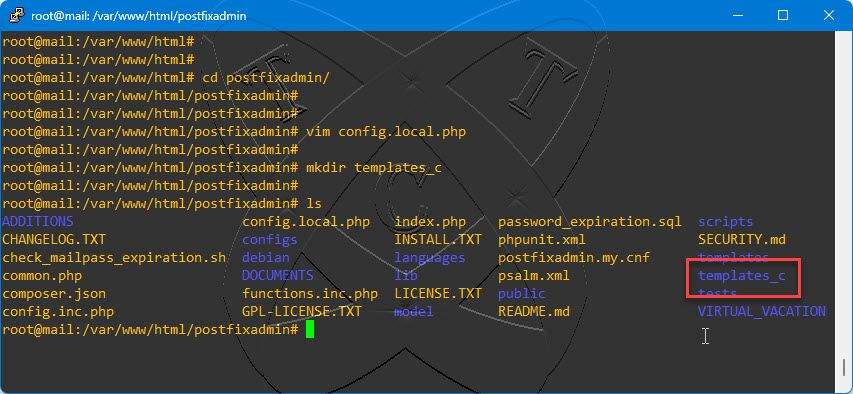
Next, create a new directory called templates_c. This directory will store compiled versions and help optimize the performance of PostfixAdmin
mkdir templates_c
ls
And change ownership permissions on the postfixadmin directory:
chown -R www-data:www-data /var/www/html/postfixadmin
Next, create an Apache configuration file for PostfixAdmin named postfixadmin.totatca.xyz.conf in the /etc/apache2/sites-available/ directory so that we can access PostfixAdmin using the address http://postfixadmin.totatca.xyz (the A record named postfixadmin was created in Part 1)
Note: Replace totatca.xyz = Your-Domain
vim
/etc/apache2/sites-available/postfixadmin.totatca.xyz.conf
Add the following content to the file:
<VirtualHost *:80>

	DocumentRoot /var/www/html/postfixadmin/public
	ServerName totatca.xyz
	ServerAlias postfixadmin.totatca.xyz

	<Directory /var/www/html/postfixadmin/>
		Options FollowSymlinks
		AllowOverride All
		Require all granted
	</Directory>

	ErrorLog ${APACHE_LOG_DIR}/error.log
	CustomLog ${APACHE_LOG_DIR}/access.log combined

</VirtualHost>
Once finished. Save and exit the file.
Next, activate the newly created configuration file and disable the default Apache configuration file
a2ensite postfixadmin.totatca.xyz.conf
a2dissite 000-default.conf
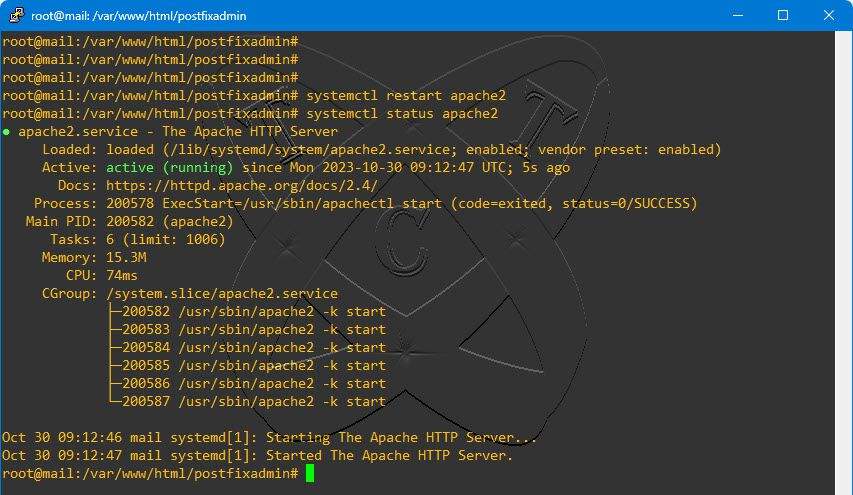
Now, restart the Apache service to apply the changes:
systemctl restart apache2
Check the status of the Apache service to ensure that it is still running on the system:
systemctl status apache2
Step 11 – Setup PostfixAdmin
Everything is set up and ready. Access the http://postfixadmin.totatca.xyz/setup.php address to begin the PostfixAdmin installation.
(11.*) On the first page, enter a password (this password is referred to as the setup password). Then click on the Generate setup_password hash button. The system will generate a code like the one below:
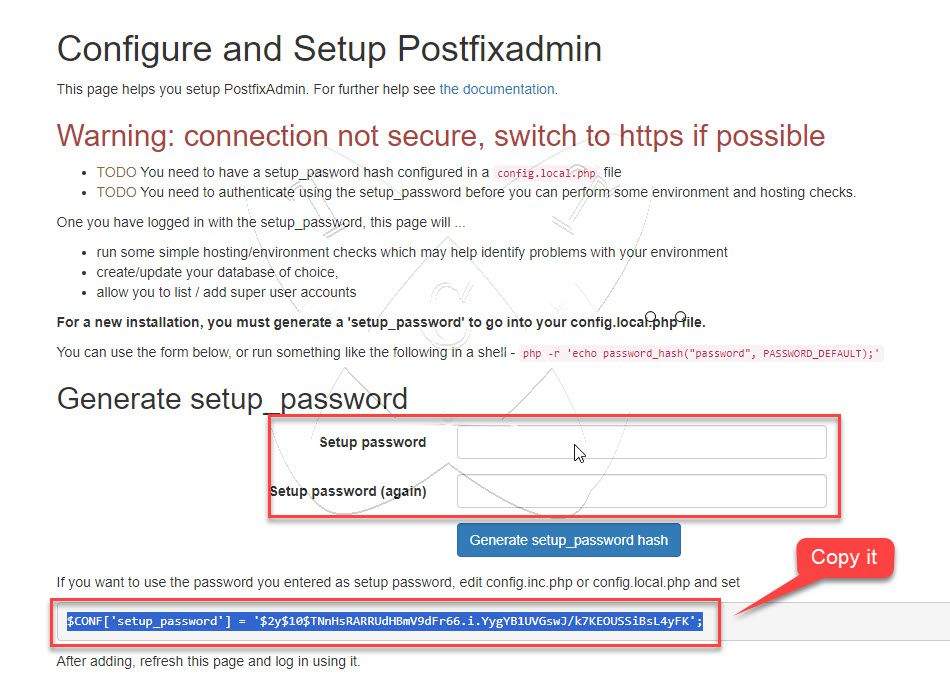
Copy that line and paste it into the config.local.php file in step (10.*)
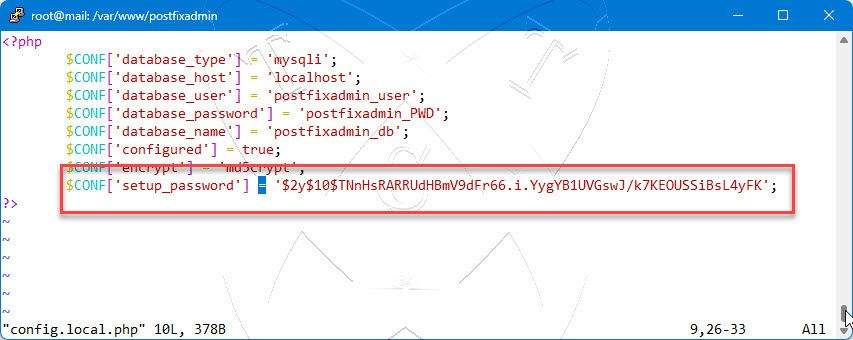
Once finished, save and exit the file.
Now, restart the Apache service to apply the changes:
systemctl restart apache2
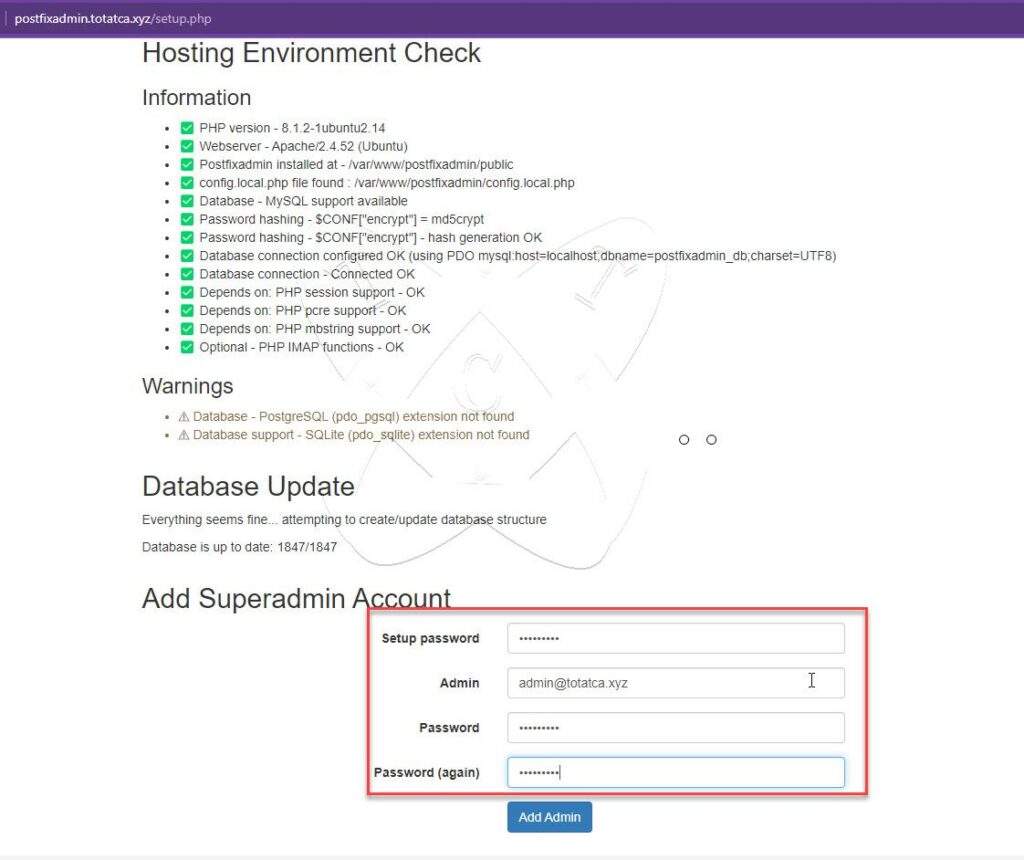
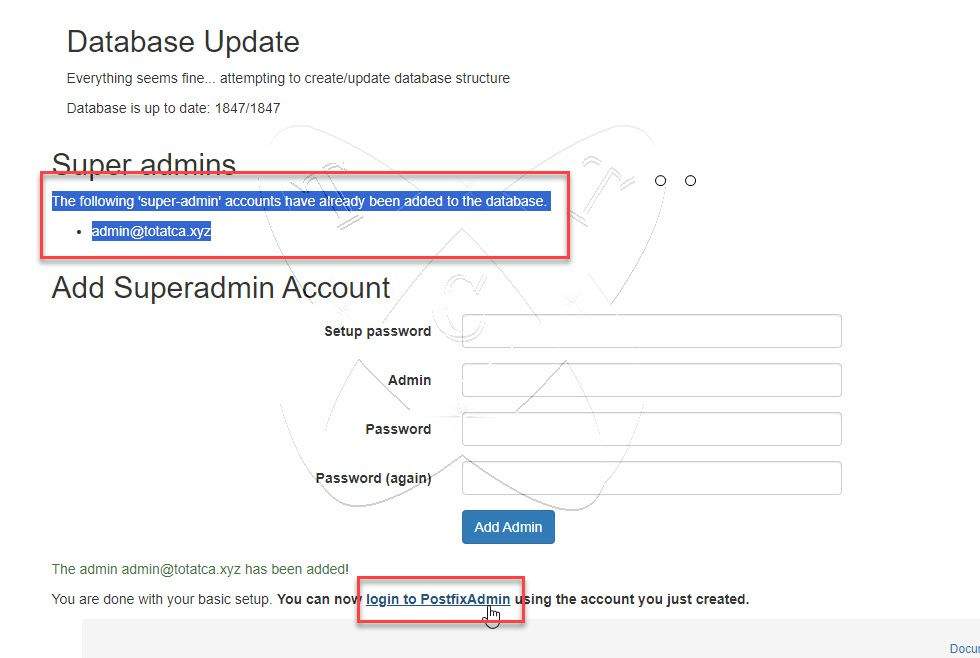
Now, go back to the setup page and press F5 to refresh. You will be redirected to the Configure and Setup PostfixAdmin page. You need to check if all the modules required by PostfixAdmin have been satisfied. If everything is OK, scroll down to the bottom of the page and set up an admin account for your PostfixAdmin as follows:
- Setup password: Enter the setup password from step 11(*)
- Admin: Enter the account you want to create in the format account_name@Your-Domain
- Password: Password for your account
- Password (again): Password for your account
Then click the Add Admin button
Immediately, the system will create an admin account for you. Click on login to PostfixAdmin to go to the login page
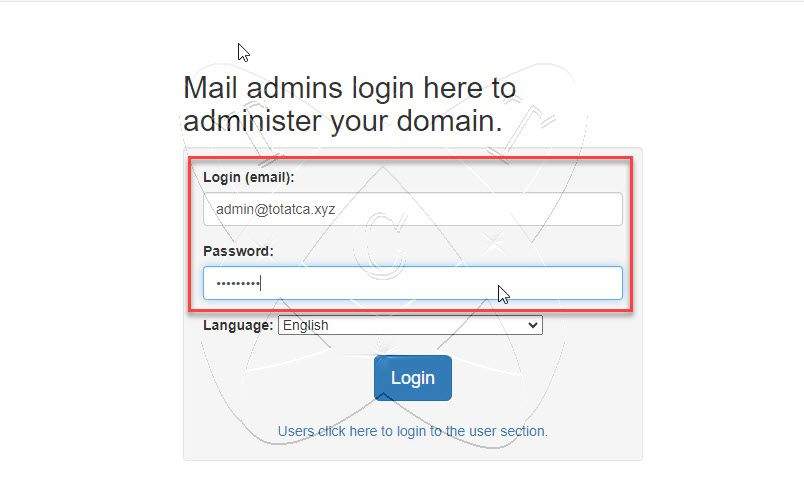
Enter your login information and click the Login button:
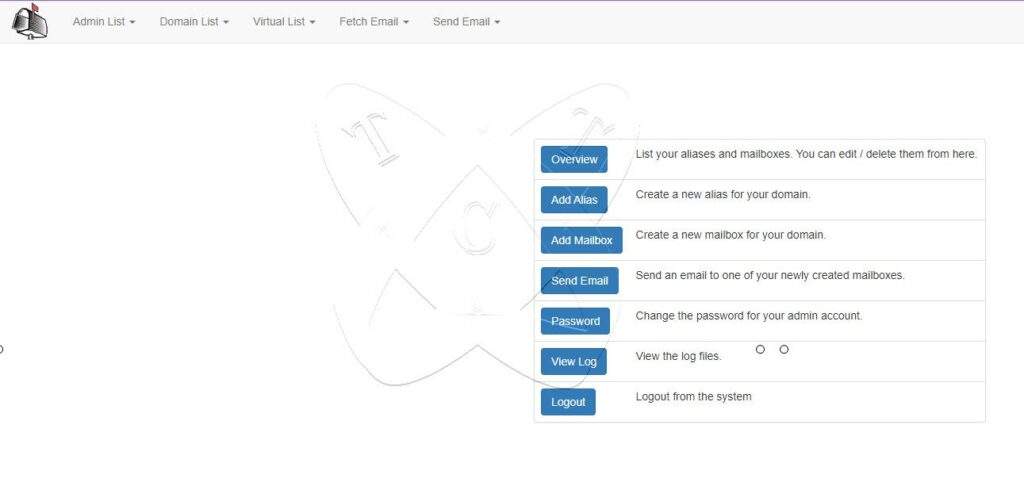
And here is the PostfixAdmin admin dashboard:
Conclusions
That completes the installation and configuration process for PostfixAdmin. We will meet again in Part 5 – Creating Domains and Accounts on Postfix to finalize this Install and Configure PostfixAdmin on Ubuntu/Debian series.