Hello everyone, continuing from the previous articles in the Install and Configure Mail Server with PostfixAdmin on Ubuntu/Debian series. In Part 3 – Configuring Dovecot with MySQL/MariaDB, we will configure Dovecot to work with MySQL/MariaDB together.
Recap some information from Part 1 that we created:
- User and Group: totatca with ID 5000
- Email storage: /var/virtual_mail_box
- Database name: postfixadmin_db
- Database user: postfixadmin_user
- Database password: postfixadmin_PWD
Important: Ensure that you replace the above information with your details; these details will be used consistently throughout this series of posts.
Step 8 – Configure Dovecot with MySQL/MariaDB
In Part 1, we installed Dovecot, and its configuration files are located in the /etc/dovecot directory. Let’s navigate to the /etc/dovecot directory to begin configuring Dovecot.
cd /
cd /etc/dovecot
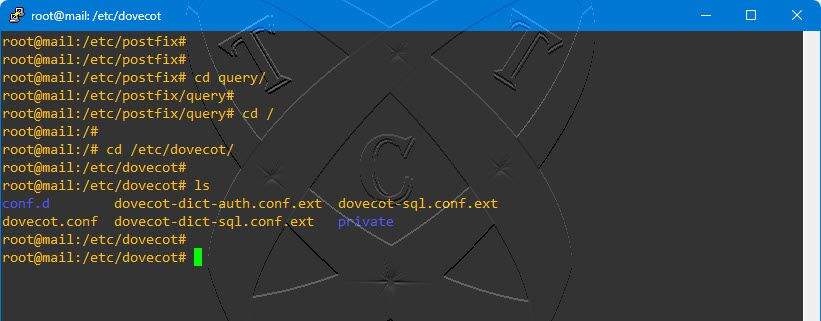
ls
You will find the contents in the /etc/dovecot directory to be similar to this:
Edit dovecot.conf file
First, open the dovecot.conf file using the following command:
vim dovecot.conf
Find the line #listen = * and uncomment it as shown below:
# A comma separated list of IPs or hosts where to listen in for connectios.
# "*" listens in all IPv4 interfaces, "::" listens in all IPv6 interfaces.
# If you want to specify non-default ports or anything more complex,
# edit conf.d/master.conf.
listen = *

# Base directory where to store runtime data.
#base_dir = /var/run/dovecot/

# Name of this instance. In multi-instance setup doveadm and other commands
# can use -i <instance_name> to select which instance is used (an alternative
# to -c <config_path>). The instance name is also added to Dovecot processes
# in ps output.
#instance_name = dovecot
Once finished, save and exit the file.
Edit 10-mail.conf file
Next, navigate to the conf.d directory
cd conf.d
ls
You will find configuration files like this:
07
Now, open and edit the file 10-mail.conf
vim 10-mail.conf
Comment line mail_location = mbox:~/mail:INBOX=/var/mail/%u and add the content below to the beginning of the file:
# See doc/wiki/Variables.txt for full list. Some examples:
#
#   mail_location = maildir:~/Maildir
#   mail_location = mbox:~/mail:INBOX=/var/mail/%u
#   mail_location = mbox:/var/mail/%d/%1n/%n:INDEX=/var/indexes/%d/%1n/%n
#
# <doc/wiki/MailLocation.txt>
#
#mail_location = mbox:~/mail:INBOX=/var/mail/%u
mail_location = maildir:/var/virtual_mail_box/%d/%n
mail_privileged_group = totatca
mail_uid = totatca
mail_gid = totatca
first_valid_uid = 5000
last_valid_uid = 5000

# If you need to set multiple mailbox locations or want to change default
# namespace settings, you can do it by defining namespace sections.
Once finished, save and exit the file.
Edit 10-auth.conf file
Next, open and edit the file 10-auth.conf
vim 10-auth.conf
Edit the lines highlighted in orange below:
##
## Authentication processes
##

# Disable LOGIN command and all other plaintext authentications unless
# SSL/TLS is used (LOGINDISABLED capability). Note that if the remote IP
# matches the local IP (ie. you're connecting from the same computer), the
# connection is considered secure and plaintext authentication is allowed.
# See also ssl=required setting.
disable_plaintext_auth = no

# Authentication cache size (e.g. 10M). 0 means it's disabled. Note that
# bsdauth and PAM require cache_key to be set for caching to be used.
#auth_cache_size = 0
# Time to live for cached data. After TTL expires the cached record is no
# longer used, *except* if the main database lookup returns internal failure.
# We also try to handle password changes automatically: If user's previous
# authentication was successful, but this one wasn't, the cache isn't used.
# For now this works only with plaintext authentication.
#auth_cache_ttl = 1 hour
# TTL for negative hits (user not found, password mismatch).
# 0 disables caching them completely.
#auth_cache_negative_ttl = 1 hour

# Space separated list of realms for SASL authentication mechanisms that need
# them. You can leave it empty if you don't want to support multiple realms.
# Many clients simply use the first one listed here, so keep the default realm
# first.
#auth_realms =

# Default realm/domain to use if none was specified. This is used for both
# SASL realms and appending @domain to username in plaintext logins.
#auth_default_realm =

# List of allowed characters in username. If the user-given username contains
# a character not listed in here, the login automatically fails. This is just
# an extra check to make sure user can't exploit any potential quote escaping
# vulnerabilities with SQL/LDAP databases. If you want to allow all characters,
# set this value to empty.
#auth_username_chars = abcdefghijklmnopqrstuvwxyzABCDEFGHIJKLMNOPQRSTUVWXYZ01234567890.-_@

# Username character translations before it's looked up from databases. The
# value contains series of from -> to characters. For example "#@/@" means
# that '#' and '/' characters are translated to '@'.
#auth_username_translation =

# Username formatting before it's looked up from databases. You can use
# the standard variables here, eg. %Lu would lowercase the username, %n would
# drop away the domain if it was given, or "%n-AT-%d" would change the '@' into
# "-AT-". This translation is done after auth_username_translation changes.
#auth_username_format = %Lu

# If you want to allow master users to log in by specifying the master
# username within the normal username string (ie. not using SASL mechanism's
# support for it), you can specify the separator character here. The format
# is then <username><separator><master username>. UW-IMAP uses "*" as the
# separator, so that could be a good choice.
#auth_master_user_separator =

# Username to use for users logging in with ANONYMOUS SASL mechanism
#auth_anonymous_username = anonymous

# Maximum number of dovecot-auth worker processes. They're used to execute
# blocking passdb and userdb queries (eg. MySQL and PAM). They're
# automatically created and destroyed as needed.
#auth_worker_max_count = 30

# Host name to use in GSSAPI principal names. The default is to use the
# name returned by gethostname(). Use "$ALL" (with quotes) to allow all keytab
# entries.
#auth_gssapi_hostname =

# Kerberos keytab to use for the GSSAPI mechanism. Will use the system
# default (usually /etc/krb5.keytab) if not specified. You may need to change
# the auth service to run as root to be able to read this file.
#auth_krb5_keytab =

# Do NTLM and GSS-SPNEGO authentication using Samba's winbind daemon and
# ntlm_auth helper. <doc/wiki/Authentication/Mechanisms/Winbind.txt>
#auth_use_winbind = no

# Path for Samba's ntlm_auth helper binary.
#auth_winbind_helper_path = /usr/bin/ntlm_auth

# Time to delay before replying to failed authentications.
#auth_failure_delay = 2 secs

# Require a valid SSL client certificate or the authentication fails.
#auth_ssl_require_client_cert = no

# Take the username from client's SSL certificate, using
# X509_NAME_get_text_by_NID() which returns the subject's DN's
# CommonName.
#auth_ssl_username_from_cert = no

# Space separated list of wanted authentication mechanisms:
#   plain login digest-md5 cram-md5 ntlm rpa apop anonymous gssapi otp
#   gss-spnego
# NOTE: See also disable_plaintext_auth setting.
auth_mechanisms = plain login

##
## Password and user databases
##

#
# Password database is used to verify user's password (and nothing more).
# You can have multiple passdbs and userdbs. This is useful if you want to
# allow both system users (/etc/passwd) and virtual users to login without
# duplicating the system users into virtual database.
#
# <doc/wiki/PasswordDatabase.txt>
#
# User database specifies where mails are located and what user/group IDs
# own them. For single-UID configuration use "static" userdb.
#
# <doc/wiki/UserDatabase.txt>

#!include auth-deny.conf.ext
#!include auth-master.conf.ext

#!include auth-system.conf.ext
!include auth-sql.conf.ext
#!include auth-ldap.conf.ext
#!include auth-passwdfile.conf.ext
#!include auth-checkpassword.conf.ext
#!include auth-static.conf.ext
Once finished, save and exit the file.
Edit /etc/dovecot/dovecot-sql.conf.ext file
Open and edit the file /etc/dovecot/dovecot-sql.conf.ext
vim /etc/dovecot/dovecot-sql.conf.ext
Add the lines highlighted in orange below to the beginning of the page:
# This file is commonly accessed via passdb {} or userdb {} section in
# conf.d/auth-sql.conf.ext
driver = mysql

connect = host=localhost dbname=postfixadmin_db user=postfixadmin_user password=postfixadmin_PWD

default_pass_scheme = MD5-CRYPT

password_query = SELECT username as user, password, '/var/virtual_mail_box/%d/%n' as userdb_home, 'maildir:/var/virtual_mail_box/%d/%n' as userdb_mail, 5000 as userdb_uid, 8 as userdb_gid FROM mailbox WHERE username = '%u' AND active = '1'

user_query = SELECT '/var/virtual_mail_box/%d/%u' as home, 'maildir:/var/virtual_mail_box/%d/%u' as mail, 5000 AS uid, 8 AS gid, concat('dirsize:storage=', quota) AS quota FROM mailbox WHERE username = '%u' AND active = '1'
# This file is opened as root, so it should be owned by root and mode 0600.
#
# http://wiki2.dovecot.org/AuthDatabase/SQL
#
# For the sql passdb module, you'll need a database with a table that
# contains fields for at least the username and password. If you want to
# use the user@domain syntax, you might want to have a separate domain
# field as well.
#
# If your users all have the same uig/gid, and have predictable home
# directories, you can use the static userdb module to generate the home
# dir based on the username and domain. In this case, you won't need fields
# for home, uid, or gid in the database.
... ... ...
Once finished, save and exit the file
Edit 10-ssl.conf file
Next, open and edit the file 10-ssl.conf
vim 10-ssl.conf
Edit the lines highlighted in orange below:
##
## SSL settings
##

# SSL/TLS support: yes, no, required. <doc/wiki/SSL.txt>
ssl = no

# PEM encoded X.509 SSL/TLS certificate and private key. They're opened before
# dropping root privileges, so keep the key file unreadable by anyone but
# root. Included doc/mkcert.sh can be used to easily generate self-signed
# certificate, just make sure to update the domains in dovecot-openssl.cnf
#ssl_cert = </etc/dovecot/private/dovecot.pem
#ssl_key = </etc/dovecot/private/dovecot.key

# If key file is password protected, give the password here. Alternatively
# give it when starting dovecot with -p parameter. Since this file is often
# world-readable, you may want to place this setting instead to a different
# root owned 0600 file by using ssl_key_password = <path.
#ssl_key_password =

# PEM encoded trusted certificate authority. Set this only if you intend to use
# ssl_verify_client_cert=yes. The file should contain the CA certificate(s)
# followed by the matching CRL(s). (e.g. ssl_ca = </etc/ssl/certs/ca.pem)
#ssl_ca =

# Require that CRL check succeeds for client certificates.
#ssl_require_crl = yes
... ... ...
Once finished, save and exit the file.
Edit 15-lda.conf file
Next, open and edit the file 15-lda.conf
vim 15-lda.conf
Edit the line highlighted in orange below:
##
## LDA specific settings (also used by LMTP)
##

# Address to use when sending rejection mails.
# Default is postmaster@%d. %d expands to recipient domain.
# Replace totatca.xyz = Your-Domain
postmaster_address = [email protected]

# Hostname to use in various parts of sent mails (e.g. in Message-Id) and
# in LMTP replies. Default is the system's real hostname@domain.
#hostname =

# If user is over quota, return with temporary failure instead of
# bouncing the mail.
#quota_full_tempfail = no

# Binary to use for sending mails.
#sendmail_path = /usr/sbin/sendmail

# If non-empty, send mails via this SMTP host[:port] instead of sendmail.
#submission_host =

# Subject: header to use for rejection mails. You can use the same variables
# as for rejection_reason below.
#rejection_subject = Rejected: %s
... ... ...
Once finished, save and exit the file.
Edit 10-master.conf file
Next, open and edit the file edit 10-master.conf
vim 10-master.conf
Edit the lines highlighted in orange below:
#default_process_limit = 100
#default_client_limit = 1000

# Default VSZ (virtual memory size) limit for service processes. This is mainly
# intended to catch and kill processes that leak memory before they eat up
# everything.
#default_vsz_limit = 256M

# Login user is internally used by login processes. This is the most untrusted
# user in Dovecot system. It shouldn't have access to anything at all.
#default_login_user = dovenull

# Internal user is used by unprivileged processes. It should be separate from
# login user, so that login processes can't disturb other processes.
#default_internal_user = dovecot

service imap-login {
  inet_listener imap {
    port = 143
  }
  inet_listener imaps {
    #port = 993
    #ssl = yes
  }

  # Number of connections to handle before starting a new process. Typically
  # the only useful values are 0 (unlimited) or 1. 1 is more secure, but 0
  # is faster. <doc/wiki/LoginProcess.txt>
  #service_count = 1

  # Number of processes to always keep waiting for more connections.
  #process_min_avail = 0

  # If you set service_count=0, you probably need to grow this.
  #vsz_limit = $default_vsz_limit
}

service pop3-login {
  inet_listener pop3 {
    port = 110
  }
  inet_listener pop3s {
    #port = 995
    #ssl = yes
  }
}

service submission-login {
  inet_listener submission {
    #port = 587
  }
}

service lmtp {
  #unix_listener lmtp {
    #mode = 0666
  #}
  unix_listener /var/spool/postfix/private/dovecot-lmtp {
	mode = 0600
	user = postfix
	group = postfix
  }
  # Create inet listener only if you can't use the above UNIX socket
  #inet_listener lmtp {
    # Avoid making LMTP visible for the entire internet
    #address =
    #port =
  #}
}

service imap {
  # Most of the memory goes to mmap()ing files. You may need to increase this
  # limit if you have huge mailboxes.
  #vsz_limit = $default_vsz_limit

  # Max. number of IMAP processes (connections)
  #process_limit = 1024
}

service pop3 {
  # Max. number of POP3 processes (connections)
  #process_limit = 1024
}

service submission {
  # Max. number of SMTP Submission processes (connections)
  #process_limit = 1024
}

service auth {
  # auth_socket_path points to this userdb socket by default. It's typically
  # used by dovecot-lda, doveadm, possibly imap process, etc. Users that have
  # full permissions to this socket are able to get a list of all usernames and
  # get the results of everyone's userdb lookups.
  #
  # The default 0666 mode allows anyone to connect to the socket, but the
  # userdb lookups will succeed only if the userdb returns an "uid" field that
  # matches the caller process's UID. Also if caller's uid or gid matches the
  # socket's uid or gid the lookup succeeds. Anything else causes a failure.
  #
  # To give the caller full permissions to lookup all users, set the mode to
  # something else than 0666 and Dovecot lets the kernel enforce the
  # permissions (e.g. 0777 allows everyone full permissions).
  #unix_listener auth-userdb {
    #mode = 0666
    #user =
    #group =
  #}
  unix_listener /var/spool/postfix/private/auth {
	mode = 0666
	user = postfix
	group = postfix
	}

  unix_listener auth-userdb {
	mode = 0600
	user = totatca
	}
  user = dovecot
  # Postfix smtp-auth
  #unix_listener /var/spool/postfix/private/auth {
  #  mode = 0666
  #}

  # Auth process is run as this user.
  #user = $default_internal_user
}

service auth-worker {
  # Auth worker process is run as root by default, so that it can access
  # /etc/shadow. If this isn't necessary, the user should be changed to
  # $default_internal_user.
  #user = root
  user = totatca
}

service dict {
  # If dict proxy is used, mail processes should have access to its socket.
  # For example: mode=0660, group=vmail and global mail_access_groups=vmail
  unix_listener dict {
    #mode = 0600
    #user =
    #group =
  }
}
Once finished, save and exit the file.
Now, restart Dovecot service to apply the change:
systemctl restart dovecot
Check the status of the Postfix service, ensuring it is Active on the system

Conclusions
In this post, we’ve learned How to configure Dovecot to use MySQL/MariaDB as the database for Mail Server in the Set Up a Mail Server with PostfixAdmin on Ubuntu/Debian series.
See you in Part 4 of this series. If you encounter any issues or have additional questions, feel free to leave a comment below.